
Įvadas
The ButtKicker Gamer2 is an immersive haptic transducer system designed to provide powerful and accurate tactile feedback, enhancing your gaming, simulation, and entertainment experiences. Unlike traditional subwoofers that move air, the ButtKicker Gamer2 directly transfers low-frequency sound into physical vibrations, allowing you to feel the action without excessive noise. This manual provides comprehensive instructions for the proper installation, operation, and maintenance of your ButtKicker Gamer2 system.
The system includes a ButtKicker Gamer transducer unit and a 90-watt power amplifier, along with all necessary cables and mounting hardware for easy attachment to most chairs or sim rigs.
Kas yra dėžutėje
Įsitikinkite, kad pakuotėje yra visi komponentai:
- ButtKicker Gamer transducer with Easy Clamp™ tvirtinimo mechanizmas
- ButtKicker galia Amplifier BKA-130-C (120V Only)
- 13.5' cable with quick release, connecting ButtKicker Gamer to the Ampgyvybingesnis
- RCA and mini "Y" adapters
- 5' RCA to RCA cable
- 5' RCA to mini cable
- Two Velcro® cable holders

Figure 1: Included components of the ButtKicker Gamer2 system.
Sąrankos instrukcijos
Follow these steps to properly set up your ButtKicker Gamer2 system:
1. Attaching the ButtKicker Gamer Transducer
The ButtKicker Gamer unit features an Easy-Clamp™ mounting arm designed for quick and secure attachment. It can be clamped to any center post up to 1.4 inches (3.5 cm) in diameter, commonly found on office chairs or sim racing cockpits.
- Identify a sturdy, central post on your chair or sim rig.
- Loosen the adjustment knob on the Easy-Clamp™ mechanism.
- Padėkite klamp around the post and tighten the adjustment knob until the ButtKicker Gamer is securely fastened and does not wobble. Ensure the unit is positioned to allow for free movement and does not interfere with chair mechanisms.

Figure 2: Detail of the Easy-Clamp™ mounting arm.

Figure 3: ButtKicker Gamer2 mounted on an office chair.

Figure 4: ButtKicker Gamer2 mounted on a sim racing rig.
2. Maitinimo prijungimas Ampgyvybingesnis
Place the ButtKicker Power Amplifier BKA-130-C in a convenient location, ensuring adequate ventilation. The amplifier is fanless for quiet operation.
- Connect the 13.5' cable from the ButtKicker Gamer transducer to the speaker output terminals on the amplifier. Ensure correct polarity if applicable (though typically not critical for transducers).
- Prijunkite amplifier's power cable to a standard 120V AC outlet.

5 paveikslas: Amplifier placement in a typical setup.
3. Garso jungtys
The ButtKicker Gamer2 operates by converting low-frequency audio signals into vibrations. Connect the amplifier to your audio source (PC, gaming console, home theater receiver) using the provided cables.
- Kompiuterio jungtis: Use the 5' RCA to mini cable and the mini "Y" adapter to split the audio output from your PC's sound card. One branch goes to your speakers/headphones, and the other to the amplifier'io indėlis.
- Konsolės jungtis: Use the RCA "Y" adapters with the 5' RCA to RCA cable to connect to your console's audio output (if available) or an audio extractor.
- Dedicated Subwoofer Output: For optimal performance, if your audio source has a dedicated subwoofer (LFE) output, connect the amplifier directly to this output using the appropriate RCA cable. This provides a cleaner low-frequency signal.
Svarbi pastaba: Some users report static when using the 3.5mm Y-splitter directly from a PC's main audio output. If you experience this, consider using a separate audio output for the ButtKicker (e.g., a secondary sound card, a monitor's 3.5mm output, or an Xbox controller's 3.5mm input if applicable for console setups) to provide a dedicated signal to the ampgyvesnis.
4. Laidinis nuotolinio valdymo pultas
Connect the wired remote control to the "Remote" port on the amplifier. This allows for convenient volume adjustment and power control from your seating position.
Naudojimo instrukcijos
Once the system is set up, follow these steps to operate your ButtKicker Gamer2:
1. Įjungimas
Press the "Power" button on the amplifier or the wired remote control. The power indicator light will illuminate.
2. Amp„Lifeier Controls“

Figure 6: ButtKicker Power Amplifier BKA-130-C front panel.
- Low Filter Cutoff: Adjusts the lowest frequency the ButtKicker will respond to. Typically set between 50-70 Hz for general use.
- High Cutoff Frequency: Adjusts the highest frequency the ButtKicker will respond to. Setting this lower (e.g., 70-110 Hz) can provide a more focused "kick" sensation, while higher settings (up to 160 Hz) can offer a broader range of tactile feedback.
- Apimtis: Controls the intensity of the vibrations. Start with a low setting and gradually increase to your preferred level. Avoid setting it too high, which can lead to clipping.
- Clip/Signal Indicators: The "Signal" light indicates that an audio signal is being received. The "Clip" light indicates that the amplifier is being overdriven. If the "Clip" light flashes frequently, reduce the volume to prevent damage to the amplifier and transducer.
3. Adjusting for Optimal Experience
Experiment with the Low and High Cutoff Frequency settings to find the ideal tactile response for different games or media. For racing simulations, you might prefer a tighter, more impactful feel for engine RPMs and road textures. For explosions in action games, a broader frequency range might be desired.
Vaizdo demonstracija: For a visual guide on the ButtKicker Gamer2's capabilities and setup, please refer to the official product video below.
Video 1: Official ButtKicker video demonstrating the Gamer2's immersive haptic feedback in various gaming scenarios. This video showcases the product's ability to translate in-game audio into physical sensations, enhancing realism.
Priežiūra
The ButtKicker Gamer2 system is designed for durability and requires minimal maintenance.
- Valymas: Use a soft, dry cloth to wipe down the transducer and ampVenkite naudoti skystus valiklius ar abrazyvines medžiagas.
- Vėdinimas: Užtikrinti, amplifier has adequate airflow around it to prevent overheating, especially since it is convection-cooled (fanless).
- Kabelių valdymas: Use the provided Velcro cable ties to keep cables organized and prevent them from being snagged or damaged.
- Saugykla: Jei įrenginį ilgesnį laiką sandėliuosite, atjunkite jį nuo elektros tinklo ir laikykite sausoje, vėsioje vietoje.
Trikčių šalinimas
If you encounter issues with your ButtKicker Gamer2, refer to the following common problems and solutions:
| Problema | Galima priežastis | Sprendimas |
|---|---|---|
| Nėra galios ampgyvybingesnis | Atjungtas maitinimo laidas; lizdas neaktyvus; ampgyvybingesnis. | Check power cable connection; test outlet with another device; ensure amplifier power button is pressed. |
| No haptic feedback | Audio input not connected; volume too low; transducer cable disconnected; amplifier not receiving signal. | Verify all audio connections; increase amplifier volume; check transducer cable connection; ensure audio source is playing low-frequency content. Check "Signal" light on ampgyvesnis. |
| Weak or inconsistent feedback | Volume too low; filter settings incorrect; transducer not securely mounted; audio source lacking strong bass. | Increase volume; adjust Low/High Cutoff Frequency; tighten transducer clamp; ensure audio content has sufficient bass. |
| "Clip" light flashing frequently | Amplifier is overdriven. | Sumažinti amplifier's volume. Persistent clipping can damage the unit. |
| Static or unwanted noise in audio | Ground loop; audio Y-splitter interference. | Pabandykite prijungti amplifier to a different audio output (e.g., a dedicated sound card output, or a monitor's audio out). Consider a ground loop isolator if the issue persists. |
Specifikacijos
ButtKicker Gamer Transducer
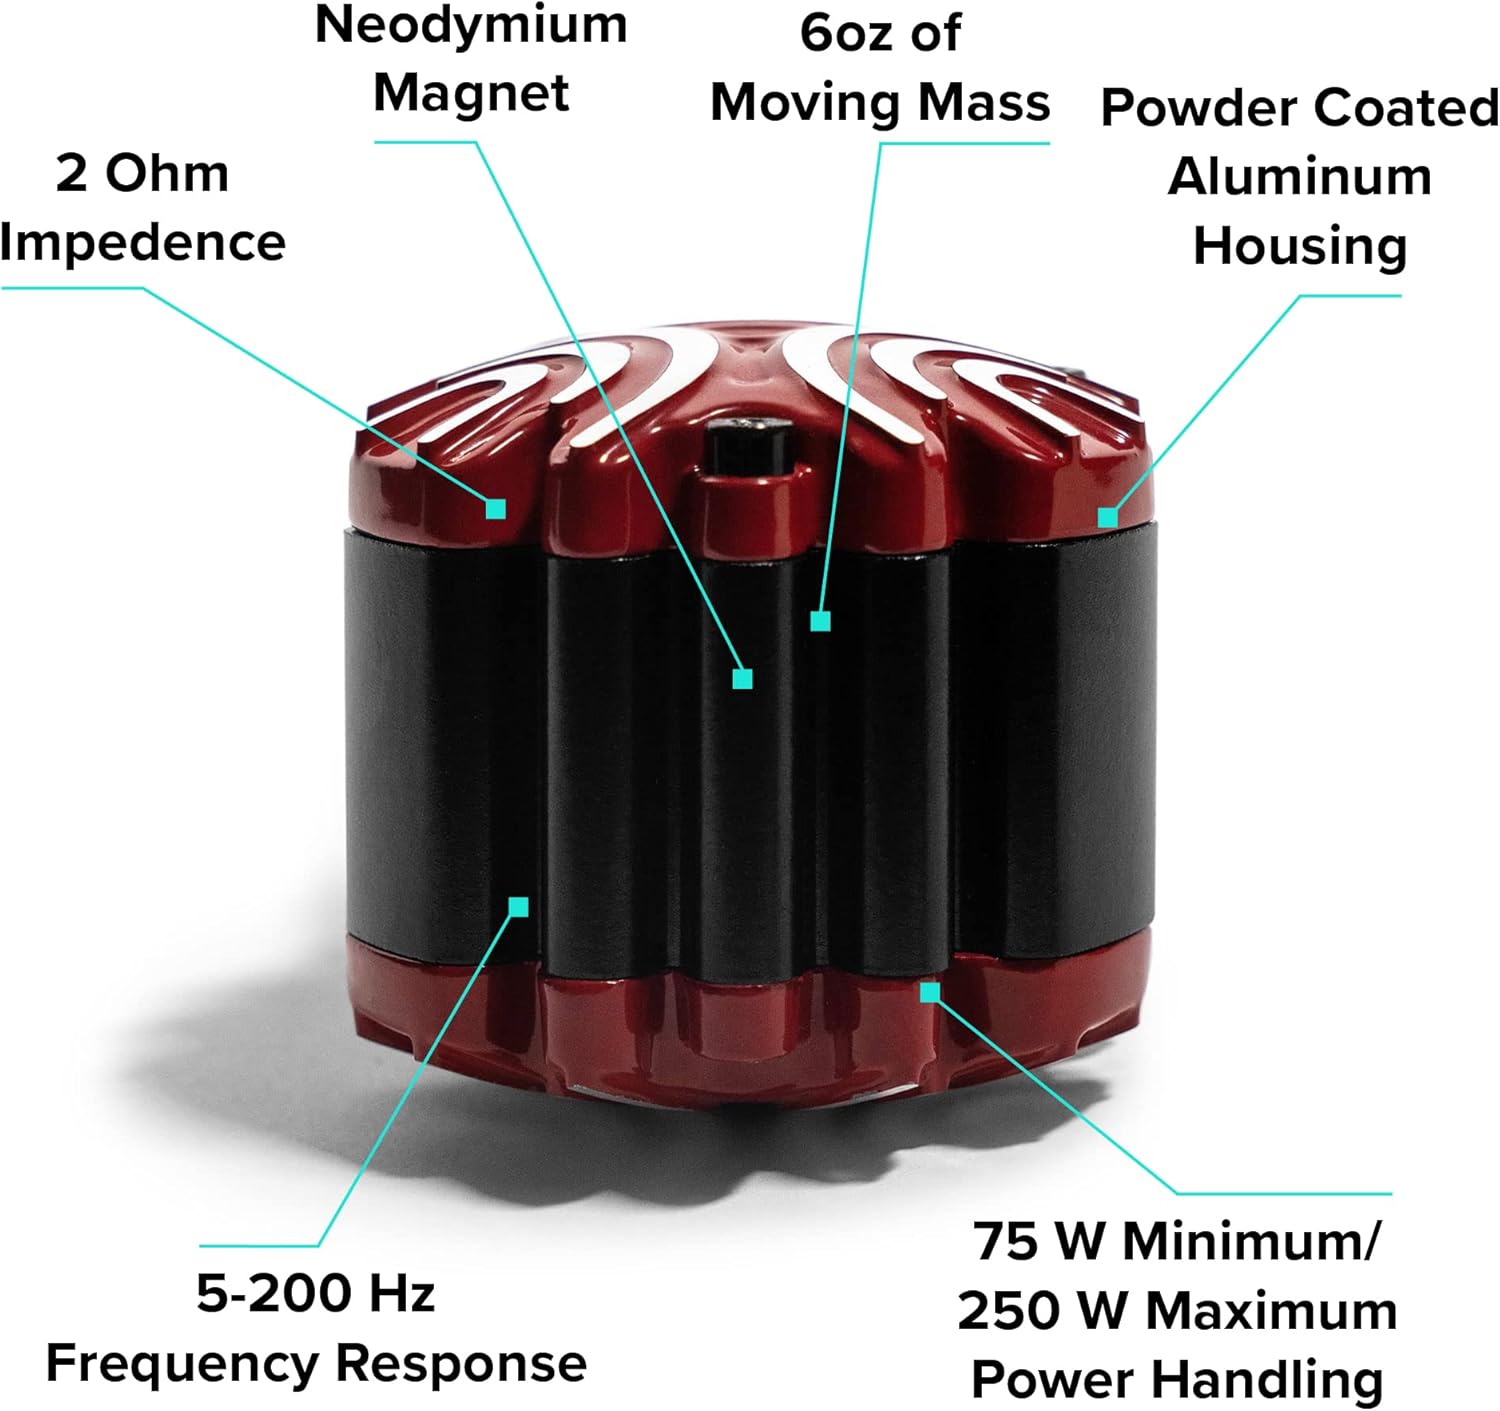
Figure 7: ButtKicker Gamer transducer key features.
- Varža: 2 omai
- Dažnio atsakas: 5-200 Hz
- Galios valdymas: 75 W Minimum / 250 W Maximum
- Judančios masės: 6 uncijos
- Konstrukcija: Powder Coated Aluminum Housing, Neodymium Magnet
- Montavimas: Easy-Clamp™ mechanism for posts up to 1.4" diameter
ButtKicker galia Ampkeltuvas BKA-130-C
- Galia: 90 vatų esant 2 omams
- Aušinimas: Fanless (convection-cooled)
- Įvesties tomastage: TIK 120 V AC
- Dažnio atsakas: 10-300 Hz
- Valdikliai: Low Filter Cutoff, High Cutoff Frequency, Volume
- Savybės: Wired remote control port, Pass-through outlet for daisy-chaining multiple units
- Konstrukcija: Metalinis korpusas
Bendra gaminio informacija
- Gaminio matmenys: 12.2 x 10.83 x 16.14 colio (supakuotas)
- Prekės svoris: 10.56 pounds (packaged)
- Modelio numeris: BK-GR2
- ASIN: B000AOTLP6
Informacija apie garantiją
ButtKicker products are manufactured to high standards. For specific warranty details, including coverage period and terms, please refer to the warranty card included with your product or visit the official ButtKicker websvetainėje. Išsaugokite pirkimo įrodymą garantiniams reikalavimams.
Palaikymas
For technical assistance, troubleshooting beyond this manual, or customer service inquiries, please contact ButtKicker customer support. The manufacturer, Guitammer Company, is known for its responsive customer support.
Please visit the official ButtKicker websvetainę, kurioje rasite naujausią kontaktinę informaciją ir pagalbos išteklius.