1. Įvadas
This manual provides essential information for the safe and efficient operation of your Technaxx Wireless CarPlay & Android Car Monitor TX-361. Please read this manual thoroughly before using the device and retain it for future reference. The TX-361 is designed to integrate modern smartphone connectivity, including Apple CarPlay and Android Auto, into your vehicle without requiring a complex car radio replacement. It also features an integrated DAB digital radio for enhanced audio experience.
2. Saugos informacija
- Visada vairuokite įrenginį atsakingai ir laikydamiesi vietinių kelių eismo taisyklių. Dėl išsiblaškiusio vairavimo gali įvykti avarijos.
- Nebandykite ardyti ar modifikuoti įrenginio. Tai gali panaikinti garantiją ir sukelti pavojų saugumui.
- Laikykite įrenginį atokiau nuo ekstremalių temperatūrų, tiesioginių saulės spindulių ir drėgmės.
- Įsitikinkite, kad įrenginys yra tvirtai pritvirtintas ir netrukdo view arba trukdyti automobilio valdymui.
- Naudokite tik pateiktą maitinimo laidą ir priedus.
- If the device malfunctions, disconnect it from the power source and contact customer support.
3. Pakuotės turinys
Patikrinkite, ar pakuotėje yra visi toliau išvardyti daiktai:
- DAB 7-inch CarPlay with Touch Screen TX-361
- Power Supply (USB-A to USB-C, 1.5m cable)
- Pagalbinis kabelis (1 m)
- DAB antena
- Holder (Mounting Bracket)
- Vartotojo vadovas
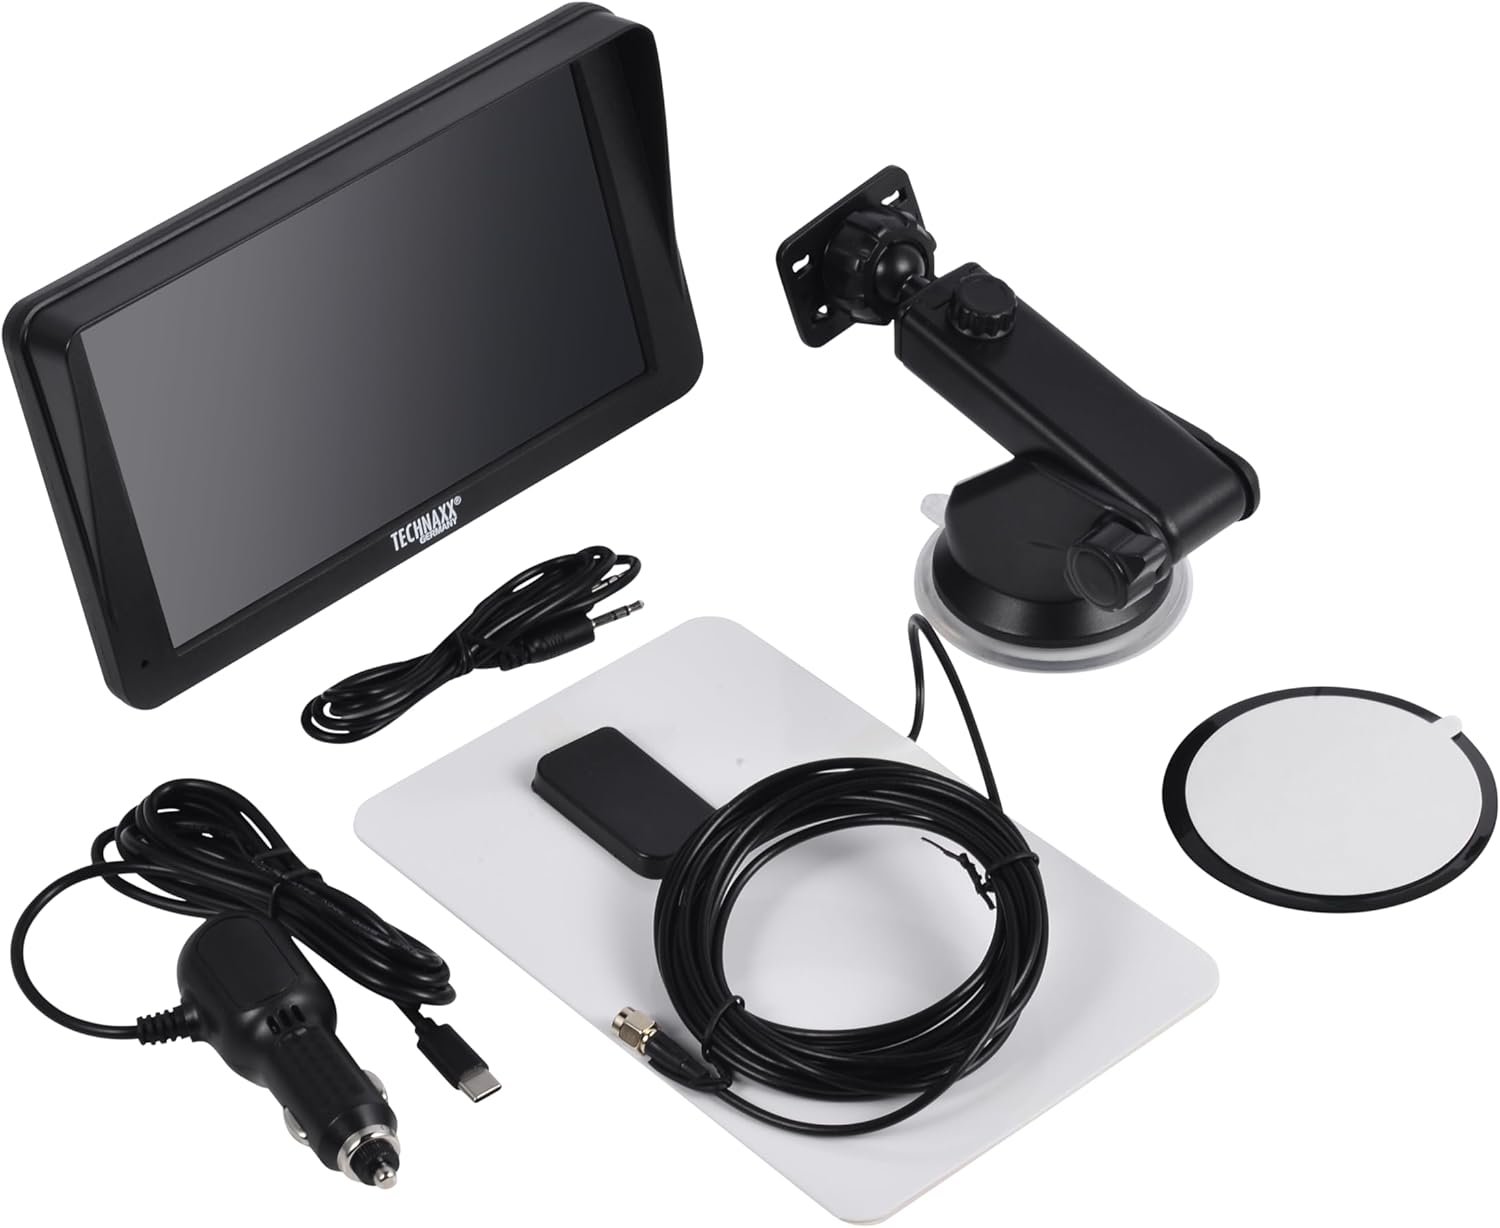
Image: All components included in the Technaxx TX-361 package, neatly laid out.
4. Produktas baigtasview
Familiarize yourself with the main components of your TX-361 monitor.
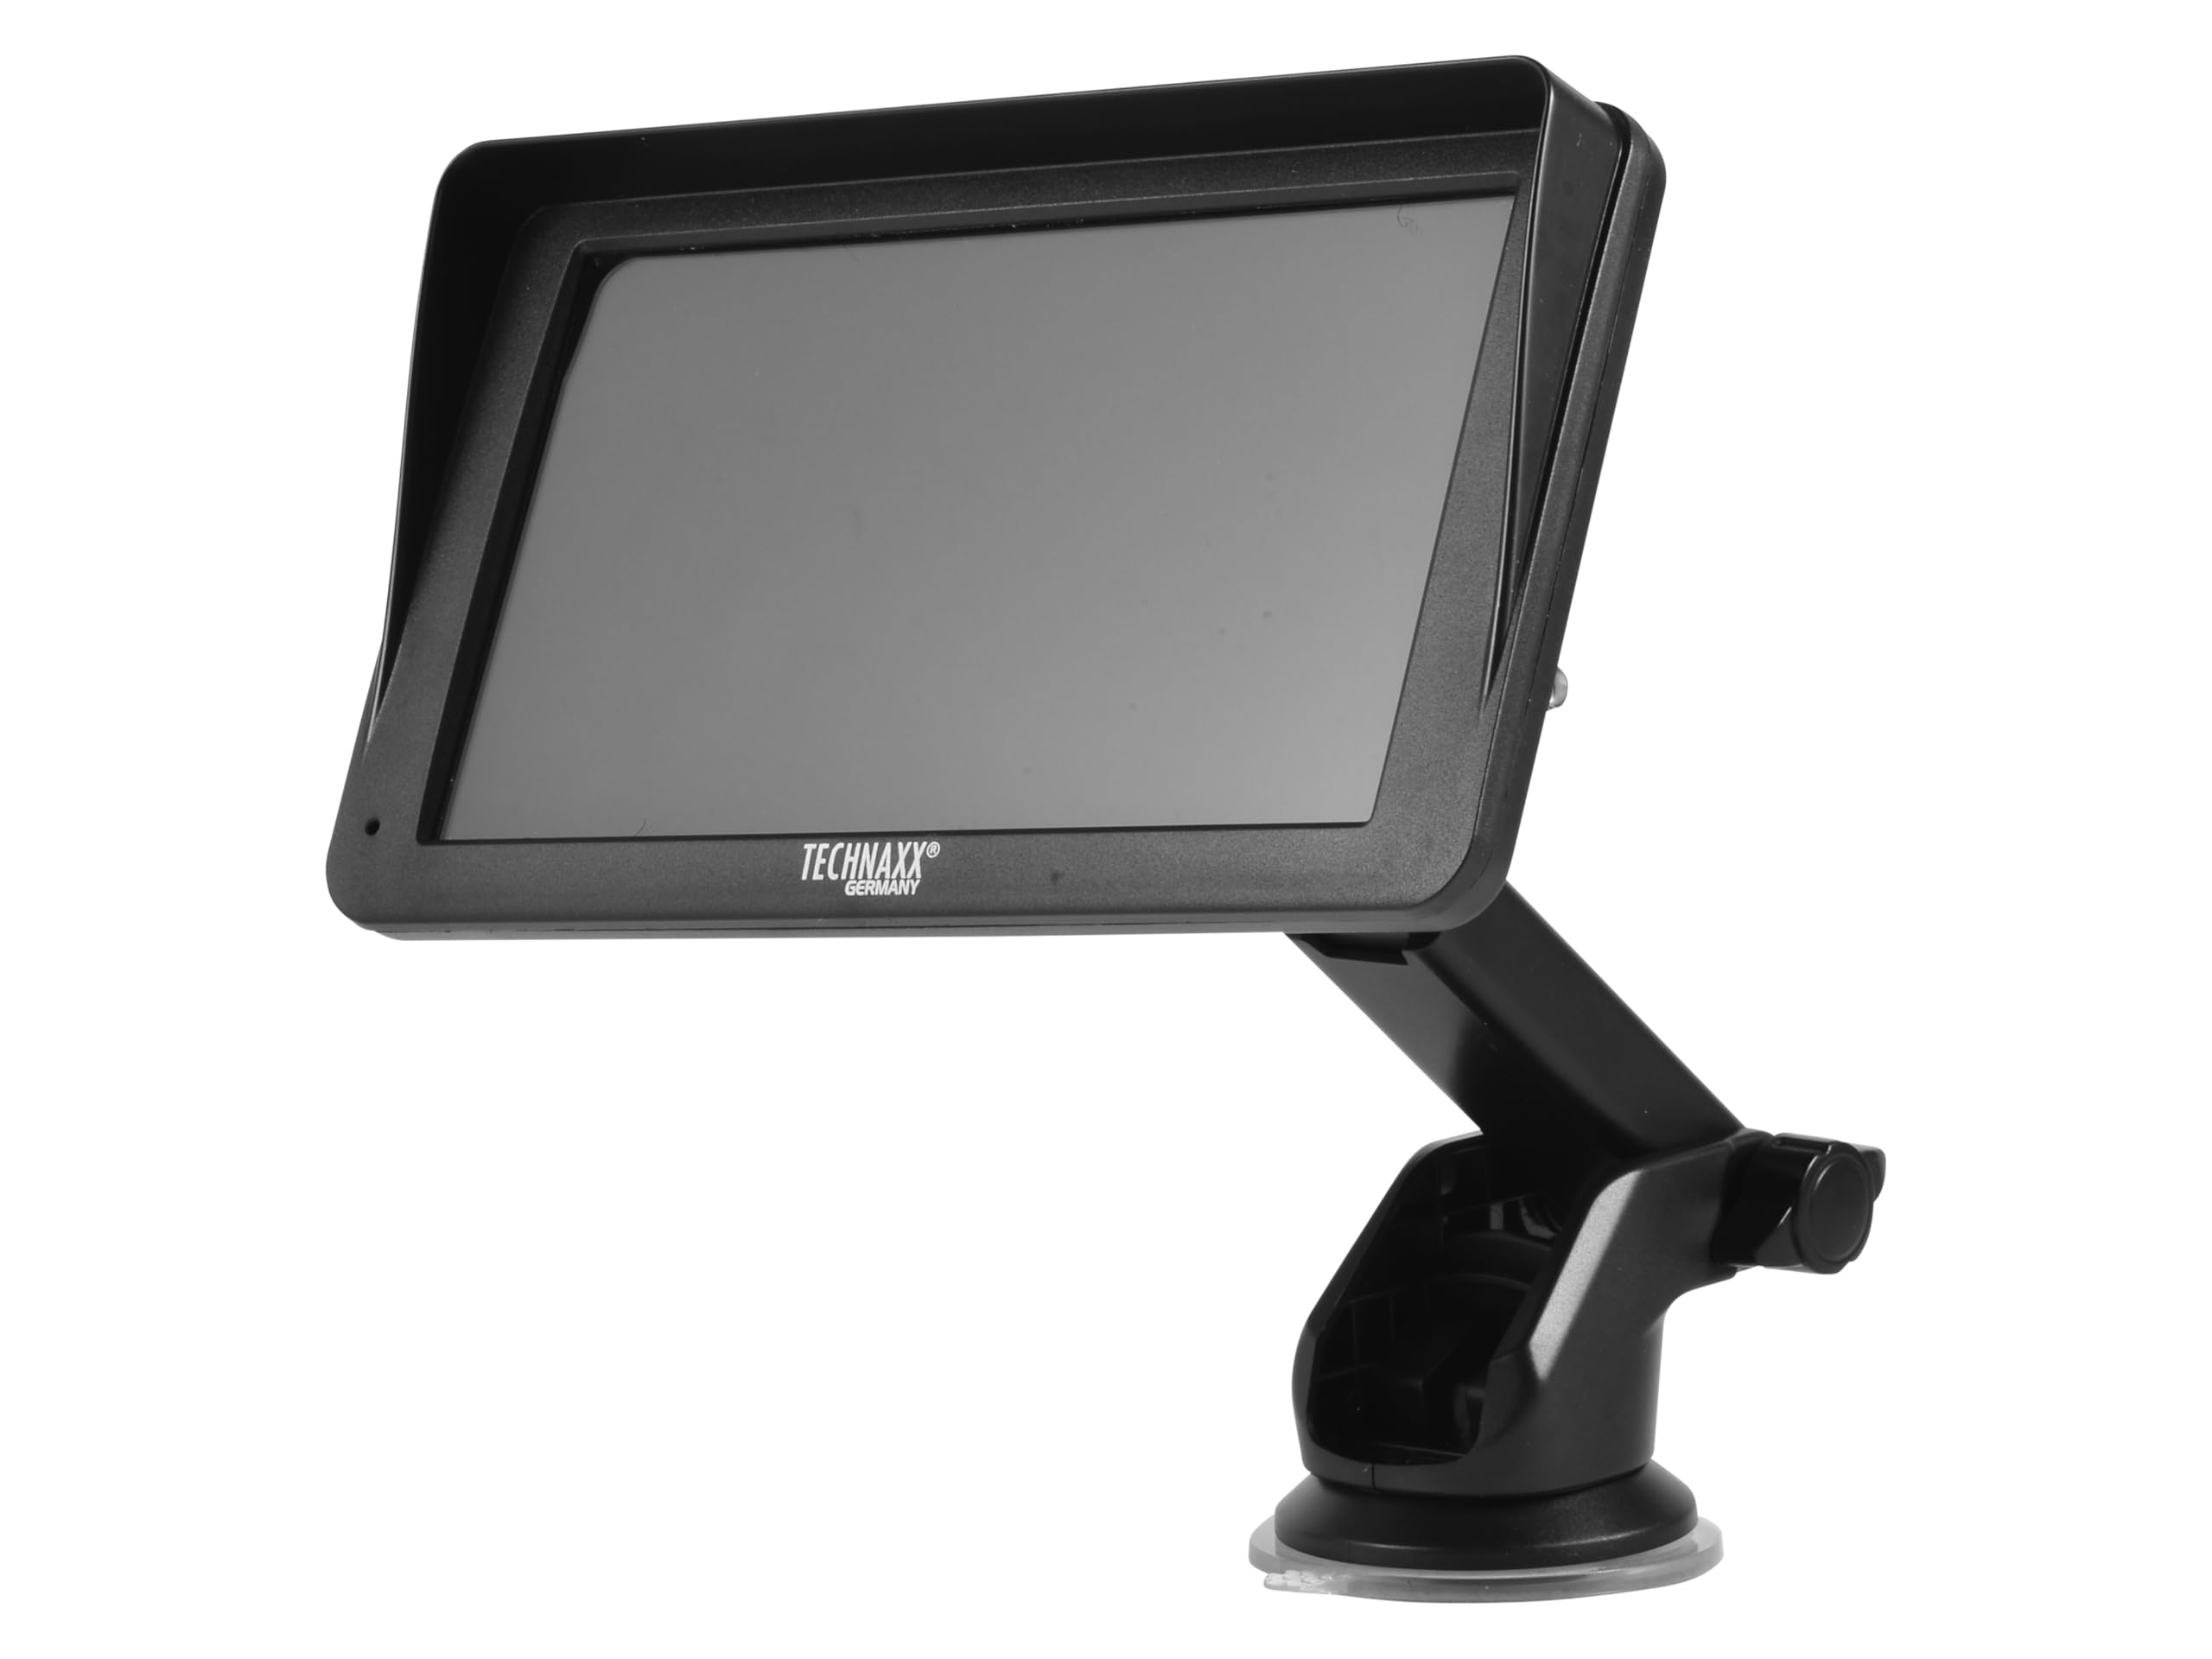
Vaizdas: priekis view of the TX-361 monitor with its 7-inch display and 'TECHN AXX GERMANY' branding, attached to the adjustable mounting stand.

Vaizdas: Galinis view of the TX-361 monitor, highlighting the ventilation grilles and the attachment point for the mounting bracket.

Vaizdas: Išsamus view of the right side of the TX-361 monitor, showing the power button, reset button, USB-C power input, AUX output, and USB-A port.
4.1. Įrenginio komponentai
- 7 colių talpinis jutiklinis ekranas: Pagrindinis ekranas visoms funkcijoms.
- Maitinimo mygtukas: Located on the top right side.
- Atkūrimo mygtukas: Small pinhole button for system reset.
- USB-C prievadas: Dėl maitinimo įvesties.
- AUX išvestis: 3.5mm jack for wired audio transmission.
- USB-A prievadas: For media playback or charging external devices.
- DAB Antenna Input: Connector for the external DAB antenna.
- Integruotas garsiakalbis: For direct audio playback.
5. Sąranka
5.1. Prietaiso montavimas
The TX-361 can be mounted on your vehicle's windscreen or dashboard using the provided holder.
- Attach the monitor to the mounting bracket.
- For Windscreen Mounting: Clean the desired area on the windscreen. Press the suction cup firmly against the glass and engage the lever to secure it.
- For Dashboard Mounting: Clean the desired area on the dashboard. If necessary, use the adhesive disc provided for a more secure attachment point for the suction cup. Press the suction cup firmly and engage the lever.
- Nustatykite optimalų monitoriaus kampą viewnetrukdydamas vairuoti view.

Image: The TX-361 monitor securely mounted on a car dashboard, showing its position relative to the driver's view.

Image: The TX-361 monitor mounted on a car windscreen, demonstrating an alternative placement option.
5.2. Maitinimo prijungimas
- Connect the USB-C end of the power cable to the USB-C port on the monitor.
- Plug the USB-A end of the power cable into the provided 12V/24V cigarette lighter adapter.
- Insert the cigarette lighter adapter into your vehicle's 12V/24V power socket. The device will power on automatically or can be turned on using the power button.
5.3. DAB Antenna Connection
For optimal DAB radio reception, connect the included DAB antenna:
- Connect the DAB antenna cable to the dedicated DAB antenna input on the monitor.
- Mount the DAB antenna on your windscreen or another suitable location, ensuring it has clear line of sight for best signal reception.
6. Naudojimo instrukcijos
6.1. Įjungimas/išjungimas
- Maitinimas: The device typically powers on automatically when connected to the vehicle's power. If not, press and hold the power button on the top right side.
- Išjungti: Press and hold the power button until the device shuts down. A short press will turn the screen off/on.
6.2. Initial Setup and Smartphone Connection
The TX-361 supports wireless Apple CarPlay and Android Auto via Wi-Fi and Bluetooth 5.0.
- Įsitikinkite, kad jūsų išmaniajame telefone įjungti „Wi-Fi“ ir „Bluetooth“.
- On the TX-361 monitor, navigate to the CarPlay or Android Auto section.
- The monitor will display a Bluetooth name. On your smartphone, search for and connect to this Bluetooth device.
- Once connected via Bluetooth, the device will prompt you to enable Wi-Fi for CarPlay/Android Auto functionality. Confirm the connection on your phone.
- After successful pairing, Apple CarPlay or Android Auto will launch automatically on the monitor.
6.3. Jutiklinio ekrano veikimas
The 7-inch capacitive touchscreen allows for intuitive control:
- Bakstelėkite: Pasirinkite elementus arba patvirtinkite veiksmus.
- Perbraukimas: Navigate through menus or lists.
- Žiupsnelis, norint priartinti: (Where supported, e.g., in navigation apps) Adjust map zoom levels.
6.4. DAB Digital Radio
To use the integrated DAB digital radio:
- Ensure the DAB antenna is properly connected.
- From the main menu, select the 'DAB Radio' option.
- The device will automatically scan for available DAB stations.
- Select your desired station from the list.
6.5. FM radijas
For traditional FM radio reception:
- From the main menu, select the 'FM Radio' option.
- Norėdami ieškoti stočių arba rankiniu būdu suderinti dažnį, naudokite ekrane rodomus valdiklius.
6.6. Garso išvesties parinktys
The TX-361 offers several ways to transmit audio to your vehicle's sound system:
- Integruotas garsiakalbis: Audio will play directly from the monitor's built-in speaker.
- AUX kabelis: Connect the provided 3.5mm AUX cable from the monitor's AUX output to your car's AUX input. Select 'AUX' as the input source on your car radio.
- FM perdavimas: Select an unused FM frequency on the TX-361 and tune your car radio to the same frequency. Audio will be transmitted wirelessly to your car's speakers.
7. Priežiūra
- Valymas: Ekraną ir įrenginio išorę valykite minkštu, sausu skudurėliu. Nenaudokite abrazyvinių valiklių ar tirpiklių.
- Saugykla: Jei prietaisą ilgesnį laiką sandėliuosite, atjunkite jį nuo maitinimo šaltinio ir laikykite vėsioje, sausoje vietoje.
- Programinės įrangos atnaujinimai: Periodiškai tikrinkite gamintojo websvetainėje, kurioje pateikiami visi galimi programinės įrangos atnaujinimai, siekiant užtikrinti optimalų našumą.
8. Problemų sprendimas
| Problema | Galimas sprendimas |
|---|---|
| Įrenginys neįsijungia. |
|
| Nepavyksta prisijungti prie „CarPlay“ / „Android Auto“. |
|
| Poor DAB/FM radio reception. |
|
| Nėra garso išvesties. |
|
9. Specifikacijos
| Funkcija | Specifikacija |
|---|---|
| Modelio numeris | 5361 |
| Ekranas | 7 colių talpinis jutiklinis ekranas |
| Ryšio technologija | Wi-Fi (Dual-band 2.4 / 5 GHz), Bluetooth 5.0 |
| Ypatingos savybės | Wireless CarPlay & Android Auto, DAB Digital Radio, FM Radio, Touchscreen Display |
| DAB dažnių diapazonas | Band III: 174-240 MHz |
| Garso išvestis | AUX, FM Transmission, Integrated Speaker |
| Maitinimo šaltinis | 12V/24V via Cigarette Lighter |
| Gaminio matmenys (D x P x A) | 18.8D x 10.8W x 3.5H centimetrai |
| Prekės svoris | 0.58 svaro (maždaug 263 gramai) |
10. Garantija ir palaikymas
Technaxx products are covered by a manufacturer's warranty. For detailed warranty information, please refer to the warranty card included with your product or visit the official Technaxx website. For technical support, troubleshooting assistance, or service inquiries, please contact Technaxx customer support through their official channels.
You can often find additional resources, FAQs, and contact information on the Technaxx official websvetainę.