
1. Įvadas
This manual provides comprehensive instructions for the setup, operation, and maintenance of your KitVision 7-inch Digital Photo Frame, model DPF7BKK. Please read this manual thoroughly before using the device to ensure proper functionality and longevity.

1 pav.: priekis view of the KitVision 7-inch Digital Photo Frame. The frame is silver with a black bezel, displaying a vibrant image of a person holding a child on a beach.
2. Pakuotės turinys
Patikrinkite, ar jūsų pakuotėje yra visi toliau išvardyti daiktai:
- KitVision 7-inch Digital Photo Frame (DPF7BKK)
- Kintamos srovės adapteris
- Nuimamas stovas
- Vartotojo vadovas (šis dokumentas)

Figure 2: The product packaging for the KitVision 7-inch Digital Photo Frame. The box features a blue background with wave patterns and an image of the digital photo frame displaying a beach scene.
3. Produktas baigtasview
3.1. Galinis skydelis ir valdikliai

3 pav.: galinis view of the digital photo frame. Visible features include the USB port, SD/MMC/MS card slot, DC power input, control buttons (ENTER, arrows, MENU, STANDBY), and a detachable stand.
- USB prievadas: Skirta USB atmintinėms prijungti.
- SD/MMC/MS Card Slot: For inserting compatible memory cards.
- DC įvestis: Power connection port for the AC adapter.
- Valdymo mygtukai:
- Įveskite: Patvirtina pasirinkimus.
- < / > (Left/Right Arrows): Navigates through menus and images.
- ^ / v (Up/Down Arrows): Naršykite meniu ir parinktis.
- MENIU: Prieina prie pagrindinio meniu.
- PASIRENGIMAS: Powers the frame on or off.
- Nuimamas stovas: Allows for tabletop placement in landscape or portrait orientation.
- Sieninio tvirtinimo anga: Rėmo tvirtinimui prie sienos.
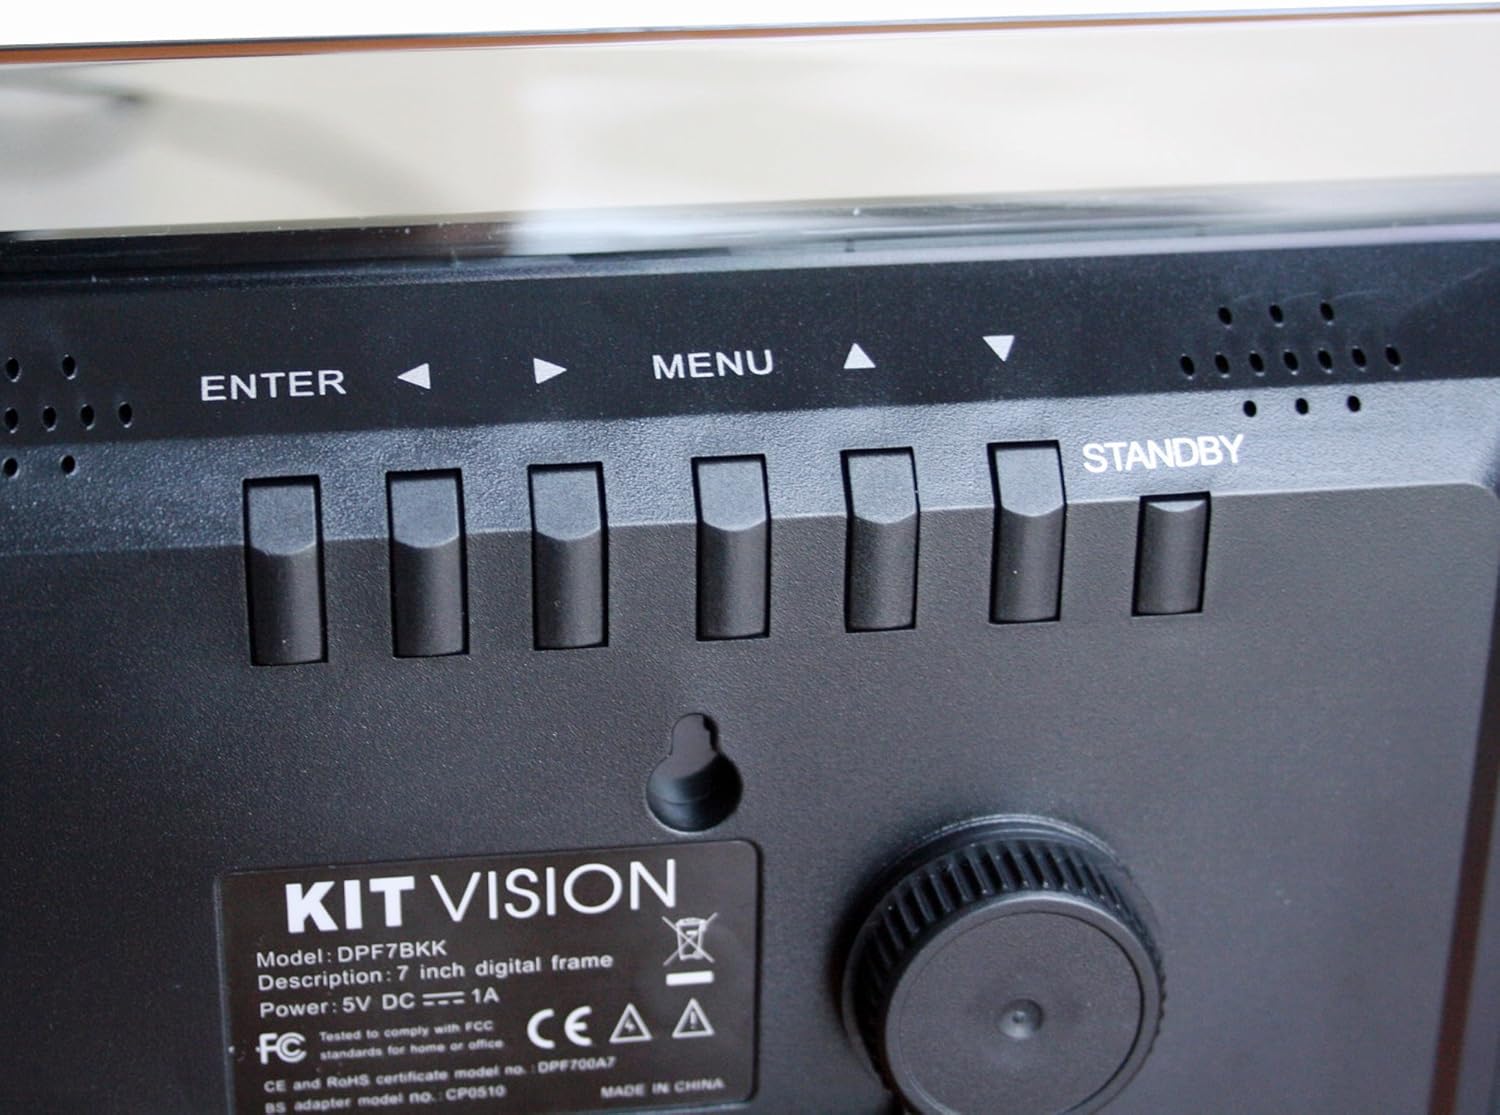
4 pav. Iš arti view of the control buttons and product label on the rear of the digital photo frame. The label clearly shows "KITVISION", "Model: DPF7BKK", and power specifications.
4. Sąranka
4.1. Stovo pritvirtinimas
- Locate the detachable stand in the package.
- Insert the stand's peg into the designated hole on the rear of the photo frame.
- Rotate the stand to secure it in place and adjust the angle for optimal viewing. The stand supports both landscape and portrait orientations.
4.2. Maitinimo prijungimas
- Connect the AC power adapter to the DC input port on the rear of the frame.
- Kitą maitinimo adapterio galą prijunkite prie standartinio elektros lizdo.
- The frame will typically power on automatically or can be turned on using the STANDBY button.
4.3. Inserting a Memory Card or USB Drive
The frame supports SD, MMC, MS memory cards, and USB flash drives. Ensure your photos are in a compatible format (e.g., JPEG).
- Carefully insert your memory card into the SD/MMC/MS slot or your USB flash drive into the USB port.
- Ensure the card or drive is inserted correctly and fully seated. Do not force it.
- The frame should automatically detect the storage device and begin displaying photos, or prompt you to select a source.
5. Naudojimo instrukcijos
5.1. Pagrindinė navigacija
- Naudokite </> (Left/Right) and ^ / v (Up/Down) arrow buttons to navigate through menus and select options.
- Paspauskite ENTER button to confirm a selection or open a sub-menu.
- Paspauskite MENIU button to return to the previous menu or access the main menu from a slideshow.
- Paspauskite ir palaikykite LAIKYMAS button to power the frame off or on.
5.2. Viewnuotraukos
Once a memory card or USB drive is inserted, the frame will typically start a slideshow automatically. If not, navigate to the "Photo" or "Slideshow" option in the main menu and press ENTER.
5.3. Slideshow Settings
To customize your slideshow:
- Paspauskite MENIU mygtuką, kad pasiektumėte pagrindinį meniu.
- Navigate to "Settings" or "Slideshow Options" using the arrow buttons and press ENTER.
- Adjust settings such as:
- Rodymo laikas: Duration each photo is shown.
- Perėjimo efektas: How photos change (e.g., fade, wipe).
- Kartojimo Režimas: Loop all photos or play once.
- Photo Order: Sequential or random.
- Paspauskite ENTER to confirm changes and MENIU išeiti.
6. Priežiūra
6.1. Cleaning the Frame
- Prieš valydami visada atjunkite maitinimo adapterį.
- Minkšta, sausa, nepūkuota šluoste švelniai nuvalykite ekraną ir rėmelį.
- Jei ekrane yra sunkiai įveikiamų žymių, lengvai nuvalykiteampNuvalykite šluostę vandeniu arba ekranui saugiu valymo tirpalu. Nepurkškite skysčio tiesiai ant ekrano.
- Avoid using abrasive cleaners, solvents, or alcohol-based solutions, as these can damage the surface.
6.2. Sandėliavimas
- When not in use for extended periods, store the digital photo frame in a cool, dry place, away from direct sunlight and extreme temperatures.
- It is recommended to store the frame in its original packaging to protect it from dust and physical damage.
7. Problemų sprendimas
| Problema | Galima priežastis | Sprendimas |
|---|---|---|
| Rėmelis neįsijungia. | No power, faulty adapter, or STANDBY button not pressed. | Ensure power adapter is securely connected to both the frame and a working electrical outlet. Press the STANDBY button. Try a different outlet. |
| No images displayed. | No memory card/USB, incompatible file format, or card/USB not inserted correctly. | Insert a memory card or USB drive with compatible image files (JPEG). Ensure it is fully seated. Check if the frame is set to the correct source input in the menu. |
| Vaizdai atrodo iškraipyti arba prastos kokybės. | Low resolution images, damaged memory card/USB, or screen issue. | Use higher resolution images. Try a different memory card or USB drive. Clean the screen. |
| Mygtukai nereaguoja. | Laikinas programinės įrangos triktis. | Disconnect the power adapter, wait 10 seconds, then reconnect it to reset the device. |
8. Specifikacijos
| Modelio numeris | DPF7BKK |
| Ekrano dydis | 7 colių |
| Rezoliucija | WXGA |
| Gaminio matmenys | 9.06 x 6.5 x 1.26 colio |
| Prekės svoris | 0.012 uncijos |
| Ryšio technologija | USB |
| Maitinimo šaltinis | Corded Electric (5V DC === 1A) |
| Palaikomos atminties kortelės | SD, MMC, MS |
| Palaikomi vaizdo formatai | JPEG (common format, specific list not provided in input) |
9. Garantija ir palaikymas
For warranty information and technical support, please refer to the documentation provided at the time of purchase or contact KitVision customer service. Specific warranty terms may vary by region and retailer.
