Įvadas
Ačiū, kad pirkoteasing the SENTRY CL933 Big Screen Weather Alarm Clock. This device combines a digital alarm clock with a large LCD display, providing essential information such as time, date, indoor temperature, humidity, and a weather forecast. This manual will guide you through the setup, operation, and maintenance of your new alarm clock.
Saugos informacija
- Nelaikykite įrenginio ekstremaliose temperatūrose, tiesioginiuose saulės spinduliuose ar didelėje drėgmėje.
- Venkite įrenginio numetimo ar stiprių smūgių.
- Nemaišykite senų ir naujų baterijų arba skirtingų tipų baterijų.
- Išimkite baterijas, jei įrenginio nenaudosite ilgesnį laiką.
- Prietaisą valykite minkštu, sausu skudurėliu. Nenaudokite abrazyvinių valiklių ar tirpiklių.
- Šis gaminys skirtas naudoti tik patalpose.
Pakuotės turinys
Prašome patikrinti, ar yra visi daiktai:
- SENTRY CL933 Big Screen Weather Alarm Clock
- Vartotojo vadovas (šis dokumentas)
Produktas baigtasview
The SENTRY CL933 features a large, easy-to-read LCD display and intuitive controls. Familiarize yourself with the main components:
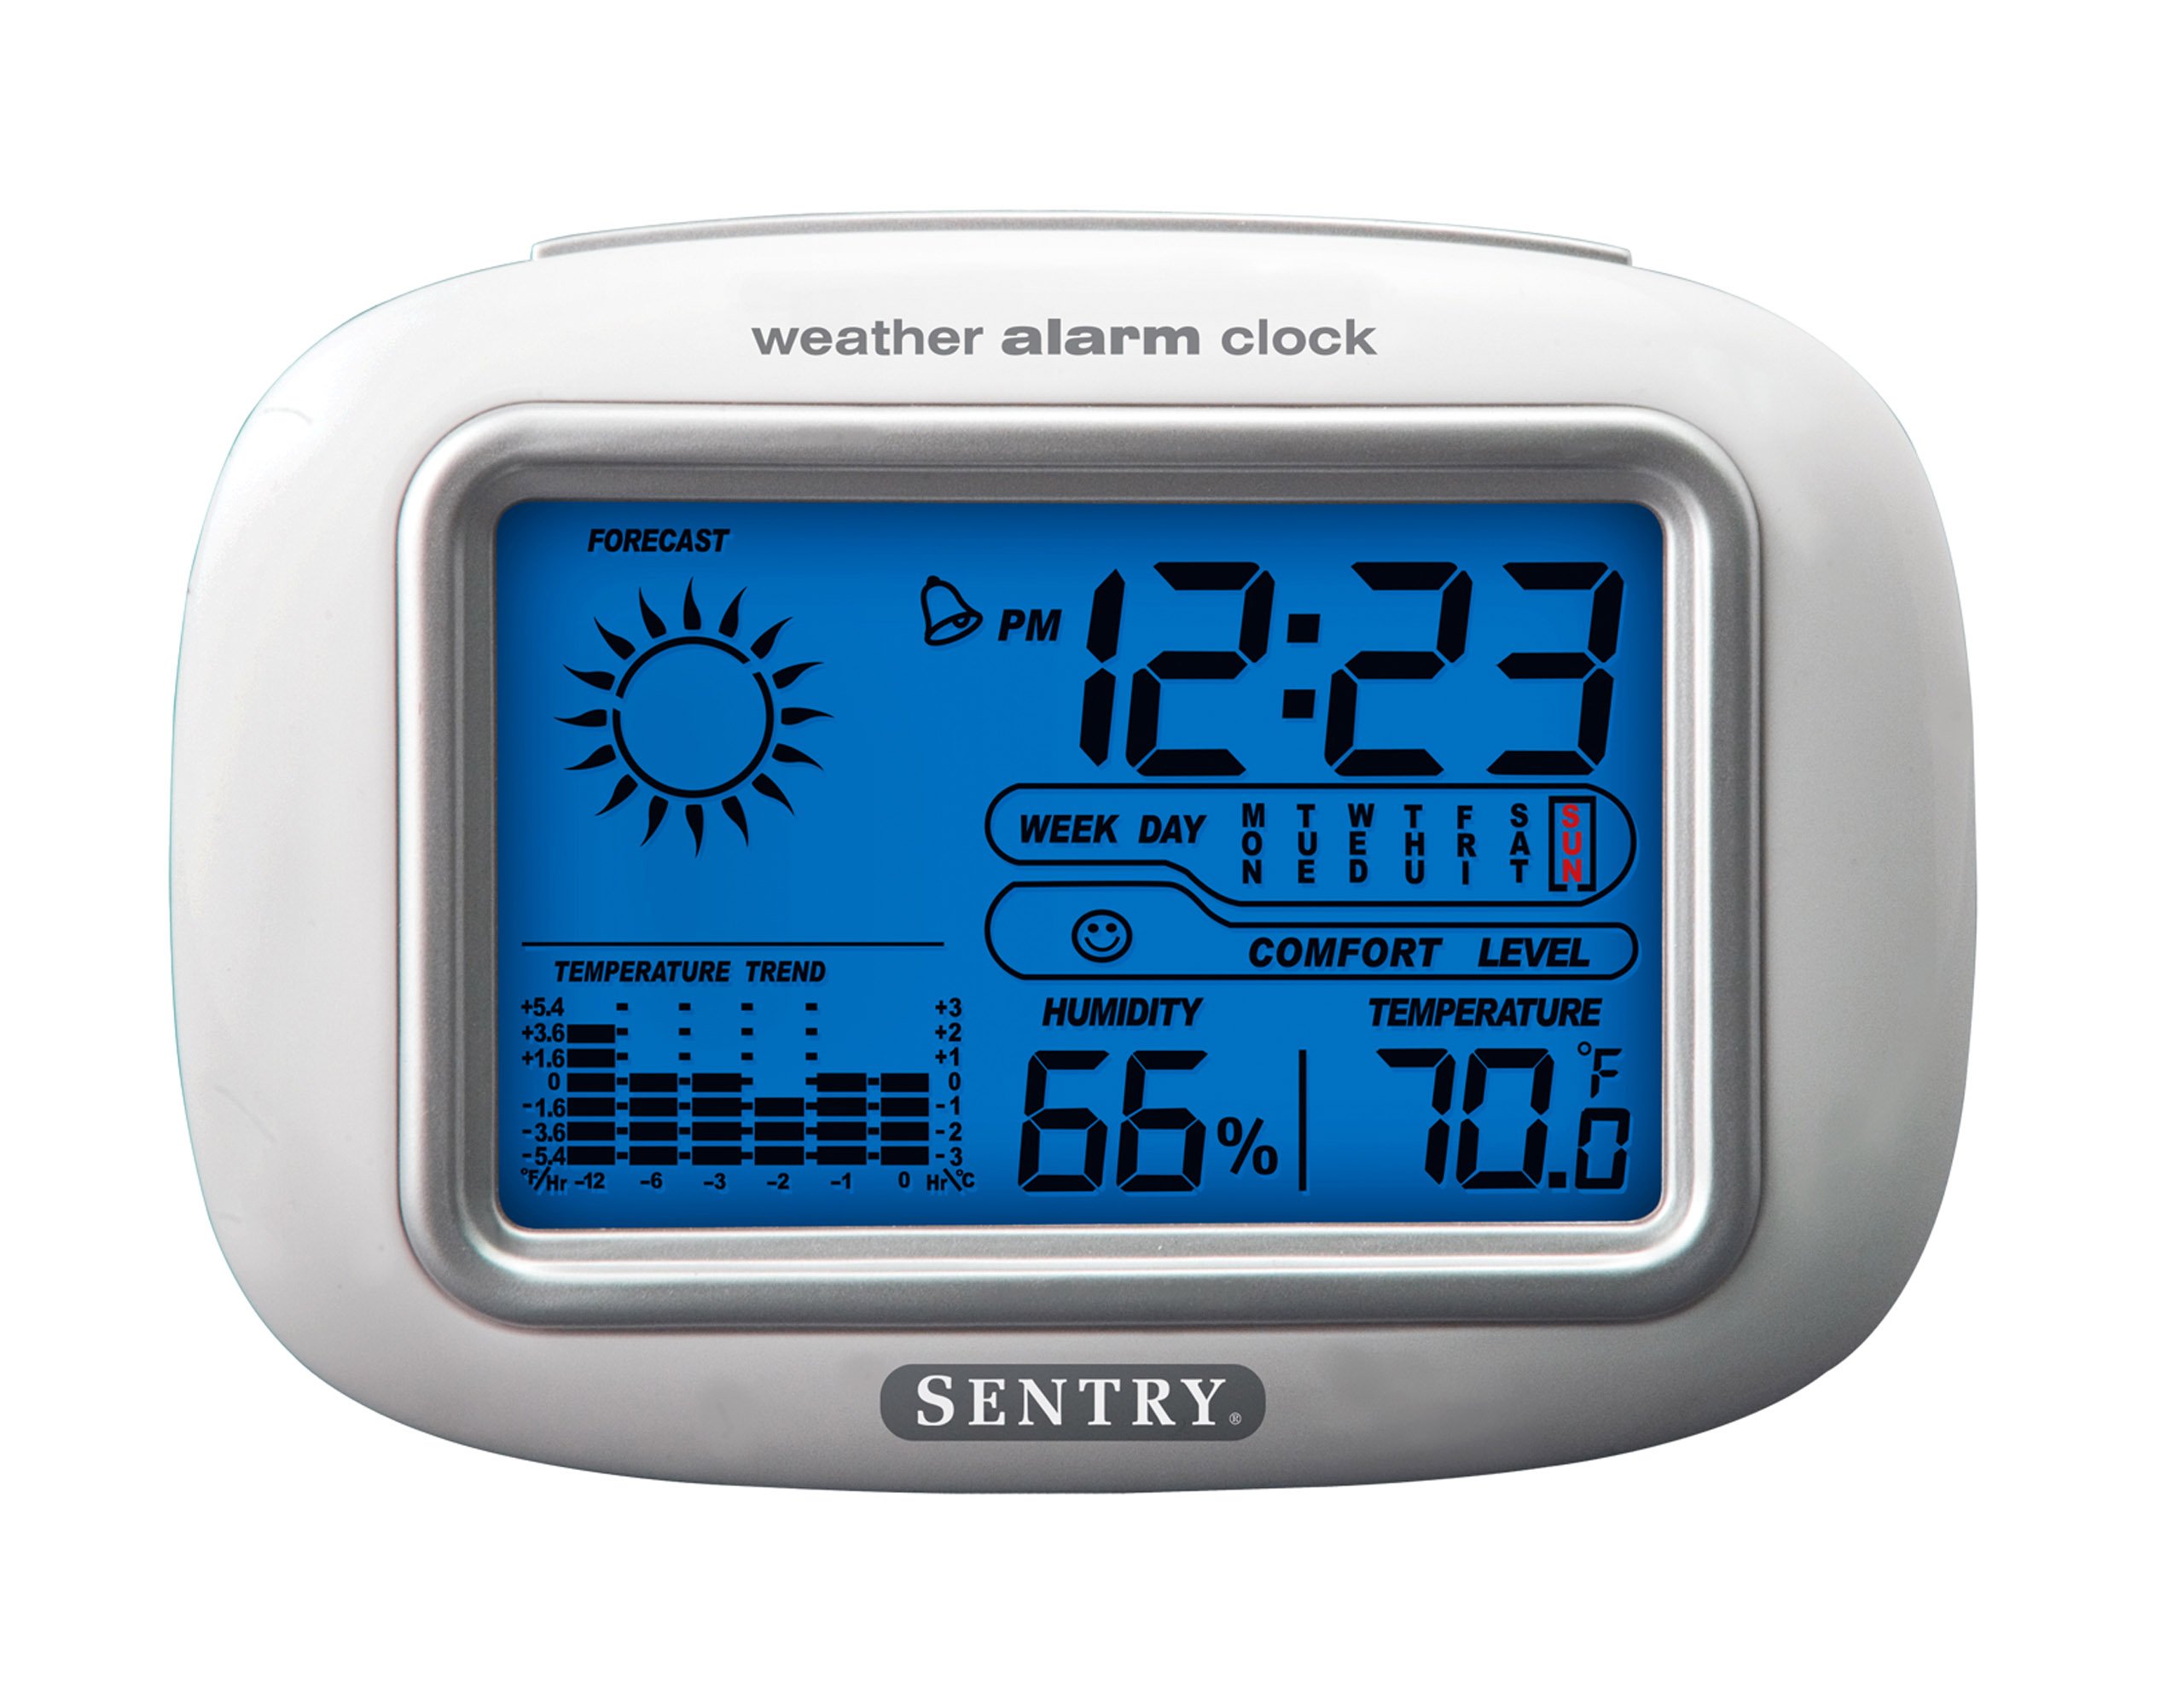
The SENTRY CL933 Big Screen Weather Alarm Clock displayed in its retail packaging, showing the clock face with time, weather forecast, humidity, and temperature readings.
Ekrano elementai:
- Laiko rodymas: Shows current time (12/24 hour format).
- Date & Day of Week: Displays the current date and day.
- Weather Forecast Icon: Indicates predicted weather conditions (e.g., sunny, cloudy, rainy).
- Moon Phase Icon: Rodo dabartinę mėnulio fazę.
- Temperatūros rodymas: Shows indoor temperature in Celsius or Fahrenheit.
- Drėgmės ekranas: Shows indoor humidity percentage.
- Comfort Level Icon: Indicates the comfort level based on temperature and humidity.
- Temperatūros tendencijos indikatorius: Shows if the temperature is rising, falling, or stable over the last 12 hours.
- Signalizacijos piktograma: Indicates when the alarm is set.
Control Buttons (typically on the back or sides):
- MODE/SET Button: Used to switch between display modes and enter setting mode.
- AUKŠTYN/ŽEMYN mygtukai: Used to adjust values during setting and sometimes to toggle display options.
- ALARM mygtukas: Used to set or activate/deactivate the alarm.
- Snaudimo/apšvietimo mygtukas: Activates the backlight and functions as the snooze button when the alarm sounds.
- °C/°F mygtukas: Perjungia temperatūros rodymą pagal Celsijų ir Farenheitą.
Sąranka
1. Akumuliatoriaus įdėjimas
- Įrenginio gale suraskite baterijų skyriaus dangtelį.
- Nuimkite dangtelį jį stumdami arba keldami.
- Insert two (2) new AAA batteries (not included) according to the polarity indicators (+ and -) inside the compartment.
- Saugiai uždėkite akumuliatoriaus skyriaus dangtelį.
- The clock will power on and the display will activate.
2. Pradinis paskirstymas
Place the alarm clock on a stable, flat surface away from direct heat sources, strong vibrations, or areas with extreme temperature fluctuations for accurate readings.
Naudojimo instrukcijos
1. Laiko ir datos nustatymas
- Paspauskite ir palaikykite REŽIMAS/NUSTATYMAS button for approximately 3 seconds to enter time setting mode. The hour digit will start flashing.
- Naudokite UP or ŽEMYN mygtukai valandoms reguliuoti.
- Paspauskite REŽIMAS/NUSTATYMAS dar kartą, kad patvirtintumėte valandas ir pereitumėte prie minučių nustatymo.
- Repeat steps 2 and 3 for minutes, year, month, and day.
- Nustatę dieną, paspauskite REŽIMAS/NUSTATYMAS paskutinį kartą, kad išeitumėte iš nustatymų režimo.
- Norėdami perjungti iš 12 valandų į 24 valandų laiko formatą, paspauskite UP mygtuką, kol laiko nustatymo metu mirksi valandos.
2. Signalo nustatymas
- Paspauskite SIGNALAS mygtuką vieną kartą, kad būtų rodomas dabartinis žadintuvo laikas.
- Paspauskite ir palaikykite SIGNALAS button for approximately 3 seconds. The alarm hour digit will start flashing.
- Naudokite UP or ŽEMYN mygtukai žadintuvo valandoms reguliuoti.
- Paspauskite SIGNALAS dar kartą, kad patvirtintumėte valandą ir pereitumėte prie žadintuvo minučių nustatymo.
- Naudokite UP or ŽEMYN mygtukai žadintuvo minutėms reguliuoti.
- Paspauskite SIGNALAS one last time to confirm and exit alarm setting mode.
- Norėdami įjungti arba išjungti žadintuvą, paspauskite SIGNALAS button briefly when the current time is displayed. An alarm icon will appear on the display when the alarm is active.
3. Snaudimo funkcija ir foninis apšvietimas
- Kai skamba žadintuvas, paspauskite SNAIGĖ / ŠVIESA mygtuką, kad įjungtumėte snaudimo funkciją. Žadintuvas laikinai išsijungs ir vėl suskambės po kelių minučių (paprastai 5–10 minučių).
- Norėdami visiškai išjungti žadintuvą, paspauskite bet kurį kitą mygtuką (pvz., SIGNALAS, REŽIMAS/NUSTATYMAS) when the alarm is sounding.
- Paspauskite SNAIGĖ / ŠVIESA button at any time to activate the backlight for a few seconds, illuminating the display for easy viewing in low light conditions. The backlight is not designed to stay on continuously to conserve battery life.
4. Temperatūros vieneto pasirinkimas (°C/°F)
Paspauskite ° C / ° F button (usually located on the back or side) to toggle the temperature display between Celsius and Fahrenheit.
5. Understanding Weather and Environmental Displays
- Orų prognozė: The icon (e.g., sun, clouds, rain) represents a prediction of the weather for the next 12-24 hours based on atmospheric pressure changes detected by the internal sensor. This is an estimate and may not always match official weather reports.
- Drėgmė: Displays the current indoor relative humidity percentage.
- Komforto lygis: An icon (e.g., smiley face, neutral face, frowny face) indicates the indoor comfort level based on the combination of temperature and humidity.
- Temperatūros tendencija: The arrow indicator shows if the indoor temperature has been rising, falling, or remaining stable over the past 12 hours.
- Mėnulio fazė: The moon icon changes to reflect the current phase of the moon.
Priežiūra
- Valymas: Nuvalykite įrenginį minkšta, šiek tiek damp audinys. Nenaudokite stiprių cheminių medžiagų ar abrazyvinių medžiagų.
- Baterijos keitimas: When the display becomes dim or functions become erratic, replace the two AAA batteries. Ensure correct polarity.
- Saugykla: Jei laikrodį ilgesnį laiką laikysite, išimkite baterijas, kad išvengtumėte pratekėjimo.
Trikčių šalinimas
| Problema | Galima priežastis / sprendimas |
|---|---|
| Ekranas tuščias arba blankus. | Batteries are low or incorrectly installed. Replace with new AAA batteries, ensuring correct polarity. |
| Laiko / datos nustatyti negalima. | Įsitikinkite, kad paspaudžiate ir laikote REŽIMAS/NUSTATYMAS mygtuką 3 sekundes, kad įjungtumėte nustatymo režimą. |
| Signalizacija neskamba. | The alarm may not be activated. Press the SIGNALAS button briefly to ensure the alarm icon is displayed. Check alarm time setting. |
| Inaccurate temperature/humidity. | The unit may be placed near a heat source, vent, or in direct sunlight. Move the clock to a more stable environment. Readings are for indoor conditions only. |
| Orų prognozė atrodo neteisinga. | The weather forecast is an estimate based on internal barometric pressure changes and may not always align with local weather reports. It is a general trend indicator. |
Specifikacijos
- Modelis: CL933
- Prekinis ženklas: SENTRY
- Ekrano tipas: Skaitmeninis LCD su foniniu apšvietimu
- Maitinimo šaltinis: Maitinamas baterijomis
- Reikalingos baterijos: 2 x AAA (neįtraukta)
- Matmenys: 6.5 x 2.25 x 4.25 colio (16.5 x 5.7 x 10.8 cm)
- Svoris: 6.2 uncijos (176 gramų)
- Savybės: Time, Date, Day of Week, Alarm, Snooze, Indoor Temperature (°C/°F), Indoor Humidity, Weather Forecast Icons, Moon Phase, Comfort Level Indicator, 12-hour Temperature Trend.
- Montavimo tipas: Stalviršis
Garantija ir palaikymas
SENTRY products are designed for reliability and performance. For any questions, technical support, or warranty inquiries, please refer to the contact information provided with your purchase or visit the official SENTRY websvetainėje. Prašome išsaugoti pirkimo įrodymą garantiniams reikalavimams.