
Įvadas
This manual provides detailed instructions for the Vivitar PZ3115 Date-A-Print AF Auto Focus 35mm Film Camera. Please read this manual thoroughly before using your camera to ensure proper operation and to achieve optimal photographic results. Keep this manual for future reference.
The Vivitar PZ3115 is a compact 35mm film camera featuring auto-focus capabilities and a versatile Vivitar Series 1 38-115mm power zoom lens. It also includes a Date-A-Print function to imprint the date onto your photographs.
Fotoaparato komponentai
Familiarize yourself with the various parts of your Vivitar PZ3115 camera.
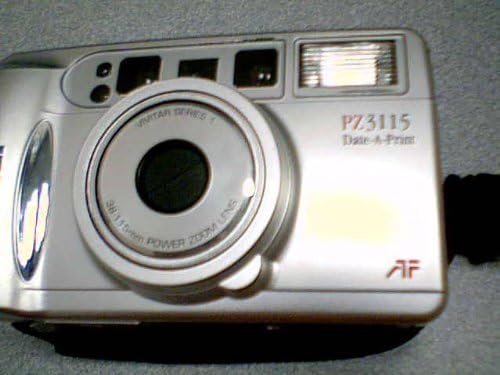
Vaizdas: Priekyje view of the Vivitar PZ3115 camera, showing the lens, flash, viewfinder, and Vivitar branding.

Vaizdas: Galinis view of the Vivitar PZ3115 camera, displaying the film counter, mode select, and set buttons for the Date-A-Print function.
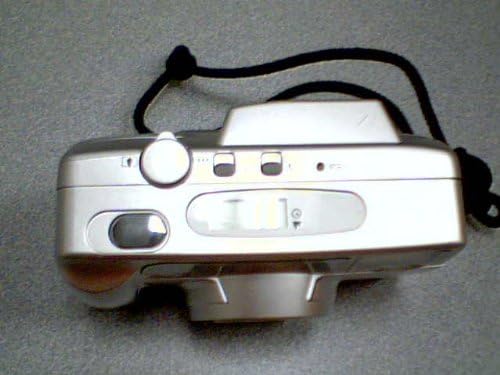
Vaizdas: Į viršų view of the Vivitar PZ3115 camera, showing the shutter button and film compartment release.
Pagrindiniai komponentai:
- Objektyvas: Vivitar Series 1 38-115mm Power Zoom Lens.
- Flash: Built-in automatic flash.
- Viewieškiklis: Už kadrų komponavimą.
- Užrakto mygtukas: To take photographs.
- Mastelio keitimo mygtukai: To adjust the focal length of the lens.
- Filmų skyrius: For loading 35mm film.
- Baterijų skyrius: For power source.
- Date-A-Print Controls: Buttons for setting and displaying date/time.
Sąranka
1. Akumuliatoriaus įdėjimas
The Vivitar PZ3115 requires batteries for operation. (Battery type not specified in product data, typically CR123A or AA for similar models. Refer to the battery compartment cover for specific type.)
- Raskite baterijų skyriaus dangtelį fotoaparato apačioje arba šone.
- Open the cover by sliding or lifting it according to the indicator.
- Įdėkite naujas baterijas, užtikrindami teisingą poliškumą (+/-), kaip nurodyta skyriaus viduje.
- Saugiai uždarykite akumuliatoriaus skyriaus dangtelį.
2. Plėvelės įdėjimas
Use standard 35mm film rolls.
- Open the camera back by sliding the film door latch (usually on the side or top).
- Įdėkite naują 35 mm juostos kasetę į juostos kamerą kairėje pusėje.
- Pull the film leader across to the film take-up spool on the right side. Ensure the film perforations engage with the teeth on the take-up spool.
- Tvirtai uždarykite kamerą, kol ji užsifiksuos.
- Press the shutter button once or twice to advance the film until the film counter displays "1" or the first frame number. The camera will automatically advance the film to the first frame.
3. Setting Date and Time (Date-A-Print)
The Date-A-Print feature allows you to imprint the date or time onto your photos.
- Locate the Date-A-Print display and control buttons on the camera back (refer to the rear view vaizdas).
- Paspauskite REŽIMAS button to cycle through display options (Year/Month/Day, Month/Day/Year, Day/Month/Year, Time, Off).
- When the desired format is displayed, press the NUSTATYTI button to adjust the blinking digit.
- Naudokite PASIRINKTI mygtuką (arba REŽIMAS again, depending on model) to advance the blinking digit.
- Kartokite, kol bus nustatyta teisinga data ir laikas.
- Select "Off" if you do not wish to imprint the date/time.
Fotoaparato valdymas
1. Įjungimas/išjungimas
To power on the camera, slide the lens cover open or press the power button (if available). The lens will extend. To power off, close the lens cover or press the power button again.
2. Fotografavimas
- Pažiūrėkite per viewieškiklis, kad sukurtumėte kadrą.
- Use the zoom buttons (usually near the shutter button) to adjust the focal length (38mm wide-angle to 115mm telephoto).
- Gently press the shutter button halfway down. The auto-focus system will engage, and an indicator light (often green) will confirm focus.
- Norėdami nufotografuoti, paspauskite užrakto mygtuką iki galo. Juosta automatiškai perjungs kitą kadrą.
3. Blykstės režimai
The camera features an automatic flash. In low light conditions, the flash will typically fire automatically. Some models may offer manual flash override or red-eye reduction modes. Consult the camera's specific indicators for flash status.
4. Filmo pervyniojimas
Once all frames on the film roll have been exposed, the camera will usually rewind the film automatically. If manual rewind is necessary (e.g., to change film mid-roll), locate the rewind button (often a small recessed button on the bottom or side) and press it. The film counter will count down as the film rewinds into the cartridge.
Once rewinding is complete, open the camera back and remove the film cartridge. Take the exposed film to a photo lab for development.
Priežiūra
1. Kameros valymas
- Kameros korpusą nuvalykite minkštu, nepūkuotu skudurėliu.
- For the lens, use a specialized lens cleaning cloth and lens cleaning fluid. Gently wipe in a circular motion from the center outwards. Avoid touching the lens with your fingers.
- Laikykite viewfinder clean for clear composition.
- Nenaudokite stiprių cheminių medžiagų ar abrazyvinių medžiagų.
2. Baterijos keitimas
Replace batteries promptly when the low battery indicator appears or if the camera fails to power on. Always use fresh batteries of the correct type.
3. Film Handling and Storage
- Store film in a cool, dry place, away from direct sunlight and high temperatures.
- Load and unload film in subdued light to prevent accidental exposure.
- Have exposed film developed as soon as possible for best results.
4. Kameros saugojimas
When not in use, store the camera in its case or a protective bag, away from dust, moisture, and extreme temperatures. Remove batteries if storing for extended periods to prevent leakage.
Trikčių šalinimas
| Problema | Galima priežastis | Sprendimas |
|---|---|---|
| Kamera neįsijungia. | Neišsikrovusios arba neteisingai įdėtos baterijos. | Pakeiskite baterijas naujomis, užtikrindami teisingą poliškumą. |
| Filmas nejuda į priekį. | Juosta netinkamai įdėta; juostos kreiptuvas neįjungtas. | Open camera back in subdued light, re-load film, ensuring leader is properly attached to take-up spool. |
| Flash does not fire in low light. | Flash mode set to "Off" or batteries are low. | Check flash mode settings; replace batteries if low. |
| Nuotraukos neryškios. | Camera shake; subject too close; auto-focus failed. | Hold camera steady; ensure subject is within minimum focus distance; allow auto-focus to lock before fully pressing shutter. |
| Date/Time imprint is incorrect or not appearing. | Date/Time not set correctly; Date-A-Print function turned off. | Refer to "Setting Date and Time" section to adjust settings or turn on the function. |
Specifikacijos
| Funkcija | Aprašymas |
|---|---|
| Prekės ženklas | „Vivitar“ |
| Modelio pavadinimas | Vivitar PZ 3115 Date-A-Print |
| Filmo formato tipas | 35 mm |
| Objektyvas | Vivitar Series 1 38-115mm Power Zoom Lens |
| Ypatingos savybės | Auto Exposure, Date-A-Print |
| Ekspozicijos valdymas | Automatinis |
| Automatinis fokusavimas | Taip |
| Įtraukti komponentai | Camera Body Only (as per product listing) |