
Įvadas
Ačiū, kad pirkoteasing the STOGA Ubox STV040 Dual Lens Car DVR Camera. This manual provides detailed instructions for the proper installation, operation, and maintenance of your device. Please read this manual thoroughly before using the product to ensure optimal performance and safety.
Pakuotės turinys
Atidarę pakuotę, patikrinkite jos turinį. Jei trūksta kokių nors daiktų arba jie pažeisti, susisiekite su pardavėju.
- 1 x STOGA Ubox STV040 Car DVR Camera
- 1x automobilinis pakrovėjas
- 1 x Car Mount
- 1 x External GPS Module
- 1 x Vartotojo vadovas
Produktas baigtasview
Familiarize yourself with the components and features of your STOGA Ubox STV040 Car DVR Camera.

1 paveikslas: Priekyje view of the DVR camera with the display screen active.

2 paveikslas: Priekyje view detailing the dual wide-angle lenses and surrounding controls.
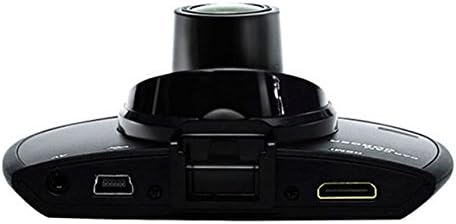
3 paveikslas: Į viršų view illustrating the connectivity ports (HDMI, USB, AV).
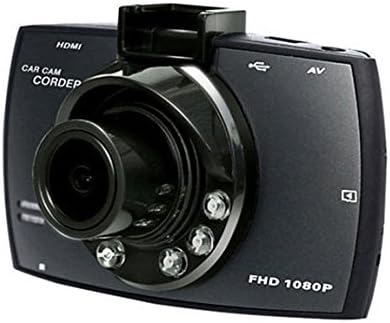
4 paveikslas: Angled perspective of the DVR camera, showing its compact design.
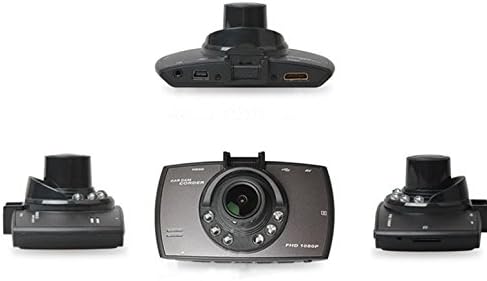
5 paveikslas: Visapusiškas view of the DVR camera from various angles.
Sąranka
1. „Micro SD“ kortelės įdėjimas
Insert a Micro SD card (Class 6 or higher, 4GB-32GB) into the designated slot on the DVR camera. Ensure the card is inserted correctly until it clicks into place. The device supports continuous loop recording and emergency event recording.
2. Kameros montavimas
- Attach the car mount to the windshield in a position that does not obstruct your view.
- Securely attach the DVR camera to the car mount.
- Adjust the camera angle to ensure both lenses capture the desired view (front and interior/side). The dual lenses are 180-degree rotatable.
3. Maitinimo prijungimas
Connect the car charger to the DVR camera's power input and plug the other end into your vehicle's 12V power outlet (cigarette lighter socket). The camera will typically power on automatically when the vehicle starts and power off when the vehicle is turned off.
4. GPS Module Connection (Optional)
Connect the external GPS module to the designated GPS port on the DVR camera. This enables GPS logging, recording location data along with video footage.
Naudojimo instrukcijos
Maitinimo įjungimas/išjungimas
- Automatinis: The camera powers on and starts recording automatically when the car engine starts. It powers off automatically when the engine is turned off.
- Rankinis: Press and hold the power button to manually turn the device on or off.
Įrašymo režimai
- Ciklo įrašymas: The camera continuously records video in segments. When the memory card is full, it automatically overwrites the oldest unlocked footage.
- Avarinis įrašymas (G jutiklis): The built-in G-Sensor detects sudden impacts or collisions. In such an event, the current video segment is automatically locked and protected from being overwritten.
Meniu naršymas
Use the control buttons located on the device to navigate through the menu options on the 2.0" TFT LCD screen. Adjust settings such as video resolution, date/time stamp, language (English, Chinese, Japanese, Russian), and G-Sensor sensitivity.
Atkūrimas
- Stop recording if currently active.
- Enter playback mode via the menu.
- Pasirinkite norimą vaizdo įrašą file for playback on the device screen.
- Alternatively, remove the Micro SD card and insert it into a computer to view files.
Slaptažodžio apsauga
The device supports password protection to prevent unauthorized access to recordings. Refer to the on-screen menu for setting up and managing this feature.
Priežiūra
- Valymas: Use a soft, dry cloth to clean the camera lenses and screen. Avoid abrasive cleaners or solvents.
- „Micro SD“ kortelė: Format the Micro SD card regularly (e.g., once a month) to ensure optimal performance and prevent data corruption. Back up important files prieš formatavimą.
- Temperatūra: Venkite įrenginio ilgalaikio laikymo tiesioginiuose saulės spinduliuose, itin aukštose temperatūrose ar didelėje drėgmėje.
- Firmware atnaujinimai: Patikrinkite gamintojo websvetainėje periodiškai ieškokite galimų programinės įrangos atnaujinimų, skirtų našumui pagerinti ir funkcijoms papildyti.
Trikčių šalinimas
| Problema | Galima priežastis / sprendimas |
|---|---|
| Kamera neįsijungia. |
|
| Įrašymas netikėtai nutrūksta. |
|
| Prasta vaizdo kokybė. |
|
| GPS neveikia. |
|
| Baterija nelaiko įkrovos. |
|
Specifikacijos
| Funkcija | Detalė |
|---|---|
| Modelio numeris | Ubox STV040 |
| Ekranas | 2.0" TFT LCD (960 x 240 pixels) |
| Objektyvai | Dual 140-degree A+ wide-angle, 180-degree rotatable |
| Jutiklis | CMOS |
| Vaizdo raiška | 1280 x 480 @ 30 fps, 640 x 480 @ 30 fps |
| Vaizdo įrašo formatas | AVI |
| Vaizdo formatas | M-JPG |
| Naktinis matymas | Infraraudonoji naktinio matymo funkcija |
| Sandėliavimas | Micro TF (SD HC) card, 4GB-32GB, Class 6 and above |
| GPS | Supports external GPS module |
| G jutiklis | Integrated, supports emergency event recording lock |
| Mikrofonas/garsiakalbis | Integruota |
| Išvestis | CVBS (Video Output) |
| Baterija | 3.7V 700mA Lithium-Polymer battery |
| Operacinės sistemos suderinamumas | Windows 2000/XP/Vista/Windows 7 |
| Palaikomos kalbos | English, Chinese, Japanese, Russian |
Garantija ir palaikymas
For warranty information and technical support, please refer to the documentation provided with your purchase or contact your retailer. Keep your purchase receipt as proof of purchase for warranty claims.
For further assistance, you may also visit the official STOGA website (if available) or contact their customer service department.