
Įvadas
This manual provides comprehensive instructions for the installation, operation, and maintenance of your Gateman ASSA ABLOY WG-100 Digital Door Lock. Please read this manual carefully before installation and use to ensure proper function and safety. Keep this manual for future reference.
Sąranka ir diegimas
Proper installation is crucial for the optimal performance of your digital door lock. It is recommended to have the lock installed by a qualified professional if you are unsure about any steps.
1. Išpakavimas ir komponentų patikrinimas
Carefully unpack all components and verify that all parts are present according to the packing list. Refer to the diagram below for an overview of the lock components.

Vaizdas: Priekyje view of the Gateman WG-100 Digital Door Lock, highlighting the Number Keypad, RF Tag Input, Emergency Power Input Area, Handle, and Reset Hole.

Vaizdas: Galinis view of the Gateman WG-100 Digital Door Lock, showing the Battery Cover, Lock Status Lamp, Battery Change Alert Lamp, Lock Button, and Handle.
Vaizdas: An exploded diagram illustrating the various components of the Gateman WG-100 Digital Door Lock and their assembly order for installation.
2. Durų paruošimas
Ensure your door is properly prepared for the lock installation. This may involve drilling holes or modifying existing ones to fit the lock's dimensions. Refer to the installation template provided with your lock for precise measurements.
3. Lock Assembly and Installation
- Įstatykite spynos mechanizmą į durų kraštą.
- Mount the exterior body of the lock, ensuring cables are routed correctly.
- Attach the interior body, connecting the cables securely.
- Secure the lock with screws, ensuring it is firmly attached and aligned.
4. Akumuliatoriaus įdėjimas
Open the battery cover on the interior unit. Insert four (4) AA alkaline batteries, observing the correct polarity (+/-). Close the battery cover.

Vaizdas: Close-up of the Gateman WG-100 showing the battery compartment and a visual representation of a low battery warning indicator.
5. Initial Code and RF Tag Registracija
After installation, you will need to register your master passcode and any RF tags or cards. Refer to the programming section for detailed steps on how to register access credentials.
Dėl generolo perview of digital door lock installation, you may refer to the following video. Please note that this video is not specific to the Gateman WG-100 model but provides helpful visual guidance on the installation process for similar digital locks.
Vaizdo įrašas: General Digital Door Lock Installation Guide. This video demonstrates the installation process for a digital door lock, which may be helpful for understanding the steps involved, though it is not specific to the Gateman WG-100.
Naudojimo instrukcijos
The Gateman WG-100 offers multiple ways to unlock and lock your door.
1. Unlocking from the Exterior
a. Using the Number Keypad
- Palieskite klaviatūrą, kad ją suaktyvintumėte.
- Enter your registered passcode followed by the '*' or '#' button (refer to your specific programming for confirmation).
- The lock will disengage, and you can open the door using the handle.
b. Using an RF Tag/Kortelė
- Place your registered RF tag or card on the RF Tag Input area (as shown in the image).
- The lock will disengage, and you can open the door using the handle.

Vaizdas: Demonstrates how to use an RF tag for unlocking and the activation of the keypad by touch on the Gateman WG-100.
2. Locking from the Exterior
The lock typically features an auto-locking function. After closing the door, the lock will automatically engage after a few seconds. You can also manually lock it by pressing the lock button on the exterior unit (if available) or by touching the keypad.
3. Unlocking from the Interior
To unlock from the interior, simply press the lock button or turn the handle, depending on the specific configuration of your lock.
4. Emergency Power Input
In case of complete battery discharge, you can use a 9V battery to temporarily power the lock. Connect the 9V battery to the Emergency Power Input Area on the exterior unit (as shown in the component diagram) while entering your passcode or using an RF tag.
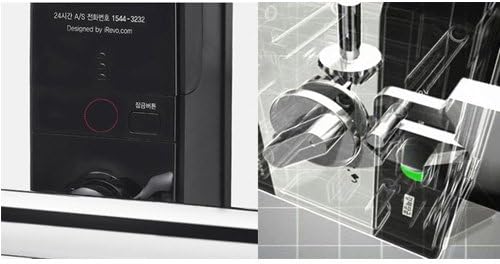
Vaizdas: Iš arti view of the emergency power input area on the Gateman WG-100, alongside an illustration of its internal locking mechanism.
Priežiūra
1. Baterijos keitimas
When the battery change alert lamp illuminates or you hear a low battery warning sound, replace all four (4) AA alkaline batteries immediately. Do not mix old and new batteries or different types of batteries. Failure to replace batteries promptly may result in the lock becoming inoperable.
2. Valymas
Wipe the lock's surface with a soft, dry cloth. Do not use abrasive cleaners, solvents, or chemical sprays, as these can damage the finish and electronic components.
3. Aplinkosaugos svarstymai
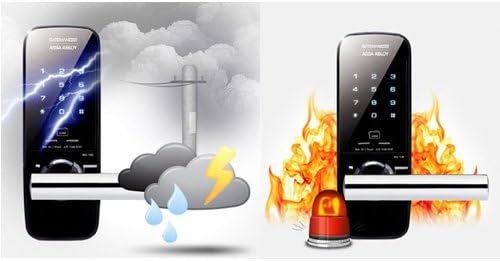
The Gateman WG-100 is designed with certain environmental resistances. However, avoid exposing the lock to extreme moisture or direct impact. The lock is designed to withstand typical weather conditions and has fire detection capabilities.

Vaizdas: Visual representation of the Gateman WG-100's resistance to environmental factors like rain and lightning, and its integrated fire alarm functionality.
Trikčių šalinimas
If you encounter issues with your Gateman WG-100, refer to the following common problems and solutions:
- Užraktas nereaguoja: Check battery levels. If batteries are dead, use the emergency 9V battery input. Ensure the keypad is activated by touching it.
- Passcode/RF tag neveikia: Re-enter the passcode carefully. Ensure the RF tag is placed correctly on the sensor. If issues persist, try re-registering the passcode/RF tag (refer to programming instructions).
- Lock repeatedly beeps or flashes: Tai dažnai rodo, kad baterijos išsikrovė. Nedelsdami pakeiskite baterijas.
- Door does not lock automatically: Check if the door is fully closed and aligned. Ensure the auto-lock function is enabled in the settings.
- Resetting the lock: If the lock malfunctions or you forget your master passcode, you may need to perform a factory reset. Locate the Reset Hole (as shown in the front view diagram) and follow the specific reset procedure outlined in the full programming guide. Įspėjimas: A factory reset will erase all registered passcodes and RF tags.
Specifikacijos
| Funkcija | Detalė |
|---|---|
| Prekės ženklas | Gateman |
| Modelis | „WG-100“ |
| Spalva | Juoda |
| Diegimo tipas | Sraigtinis kalnas |
| Maitinimo šaltinis | AA baterijos (4 vnt.) |
| Avarinė galia | 9V akumuliatoriaus gnybtas |
| Prieigos metodai | Passcode, RF Tag/Kortelė |
Informacija apie garantiją
The Gateman ASSA ABLOY WG-100 Digital Door Lock typically comes with a manufacturer's warranty covering defects in materials and workmanship. Please refer to the warranty card included with your product packaging for specific terms, conditions, and duration of the warranty. Keep your proof of purchase for warranty claims.
Pagalba klientams
For technical assistance, troubleshooting beyond this manual, or warranty inquiries, please contact your retailer or the official Gateman customer support in your region. Contact information can usually be found on the product packaging or the manufacturer's official websvetainę.