Įvadas
This manual provides detailed instructions for the installation, operation, and maintenance of your Venstar T1900 Residential Slimline Platinum Thermostat. Please read this manual thoroughly before attempting to install or operate the thermostat to ensure proper function and to avoid potential damage.
Svarbi saugos informacija
- Always turn off power to the heating/cooling system at the main circuit breaker or fuse box before installing or servicing the thermostat.
- This thermostat operates on 24 Volts AC. Do not connect to line voltage (120V arba 240V).
- Jei nesate susipažinę su elektros instaliacija, montavimą turėtų atlikti kvalifikuotas specialistas.
- Termostato bandymui nesujunkite trumpuoju jungimu dujų vožtuvo ar sistemos valdymo gnybtų. Tai sugadins termostatą ir panaikins garantiją.
- Ensure all wiring connections are secure and insulated to prevent short circuits.
Pakuotės turinys
Patikrinkite, ar jūsų pakuotėje yra šie elementai:
- „Venstar T1900“ termostato blokas
- Tvirtinimo detalės (varžtai ir sieniniai inkarai)
- Vartotojo vadovas (šis dokumentas)
Produktas baigtasview
The Venstar T1900 is a 7-day programmable digital thermostat designed for residential use. It offers precise temperature control and energy-saving scheduling capabilities. This thermostat is compatible with heat/cool, heat pump, and dual-fuel systems, controlling up to three heat stages ir du šaunūs stages.
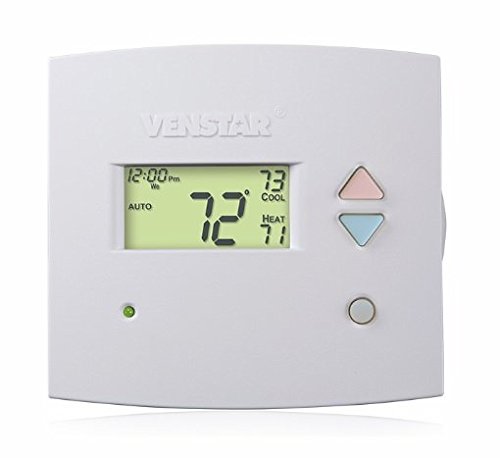
1 paveikslas: Priekyje view of the Venstar T1900 Thermostat. This image displays the thermostat's LCD screen and control buttons, indicating its slimline design.
Pagrindinės funkcijos:
- 7 dienų programavimo galimybė: Allows for customized heating and cooling schedules for each day of the week.
- Sistemos suderinamumas: Works with heat/cool, dual-fuel, and heat pump systems.
- Multi-Stage Valdymas: Manages up to three heat stages ir du šaunūs stages.
- Nuotolinio valdymo galimybės: Controllable by phone using an optional add-on (sold separately).
- Automatic or Manual Operation: Provides flexibility for scheduled or on-demand temperature adjustments.
Diegimo vadovas
Reikalingi įrankiai:
- Atsuktuvas (Phillips ir (arba) plokščiagalvis)
- Drill with appropriate drill bit (if installing new wall anchors)
- Įrankių lagaminai
- Pieštukas
- Lygis (neprivaloma)
1. Išjunkite maitinimą
Locate the circuit breaker or fuse box that controls your heating and cooling system. Turn off the power completely before proceeding with any wiring.
2. Remove Old Thermostat (if applicable)
- Atsargiai nuimkite seno termostato dangtelį.
- Nufotografuokite esamus laidų sujungimus, kad būtų aiškiau.
- Label each wire with the terminal designation it was connected to (e.g., R, G, Y, W).
- Atjunkite laidus ir nuimkite seno termostato tvirtinimo plokštelę nuo sienos.
3. Naujo termostato pagrindo montavimas
- Separate the front cover of the T1900 thermostat from its base plate.
- Position the base plate on the wall where you want to install the thermostat. Ensure it is level.
- Pieštuku pažymėkite tvirtinimo angas.
- Jei reikia, išgręžkite kreipiamąsias skyles ir įstatykite sieninius inkarus.
- Pritvirtinkite termostato pagrindinę plokštę prie sienos naudodami pateiktus varžtus.
4. Laidai
Connect the wires from your HVAC system to the corresponding terminals on the T1900 thermostat base. Refer to the wiring diagram provided with your specific HVAC system for precise connections. Ensure wires are stripped approximately 3/8 inch and securely fastened under the terminal screws.
Įprasti terminalų pavadinimai:
- R/Rc/Rh: 24V Power (Heating/Cooling)
- C: Common (24V return)
- G: Ventiliatorius
- Y/Y1: Kompresorius S.tage 1 (aušinimas)
- Y2: Kompresorius S.tage 2 (aušinimas)
- W/W1: Šiluma Stage 1 (šildymas)
- W2: Šiluma Stage 2 (šildymas)
- O / B: Reversing Valve (Heat Pumps)
Note: The T1900 supports various system types. Consult the detailed wiring diagrams in the full installation manual for specific configurations (e.g., heat pump with auxiliary heat, conventional multi-stage sistemos).
5. Termostato pritvirtinimas prie pagrindo
Once wiring is complete and verified, carefully align the thermostat front cover with the mounted base plate and snap it into place.
6. Atkurti maitinimą
Return to your circuit breaker or fuse box and restore power to your heating and cooling system.
Pradinė sąranka
Upon initial power-up, the thermostat may prompt you to configure basic settings. Follow the on-screen instructions to set the current date, time, and system type (e.g., Conventional, Heat Pump).
System Type Configuration:
It is crucial to correctly configure the thermostat for your specific HVAC system. Incorrect settings can lead to improper operation or damage. Access the installer settings menu (refer to the full installation guide for specific button sequences) to select:
- Sistemos tipas: Heat/Cool, Heat Pump, Dual Fuel
- Šilumos skaičius Stages
- Kietų S skaičiustages
- Reversing Valve Operation: O (Cooling) or B (Heating)
Naudojimo instrukcijos
Ekrano supratimas:
The LCD screen displays the current temperature, set temperature, system mode, fan mode, time, and programming status. Refer to the icons and indicators on the screen for current operational status.
Setting System Mode:
Paspauskite REŽIMAS button to cycle through available system modes:
- HEAT: The system will operate to maintain the heating setpoint.
- SAUNUS: The system will operate to maintain the cooling setpoint.
- AUTOMATINIS: The thermostat automatically switches between heating and cooling as needed to maintain the set temperature range.
- IŠJUNGTA: Šildymo ir vėsinimo sistema išjungta.
Setting Fan Mode:
Paspauskite VENTILIATORIUS mygtukas, skirtas ventiliatoriaus režimams perjungti:
- AUTOMATINIS: Ventiliatorius veikia tik tada, kai aktyviai veikia šildymo arba vėsinimo sistema.
- ĮJUNGTA: Ventiliatorius veikia nuolat, nepriklausomai nuo šildymo ar vėsinimo poreikių.
Temperatūros reguliavimas:
Naudokite UP ir ŽEMYN arrow buttons to adjust the desired temperature setpoint. In programmable modes, this will temporarily override the schedule until the next scheduled change.
Programming Schedules (7-Day):
The T1900 allows for 7-day programming, enabling different schedules for each day of the week. This feature helps save energy by adjusting temperatures when you are away or asleep.
- Paspauskite PROGRAMA mygtuką, norėdami įjungti programavimo režimą.
- Naudokite DIENA button to select the day or group of days you wish to program (e.g., Mon-Fri, Sat-Sun, or individual days).
- Naudokite LAIKAS button to cycle through the four available periods: Wake, Leave, Return, Sleep.
- Naudokite UP ir ŽEMYN arrow buttons to set the desired temperature for each period.
- Naudokite LAIKYTI button to exit programming mode or save changes.
Refer to the detailed programming section in the full user guide for advanced options and specific button sequences.
Remote Control (Optional Add-on):
The Venstar T1900 thermostat can be controlled remotely via a phone using an optional add-on module (sold separately). This module connects to the thermostat and allows for remote access and control through a dedicated application. Installation and setup instructions for the remote control module are provided with the module itself.
Priežiūra
Termostato valymas:
Norėdami išlaikyti termostato išvaizdą ir funkcionalumą, periodiškai nuvalykite jo išorę minkšta,amp šluoste. Nenaudokite abrazyvinių valiklių, tirpiklių ar cheminių purškalų, nes jie gali pažeisti plastiką ir elektroninius komponentus.
Baterijos keitimas:
The Venstar T1900 thermostat does not require batteries for operation as it is powered by the 24V AC system.
Trikčių šalinimas
If you experience issues with your Venstar T1900 thermostat, consult the following common problems and solutions:
| Problema | Galima priežastis | Sprendimas |
|---|---|---|
| Termostato ekranas tuščias | Termostatui netiekiama maitinimas. | Patikrinkite ŠVOK sistemos automatinį jungiklį. Įsitikinkite, kad visos laidų jungtys yra tvirtos. |
| Heating/Cooling system does not respond | Incorrect system mode selected; wiring issue; system lockout. | Verify the system mode (HEAT/COOL/AUTO). Check wiring connections. Wait 5 minutes for system lockout to reset. |
| Temperatūros rodmenys atrodo netikslūs | Thermostat location; sensor obstruction. | Ensure the thermostat is not exposed to direct sunlight, drafts, or heat sources. Clean any dust from the thermostat vents. |
| Programming schedule is not working | Program not saved; temporary override active; incorrect time/day setting. | Ensure programs are saved. Check if a temporary override is active and cancel it. Verify current time and day settings. |
| Ventiliatorius nuolat veikia AUTOMATINIU režimu | Fan mode set to ON; wiring issue. | Press the FAN button to ensure it is set to AUTO. Check fan wiring. |
If these solutions do not resolve the issue, please contact customer support or a qualified HVAC technician.
Specifikacijos
| Funkcija | Specifikacija |
|---|---|
| Prekės ženklas | Venstar |
| Modelio pavadinimas | Venstar T1900 |
| Valdiklio tipas | Mygtukas |
| Ypatinga funkcija | Programuojamas |
| Spalva | Baltas |
| Specifinis produkto naudojimas | Heat Pump, Heater |
| Temperatūros valdymo tipas | Programmable, Smart/Remote (with add-on) |
| ttage | 24 voltų kintamoji srovė |
| Ekrano tipas | LCD arba LED |
| Kontrolės metodas | Remote (with add-on) |
| Foninis apšvietimas | Taip |
| Gaminio matmenys | 5.3 x 2 x 2 colio |
| Prekės svoris | 0.01 uncijos |
| Reikalingos baterijos? | Nr |
Informacija apie garantiją
Venstar products are manufactured to high-quality standards. This product is covered by a limited warranty against defects in materials and workmanship. The specific terms and duration of the warranty may vary. Please refer to the warranty card included with your product or visit the official Venstar websvetainėje rasite išsamią informaciją apie garantiją ir registracijos procedūras.
Pagalba klientams
For technical assistance, troubleshooting, or warranty inquiries, please contact Venstar customer support. You can typically find contact information, including phone numbers and email addresses, on the official Venstar websvetainė (www.venstar.com) arba ant produkto pakuotės.
When contacting support, please have your thermostat model number (T1900) and any relevant purchase information ready.