KING KB2407-1-B2-ECO
KING KB2407-1-B2-ECO ECO2S 7500W garažo šildytuvo naudotojo vadovas
Modelis: KB2407-1-B2-ECO
1. Įvadas
This manual provides essential instructions for the safe installation, operation, and maintenance of your KING KB2407-1-B2-ECO ECO2S 7500W Garage Heater. Please read this manual thoroughly before installation and use, and retain it for future reference. Proper installation and adherence to these instructions are crucial for optimal performance and safety.
2. Svarbi saugos informacija
ĮSPĖJIMAS: Gaisro, elektros smūgio arba asmenų sužalojimo pavojus.
- Prieš montuodami arba naudodami šį šildytuvą, perskaitykite visas instrukcijas.
- Šis šildytuvas naudojimo metu įkaista. Kad išvengtumėte nudegimų, neleiskite plika odai liesti karštų paviršių. Laikykite degias medžiagas, tokias kaip baldai, pagalvės, patalynė, popieriai, drabužiai ir užuolaidos, bent 0.9 m atstumu nuo šildytuvo priekio ir atokiau nuo šonų bei galo.
- Ypatingas atsargumas yra būtinas, kai bet kurį šildytuvą naudoja vaikai arba neįgalūs asmenys, arba kai šildytuvas yra veikiamas be priežiūros.
- Nenaudokite šildytuvo su pažeistu laidu ar kištuku, taip pat po to, kai šildytuvas sugedo, buvo numestas ar kitaip pažeistas. Išmeskite šildytuvą arba grąžinkite jį į įgaliotąją aptarnavimo įstaigą apžiūrai ir (arba) remontui.
- Nenaudoti lauke.
- Šis šildytuvas nėra skirtas naudoti vonios kambariuose, skalbyklose ir panašiose patalpose. Niekada nestatykite šildytuvo ten, kur jis gali patekti į vonią ar kitą vandens indą.
- Netieskite laido po kilimu. Neuždenkite laido kilimėliais, bėgiais ar panašiomis dangomis. Laidą laikykite toliau nuo eismo zonos ir ten, kur jis neužkliūtų.
- Norėdami atjungti šildytuvą, išjunkite valdiklius, tada ištraukite kištuką iš lizdo.
- Nekiškite ir neleiskite pašaliniams daiktams patekti į ventiliacijos arba išmetimo angas, nes tai gali sukelti elektros smūgį, gaisrą arba sugadinti šildytuvą.
- Kad išvengtumėte galimo gaisro, jokiu būdu neuždenkite oro įleidimo ar išleidimo angų. Nenaudokite ant minkštų paviršių, pavyzdžiui, lovos, kur angos gali užsikimšti.
- Šildytuvo viduje yra įkaitusių ir kibirkščiuojančių dalių. Nenaudokite jo vietose, kur naudojamas arba laikomas benzinas, dažai arba degūs garai ar skysčiai.
- Naudokite šį šildytuvą tik taip, kaip aprašyta šiame vadove. Bet koks kitas gamintojo nerekomenduojamas naudojimas gali sukelti gaisrą, elektros smūgį arba sužaloti žmones.
- Šildytuvus visada junkite tiesiai į sieninį elektros lizdą / lizdą. Niekada nenaudokite su ilginamuoju laidu arba perkeliamu maitinimo čiaupu (išvadu / maitinimo juosta).
- This heater is for 240V applications only.
3. Pakuotės turinys
Verify that all components are present and undamaged. If any items are missing or damaged, contact your retailer.
- KING KB2407-1-B2-ECO ECO2S Garage Heater (7500W / 240V)
- Universalus sieninis / lubinis tvirtinimo laikiklis
- Nuotolinio valdymo pultas
- Vartotojo vadovas (šis dokumentas)

Image 3.1: The KING KB2407-1-B2-ECO ECO2S Garage Heater, showing the main unit, the universal mounting bracket, and the remote control.
4. Sąranka ir diegimas
Montavimą turi atlikti kvalifikuotas elektrikas, laikydamasis visų vietinių ir nacionalinių elektros kodeksų.
4.1 Montavimo vieta
- Select a location where the heater is protected from water spray, dripping water, and excessive dust.
- Ensure adequate clearance from combustible materials (minimum 3 feet from front, sides, and rear).
- Mount the heater securely to a structural member (stud, joist) capable of supporting its weight (approximately 33.5 lbs).
- The universal bracket allows for wall or ceiling mounting.
4.2 Šildytuvo montavimas
- Attach the universal mounting bracket to a sturdy wall stud or ceiling joist using appropriate fasteners (not included). Ensure the bracket is level and securely fastened.
- Lift the heater and align the hanging hooks on top of the heater with the slots on the mounting bracket.
- Slide the heater onto the bracket until it is securely seated.
- Adjust the heater's angle as desired and secure it using the provided hardware to prevent accidental movement.
4.3 Elektros laidai
DANGER: Disconnect power at the main service panel before attempting any wiring to prevent electric shock.
- This heater requires a dedicated 240V circuit.
- The heater is rated for 7500W, drawing approximately 31.25 Amps. A circuit breaker and wiring sized appropriately for this load are required (e.g., 40 Amp breaker with 8-gauge wire, consult local codes).
- Access the internal wiring compartment by removing the appropriate cover plate on the heater.
- Connect the 240V supply wires to the heater's terminals as indicated in the wiring diagram inside the heater's compartment. Ensure proper grounding.
- Secure all wiring connections and replace the cover plate.

4.1 vaizdas: galinis view of the heater, illustrating the fan and location of electrical warning labels. Ensure all wiring is done by a qualified professional.
5. Operacija
Once properly installed and powered, the heater can be operated using its integrated control panel or the remote control.
5.1 Valdymo skydas baigtasview

5.1 vaizdas: priekis view of the heater, highlighting the digital display and control buttons for direct operation.
The control panel features a digital display and several buttons:
- Skaitmeninis ekranas: Shows current temperature, set temperature, and mode indicators.
- Įjungimo mygtukas: Įjungia / išjungia šildytuvą.
- MODE mygtukas: Cycles through heating modes (ECO, HIGH, FAN ONLY).
- Rodyklės aukštyn/žemyn: Reguliuoja nustatytą temperatūrą.
- TIMER mygtukas: Activates or adjusts the timer function.
5.2 Nuotolinis valdymas
Pridedamas nuotolinio valdymo pultas suteikia patogią prieigą prie visų šildytuvo funkcijų per atstumą.
- Ensure batteries are correctly installed in the remote control.
- Point the remote control towards the heater's control panel for optimal signal reception.
- Buttons on the remote mirror the functions of the control panel (Power, Mode, Up/Down Temperature, Timer).
5.3 Darbo režimai
- ECO režimas: The heater automatically selects the lowest wattage needed to maintain the set temperature, optimizing energy consumption.
- HIGH Heat Mode: The heater operates at full wattage (7500W) to quickly reach and maintain the set temperature.
- FAN ONLY Mode: The fan operates without engaging the heating elements, providing air circulation.
5.4 Temperatūros nustatymas
- Press the POWER button to turn the heater on.
- Use the UP or DOWN arrow buttons to set your desired temperature. The display will show the set temperature, then revert to the ambient temperature.
- Šildytuvas automatiškai įsijungs ir išsijungs, kad palaikytų nustatytą temperatūrą.
5.5 Laikmačio funkcija
The timer allows you to set a duration for the heater to operate before automatically turning off.
- With the heater on, press the TIMER button.
- Use the UP or DOWN arrow buttons to set the desired operating time (e.g., 1-12 hours).
- The heater will operate for the set duration and then power off.
6. Priežiūra
WARNING: Always disconnect power to the heater at the main service panel before performing any maintenance or cleaning.
- Valymas: Reguliariai valykite šildytuvo išorę minkšta, d šluosteamp audinys. Nenaudokite abrazyvinių valiklių ar tirpiklių.
- Dulkių šalinimas: Use a vacuum cleaner with a brush attachment to remove dust from the grilles and internal components. Ensure the fan blades are free of obstructions.
- Patikra: Regularly inspect the power cord and plug for any signs of damage. If damage is found, discontinue use and contact a qualified electrician for repair.
- No lubrication is required for the motor.
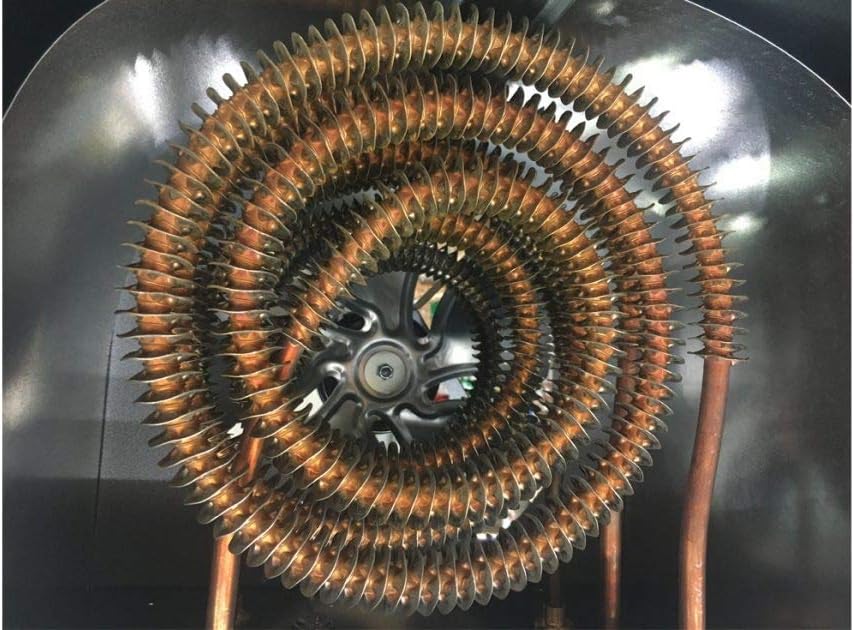
Image 6.1: Close-up of the spiral steel heating elements. Regular cleaning helps maintain efficiency and prolong heater life.
7. Problemų sprendimas
Jei jūsų šildytuvas neveikia tinkamai, prieš kreipdamiesi į klientų aptarnavimo tarnybą, peržiūrėkite šią lentelę.
| Problema | Galima priežastis | Sprendimas |
|---|---|---|
| Šildytuvas neįsijungia. | Nėra maitinimo. Išjungtas grandinės pertraukiklis. Įjungta apsauga nuo perkaitimo. | Ensure heater is properly wired and connected to 240V supply. Patikrinkite ir iš naujo nustatykite grandinės pertraukiklį. Turn off heater, allow to cool for 30 minutes, then restart. Clear any obstructions. |
| Šildytuvas gamina nepakankamai šilumos. | Pasirinktas neteisingas režimas. Nustatyta per žema temperatūra. Kambario dydis viršija šildymo galią. | Ensure HIGH or ECO mode is selected, not FAN ONLY. Padidinkite nustatytą temperatūrą. Verify the heater's coverage area (700 sq ft for 7500W) is appropriate for your space. |
| Ventiliatorius veikia, bet nešildo. | FAN ONLY mode selected. Heating elements malfunction. | Switch to ECO or HIGH heat mode. If problem persists, contact a qualified technician. |
| Nuotolinio valdymo pultas neveikia. | Išsikrovusios baterijos. Kliūtis tarp nuotolinio valdymo pulto ir šildytuvo. | Pakeiskite nuotolinio valdymo pulto baterijas. Ensure a clear line of sight to the heater's control panel. |

Image 7.1: Heating coverage chart for various KING garage heater wattages. The 7500W model covers up to 750 sq ft.
8. Specifikacijos
| Funkcija | Detalė |
|---|---|
| Modelis | KB2407-1-B2-ECO |
| Prekės ženklas | KARALIUS |
| Vattage | 7500 vatų |
| ttage | 240 voltų |
| Amppakilimas | 31.25 Amps |
| Šildymo aprėptis | Up to 700 ft² (based on 8 ft ceiling height and FHA standard insulation values) |
| Ypatingos savybės | Remote Control, Built-In Fan Delay, Summer Fan Only & Timer Modes, ECO2S Electronic Thermostat |
| Montavimo tipas | Universal Wall/Ceiling Bracket |
| Gaminio matmenys | 13.5 x 15 x 16.5 colio |
| Prekės svoris | 33.5 svaro |
| UPC | 093319220405 |
9. Garantija ir palaikymas
For warranty information or technical support, please refer to the warranty card included with your product or visit the manufacturer's official websvetainėje. Išsaugokite pirkimo kvitą kaip pirkimo įrodymą garantiniams reikalavimams.
Gamintojas: King Electric
For further assistance, contact King Electric customer service.
Ask a question about this manual
Ask about setup, troubleshooting, compatibility, parts, safety, or missing instructions. Manuals+ will review the question and use this page’s manual context to help answer it.