
1. Įvadas
This manual provides essential information for the safe and efficient use of your Alienware AW3418DW 34.1-inch Curved Gaming Monitor. This monitor features a WQHD (3440x1440) resolution, a 120Hz refresh rate (overclocked), and NVIDIA G-SYNC technology for an immersive gaming experience. Please read this manual thoroughly before operating the device.
2. Saugos informacija
- Always disconnect the power cable from the wall outlet before cleaning the monitor.
- Saugokite monitorių nuo lietaus ar drėgmės, kad išvengtumėte gaisro ar elektros smūgio pavojaus.
- Neatidarykite monitoriaus c.asing. Viduje nėra dalių, kurias galėtų aptarnauti vartotojas. Visus techninės priežiūros darbus patikėkite kvalifikuotiems techninės priežiūros darbuotojams.
- Padėkite monitorių ant stabilaus, lygaus paviršiaus, kad jis nenukristų.
- Užtikrinkite tinkamą vėdinimą aplink monitorių. Neužblokuokite ventiliacijos angų.
- Naudokite tik prie monitoriaus pridėtą maitinimo adapterį ir laidus.
3. Pakuotės turinys
Patikrinkite, ar pakuotėje yra visi komponentai:
- Alienware AW3418DW Monitor
- Monitoriaus stovas (pagrindas ir pakyla)
- Maitinimo kabelis
- „DisplayPort“ laidas
- HDMI kabelis
- USB 3.0 prieš srovę laidas
- Dokumentacija (greito diegimo vadovas, saugos informacija)
4. Sąranka
4.1 Fizinė konfigūracija
Carefully remove the monitor and its components from the packaging. Place the monitor face down on a soft cloth or cushion to prevent scratches.
Stovo tvirtinimas
- Pritvirtinkite stovo laikiklį prie monitoriaus skydelio, kol jis spragtelėdamas užsifiksuos vietoje.
- Pritvirtinkite stovo pagrindą prie stovo pakėlimo elemento ir priveržkite fiksavimo varžtą.

4.1 pav.: priekis view of the Alienware AW3418DW monitor with its stand attached.

4.2 pav.: šonas view of the Alienware AW3418DW monitor with its stand.
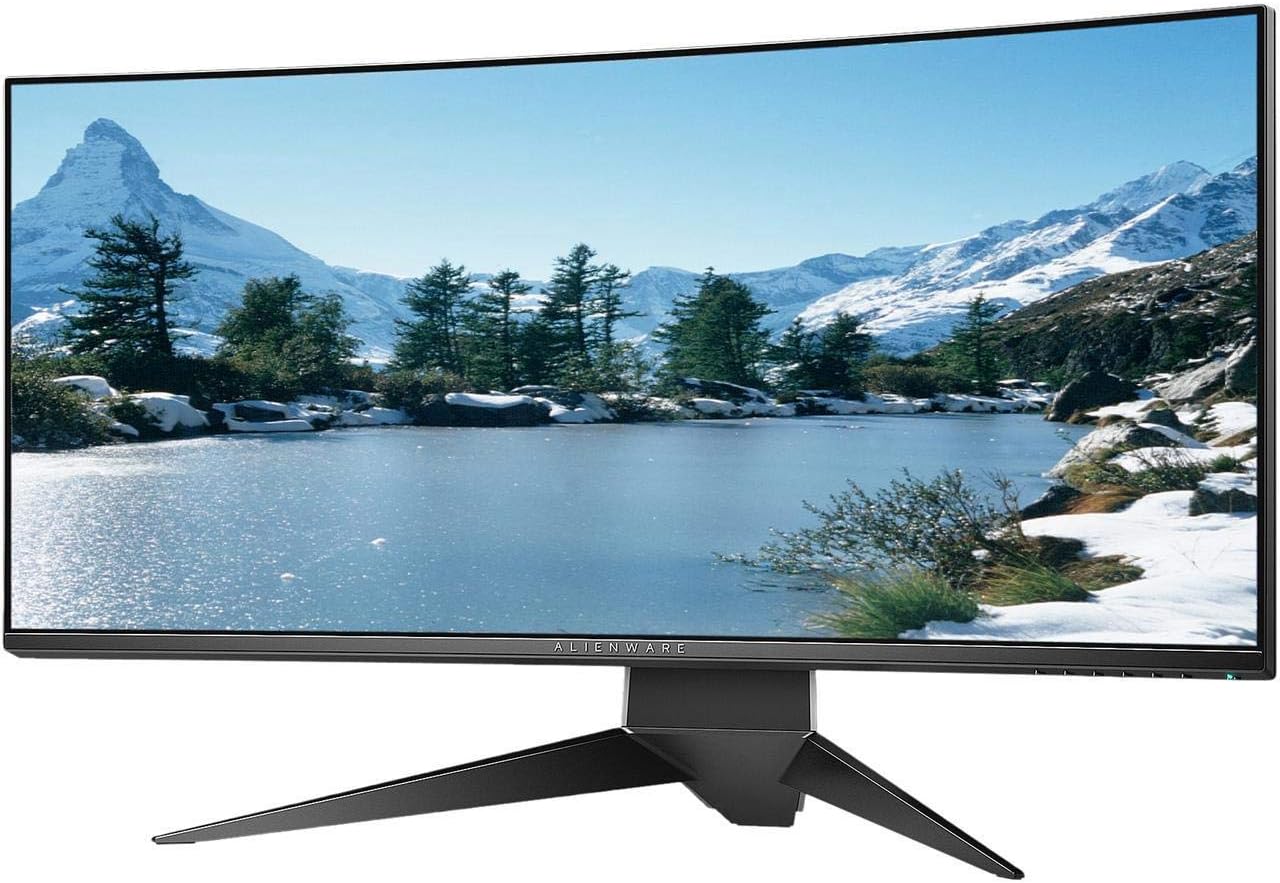
4.3 pav.: galinis view of the Alienware AW3418DW monitor showing the stand and AlienFX lighting.
VESA montavimas
The monitor supports VESA mounting (100 x 100 mm). Remove the stand riser by pressing the release button and then attach the VESA-compatible mount to the monitor using appropriate screws. Ensure the mount can support the monitor's weight of 26.1 pounds (without stand).

Figure 4.4: Monitor dimensions for VESA mount compatibility.
4.2 Jungiamieji kabeliai
Prijunkite reikiamus laidus prie monitoriaus ir kompiuterio.
- Maitinimo kabelis: Prijunkite maitinimo laidą prie monitoriaus maitinimo prievado, o tada – prie sieninio lizdo.
- Vaizdo kabelis: Connect either the DisplayPort cable or the HDMI cable from your computer's graphics card to the corresponding port on the monitor. For optimal performance, especially for 120Hz refresh rate and G-SYNC, use the DisplayPort connection.
- USB išsiuntimo kabelis: Connect the USB 3.0 upstream cable from your computer to the monitor's upstream USB port to enable the monitor's USB hub functionality.
- USB pasroviui skirti prievadai: Connect your USB devices (e.g., keyboard, mouse, webcam) to the four USB 3.0 downstream ports on the monitor.
5. Naudojimo instrukcijos
5.1 Maitinimo įjungimas/išjungimas
Norėdami įjungti arba išjungti monitorių, paspauskite ant jo esantį maitinimo mygtuką. Maitinimo šviesos diodas rodys monitoriaus būseną.
5.2 Ekrano meniu (OSD) navigacija
The On-Screen Display (OSD) menu allows you to adjust various monitor settings. Use the control buttons, typically located on the bottom right or rear of the monitor, to navigate the OSD.
- Press a control button to activate the OSD menu.
- Use the navigation buttons (up/down/left/right) to move through menu options.
- Paspauskite pasirinkimo mygtuką, kad patvirtintumėte pasirinkimą arba atidarytumėte submeniu.
- Norėdami grįžti į ankstesnį meniu arba išeiti iš OSD, naudokite mygtuką „Atgal / išeiti“.
5.3 Ekrano nustatymai
Sureguliuokite ekrano nustatymus, kad būtų optimalūs viewing and gaming performance.
- Rezoliucija: Set your computer's display resolution to 3440x1440 for the native WQHD experience.
- Atnaujinimo dažnis: The monitor supports up to 120Hz refresh rate (overclocked). Ensure your graphics card drivers are updated and the refresh rate is set in your operating system's display settings or graphics control panel.
- NVIDIA G-SYNC: For tear-free and smooth gameplay, enable G-SYNC in your NVIDIA Control Panel. This feature synchronizes the monitor's refresh rate with your GPU's frame rate.
- Ryškumas / kontrastas: Adjust these settings in the OSD menu to suit your environment and preference.
5.4 AlienFX Lighting
Customize the AlienFX lighting zones on your monitor through the OSD menu or Alienware Command Center software (if installed on your PC). You can select colors, effects, and synchronize lighting with other Alienware devices.
5.5 USB šakotuvo naudojimas
The monitor acts as a USB 3.0 hub, providing convenient access to four downstream USB ports for connecting peripherals. Ensure the USB upstream cable is connected to your computer for this feature to function.
6. Priežiūra
6.1 Monitoriaus valymas
- Prieš valydami visada atjunkite monitorių nuo elektros lizdo.
- Lengvai naudokite minkštą, nepūkuotą audinį dampnuplaukite vandeniu arba neabrazyviniu ekrano valikliu.
- Nepurkškite valiklio tiesiai ant ekrano.
- Švelniai nuvalykite ekraną, kad pašalintumėte dulkes ir dėmes.
- Išvalykite išorę casing minkštu, sausu skudurėliu.
6.2 Saugykla
If storing the monitor for an extended period, disconnect all cables, carefully disassemble the stand (if applicable), and store it in its original packaging in a cool, dry place.
7. Problemų sprendimas
Jei kyla problemų dėl monitoriaus, žr. šiuos įprastus trikčių šalinimo veiksmus:
- Nėra ekrano: Ensure all power and video cables are securely connected. Check if the monitor is powered on and the correct input source is selected in the OSD.
- Mirgėjimas / mikčiojimas: Verify that your graphics drivers are up to date. Ensure G-SYNC is properly configured in the NVIDIA Control Panel. Check for interference from other electronic devices.
- Neteisinga raiška / atnaujinimo dažnis: Adjust the display settings in your operating system or graphics control panel to the native resolution (3440x1440) and desired refresh rate (up to 120Hz).
- Negyvi pikseliai: The Alienware AW3418DW comes with a Premium Panel Guarantee. Refer to the warranty information for details on pixel policy.
- USB prievadai neveikia: Ensure the USB 3.0 upstream cable is connected from the monitor to your computer.
8. Specifikacijos
| Funkcija | Specifikacija |
|---|---|
| Prekės ženklas | Alienware |
| Modelio numeris | AW3418DW |
| Ekrano dydis | 34.1 colių |
| Rezoliucija | WQHD (3440 x 1440 pikselių) |
| Krašto santykis | 21:9 |
| Atnaujinimo dažnis | 120 Hz (perjungtas) |
| Reagavimo laikas | 4 milisekundės |
| Adaptyvaus sinchronizavimo technologija | "NVIDIA G-SYNC" |
| Ekrano tipas | LED IPS |
| Kreivumas | 1900R |
| Ryškumas | 300 cd/m² |
| Kontrasto santykis | 1000:1 |
| Viewing kampas | 178 laipsnių |
| Ryšys | 1x DisplayPort (1.2), 1x HDMI (1.4), 4x USB 3.0 Downstream, 1x USB 3.0 Upstream |
| Prekės svoris | 26.1 svaro (be stovo) |
| Montavimo tipas | VESA Compatible (100 x 100 mm) |
9. Garantija ir palaikymas
Your Alienware AW3418DW monitor is covered by a 3 Years Limited Hardware Warranty ir 3 Years Advance Exchange Service, įskaitant a Premium Panel Guarantee. The Premium Panel Guarantee ensures a free panel replacement during the limited hardware warranty period even if only one bright pixel is found.
For technical support, warranty claims, or additional information, please visit the official Alienware or Dell support website. You may also find updated drivers and firmware there.
Palaikymas internetu: www.dell.com/support


