1. Įvadas
Ačiū, kad pirkoteasing the CAIWEI A8AB-NEW Video Projector. This manual provides essential information for the safe and efficient operation of your device. Please read it thoroughly before use and retain it for future reference.
2. Saugos instrukcijos
- Nežiūrėkite tiesiai į projektoriaus objektyvą, kai lamp yra įjungtas.
- Užtikrinkite tinkamą vėdinimą aplink projektorių, kad išvengtumėte perkaitimo.
- Saugokite projektorių nuo lietaus ar drėgmės.
- Naudokite tik prie projektoriaus pridėtą maitinimo adapterį.
- Keep the projector away from flammable materials.
- Atjunkite projektorių nuo elektros tinklo žaibuojant arba kai jis ilgą laiką nenaudojamas.
- Nebandykite patys taisyti projektoriaus. Visus techninės priežiūros darbus patikėkite kvalifikuotiems specialistams.
3. Pakuotės turinys
Išpakuodami patikrinkite, ar yra visi daiktai:
- CAIWEI A8AB-NEW Video Projector
- Maitinimo kabelis
- Nuotolinio valdymo pultas
- HDMI kabelis
- VGA laidas
- AV kabelis
- Vartotojo vadovas
4. Produktas baigtasview
Susipažinkite su projektoriaus komponentais:
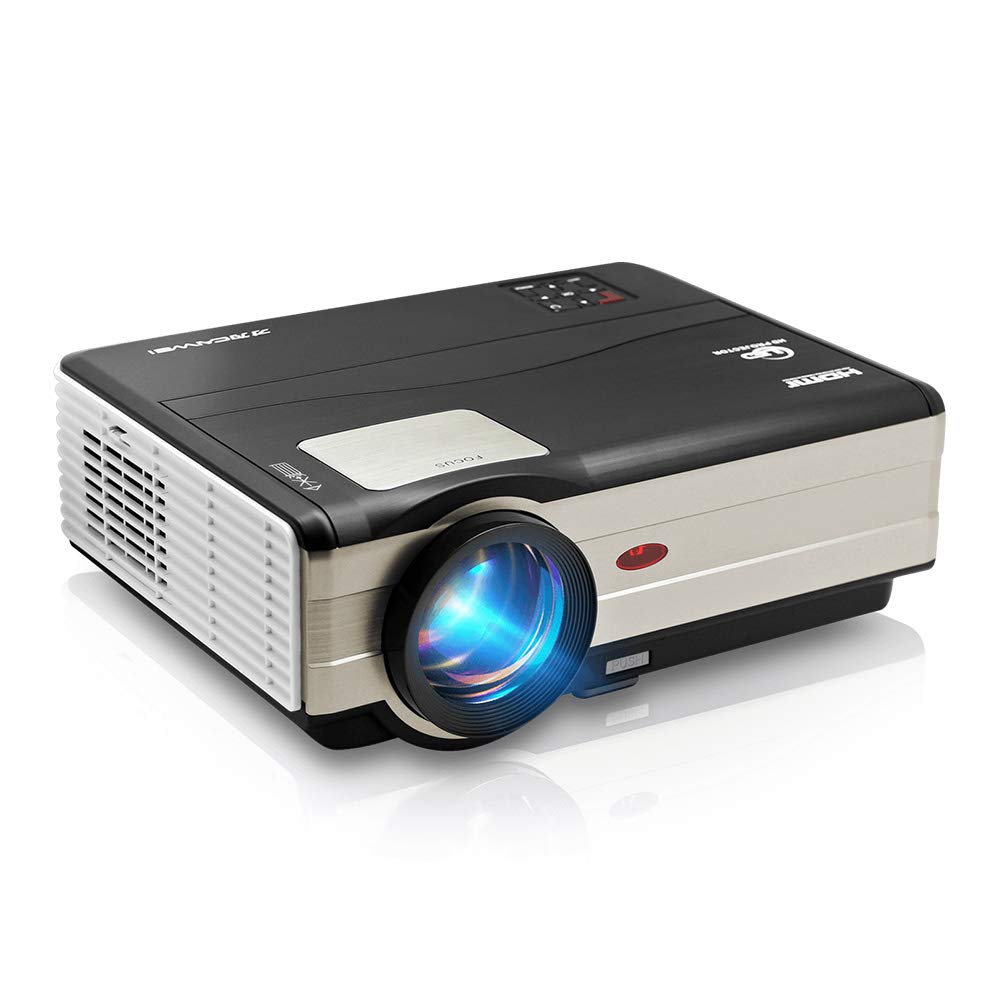
1 paveikslas: Priekyje view of the CAIWEI A8AB-NEW Video Projector, showing the lens and ventilation.
Priekinis skydelis
- Projekcinis objektyvas: Išleidžia vaizdą.
- Fokusavimo žiedas: Reguliuoja vaizdo aiškumą.
- Keystone korekcija: Koreguoja trapecijos formos vaizdo iškraipymus.
Galinis skydelis
- Maitinimo prievadas: Jungiamas prie maitinimo kabelio.
- HDMI prievadai (x2): Connects to HDMI-enabled devices (e.g., Blu-ray player, game console).
- USB prievadai (x2): Connects to USB storage devices or other USB peripherals.
- VGA prievadas: Connects to computers or laptops with VGA output.
- AV prievadas: Connects to older devices using composite video and stereo audio.
- Garso išvestis (3.5 mm): Prijungiama prie išorinių garsiakalbių arba ausinių.
5. Sąranka
5.1 Įdėjimas
Place the projector on a stable, flat surface or mount it to a ceiling. Ensure the projector is perpendicular to the projection screen or wall. The optimal projection distance varies, but generally, a larger distance yields a larger image.
5.2 Maitinimo jungtis
- Connect the power cable to the projector's power port.
- Kitą maitinimo laido galą įkiškite į elektros lizdą.
- Užsidegs maitinimo indikatoriaus lemputė.
5.3 Įvesties įrenginių prijungimas
Projektorius palaiko įvairius įvesties šaltinius:
- HDMI: Connect an HDMI cable from your device (e.g., laptop, game console, streaming stick) to one of the projector's HDMI ports.
- USB: Įkiškite USB atmintinę į USB prievadą, kad galėtumėte leisti mediją files tiesiogiai.
- VGA: Prijunkite VGA kabelį iš kompiuterio į projektoriaus VGA prievadą.
- APIE: Use the provided AV cable to connect to devices with composite video output.
- Belaidis ryšys (Wi-Fi): For screen mirroring from smartphones or tablets, navigate to the 'Wireless Display' or 'Screen Mirroring' option in the projector's menu and follow the on-screen instructions. Ensure your device and the projector are on the same Wi-Fi network.
- Bluetooth: To connect external Bluetooth speakers, go to the Bluetooth settings in the projector's menu, enable Bluetooth, and pair with your desired audio device.
5.4 Fokusavimo ir trapecijos koregavimas
- Įjunkite projektorių ir parodykite vaizdą.
- Pasukite Fokusavimo žiedas on the lens until the image appears sharp and clear.
- If the image is trapezoidal (wider at the top or bottom), adjust the Keystone Korekcija dial or setting until the image is rectangular.
6. Naudojimo instrukcijos
6.1 Maitinimo įjungimas/išjungimas
- Maitinimas: Paspauskite maitinimo mygtuką ant projektoriaus arba nuotolinio valdymo pulto.
- Išjungti: Dar kartą paspauskite maitinimo mygtuką. Jei būsite paraginti, patvirtinkite išjungimą.
6.2 Meniu naršymas
Use the navigation buttons (Up, Down, Left, Right, OK) on the projector or remote control to browse the on-screen menu. The 'Menu' button typically opens the main settings, and 'Exit' or 'Back' closes sub-menus.
6.3 Įvesties šaltinio pasirinkimas
Press the 'Source' or 'Input' button on the remote control or projector. A list of available input sources (HDMI1, HDMI2, USB1, USB2, VGA, AV, Wireless Display) will appear. Select the desired source using the navigation buttons and press 'OK'.
6.4 Garso nustatymai
Access the audio settings through the main menu to adjust volume, select audio output (internal speaker, external via 3.5mm jack, or Bluetooth), and modify sound modes.
6.5 Wireless/Bluetooth Connection
Refer to section 5.3 for detailed instructions on connecting via Wi-Fi for screen mirroring or Bluetooth for audio output.
7. Priežiūra
7.1 Objektyvo valymas
Use a soft, lint-free cloth specifically designed for optical lenses. Gently wipe the lens surface. Avoid using abrasive cleaners or excessive force, which can scratch the lens.
7.2 Cleaning the Air Filter/Vents
Regularly check the air intake and exhaust vents for dust accumulation. Use a soft brush or a can of compressed air to gently clean the vents. This helps maintain proper airflow and prevents overheating.
7.3 Saugykla
When not in use, store the projector in a cool, dry, and dust-free environment. Use the original packaging or a protective case to prevent damage.
8. Problemų sprendimas
| Problema | Galima priežastis | Sprendimas |
|---|---|---|
| Ekrane nėra vaizdo | Power not connected; Incorrect input source; Device not powered on. | Check power cable; Select correct input source; Ensure connected device is on. |
| Vaizdas neryškus | Nenustatytas fokusavimas; projektorius per toli/per arti. | Sureguliuokite fokusavimo žiedą; Pakeiskite projektoriaus padėtį. |
| Vaizdas yra trapecijos formos | Trapecijos formos korekcija nepakoreguota. | Sureguliuokite trapecijos korekciją. |
| Nėra garso | Volume too low; Muted; Incorrect audio output; Cable issue. | Increase volume; Unmute; Check audio settings; Verify cable connections. |
| Nuotolinio valdymo pultas neveikia | Batteries dead; Obstruction; Out of range. | Replace batteries; Remove obstructions; Ensure line of sight to IR receiver. |
| Įspėjimas apie perkaitimą | Blocked vents; Poor ventilation. | Clear vents; Ensure adequate space around projector. |
9. Specifikacijos
- Modelis: A8AB-NEW
- Prekinis ženklas: CAIWEI
- Ekrano skiriamoji geba: 1280 x 800
- Ryšio technologija: Bluetooth, HDMI, USB, VGA, Wireless
- Ypatingos savybės: Built-In Wi-Fi, Portable, Wireless
- Rekomenduojami naudojimo būdai: Žaidimai, namų kinas
- Prekės svoris: 6.1 svaro
- Gaminio matmenys: 11.2 x 14.7 x 5 colio
10. Garantija ir palaikymas
CAIWEI products are designed for reliability and performance. For specific warranty details, please refer to the warranty card included with your purchase or contact CAIWEI customer support. If you encounter any issues not covered in this manual, please reach out to our support team for assistance.
Klientų aptarnavimas: Please visit the official CAIWEI website or contact your retailer for support information.