
1. Įvadas
Thank you for choosing the TFA Dostmann CLOCCO 60.2549.08 Radio-Controlled Alarm Clock. This device combines a minimalist wood-look design with precise radio-controlled timekeeping, an indoor temperature display, and an alarm function. This manual provides essential information for the correct setup, operation, and maintenance of your new alarm clock.
Pagrindinės funkcijos:
- Radijo bangomis valdomas laikas: Automatic synchronization with the atomic clock for high precision, eliminating the need for manual time adjustments.
- Vidaus temperatūros ekranas: Integrated sensor accurately displays the current room temperature in Celsius.
- Minimalist Wood Look Design: Estetiškai malonusasing design suitable for various environments, including bedrooms, living rooms, and offices.
- Kintamasis ekranas: Shows time, date, day of the week, or indoor temperature. The display can be set to react to sound or touch.
- Automatinis pritemdymas: The display brightness automatically adjusts between 7:00 PM and 6:59 AM for comfortable viewesant silpnam apšvietimui.
- Signalizacijos funkcija: Features a reliable alarm with a pre-settable wake-up time.
2. Sąranka
2.1 Išpakavimas ir pridedami komponentai
Carefully remove all components from the packaging. Please ensure the following items are present:
- TFA Dostmann CLOCCO 60.2549.08 Alarm Clock
- Maitinimo adapteris
- 1 x CR2 Battery (for settings backup)
- Instrukcijų vadovas
2.2 Maitinimo šaltinis
The CLOCCO alarm clock operates primarily via the included power adapter. The CR2 battery serves as a backup to retain settings during power outages.
- Insert the CR2 battery into the designated battery compartment, observing the correct polarity (+/-). This battery ensures your settings are saved if the main power is interrupted.
- Connect the power adapter cable to the DC input port on the back of the alarm clock.
- Plug the power adapter into a standard electrical outlet. The display will illuminate.
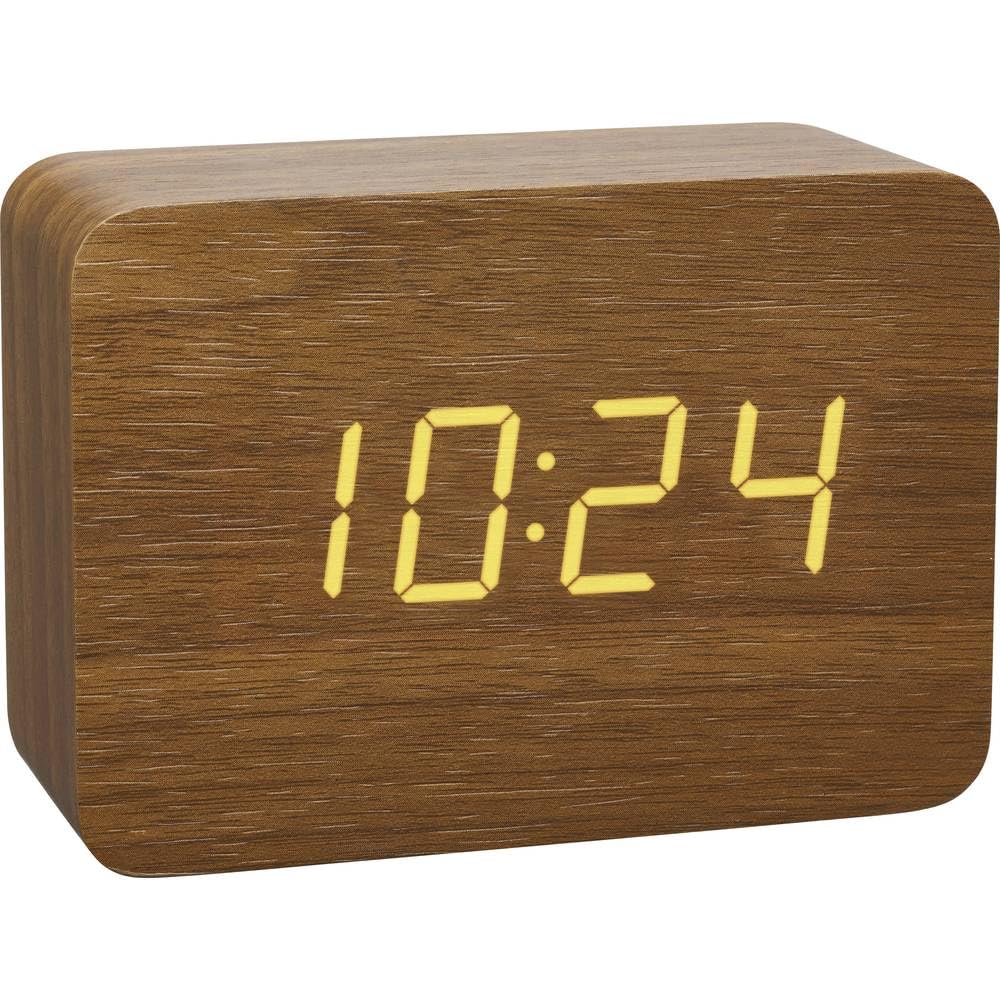
1 pav.: priekis view of the CLOCCO alarm clock, showing the digital display.
2.3 Initial Time Synchronization
Upon initial power-up, the alarm clock will automatically attempt to synchronize with the DCF77 radio signal (atomic clock in Frankfurt, Germany). This process may take several minutes to a few hours, depending on your location and environmental conditions.
- Place the alarm clock near a window, away from electronic devices that might cause interference.
- A flashing antenna symbol on the display indicates that the clock is searching for the radio signal.
- Once synchronized, the antenna symbol will become solid, and the correct time will be displayed. The clock will automatically check and adjust the time, typically between 2:00 AM and 4:00 AM daily.
- If synchronization fails, you may need to manually set the time (refer to Section 3.1).
3. Naudojimo instrukcijos
3.1 Display Modes and Manual Settings
The CLOCCO alarm clock offers various display modes and manual adjustment options:

Figure 2: Feature diagram showing display modes and controls.
- Ekrano režimų perjungimas: Press the "SET" button (usually located on the back or top) to cycle through display modes: Time, Date, Day of the Week, Indoor Temperature, or an automatic cycle between these.
- Rankinis laiko / datos nustatymas: If radio synchronization is unavailable or undesired, press and hold the "SET" button until the time digits flash. Use the "UP" and "DOWN" buttons to adjust the hour, then press "SET" to confirm and move to minutes, then date, and so on. Press "SET" again to exit manual setting mode.
- Temperatūros vienetas: The temperature is displayed in Celsius (°C). There is no option to change to Fahrenheit.
3.2 Signalizacijos nustatymas
Norėdami nustatyti žadintuvo laiką:
- Press the "ALARM" button (usually on the back or top) once to display the current alarm time.
- Press and hold the "ALARM" button until the alarm hour digits flash.
- Use the "UP" and "DOWN" buttons to adjust the desired alarm hour. Press "ALARM" to confirm.
- The minute digits will flash. Use "UP" and "DOWN" to adjust the alarm minutes. Press "ALARM" to confirm.
- To activate or deactivate the alarm, press the "ALARM" button briefly when the alarm time is displayed. An alarm icon will appear/disappear on the display.
3.3 Dimming Function and Sound Activation
- Automatinis pritemdymas: The display brightness automatically reduces between 7:00 PM and 6:59 AM to prevent excessive light during nighttime hours.
- Rankinis ryškumo reguliavimas: (If available, typically via a dedicated button or holding a button) Some models allow manual adjustment of brightness levels. Refer to the specific button labels on your device.
- Sound-Activated Display: When operating on battery power (if applicable) or in a specific mode, the display can be set to turn off and only illuminate when a sound is detected (e.g., a clap) or when the clock is touched. This conserves energy and reduces light pollution. Consult your device's specific button for this feature (e.g., "DOWN" button for 5 seconds as mentioned in a review).

Figure 3: The CLOCCO alarm clock in a bedroom setting, highlighting its clear display.
4. Priežiūra
4.1 Valymas
Norėdami išlaikyti žadintuvo išvaizdą ir funkcionalumą:
- Nuvalykite paviršių minkšta, sausa arba šiek tiek sudrėkinta šluosteamp audinys.
- Do not use abrasive cleaners, solvents, or polishing agents, as these can damage the finish and display.
- Įsitikinkite, kad į įrenginio angas nepatenka skysčio.
4.2 Battery Replacement (CR2 Backup Battery)
The CR2 battery is primarily for backup. If you notice settings are not retained after a power interruption, it may be time to replace this battery.
- Raskite baterijų skyrių įrenginio gale arba apačioje.
- Atidarykite skyriaus dangtelį.
- Remove the old CR2 battery and dispose of it according to local regulations.
- Įdėkite naują CR2 bateriją, užtikrindami teisingą poliškumą.
- Saugiai uždarykite akumuliatoriaus skyriaus dangtelį.
5. Problemų sprendimas
| Problema | Galima priežastis | Sprendimas |
|---|---|---|
| Ekranas tuščias arba nešviečia. | No power, power adapter disconnected, or sound-activated display is active. | Ensure the power adapter is securely connected to both the clock and the outlet. If using sound activation, make a sound or touch the clock. |
| Radio-controlled time is not synchronizing. | Poor signal reception due to location, interference, or initial setup. | Move the clock closer to a window and away from other electronic devices. Allow several hours for synchronization. If issues persist, manually set the time. |
| Ekranas per ryškus arba per tamsus. | Automatic dimming active, or manual brightness setting needs adjustment. | The clock automatically dims between 7 PM and 7 AM. Check if your model has manual brightness adjustment buttons. |
| Signalizacija neskamba. | Signalizacija neįjungta arba nustatyta neteisingai. | Verify that the alarm is activated (alarm icon visible) and that the alarm time is set correctly (refer to Section 3.2). |
| Nustatymai prarandami atjungus maitinimą. | CR2 backup battery is depleted or missing. | Replace the CR2 backup battery (refer to Section 4.2). |
6. Specifikacijos
| Prekinis ženklas: | TFA Dostmannas |
| Modelio numeris: | 60.2549.08 |
| Matmenys (P x P x A): | 100 x 41 x 70 mm |
| Svoris: | 128 gramų |
| Medžiaga: | Plastic (with wood look finish) |
| Ekrano tipas: | Skaitmeninis LED |
| Maitinimo šaltinis: | Power Adapter (included), 1 x CR2 Battery (included for backup) |
| Ypatingos savybės: | Radio-controlled time, Alarm, Large display, Temperature display (°C), Automatic dimming, Sound-activated display |
| Naudojimas: | Naudoti tik patalpose |
| Išmaniųjų namų suderinamumas: | Nesuderinamas su išmaniųjų namų sistemomis |
7. Garantija ir palaikymas
7.1 Informacija apie garantiją
This product comes with a limited warranty. Please refer to the warranty card included in your packaging or visit the official TFA Dostmann website for detailed warranty terms and conditions. The availability of spare parts in the EU is typically 1 year from the date of purchase.
7.2 Pagalba klientams
Should you encounter any issues not covered in this manual or require further assistance, please contact TFA Dostmann customer support. Contact information can usually be found on the product packaging, the official websvetainėje arba per savo mažmenininką.
Norėdami gauti daugiau informacijos, apsilankykite oficialioje svetainėje TFA Dostmann Store.