Įvadas
This manual provides comprehensive instructions for the installation, operation, and maintenance of the UHPPOTE 125khz RFID Door Entry Controller. This vandal-resistant proximity card and keypad access control unit is designed for external applications, supporting up to 500 users with entry via proximity cards and/or PIN codes. Please read this manual thoroughly before installation and use to ensure proper functionality and safety.
Produkto savybės
- Vandal-resistant proximity card and keypad access control unit.
- Suitable for external applications with a professional waterproof cover.
- Palaiko iki 500 vartotojų.
- Provides entry via proximity cards and/or PIN codes.
- Support entry modes: Password Only / ID Card Only / Password + ID Card.
- Features a lock relay output with secure / normal Mode, NO / NC output.
- Built-in keypad for 4-digit PIN code entry.
Pakuotės turinys
Atidarius pakuotę, patikrinkite, ar yra visi komponentai ir ar jie nepažeisti:
- UHPPOTE Access Control Keypad Unit
- Vandeniui atsparus dangtelis
- Tvirtinimo varžtai ir sieniniai kaiščiai
- Vartotojo vadovas (šis dokumentas)
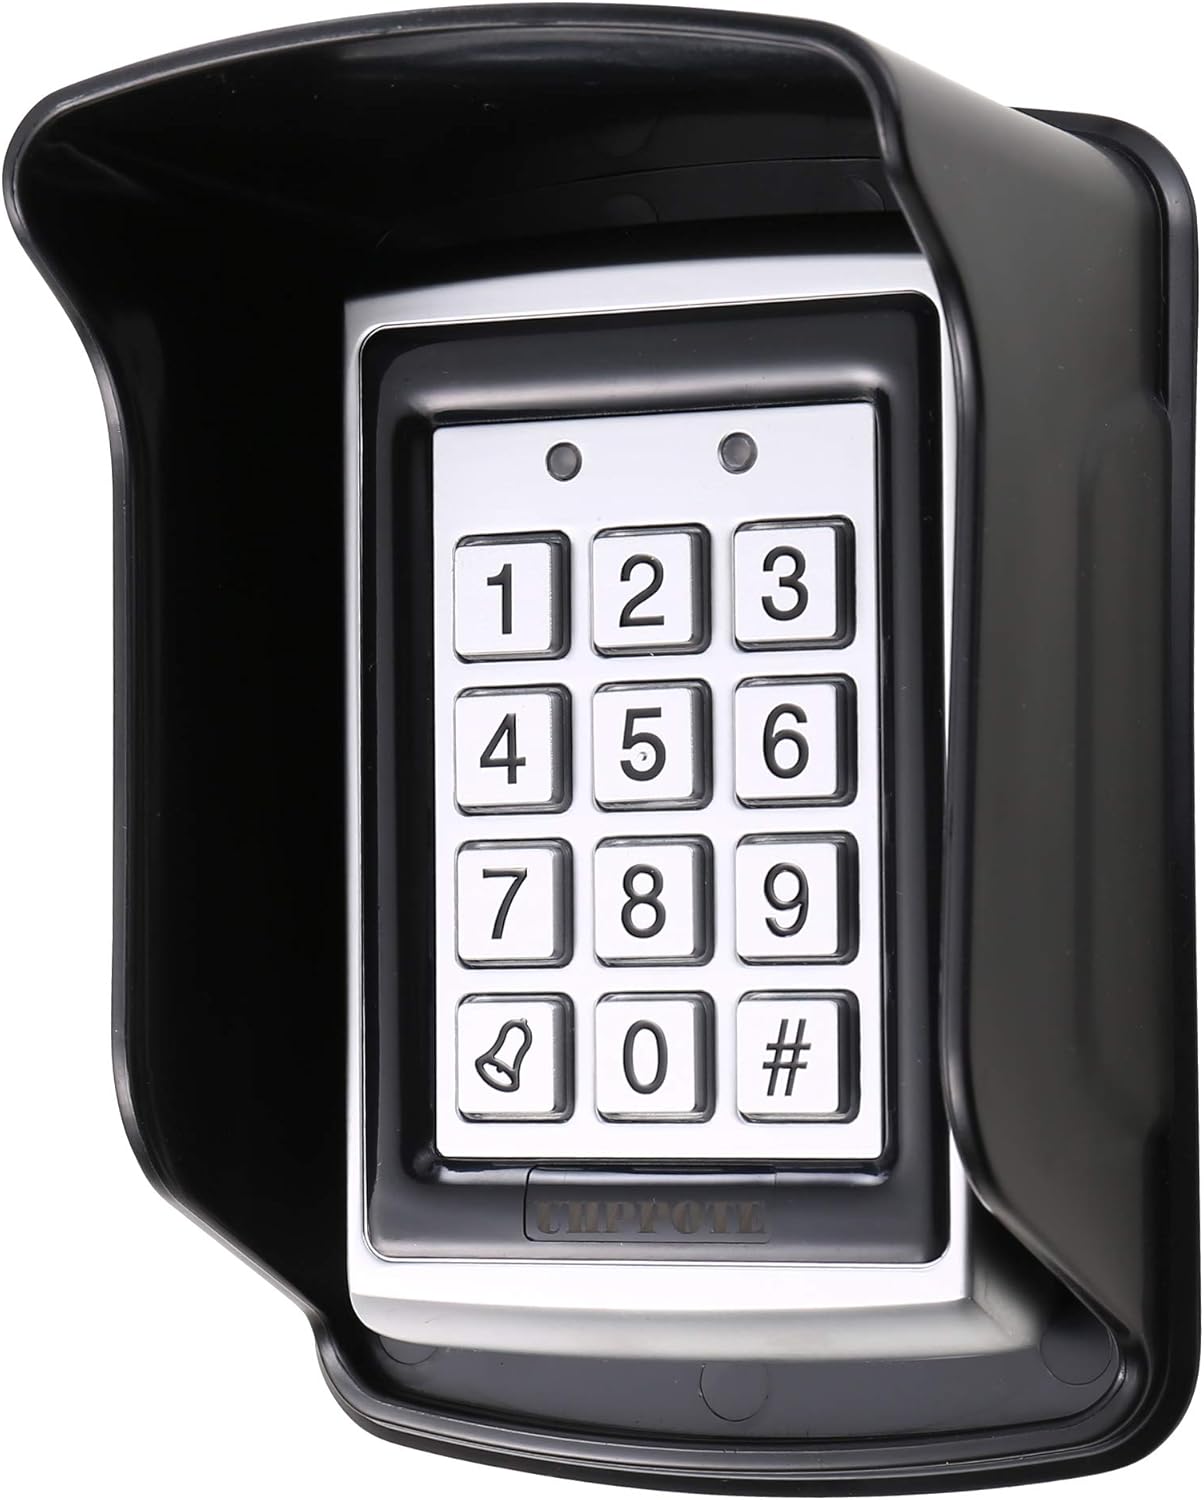
Image: The UHPPOTE Access Control Keypad unit, shown with its protective waterproof cover installed, highlighting its robust design for outdoor use.
Specifikacijos
| Atributas | Vertė |
|---|---|
| Prekės ženklas | UHPPOTE |
| Veiklos ttage | 12 voltų (10–16 V) |
| Veikimo srovė | 120mA (maks.) |
| Prekės svoris | 0.5 kilogramo |
| Vartotojo talpa | Iki 500 vartotojų |
| Įėjimo režimai | Password Only / ID Card Only / Password + ID Card |
| Gamintojas | UHPPOTE |

Paveikslėlis: Galinė dalis view of the access control keypad, showing the terminal block with clearly labeled connections for power, lock, and auxiliary outputs, along with operating voltage ir dabartinės specifikacijos.
Sąranka ir diegimas
1. Klaviatūros montavimas
Choose a suitable location for mounting the keypad, ideally near the door or gate it will control. Ensure the surface is flat and stable. Use the provided mounting screws and wall plugs to securely attach the keypad to the wall. If installing outdoors, ensure the waterproof cover is properly seated over the keypad to protect it from elements.

Paveikslėlis: Šoninė pusė view of the black waterproof cover, designed to shield the access control keypad from environmental exposure, showing its curved protective shape.

Image: A diagram illustrating the dimensions of the waterproof cover, with measurements in both millimeters and inches (150mm/5.91in length, 104mm/4.09in width, 80mm/3.15in height).
2. Laidų schema ir jungtys
The keypad requires a 12V DC power supply. Connect the wires according to the diagram below. Ensure all connections are secure and properly insulated to prevent short circuits.
- + 12 V: Connect to the positive terminal of the 12V DC power supply.
- BND: Connect to the negative terminal of the 12V DC power supply.
- UŽRAKTAS: Connect to the lock's control input (NO/NC depending on lock type).
- REX/BL: Request to Exit button / Bell connection.
- BELL1/BELL2: Bell connections.
- AUX_IN/AUX_OUT: Auxiliary input/output for additional functions.
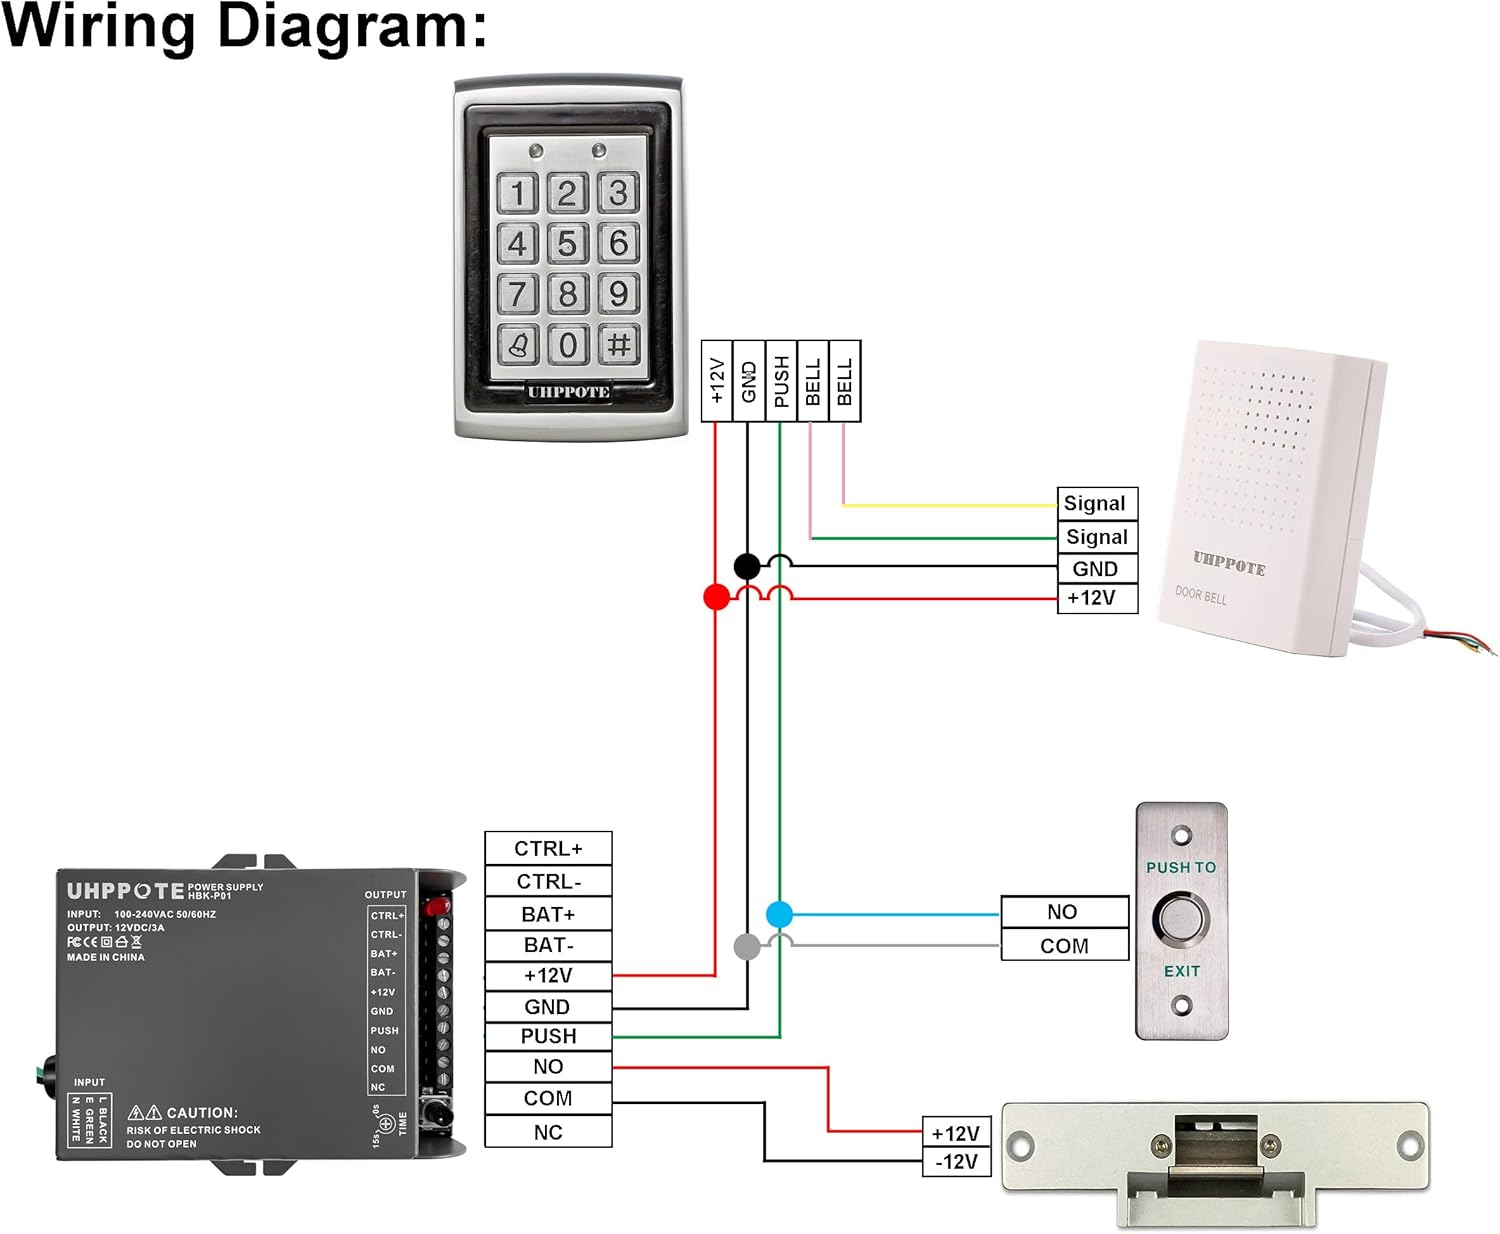
Image: A comprehensive wiring diagram illustrating how to connect the UHPPOTE access control keypad to a power supply, an electric lock, an exit button, and a doorbell, showing all necessary wire connections and components.
Siekiant optimalaus našumo ir saugumo, rekomenduojama, kad montavimą atliktų kvalifikuotas technikas.
Naudojimo instrukcijos
1. Pradinis įjungimas
Once wired, apply power to the unit. The keypad will typically emit a short beep and indicator lights may flash, indicating it is ready for operation. The default master code is usually provided in a separate quick start guide or on the unit itself. Refer to that for initial programming access.

Image: The UHPPOTE access control keypad with its buttons illuminated, indicating power and operational readiness, with two small indicator lights above the keypad.
2. Programming Users and Access Codes
The keypad supports up to 500 users. Programming involves entering a master code, followed by specific commands to add or delete user PINs or RFID cards. Consult the detailed programming guide (often a separate document or included with the unit) for exact command sequences. Generally, the process involves:
- Enter Master Programming Code.
- Select Add User/Card mode.
- Enter new PIN or present RFID card.
- Patvirtinkite įėjimą.
Repeat for all desired users. Ensure to keep your master code confidential.
3. Entry Modes
The unit supports three primary entry modes:
- Password Only: Users enter their 4-digit PIN code to gain access.
- ID Card Only: Users present their registered RFID card to the keypad's reader to gain access.
- Password + ID Card: Users must first present their registered RFID card, then enter their corresponding 4-digit PIN code for enhanced security.
The specific mode can be configured during programming. Refer to the programming guide for instructions on changing entry modes.

Paveikslėlis: Skaidrus frontas view of the UHPPOTE access control keypad, showing its numeric buttons (0-9, bell, hash) and the UHPPOTE brand name at the bottom, without the waterproof cover.
Priežiūra
The UHPPOTE Access Control Keypad is designed for durability and minimal maintenance. However, regular checks can ensure its longevity and reliable operation:
- Valymas: Periodically wipe the keypad surface and waterproof cover with a soft, damp šluoste. Venkite abrazyvinių valiklių ar tirpiklių, kurie gali pažeisti apdailą ar elektroniką.
- Jungtys: Annually inspect all wiring connections to ensure they are secure and free from corrosion, especially in outdoor installations.
- Funkcionalumo testas: Regularly test the keypad's functionality by using a valid PIN or RFID card to ensure it grants access correctly.
- Vandeniui atsparus dangtelis: Ensure the waterproof cover remains securely in place and is not cracked or damaged, as this protects the internal components from moisture.
Trikčių šalinimas
Jei kyla problemų dėl prieigos valdymo klaviatūros, žr. šias dažniausiai pasitaikančias problemas ir sprendimus:
| Problema | Galima priežastis | Sprendimas |
|---|---|---|
| Keypad does not power on. | Nėra maitinimo šaltinio; neteisingas laidas; sugedęs maitinimo šaltinis. | Check power connections (+12V, GND). Verify power supply is active and providing 12V DC. Inspect wiring for breaks or shorts. |
| Access denied despite correct PIN/Card. | User not programmed; incorrect entry mode; card/PIN corrupted. | Ensure the user's PIN/card is correctly programmed. Verify the keypad is in the correct entry mode (e.g., not set to Card Only if using PIN). Try re-programming the user. |
| Lock does not activate. | Incorrect lock wiring; faulty lock; lock relay issue. | Check lock connections (NO/NC). Ensure the lock itself is functional. Verify the lock relay output is configured correctly in programming. |
| Keypad buttons unresponsive. | Physical damage; internal fault. | Inspect for physical damage. If the issue persists after power cycling, contact customer support. |
Garantija ir palaikymas
UHPPOTE products are manufactured to high quality standards. For specific warranty information regarding your 125khz RFID Door Entry Controller, please refer to the warranty card included with your purchase or visit the official UHPPOTE website. For technical support, troubleshooting assistance beyond this manual, or inquiries about replacement parts, please contact UHPPOTE customer service through their official channels.
Daugiau informacijos ir kontaktinius duomenis galite rasti adresu UHPPOTE Store on Amazon.