PIX-LINK LV-WR07
PIX-LINK LV-WR07 Wireless Router User Manual
Model: LV-WR07
1. Įvadas
Thank you for choosing the PIX-LINK LV-WR07 Wireless Router. This device is designed to provide a high-speed wireless network connection for your home or small office. With 300Mbps wireless speed and two external antennas, it ensures stable and wide-ranging Wi-Fi coverage. This manual will guide you through the setup, operation, and maintenance of your new router.

Image 1.1: The PIX-LINK LV-WR07 Wireless Router, showcasindėl kompaktiško dizaino ir dviejų išorinių antenų.
2. Produkto ypatybės
- High-Speed Wireless: Up to 300Mbps data transmission rate, ideal for smooth HD streaming, online gaming, and fast web naršymas.
- Patobulinta aprėptis: Equipped with two external antennas to ensure a strong and stable Wi-Fi signal across your space.
- Keli uostai: Features 5 LAN ports for reliable wired connections to devices like desktop computers, smart TVs, and gaming consoles.
- WPS funkcionalumas: Supports Wi-Fi Protected Setup (WPS) for easy and secure wireless connection setup.
- Platus suderinamumas: Connects seamlessly with various devices including gaming consoles, tablets, and smart televisions.

Image 2.1: Illustration of the router's network coverage and compatibility with various devices, including laptops, smartphones, and PCs.
3. Pakuotės turinys
Prašome patikrinti, ar pakuotėje yra visi reikalingi daiktai:
- PIX-LINK LV-WR07 Wireless Router
- Maitinimo adapteris
- Ethernet kabelis
- Greito diegimo vadovas (šis vadovas)
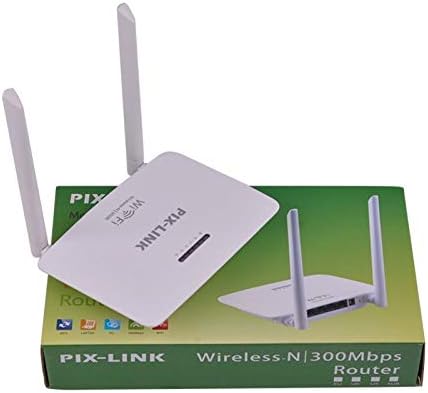
Image 3.1: The PIX-LINK LV-WR07 Wireless Router shown with its retail packaging, indicating the product as it appears in the box.

Image 3.2: The essential accessories included with the router: the power adapter for electrical connection and an Ethernet cable for wired network setup.
4. Sąrankos vadovas
4.1 Techninės įrangos prijungimas
- Maitinimas: Connect the power adapter to the router's power port and then plug the adapter into a standard electrical outlet. The power indicator light on the router should illuminate.
- Prisijungimas prie interneto šaltinio: Connect one end of the provided Ethernet cable to your modem's LAN port or your internet service provider's (ISP) Ethernet wall jack. Connect the other end of the Ethernet cable to the WAN port (usually labeled differently or colored) on your PIX-LINK LV-WR07 router.
- Prijunkite savo įrenginį:
- Laidinis ryšys: For initial setup or stable connection, connect your computer to one of the router's LAN ports (usually yellow) using another Ethernet cable.
- Belaidis ryšys: Locate the default Wi-Fi network name (SSID) and password printed on a label on the bottom or back of your router. Connect your wireless device (laptop, smartphone, tablet) to this network.
4.2 Pradinė konfigūracija (Web Sąsaja)
After connecting the hardware, you can configure your router via a web naršyklė.
- Pasiekite maršrutizatoriaus nustatymus: Atidarykite a web browser (e.g., Chrome, Firefox, Edge) on a device connected to the router. In the address bar, type the default IP address (e.g.,
192.168.1.1or192.168.0.1) and press Enter. This IP address is usually found on the router's label. - Prisijungimas: A login window will appear. Enter the default username and password (commonly
adminabiem arba kaip nurodyta maršrutizatoriaus etiketėje). - Paleiskite sąrankos vedlį: Most routers have a Quick Setup Wizard. Follow the on-screen instructions to configure your internet connection type (e.g., DHCP, Static IP, PPPoE) and set up your new Wi-Fi network name (SSID) and a strong password.
- Išsaugoti nustatymus: After configuring, save your settings and restart the router if prompted.
5. Maršrutizatoriaus valdymas
5.1 Įrenginių prijungimas prie „Wi-Fi“
Norėdami prijungti įrenginį prie „Wi-Fi“ tinklo:
- Savo įrenginyje eikite į „Wi-Fi“ nustatymus.
- Iš sąrašo pasirinkite savo „Wi-Fi“ tinklo pavadinimą (SSID).
- Enter the Wi-Fi password you set during configuration.
- Dabar jūsų įrenginys turėtų būti prijungtas prie interneto.
5.2 WPS („Wi-Fi Protected Setup“) naudojimas
WPS allows you to connect devices to your Wi-Fi network without entering the password manually.
- Press the WPS button on your router (usually located on the back or side, labeled 'WPS'). The WPS LED indicator will start blinking.
- Within two minutes, activate WPS on your client device (e.g., a wireless adapter, smartphone, or printer). Refer to your device's manual for specific instructions on activating WPS.
- Įrenginys automatiškai prisijungs prie jūsų „Wi-Fi“ tinklo.
5.3 Wired Connections (LAN Ports)
The router provides multiple LAN ports for wired connections, offering stable and fast connectivity for devices like desktop computers, gaming consoles, and smart TVs.
- Simply connect an Ethernet cable from the device's Ethernet port to any available LAN port on the router.
- The corresponding LAN indicator light on the router should illuminate, indicating a successful connection.
6. Priežiūra
- Optimali vieta: Maršrutizatorių pastatykite centrinėje vietoje, atokiau nuo kliūčių (storų sienų, metalinių daiktų) ir trukdžių šaltinių (mikrobangų krosnelių, belaidžių telefonų), kad maksimaliai padidintumėte „Wi-Fi“ aprėpties plotą.
- Laikyti švarų: Regularly clean the router's exterior with a soft, dry cloth. Ensure ventilation holes are not blocked to prevent overheating.
- Firmware atnaujinimai: Periodically check the PIX-LINK official website for firmware updates. Updating firmware can improve performance, add new features, and fix bugs. Follow the instructions provided on the websvetainę atsargiai.
- Periodiškai paleiskite iš naujo: Restarting your router every few weeks can help clear its memory and resolve minor network issues, improving overall performance.
7. Problemų sprendimas
7.1 Nėra interneto ryšio
- Check if the power adapter is securely connected and the router is powered on.
- Ensure the Ethernet cable from your modem/ISP is securely connected to the router's WAN port.
- Restart your modem and then your router. Wait a few minutes for them to fully boot up.
- Patikrinkite interneto ryšio tipo nustatymus maršrutizatoriaus web interface (e.g., DHCP, Static IP, PPPoE).
- Susisiekite su savo interneto paslaugų teikėju (IPT), kad įsitikintumėte, jog nėra jokių paslaugų.tages jūsų vietovėje.
7.2 Slow Wi-Fi Speed or Intermittent Connection
- Relocate the router to a more central position, away from obstacles and interference.
- Įsitikinkite, kad jūsų maršrutizatoriaus programinė įranga yra atnaujinta.
- Reduce the number of devices connected to the network, especially those performing high-bandwidth activities.
- Pabandykite pakeisti „Wi-Fi“ kanalą maršrutizatoriaus nustatymuose, kad išvengtumėte trukdžių iš kaimyninių tinklų.
7.3 Nepavyksta pasiekti maršrutizatoriaus Web Sąsaja
- Ensure your device is connected to the router (either via Ethernet cable or Wi-Fi).
- Verify that you are typing the correct IP address (e.g.,
192.168.1.1) in the browser's address bar. - Išvalykite naršyklės talpyklą ir slapukus arba išbandykite kitą web naršyklė.
- If you forgot the login credentials, you may need to perform a factory reset (see section 7.4).
7.4 How to Perform a Factory Reset
A factory reset will restore the router to its default settings, including the default Wi-Fi name and password, and login credentials.
- With the router powered on, locate the Reset button (often a small pinhole) on the back or bottom of the router.
- Use a paperclip or a thin object to press and hold the Reset button for about 5-10 seconds until the router's lights flash or change behavior.
- Release the button and wait for the router to restart. You will then need to reconfigure it using the initial setup steps.
8. Techninės specifikacijos
| Funkcija | Aprašymas |
|---|---|
| Prekės ženklas | PIX-LINK |
| Modelis | LV-WR07 |
| Belaidis greitis | 300 megabitų per sekundę (Mbps) |
| Antenos | 2 išorinės antenos |
| Prievadų skaičius | 5 (1 WAN, 4 LAN) |
| Ryšio technologija | Wi-Fi, LAN |
| Ypatingos savybės | WPS („Wi-Fi“ apsaugota sąranka) |
| Suderinami įrenginiai | Gaming Consoles, Tablets, Smart Televisions |
9. Informacija apie garantiją
PIX-LINK products are designed for reliability and performance. For specific warranty terms and conditions, please refer to the warranty card included with your product or visit the official PIX-LINK websvetainėje. Išsaugokite pirkimo kvitą kaip pirkimo įrodymą garantiniams reikalavimams.
10. Pagalba klientams
If you encounter any issues that are not covered in this manual or require further assistance, please contact PIX-LINK customer support. You can usually find contact information (phone number, email, or support portal) on the official PIX-LINK websvetainėje arba ant produkto pakuotės.
Before contacting support, please have the following information ready:
- Product Model: LV-WR07
- Serial Number (found on the product label)
- Išsamus problemos, su kuria susiduriate, aprašymas
- Steps you have already taken to troubleshoot
Ask a question about this manual
Ask about setup, troubleshooting, compatibility, parts, safety, or missing instructions. Manuals+ will review the question and use this page’s manual context to help answer it.