
CkeyiN JS063A
CkeyiN JS063A 550ml Aroma Diffuser and Humidifier User Manual
Model: JS063A | Brand: CkeyiN
1. Įvadas
This manual provides detailed instructions for the safe and effective use of your CkeyiN JS063A 550ml Aroma Diffuser and Humidifier. Please read this manual thoroughly before operating the device and retain it for future reference.

2. Svarbios saugos instrukcijos
- Always place the diffuser on a flat, stable surface.
- Do not place the diffuser near heat sources or in direct sunlight.
- Laikyti vaikams ir naminiams gyvūnėliams nepasiekiamoje vietoje.
- Naudokite tik švarų vandenį iš čiaupo arba distiliuotą vandenį. Nenaudokite karšto vandens.
- Neviršykite nurodyto didžiausio vandens lygio.
- Only use 100% natural essential oils. Avoid corrosive or synthetic oils.
- Prieš valydami ar pildydami, atjunkite prietaisą nuo elektros tinklo.
- Do not touch the ultrasonic plate with bare hands.
- If the device emits smoke or an unusual smell, unplug it immediately.
- Nemerkite prietaiso į vandenį ar kitą skystį.
3. Pakuotės turinys
Patikrinkite, ar pakuotėje yra visi reikalingi daiktai:
- 1 x CkeyiN 550ml Aroma Diffuser
- 1x maitinimo adapteris
- 1 x Matavimo taurė
- 1x nuotolinio valdymo pultas
- 1 x Vartotojo vadovas
4. Produktas baigtasview
Familiarize yourself with the components of your aroma diffuser.
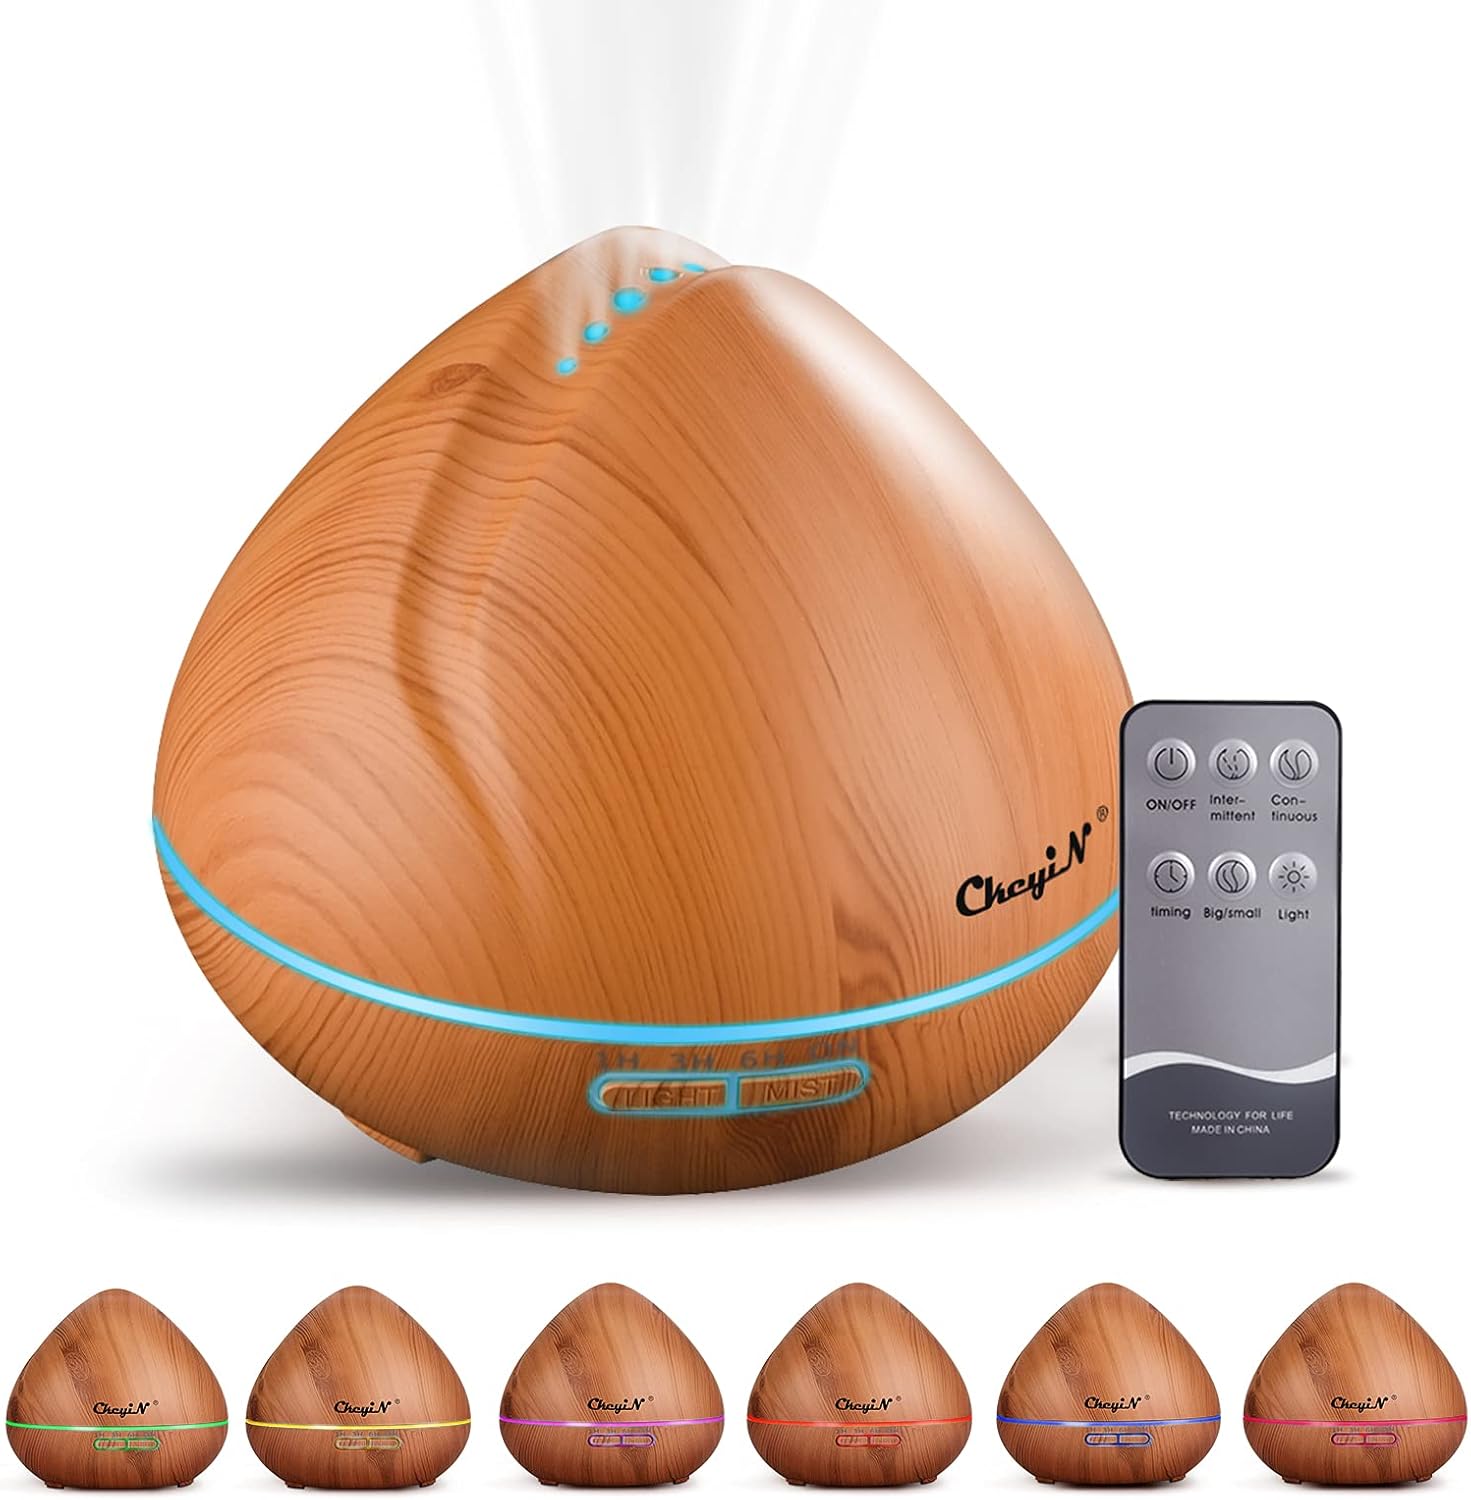


5. Sąrankos vadovas
Atlikite šiuos pradinės sąrankos veiksmus:
- Place the diffuser on a stable, level surface.
- Nuimkite viršutinį dangtelį, pakeldami jį aukštyn.
- Connect the power adapter to the DC jack at the back of the diffuser.
- Fill the measuring cup with clean water (tap or distilled) up to the 550ml max line. Do not exceed the maximum water level indicator inside the tank.
- Add 2-3 drops of essential oil directly into the water tank (optional).
- Uždėkite viršutinį dangtelį atgal, įsitikindami, kad jis tvirtai pritvirtintas.
- Įkiškite maitinimo adapterį į sieninį lizdą.

6. Naudojimo instrukcijos
Operate your diffuser using the buttons on the unit or the included remote control.

6.1. Maitinimo įjungimas/išjungimas
- Press the 'ON/OFF' button on the remote or the 'MIST' button on the unit to turn on the diffuser.
- Press the 'ON/OFF' button on the remote or hold the 'MIST' button on the unit for 2 seconds to turn off the diffuser.
6.2. Rūko kontrolė
The diffuser offers continuous or intermittent mist, and adjustable mist volume.

- Nuolatinis rūkas: Press the 'Continuous' button on the remote or press the 'MIST' button on the unit once.
- Protarpinis rūkas: Press the 'Intermittent' button on the remote or press the 'MIST' button on the unit a second time. The diffuser will mist for 10 seconds and pause for 10 seconds.
- Rūko tūris: Press the 'Big/Small' button on the remote or hold the 'MIST' button on the unit for 1 second to switch between high and low mist output.
6.3. Laikmačio nustatymai
Set the diffuser to automatically turn off after a specified period.
- Press the 'Timing' button on the remote or the 'TIMER' button on the unit to cycle through 1 hour, 3 hours, 6 hours, or continuous operation.
- The diffuser will automatically shut off when the water level is too low, regardless of the timer setting.
6.4. LED šviesos valdymas
Customize the ambient lighting with 7 color options.
- Press the 'Light' button on the remote or the 'LIGHT' button on the unit to turn on the LED light.
- Press again to cycle through the 7 colors.
- Hold the 'Light' button for 2 seconds to fix the light to a single color.
- Hold the 'Light' button again for 2 seconds to turn off the light.
7. Priežiūra ir valymas
Regular cleaning helps maintain optimal performance and extends the lifespan of your diffuser.
- Atjunkite difuzorių nuo maitinimo lizdo ir nuimkite viršutinį dangtelį.
- Empty any remaining water from the tank, ensuring to pour away from the air outlet side.
- Vandens bako vidų nuvalykite minkštu skudurėliu.
- For stubborn residue, add a small amount of white vinegar to the tank and let it sit for 10-15 minutes. Then, gently wipe clean with a soft brush or cotton swab.
- Clean the ultrasonic plate gently with a cotton swab. Do not use harsh chemicals or abrasive materials.
- Difuzoriaus išorę nuvalykite minkšta,amp audinys.
- Prieš surinkdami arba padėdami į sandėliavimo vietą, leiskite visoms dalims visiškai išdžiūti.
Pastaba: Clean the diffuser after every 5-6 uses or every 3-5 days to prevent mineral buildup and ensure proper function.
8. Problemų sprendimas
If you encounter issues with your diffuser, refer to the following common problems and solutions:
| Problema | Galima priežastis | Sprendimas |
|---|---|---|
| Jokio rūko arba silpno rūko | Žemas vandens lygis Ultragarsinė plokštelė nešvari Užblokuota oro išleidimo anga Per daug vandens | Add water to the appropriate level Nuvalykite ultragarso plokštelę Ensure air outlet is clear Do not exceed MAX water line |
| Nėra galios | Maitinimo adapteris neprijungtas Nėra maitinimo iš lizdo | Check power adapter connection Išbandykite lizdą su kitu įrenginiu |
| Šviesa neveikia | Apšvietimo funkcija išjungta | Press the 'LIGHT' button to activate |
| Nuotolinio valdymo pultas neveikia | Baterijos išsikrovusios Kliūtis tarp nuotolinio valdymo pulto ir difuzoriaus | Pakeiskite nuotolinio valdymo pulto baterijas Užtikrinkite aiškią matomumo liniją |
| Neįprastas triukšmas | Žemas vandens lygis Difuzorius ne ant lygaus paviršiaus | Įpilkite vandens Padėkite ant stabilaus, lygaus paviršiaus |
9. Techninės specifikacijos
| Funkcija | Detalė |
|---|---|
| Modelis | JS063A |
| Prekės ženklas | CkeyiN |
| Medžiaga | PP + ABS + PC |
| Įvesties tomastage | AC 100-240V, 50/60Hz |
| Išėjimas ttage | DC 24V, 650mA |
| Nominali galia | Apytiksliai 14 W |
| Vandens rezervuaro talpa | 550 ml |
| Triukšmo lygis | ≤ 36dB |
| Ultragarso dažnis | 2.4 MHz |
| Rekomenduojama naudojimo sritis | 20-25 kvadratiniai metrai |
| Drėkinimo metodas | Ultragarsinis |
| Gaminio matmenys (A x P) | 15.5 x 17 cm (apie 6.1 x 6.7 colio) |
| Produkto svoris | apytiksliai 560 g |
10. Garantija ir palaikymas
This product comes with a standard manufacturer's warranty. Please refer to the product packaging or contact your retailer for specific warranty terms and conditions. For technical support or inquiries, please contact CkeyiN customer service through the details provided at the point of purchase.
Ask a question about this manual
Ask about setup, troubleshooting, compatibility, parts, safety, or missing instructions. Manuals+ will review the question and use this page’s manual context to help answer it.