
1. Įvadas
Haloview CA109 is a wireless 720P high-definition license plate rear view camera designed to assist with vehicle backing maneuvers. This camera provides a clear view of the area behind your vehicle and is compatible with Haloview MC7108 and MC5111 systems. Its compact design and adjustable angle offer versatile installation and optimal viewing.
2. Gaminio komponentai
The CA109 package includes the following items:
- CA109 License Plate Camera
- License Plate Mount Bracket
- Kameros konvertavimo kabelis
- Fotoaparato antena
3. Sąranka ir diegimas
The CA109 camera offers straightforward installation with no cutting or drilling required for standard license plate mounting. Ensure your vehicle is turned off before beginning installation.
3.1. Kameros montavimas
The camera is designed to mount directly onto a standard US license plate using the provided bracket. Position the camera to ensure it does not obstruct the license plate numbers or tags.

Image: The CA109 camera shown mounted on a standard US license plate.
For vehicles equipped with Furrion pre-wired brackets, the B-F02 Backup Camera Bracket Adapter (sold separately) can be used for an integrated mounting solution.
3.2. Maitinimo prijungimas
Connect the camera to a 12-volt power source. This typically involves wiring it to your vehicle's reverse lights for activation when backing up, or to a constant power source if continuous monitoring is desired. Use the camera conversion cable for proper connection.
Pastaba: For some newer vehicle models, particularly certain GM vehicles, a voltage control module may be required to ensure stable power supply to the camera. Consult your vehicle's manual or a professional if experiencing power-related issues.
3.3. Antenos montavimas
Attach the camera antenna securely to the designated port on the camera. Ensure the antenna is positioned for optimal signal transmission. The wireless signal range is up to 984 feet (line of sight).
3.4. Camera Dimensions
Refer to the diagram below for the physical dimensions of the CA109 camera and its mounting bracket.
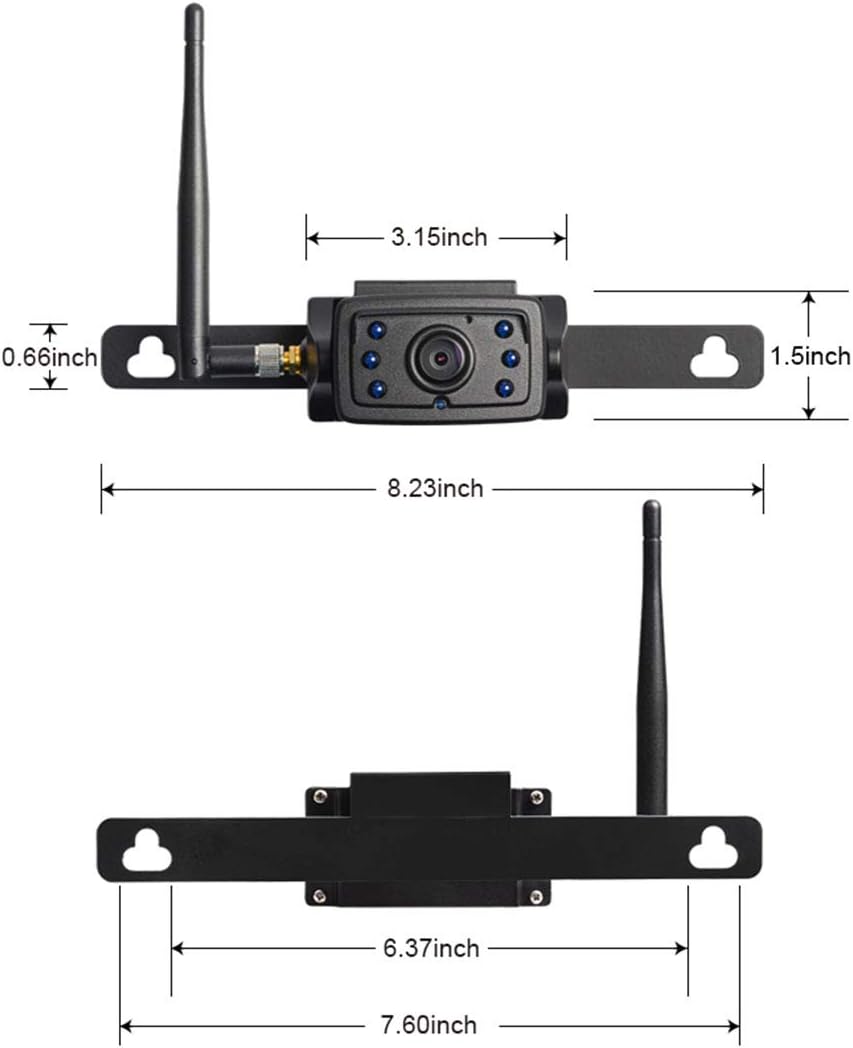
Image: Detailed dimensions of the CA109 camera and its mounting components.

Image: The CA109 camera installed on a vehicle's tailgate, showing the camera and a monitor displaying its view.
4. Naudojimo instrukcijos
Once installed and powered, the CA109 camera transmits video wirelessly to a compatible Haloview monitor (MC7108 or MC5111 system).
4.1. Kameros kampo reguliavimas
Kameros objektyvą galima vertikaliai reguliuoti iki 70 laipsnių, kad būtų pasiektas optimalus vaizdas. viewing angle for your specific vehicle and application. Loosen the adjustment screws, set the desired angle, and then tighten the screws to secure the position.

Image: The CA109 camera illustrating its 70-degree adjustable viewing kampas.
4.2. Viewgavimo srityje
The camera features a 120-degree wide-angle lens, capturing a broad view of the area behind your vehicle. This wide field of view is particularly useful for backing up and hitching trailers.
4.3. Naktinis matymas
Equipped with 6 infrared (IR) LED lights, the CA109 provides night vision capabilities, allowing for clear visibility in low-light conditions.
5. Priežiūra
Haloview CA109 camera is designed for durability and minimal maintenance.
5.1. Valymas
Reguliariai valykite kameros objektyvą ir korpusą minkšta šluosteamp cloth to remove dirt, dust, or debris that may obstruct the view. Venkite naudoti stiprių cheminių medžiagų ar abrazyvinių medžiagų.
5.2. Atsparumas vandeniui
The camera boasts an IP69K rating, indicating high resistance to dust and high-pressure, high-temperature water jets. This ensures reliable operation in various weather conditions.
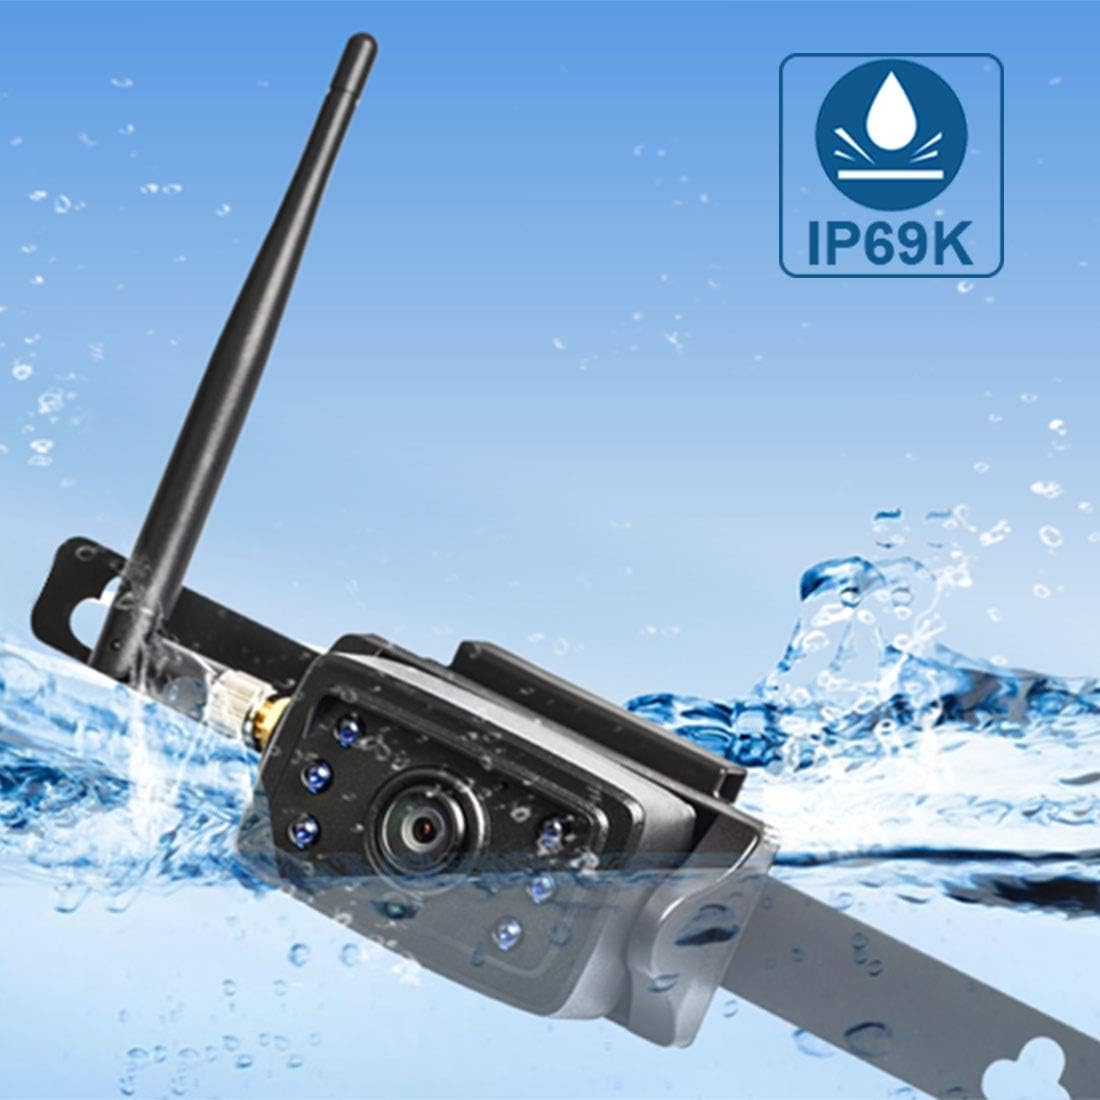
Image: The CA109 camera demonstrating its IP69K water resistance rating.
6. Problemų sprendimas
If you encounter issues with your CA109 camera, refer to the following common troubleshooting steps:
- Monitoriuje nėra vaizdo:
- Ensure the camera is receiving power. Check all cable connections.
- Verify the camera is properly paired with your Haloview monitor. Refer to your monitor's manual for pairing instructions.
- Check the antenna connection on the camera and ensure it is not obstructed.
- Prasta vaizdo kokybė:
- Nuvalykite fotoaparato objektyvą.
- Ensure there are no obstructions between the camera and the monitor that could interfere with the wireless signal.
- Patikrinkite, ar netoliese nėra stiprių elektromagnetinių trukdžių šaltinių.
- Pertraukiamas signalas:
- Reposition the camera antenna for better line of sight.
- Ensure the camera is within the effective wireless range (up to 984ft line of sight).
- Patikrinkite maitinimo jungčių stabilumą.
- Kamera neįsijungia:
- Confirm the 12V power source is active.
- Patikrinkite, ar maitinimo laidas nepažeistas.
- If installing on a newer vehicle, consider if a voltage control module is necessary.
7. Specifikacijos
Key technical specifications for the Haloview CA109 camera:
| Funkcija | Specifikacija |
|---|---|
| Prekės ženklas | Haloview |
| Modelio numeris | CA109 |
| Vaizdo įrašymo raiška | 720p |
| Veiksminga nejudančioji raiška | 720 pikselių |
| Laukas View | 120 laipsnių |
| Tikrasis kampas View | 170 laipsnių |
| Objektyvo tipas | Platus kampas |
| Optinių jutiklių technologija | CMOS Infrared |
| Optinio jutiklio dydis | 1/4 colio |
| ttage | 12 voltų |
| Jungties tipas | Bevielis |
| Diegimo tipas | Paviršinis montavimas |
| Suderinami įrenginiai | Monitor (MC7108, MC5111 systems) |
| Liukso įvertinimas | 0.2 liuksų |
| Prekės svoris | 421 gramų |
8. Garantija ir palaikymas
For warranty information, please refer to the documentation included with your purchase or visit the official Haloview websvetainėje. Garantijos sąlygos gali skirtis.
For technical support, product inquiries, or further assistance, please contact Haloview klientų aptarnavimas per jų oficialius websvetainė:


