
Įvadas
Thank you for choosing the ORSKEY Dash Cam S680. This manual provides detailed instructions for the installation, operation, and maintenance of your dash camera. Please read this manual thoroughly before use to ensure proper functionality and to maximize your experience with the product.
Pakuotės turinys
Patikrinkite pakuotę, ar joje yra šie daiktai:
- ORSKEY Dash Cam S680 Unit
- Automobilinis įkroviklis
- Siurbimo laikiklis
- Vartotojo vadovas (šis dokumentas)

The package contents of the ORSKEY Dash Cam S680, including the main camera unit, a suction cup mount for windshield attachment, and a car charger for power.
Produktas baigtasview
The ORSKEY Dash Cam S680 features a 3.0-inch LCD display, a 170-degree wide-angle lens, and records in 1080P Full HD. It is equipped with a Sony Exmor IMX 323 sensor and 6 glass lens elements for superior image quality, especially in low-light conditions with its WDR technology.
This image shows the advanced lens system of the ORSKEY Dash Cam, featuring a Sony Exmor IMX 323 sensor and 6 glass elements for clear 1080P video capture.
Sąranka
1. Micro SD kortelės įdėjimas
Before using the dash cam, a Micro SD card (Class 10 or higher, up to 32GB) must be inserted. The Micro SD card is neįtraukta pakuotėje.
- Įsitikinkite, kad vaizdo registratorius yra išjungtas.
- Raskite „Micro SD“ kortelės lizdą vaizdo registratoriaus šone.
- Įdėkite „Micro SD“ kortelę auksiniais kontaktais į kameros galą, kol ji spragtelės ir užsifiksuos.
- Norėdami išimti, švelniai stumkite kortelę, kol ji spragtelės, tada atleiskite ir ji iššoks.
Note: It is recommended to format the Micro SD card within the dash cam settings before first use and periodically thereafter to ensure optimal performance.
2. Dash Cam montavimas
- Nuvalykite priekinio stiklo vietą, kurioje ketinate montuoti vaizdo registratorių.
- Pritvirtinkite siurbtuką prie vaizdo registratoriaus.
- Tvirtai prispauskite siurbtuką prie priekinio stiklo ir pasukite svirtį, kad jį pritvirtintumėte. Padėkite kamerą taip, kad ji būtų aiškiai matoma. view kelio neužstojant matomumo vairuojant.

A visual guide demonstrating how to properly install the dash cam onto your car's windshield using the suction mount and connect the power cable.
3. Maitinimo prijungimas
- Connect the car charger to the dash cam's power input port.
- Kitą automobilio įkroviklio galą prijunkite prie savo automobilio cigarečių degiklio lizdo.
- Route the power cable neatly along the edge of the windshield and dashboard to avoid obstructing your view arba trukdo vairavimo valdikliams.
Naudojimo instrukcijos
1. Maitinimo įjungimas/išjungimas
- The dash cam will automatically power on and begin recording when your vehicle's engine starts (and the cigarette lighter provides power).
- Jis automatiškai išsijungs, kai variklis bus išjungtas.
- To manually power on/off, press and hold the Power button.
2. Įrašymo režimai
The dash cam offers several recording features to ensure comprehensive coverage:
- Ciklo įrašymas: This feature allows continuous recording. When the Micro SD card reaches its storage limit, the camera automatically overwrites the oldest unlocked footage with new recordings. This ensures that recording never stops due to a full card.

An illustration detailing the loop recording feature, where the camera continuously records and overwrites the oldest footage when the memory card is full, ensuring uninterrupted recording.
- G jutiklis (avarinis įrašymas): The built-in G-sensor detects sudden impacts or collisions. When triggered, it automatically locks the current video segment, preventing it from being overwritten by loop recording. This footage is saved in a separate folder to protect critical evidence.
- Judesio aptikimas: When enabled, the dash cam will automatically start recording if it detects movement in front of the vehicle while parked. This feature requires continuous power supply (e.g., hardwiring kit, not included) to function when the car is off.
- Parkavimo stebėjimas: Similar to motion detection, this mode activates recording if an impact is detected while the vehicle is parked and the engine is off.

This image highlights the 24-hour monitoring capabilities, including motion detection and parking monitoring, which activate the camera when movement or impact is detected while parked.
3. Wide Dynamic Range (WDR) and Night Vision
The dash cam incorporates WDR technology and 6 unique infrared LED fill lights to enhance video quality in various lighting conditions, providing clear recordings both day and night.

A side-by-side comparison demonstrating the dash cam's clear video quality during the day and its enhanced night vision performance in low-light conditions.
4. Meniu naršymas ir nustatymai
Use the buttons on the side of the dash cam to navigate through the menu options displayed on the 3-inch LCD screen. Common settings include video resolution, loop recording duration, G-sensor sensitivity, motion detection on/off, date/time stamp, and Micro SD card formatting.

Išsamią view of the dash cam's 3-inch LCD screen displaying the menu options for configuration and settings.
5. Atkūrimas
Norėdami iš naujoview įrašytas footage:
- Įrašymą sustabdykite paspausdami mygtuką Gerai (jei šiuo metu įrašinėjama).
- Enter playback mode via the menu.
- Browse through video files using the navigation buttons.
- Pasirinkite a file ir paspauskite OK, kad paleistumėte.
- Alternatively, remove the Micro SD card and view footage on a computer using a card reader.
Priežiūra
1. „Micro SD“ kortelių valdymas
- Regularly format your Micro SD card (at least once a month) to prevent data corruption and ensure smooth operation.
- Use a high-quality Class 10 or higher Micro SD card from a reputable brand.
- Replace the Micro SD card if you experience frequent errors or recording issues.
2. Vaizdo registratoriaus valymas
- Kameros objektyvą ir ekraną valykite minkšta, sausa šluoste. Venkite abrazyvinių medžiagų ar cheminių valiklių.
- Ensure the suction cup is clean for optimal adhesion to the windshield.
Trikčių šalinimas
- Kamera neįsijungia: Check if the car charger is properly connected to both the dash cam and the vehicle's cigarette lighter. Ensure the vehicle's ignition is on.
- Camera stops recording or does not record:
- Įsitikinkite, kad „Micro SD“ kortelė įdėta ir tinkamai suformatuota.
- The Micro SD card may be full; enable loop recording or format the card.
- The Micro SD card may be faulty or not Class 10 or higher. Try a different card.
- Check power connection; intermittent power can cause recording interruptions.
- Prasta vaizdo kokybė:
- Clean the camera lens and your car's windshield.
- Įsitikinkite, kad nuo objektyvo nuimta apsauginė plėvelė.
- Patikrinkite vaizdo įrašo raiškos nustatymus meniu.
- Motion Detection/Parking Monitoring not working effectively:
- These features require continuous power when the vehicle is off, typically via a hardwiring kit (not included).
- The 32GB Micro SD card capacity may limit the duration of parking mode recordings.
- Adjust sensitivity settings in the menu.
- Menu navigation is confusing: Refer to the detailed instructions in the 'Operating Instructions' section for specific button functions and menu layouts.
Specifikacijos
| Modelio numeris | S680 |
| Vaizdo įrašymo raiška | 1080p (1920x1080) at 30 fps |
| Ekrano dydis | 3 colių |
| Tikrasis kampas View | 170 laipsnių |
| Optinių jutiklių technologija | CMOS (Sony Sensor) |
| „Flash“ atminties tipas | MicroSD (up to 32GB, Class 10 or higher) |
| Ryšio technologija | HDMI, USB |
| Montavimo tipas | Siurbimo laikiklis |
| Baterijos elemento tipas | Ličio polimeras |
| Įtraukti komponentai | Car Charger, Suction Mount, User Manual |

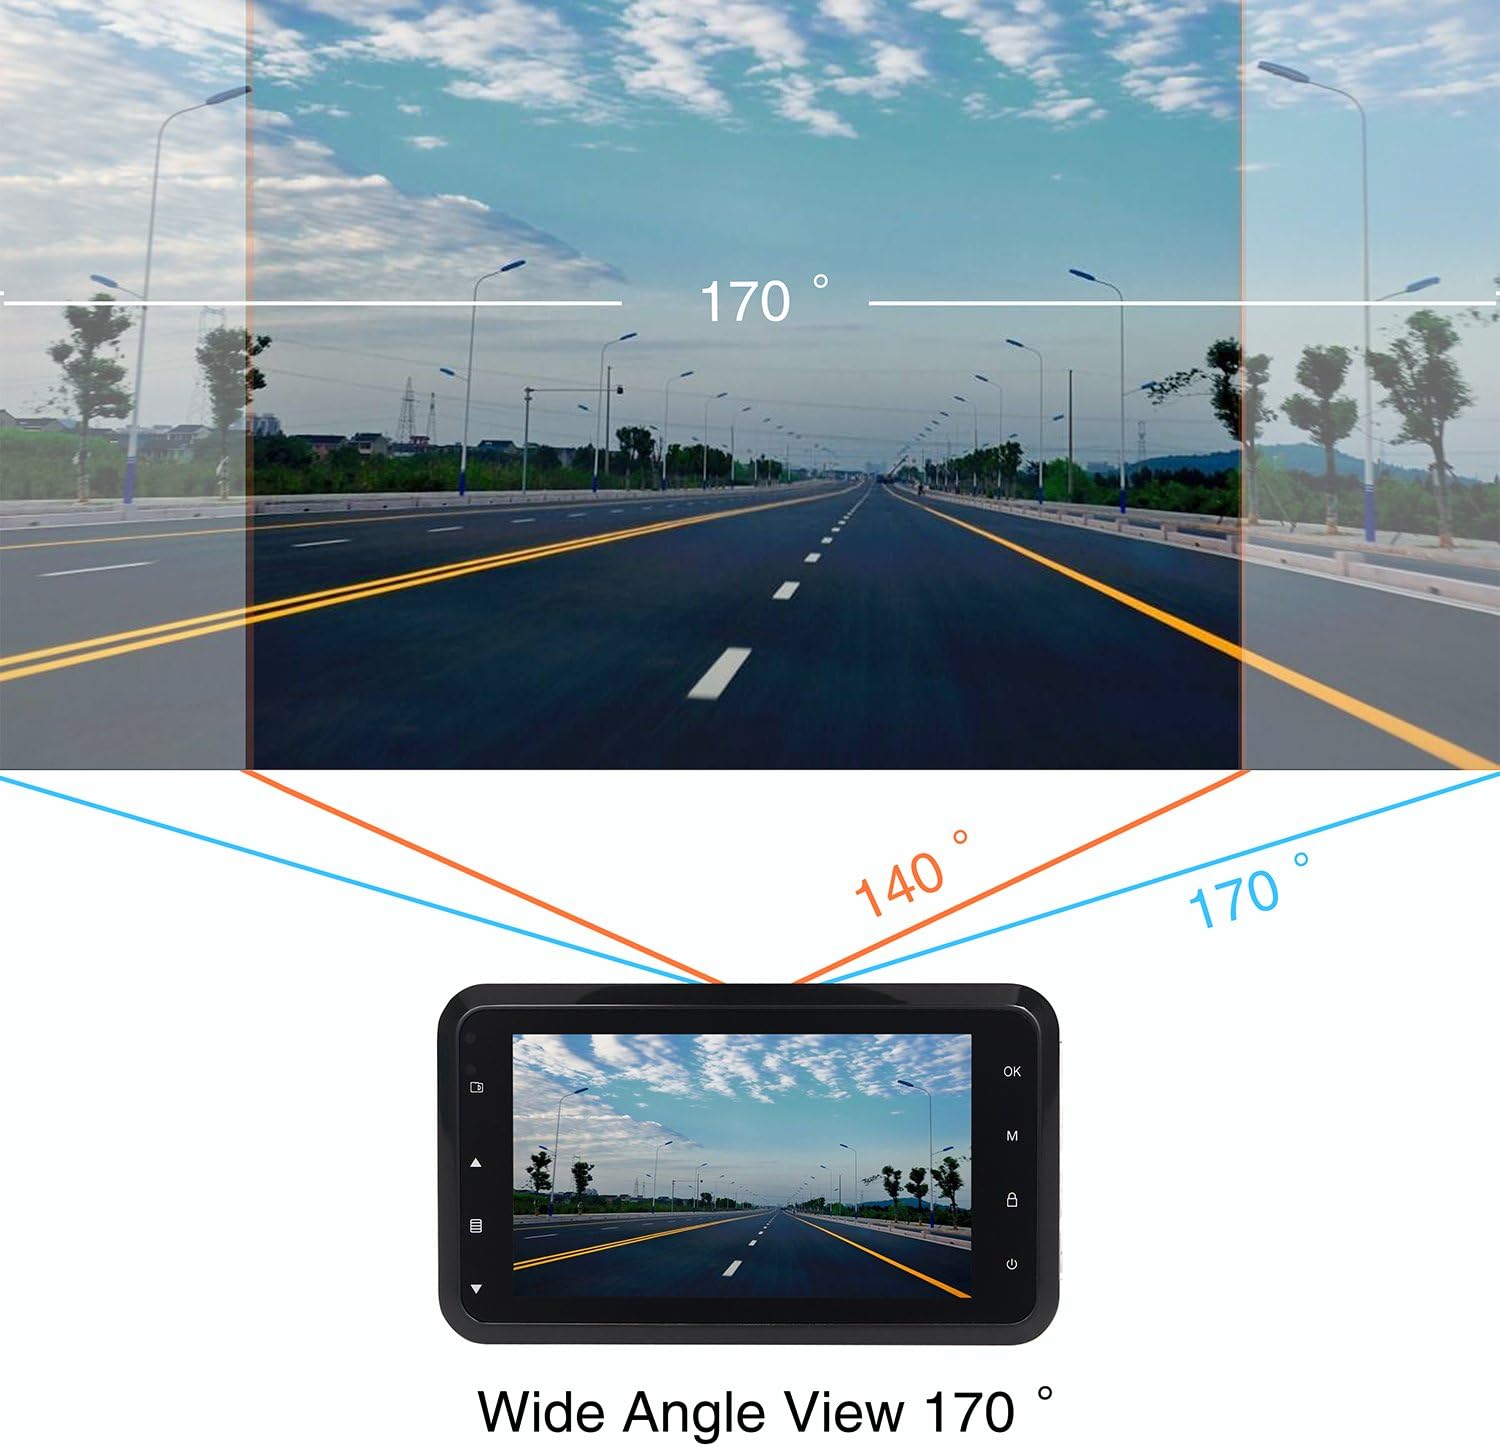
This diagram shows the expansive 170-degree wide-angle field of view captured by the dash cam, providing comprehensive road coverage.
Garantija ir palaikymas
The ORSKEY Dash Cam S680 comes with a 12 mėnesių garantija nuo įsigijimo datos. Ši garantija taikoma gamybos defektams ir užtikrina, kad gaminys veikia taip, kaip numatyta, įprastai naudojant.
For technical support, warranty claims, or any questions regarding your dash cam, please contact ORSKEY customer service. Details for contacting support are typically found on the product packaging or the official ORSKEY websvetainę.
ORSKEY provides a qualified after-sale service team, available 7 days a week, 24 hours a day, to assist you.