
Įvadas
This user manual provides comprehensive instructions for the Andoer HDV-201LM 1080P FHD Digital Video Camera. It covers setup, operation, maintenance, and troubleshooting to help you get the most out of your device. The Andoer HDV-201LM is a portable digital video camera designed for capturing high-quality photos and videos, making it ideal for preserving memories.
Pakuotės turinys
Atidarę pakuotę, patikrinkite, ar yra visi šie daiktai:
- 1 x skaitmeninė vaizdo kamera
- 1 x Camera Bag
- 2 x Rechargeable Batteries (one already in camera)
- 1x USB laidas
- 1 x AV kabelis
- 1x nuotolinio valdymo pultas
- 1 x Naudotojo vadovas (anglų kalba)

Image: All items included in the Andoer HDV-201LM package, including the camera, batteries, cables, remote, and bag.
Sąranka
1. Akumuliatoriaus įdėjimas
The camera comes with two 3.7V 1500mAh rechargeable batteries. One battery is typically pre-installed. Before first use, ensure you remove any insulating film from the battery terminals.
- Open the battery compartment cover, usually located at the bottom or side of the camera.
- Insert the battery, ensuring the correct polarity as indicated inside the compartment.
- Saugiai uždarykite akumuliatoriaus skyriaus dangtelį.
- Charge the battery fully before initial use using the provided USB cable.

Image: The Andoer HDV-201LM camera, two rechargeable batteries, and the remote control, illustrating the main components.
2. Atminties kortelės įdėjimas
The camera requires an SD card (not included) for storing photos and videos. A Class 10 or higher SD card is highly recommended for optimal performance and smooth recording.
- Suraskite SD kortelės lizdą, paprastai šalia akumuliatoriaus skyriaus.
- Įdėkite SD kortelę metaliniais kontaktais teisinga kryptimi, kol ji spragtelės ir užsifiksuos.
- Norėdami išimti, švelniai stumkite kortelę, kol ji iššoks.
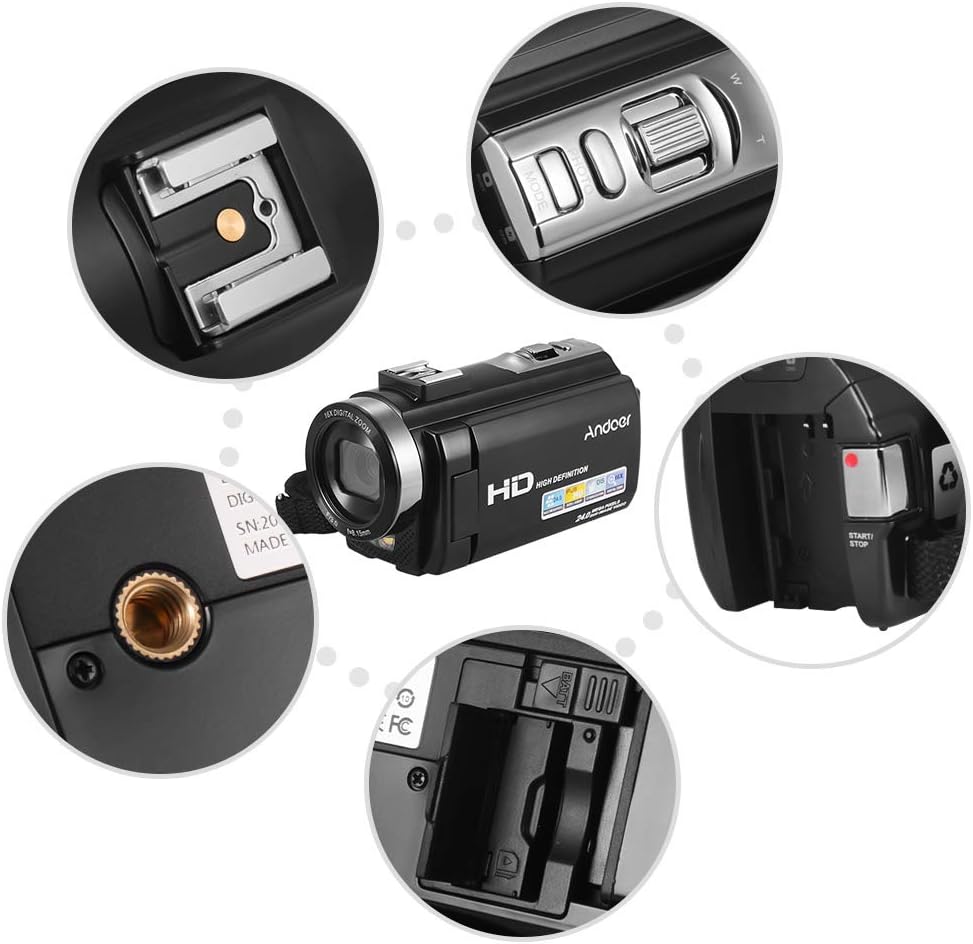
Vaizdas: Stambus planas views of various camera components, including the SD card slot, hot shoe mount, and control buttons.
3. Attaching External Accessories
The camera features a hot shoe mount for connecting external accessories such as microphones or LED video lights (sold separately).
- Slide the accessory onto the hot shoe mount located on top of the camera.
- Secure the accessory if it has a locking mechanism.
- For external microphones, connect the audio cable to the camera's microphone input port.

Image: Illustration of the hot shoe mount on the Andoer HDV-201LM camera, showing how external microphones and LED lights can be attached.
Naudojimo instrukcijos
1. Maitinimo įjungimas/išjungimas
- To power on, open the LCD screen or press the GALIA mygtuką.
- To power off, close the LCD screen or press and hold the GALIA mygtuką.
2. Vaizdo įrašų įrašymas
The camera supports 1080P FULL HD video recording.
- Įjunkite fotoaparatą.
- Ensure the camera is in video recording mode (usually indicated by a video camera icon on the screen). If not, press the REŽIMAS mygtuką, kad perjungtumėte.
- Paspauskite START/STOP mygtuką, kad pradėtumėte įrašymą. Užsidegs įrašymo indikatorius.
- Paspauskite START/STOP mygtuką dar kartą, kad sustabdytumėte įrašymą.
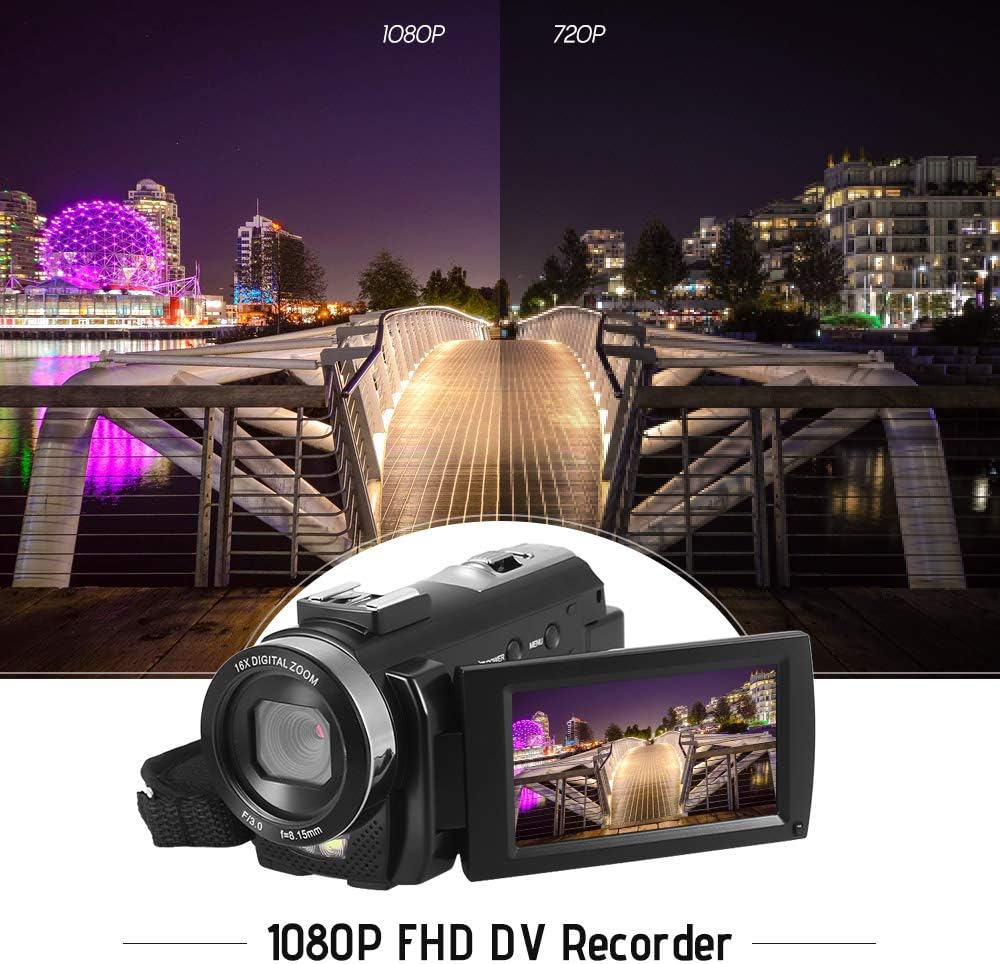
Image: Comparison of 1080P and 720P video quality, highlighting the 1080P FHD capability of the Andoer HDV-201LM camcorder.
3. Fotografavimas
The camera can capture still images up to 24MP (interpolation).
- Įjunkite fotoaparatą.
- Paspauskite REŽIMAS button to switch to photo mode (indicated by a camera icon).
- Kadruokite kadrą naudodami LCD ekraną.
- Paspauskite FOTO button (shutter button) to take a picture.
4. LCD ekrano naudojimas
The 3.0-inch TFT-LCD screen offers 270° rotation for flexible viewkampų.
- Rotate the screen to face forward for self-recording or to various angles for comfortable viewing.
- The screen displays recording status, battery level, mode, and other settings.

Image: The Andoer HDV-201LM camera with its rotatable LCD screen open, showing the camera's compact design.
5. Skaitmeninis priartinimas
The camera features 16X digital zoom.
- Naudokite W (plataus kampo) ir T (teleobjektyvas) buttons, typically located near the top of the camera, to zoom in or out.
- Note: Digital zoom may reduce image quality compared to optical zoom.

Image: Demonstrates the 16X digital zoom capability of the Andoer HDV-201LM, showing a zoomed-in view of a subject.
6. Meniu nustatymai
Access the menu to adjust various camera settings:
- Paspauskite MENIU mygtuką, kad patektumėte į nustatymų meniu.
- Use the navigation buttons (up/down/left/right) to select options.
- Paspauskite OK mygtuką, kad patvirtintumėte pasirinkimą.
- Paspauskite MENIU dar kartą išeiti.
Svarbiausi nustatymai:
- Baltos spalvos balansas: Automatinis, dienos šviesa, debesuota, fluorescencinis, volframas.
- Režimas: Auto, Night, Portrait, Landscape, Backlight, Sport, Party, Beach, High Sensitivity.
- Poveikis: Adjust brightness from ±3.0EV.
- Laikmatis: Off, 2s, 5s, 10s.
- Automatinis išjungimas: OFF, 1min, 3min, 5min.
- Kitos funkcijos: Face detection, smile capture, beauty face, anti-shake.

Image: A user holding and operating the Andoer HDV-201LM camera, demonstrating its portability and ease of use.
7. Prijungimas prie kompiuterio (USB)
You can connect the camera to a computer to transfer files.
- Įsitikinkite, kad fotoaparatas įjungtas.
- Prijunkite fotoaparatą prie kompiuterio naudodami pateiktą USB kabelį.
- Kamera kompiuteryje bus rodoma kaip išimamas diskas.
- You can now access and transfer your photos and videos.
Supported Operating Systems: Windows XP/Vista/7/8/10.

Vaizdas: Stambus planas view of the USB and TV output ports on the Andoer HDV-201LM camera, indicating connectivity options.
8. Connecting to a TV (AV Output)
View your recordings directly on a television using the AV cable.
- Connect one end of the AV cable to the camera's AV output port.
- Connect the other end to the AV input ports on your television (yellow for video, white/red for audio).
- Pasirinkite tinkamą AV įvesties šaltinį savo televizoriuje.
TV Output Standards: NTSC/PAL.
9. Nuotolinio valdymo pulto naudojimas
Pridedamas nuotolinio valdymo pultas leidžia patogiai valdyti per atstumą.
- Ensure the remote control battery (1 x 3V CR2025) is installed correctly.
- Point the remote control towards the camera's IR receiver.
- Use the buttons on the remote to control recording, playback, zoom, and menu navigation.
Priežiūra
1. Kameros valymas
- Kameros korpusą valykite minkštu, sausu skudurėliu.
- Objektyvui ir LCD ekranui valyti naudokite specializuotą objektyvo valymo šluostę ir tirpalą. Venkite abrazyvinių medžiagų.
- Nenaudokite stiprių ploviklių ar tirpiklių.
2. Akumuliatoriaus priežiūra
- Nenaudojamas baterijas laikykite vėsioje, sausoje vietoje.
- Kad pailgintumėte baterijų tarnavimo laiką, venkite jų dažnai visiškai iškrauti.
- Jei fotoaparatas ilgą laiką nebus naudojamas, išimkite bateriją.
3. Sandėliavimas
- Store the camera in its camera bag to protect it from dust and scratches.
- Saugokite fotoaparatą nuo ekstremalių temperatūrų, drėgmės ir tiesioginių saulės spindulių.
Trikčių šalinimas
| Problema | Galima priežastis | Sprendimas |
|---|---|---|
| Kamera neįsijungia. | Battery is dead or not inserted correctly. Insulating film on battery. | Charge the battery. Reinsert the battery correctly. Remove insulating film. |
| Nepavyksta įrašyti vaizdo / fotografuoti. | No SD card or SD card full/corrupted. Incorrect mode. | Insert a valid SD card. Delete files or format SD card. Switch to correct mode. |
| Prasta vaizdo / vaizdo kokybė. | Lens is dirty. Low light conditions. Digital zoom used excessively. | Clean the lens. Use LED fill light. Avoid excessive digital zoom. |
| Nuotolinio valdymo pultas neveikia. | Battery dead or incorrectly inserted. Obstruction between remote and camera. | Replace/reinsert remote battery. Ensure clear line of sight to IR receiver. |
| Kamera užstringa arba nereaguoja. | Programinės įrangos triktis. | Išimkite ir vėl įdėkite bateriją, kad iš naujo nustatytumėte fotoaparato gamyklinius nustatymus. |
Specifikacijos
| Funkcija | Detalė |
|---|---|
| Prekės ženklas | Andoer |
| Modelio numeris | HDV-201LM |
| Jutiklis | 8MP CMOS Sensor, max. 24MP (interpolation) |
| Išorinė atmintis | SD Card, max. 32G (Not included, Class 10+ recommended) |
| Kameros objektyvas | Ff (F/3.0 f=8.15mm) |
| Ekranas | 3.0 Inch TFT-LCD (16:9), 270° rotation |
| Video Format & Resolution | AVI, 1920*1080P FULL HD/30fps, 1280*720 HD/30fps, VGA 640*480/30fps, QVGA 320*240/30fps |
| Image Format & Resolution | JPG, 5600*4200 (24MP Interpolation) / 5200*3900 (20MP Interpolation) / 4608*3456 (16MP Interpolation) / 4000*3000 (12MP Interpolation) / 3648*2736 (10MP Interpolation) / 3648*2048 HD (7M-Wide Interpolation) / 2592*1944 (5MP) / 2048*1536 (3MP) / 1920*1080 HD (2M-Wide) / 640*480 VGA |
| Baltos spalvos balansas | Auto/ Daylight/ Cloudy/ Fluorescent/ Tungsten |
| Režimas | Auto/Night/Portrait/Landscape/Backlight/Sport/Party/Beach/High Sensitivity |
| Poveikis | ± 3.0EV |
| Laikmatis | Išjungta, 2s, 5s, 10s |
| Automatinis išjungimas | OFF/1min/ 3min/ 5min |
| USB prievadas | USB2.0 |
| TV išvestis | NTSC/PAL |
| Operacinės sistemos palaikymas | Windows XP / Vista / 7/8/10 |
| Kameros maitinimo šaltinis | 1 * Battery 3.7V 1500mAh (included) |
| Nuotolinio valdymo pulto baterija | 1 * 3V CR2025 Battery |
| Fotoaparato dydis | 13.5 * 5.5 * 6.5 cm / 5.3 * 2.2 * 2.6 col. |
| Kameros svoris | 273g / 9.6oz (With battery) |
Garantija ir palaikymas
This product comes with standard manufacturer support. For extended coverage, consider the following options:
- 1 metų pratęstos garantijos planas
- 2 metų pratęstos garantijos planas
For technical support or warranty claims, please refer to the contact information provided with your purchase documentation or visit the official Andoer websvetainę.