
Nextbase NBDVR222X
„Nextbase 222x“ priekinio ir galinio vaizdo registratoriaus naudotojo vadovas
Model: NBDVR222X
Įvadas
This manual provides comprehensive instructions for the installation, operation, and maintenance of your Nextbase 222x Front and Rear Dash Cam. Please read this manual thoroughly before using the device to ensure proper functionality and safety.
The Nextbase 222x is designed to record high-quality video footage of your journeys, offering enhanced security and peace of mind on the road. It features 1080p HD recording, a 140-degree wide viewing angle, and an intelligent parking mode.
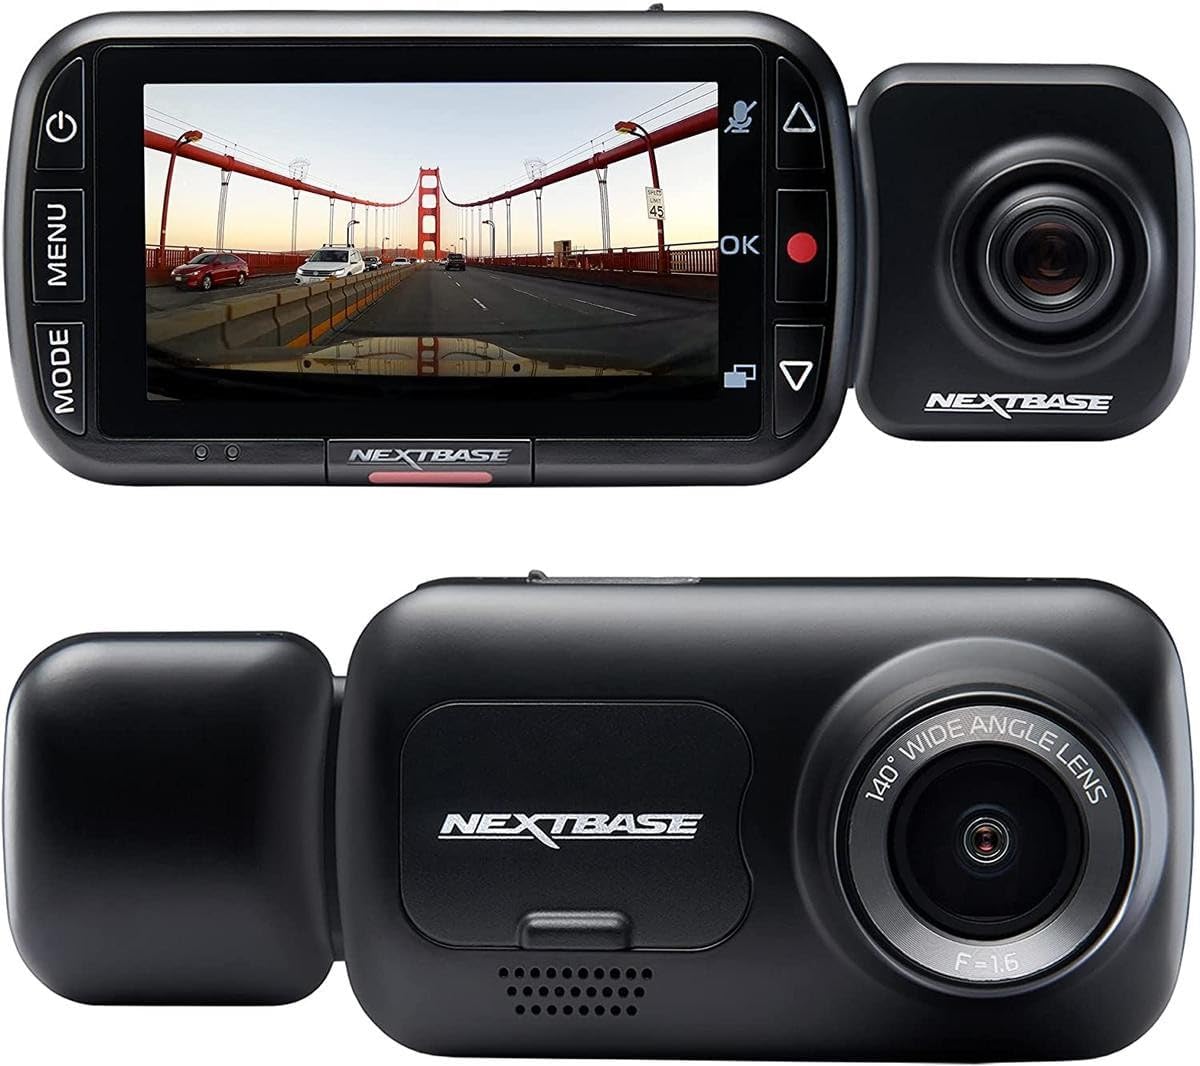
Image: The Nextbase 222x Dash Cam, showcasing its main unit with a display showing a road scene and the detachable rear camera module.
Pakuotės turinys
Prieš tęsdami diegimą, patikrinkite, ar pakuotėje yra visi reikalingi daiktai:
- Nextbase 222x Front Dash Cam Unit
- Nextbase Rear Camera Module (if purchased as a bundle)
- Click&Go PRO Powered Car Mount
- Maitinimo laidas (automobilinis įkroviklis)
- USB kabelis
- Vartotojo vadovas (šis dokumentas)
- Adhesive Mount (optional, may be included)
- Suction Cup Mount (optional, may be included)
Note: A MicroSD card is required for operation and is sold separately. For optimal performance, Nextbase recommends using a U3 or V30 rated MicroSD card specifically designed for dash cam use.
Sąranka ir diegimas
1. „MicroSD“ kortelės įdėjimas
- Įsitikinkite, kad vaizdo registratorius yra išjungtas.
- Raskite „MicroSD“ kortelės lizdą vaizdo registratoriaus šone.
- Insert the MicroSD card with the gold contacts facing the front of the camera until it clicks into place.
- Norėdami išimti kortelę, švelniai stumkite ją į vidų, kol pasigirs spragtelėjimas, tada atleiskite.
2. Dash Cam montavimas
The Nextbase 222x uses a Click&Go PRO Powered Car Mount for easy installation and removal.
- Clean the chosen area on your windshield thoroughly. Ensure it is free from dust and grease.
- Attach the Click&Go PRO mount to the windshield. For suction cup mounts, press firmly and flip the lever to secure. For adhesive mounts, peel the protective film and press firmly for 30 seconds.
- Slide the Nextbase 222x Dash Cam onto the Click&Go PRO mount until it clicks securely into place.
- Sureguliuokite kameros kampą, kad užtikrintumėte aiškų vaizdą view of the road ahead, centered on the horizon.

Image: The Nextbase 222x Dash Cam connected to its magnetic mount, illustrating the ease of attachment.
3. Prisijungimas prie maitinimo
- Connect the provided power cable to the Click&Go PRO mount.
- Plug the other end of the power cable into your vehicle's 12V power socket (cigarette lighter socket).
- Route the cable neatly around your windshield and dashboard to avoid obstructing your view arba trukdo vairavimo valdikliams.
4. Galinio vaizdo kameros montavimas (pasirinktinai)
If you have the Nextbase Rear Camera Module, it easily connects to the main unit.
- Ensure the main dash cam unit is powered off.
- Align the rear camera module with the port on the side of the main dash cam unit.
- Gently push the rear camera module into the port until it is securely connected.
- The rear camera will automatically begin recording when the main unit is powered on.
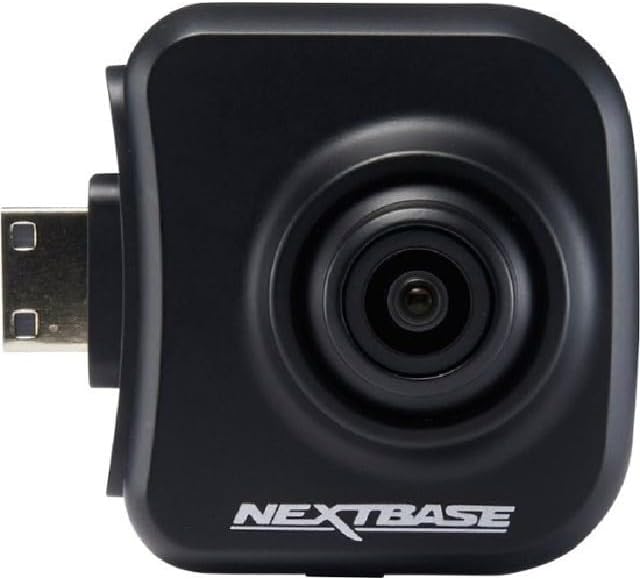
Image: The Nextbase Rear Camera Module, designed to plug directly into the main dash cam unit for dual-view įrašymas.
Naudojimo instrukcijos
Maitinimo įjungimas/išjungimas
- The dash cam will automatically power on and begin recording when your vehicle's ignition is turned on and power is supplied to the 12V socket.
- It will automatically power off shortly after the ignition is turned off.
- To manually power on/off, press and hold the Power button (usually located on the side or top of the unit).
Įrašymo režimai
- Nepertraukiamas įrašymas: The dash cam records in seamless loops, overwriting the oldest unprotected filekai „MicroSD“ kortelė pilna.
- G jutiklis (avarinis įrašymas): In the event of an impact or sudden braking, the built-in G-Sensor will automatically detect the event and protect the current recording segment from being overwritten. This file will be saved in a separate 'Protected' folder on the MicroSD card.
- Pažangus parkavimo režimas: When your vehicle is parked and the ignition is off, the dash cam will enter parking mode. If any physical movement or impact is detected, it will automatically record for a short period to capture the event.
Meniu naršymas
Use the buttons on the dash cam (typically 'Menu', 'Up', 'Down', 'OK') to navigate through settings and playback options on the 2.5" high-resolution IPS screen.

Image: The Nextbase 222x Dash Cam's user interface, showing the screen and control buttons for menu navigation.
Atkūrimas ir File Valdymas
- Atkūrimas įrenginyje: Access the 'Playback' menu on the dash cam to review recorded videos directly on the screen.
- Atkūrimas kompiuteriu: Remove the MicroSD card and insert it into a computer's card reader. Use a compatible media player (e.g., VLC Media Player) to view vaizdo įrašą files. Nextbase also offers desktop software for enhanced viewing and data analysis.
- File Apsauga: During recording, press the 'Protect' button (often indicated by a key icon) to manually protect the current recording segment from being overwritten.
Priežiūra
- „MicroSD“ kortelės formatavimas: It is recommended to format your MicroSD card regularly (e.g., once a month) using the dash cam's menu. This helps maintain card health and prevents data corruption. Formatting will erase all data on the card, so back up any important files pirmas.
- Objektyvo valymas: Gently clean the camera lens with a soft, lint-free cloth. Avoid abrasive materials or harsh chemicals.
- Firmware atnaujinimai: Periodically check the Nextbase website for firmware updates. Keeping your dash cam's firmware up-to-date ensures optimal performance and access to new features.
- Temperatūros svarstymai: Avoid exposing the dash cam to extreme temperatures for prolonged periods. Remove the dash cam from the mount and store it in a cool, dry place when not in use, especially in hot climates.
Trikčių šalinimas
| Problema | Galima priežastis | Sprendimas |
|---|---|---|
| Vaizdo registratorius neįsijungia. | No power supply; faulty cable; vehicle's 12V socket issue. | Check power cable connection. Test 12V socket with another device. Try a different power cable if available. |
| Įrašymas sustoja arba užstringa. | MicroSD card issue (slow speed, full, corrupted); firmware issue. | Format the MicroSD card. Try a new, high-speed (U3/V30) MicroSD card. Update firmware. |
| Prasta vaizdo kokybė. | Dirty lens; incorrect settings; low light conditions. | Clean the lens. Check video resolution settings in the menu. Ensure windshield is clean. |
| G jutiklis per jautrus / nepakankamai jautrus. | G jutiklio jautrumo nustatymas. | Adjust G-Sensor sensitivity in the dash cam settings menu. |
| Galinė kamera neaptikta. | Loose connection; faulty rear camera. | Ensure the rear camera module is securely connected to the main unit. Restart the dash cam. |
If you encounter issues not listed here or if the suggested solutions do not resolve the problem, please refer to the official Nextbase support resources.
Specifikacijos
| Funkcija | Detalė |
|---|---|
| Modelio pavadinimas | Nextbase 222X Front and Rear Wireless Dash Cam |
| Modelio numeris | NBDVR222X |
| Priekinės kameros skiriamoji geba | 1080p HD at 30fps |
| Galinės kameros skiriamoji geba | 720p HD (when connected) |
| Viewing kampas | 140 laipsnių |
| Ekrano dydis | 2.5 colio IPS |
| Montavimo tipas | Click&Go PRO Powered Magnetic Mount |
| Ypatingos savybės | Intelligent Parking Mode, G-Sensor, Loop Recording, Blind Spot Detection |
| Ryšys | USB |
| Matmenys (produktas) | 1.81 x 3.23 x 1.81 colio |
| Prekės svoris | 14.1 uncijos |
| Baterija | 1 ličio jonų baterija (pridedama) |
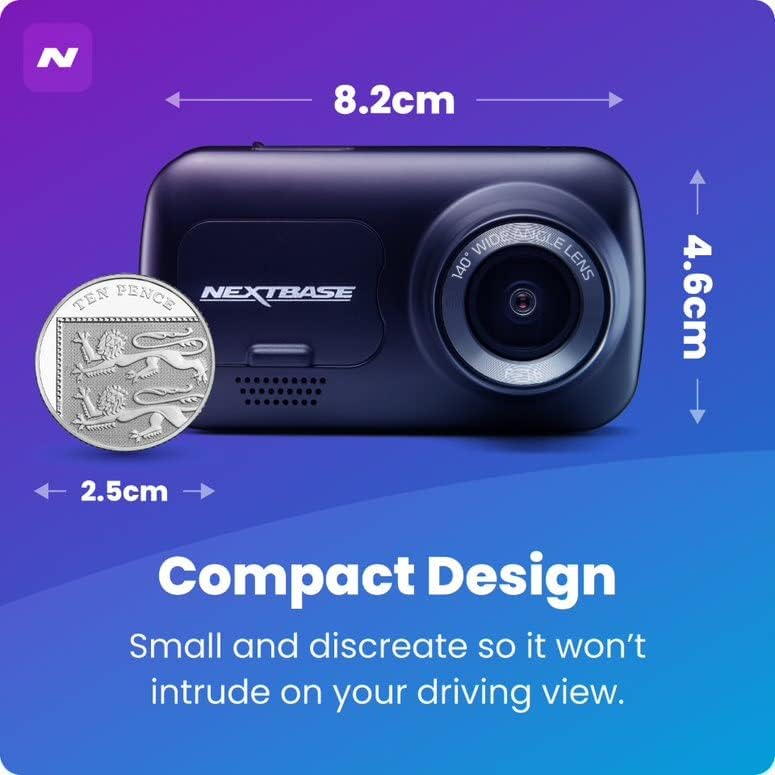
Image: A visual representation of the Nextbase 222x Dash Cam's compact design, showing its approximate dimensions.
Garantija ir palaikymas
Specific warranty details for your Nextbase 222x Dash Cam are typically provided with your purchase documentation or can be found on the official Nextbase websvetainėje. Prašome išsaugoti pirkimo įrodymą garantiniams reikalavimams.
For technical support, firmware updates, or further assistance, please visit the official Nextbase support page or contact their customer service directly. Contact information is usually available on the manufacturer's websvetainę.
Note: This manual does not contain specific warranty periods or direct contact information as these may vary by region and are subject to change. Always refer to the manufacturer's official resources for the most current information.
Ask a question about this manual
Ask about setup, troubleshooting, compatibility, parts, safety, or missing instructions. Manuals+ will review the question and use this page’s manual context to help answer it.