
Singer HD6335M
SINGER Heavy Duty 6335M siuvimo mašinos naudotojo vadovas
Modelis: HD6335M
1. Įvadas
Thank you for choosing the SINGER Heavy Duty 6335M Sewing Machine. This machine is engineered for durability and performance, designed to handle a wide range of fabrics, including heavy materials like denim. With its robust construction and powerful motor, it provides reliable and efficient sewing for various projects. This manual provides essential information for the safe operation, setup, maintenance, and troubleshooting of your new sewing machine. Please read it thoroughly before use.
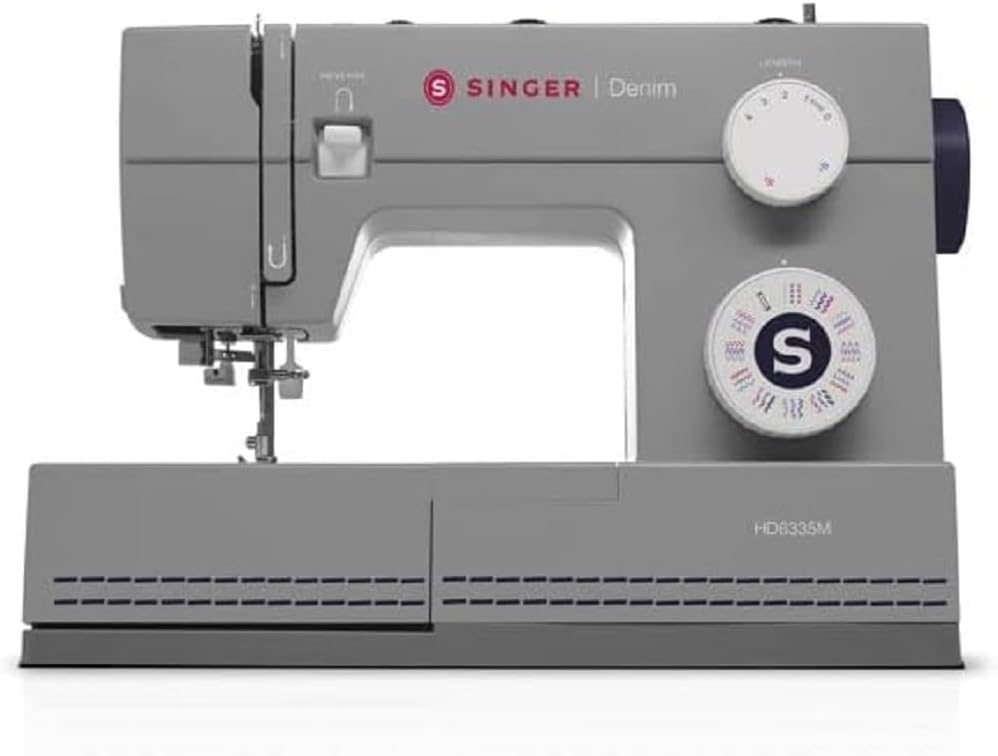
Figure 1: The SINGER Heavy Duty 6335M Sewing Machine. This image shows the overall design of the machine, highlighting its grey color and the prominent SINGER branding.
2. Saugos instrukcijos
Naudodami elektros prietaisus, visada laikykitės pagrindinių saugos priemonių, kad sumažintumėte gaisro, elektros smūgio ar asmenų sužalojimo riziką.
- Prieš naudodami mašiną perskaitykite visas instrukcijas.
- Pirštus laikykite toliau nuo visų judančių dalių. Siuvimo mašinos adata turi būti ypač atsargi.
- Visada ištraukite siuvimo mašinos kištuką iš elektros lizdo, kai nuimate dangčius, tepate arba atliekate bet kokius kitus naudotojo priežiūros reguliavimus, nurodytus naudojimo vadove.
- Never operate the sewing machine if it has a damaged cord or plug, if it is not working properly, if it has been dropped or damaged, or dropped into water.
- Niekada nemeskite ir neįkiškite jokio daikto į jokią angą.
- Nenaudoti lauke.
- Nedirbkite ten, kur naudojami aerozoliniai (purškiami) produktai arba kur įvedamas deguonis.
- Norėdami atjungti, pasukite visus valdiklius į išjungimo padėtį, tada ištraukite kištuką iš lizdo.
- Neištraukite kištuko traukdami už laido. Norėdami atjungti kištuką, imkite už kištuko, o ne už laido.
3. Pakuotės turinys
Upon unpacking your SINGER Heavy Duty 6335M, please verify that all components are present. The standard package typically includes:
- SINGER Heavy Duty 6335M Sewing Machine
- Pėdų valdiklis
- Maitinimo laidas
- Standard Accessories (e.g., various presser feet, needles, bobbins, seam ripper, lint brush, screwdriver)
- Minkštas dulkių dangtelis
- Instrukcijų vadovas (šis dokumentas)
Note: Specific accessories may vary by region or package. Refer to your product packaging list for exact contents.
4. Sąranka
4.1 Maitinimo jungtis
- Pastatykite mašiną ant stabilaus, lygaus paviršiaus.
- Connect the foot controller plug to the machine's receptacle.
- Prijunkite maitinimo laidą prie įrenginio maitinimo įvesties, o tada – prie tinkamo elektros lizdo.
- Įjunkite maitinimo jungiklį, kuris paprastai yra įrenginio šone.
4.2 Ritės užvyniojimas
Proper bobbin winding ensures smooth stitching.
- Uždėkite siūlų ritę ant ritės kaiščio.
- Prakiškite siūlą per viršutinį siūlo kreipiklį ir aplink ritės vyniojimo įtempimo diską.
- Uždėkite tuščią ritę ant ritės vyniotuvo veleno.
- Kelis kartus apvyniokite siūlą aplink ritę, tada pastumkite ritės vyniotuvo veleną į dešinę.
- Švelniai paspauskite kojinį pedalą, kad pradėtumėte vynioti. Sustokite, kai ritė bus pilna.
- Nupjaukite siūlą ir nuimkite ritę.
4.3 Ritės įdėjimas
The SINGER Heavy Duty 6335M features a top drop-in bobbin system for easy access.
- Atidarykite ritės dangtelio plokštelę.
- Įkiškite visą ritę į ritės dėklą, užtikrindami, kad siūlas išsivyniotų teisinga kryptimi (paprastai prieš laikrodžio rodyklę).
- Prakiškite siūlą per įtempimo spyruoklę į siūlo kreiptuvo kanalą.
- Pull out about 6 inches of thread and close the bobbin cover.
4.4 Viršutinio siūlo įvėrimas
Correct upper threading is crucial for balanced stitches.
- Pakelkite pėdutės keltuvą.
- Uždėkite siūlų ritę ant ritės kaiščio.
- Prakiškite siūlą per viršutinį siūlo kreipiklį.
- Bring the thread down the right channel, around the tension discs, and up the left channel.
- Įkiškite siūlą į paėmimo svirtį iš dešinės į kairę.
- Bring the thread down through the guides to the needle.
- Use the built-in needle threader (if available) or manually thread the needle from front to back.

Figure 2: Threading the needle. This image illustrates the process of threading the needle, showing the thread being guided through the needle eye.
4.5 Drawing Up the Bobbin Thread
- Viršutinį siūlą lengvai laikykite kaire ranka.
- Turn the handwheel towards you to lower the needle into the needle plate and then raise it.
- The upper thread will catch the bobbin thread, forming a loop. Pull the loop up through the needle plate opening.
- Patraukite abu siūlus (viršutinį ir ritininį) po prispaudimo pėdele link mašinos galo.
5. Naudojimo instrukcijos
5.1 Dygsnio pasirinkimas
Your SINGER Heavy Duty 6335M offers 32 built-in stitches. Use the stitch selector dial to choose the desired stitch pattern. Refer to the stitch chart on the machine for visual guidance.
5.2 Stitch Length and Width Adjustment
Adjust stitch length and width using the corresponding dials to suit your fabric and project needs. Longer stitches are generally for thicker fabrics, while shorter stitches are for finer details.
5.3 Siuvimo greičio valdymas
The sewing speed is controlled by the foot controller. Press gently for slower speeds and apply more pressure for higher speeds. The machine is capable of high-speed sewing for efficient work.
5.4 Sewing Heavy Fabrics
This machine is specifically designed for heavy-duty sewing, including multiple layers and denim fabrics.
- Use appropriate heavy-duty needles (e.g., denim needles) for thick materials.
- Adjust the presser foot pressure if your machine has this feature (refer to specific machine details).
- Ensure proper thread tension for heavy fabrics to prevent skipped stitches or thread breakage.
5.5 Siuvimas laisva ranka
Remove the accessory storage compartment to reveal the free arm. This feature is ideal for sewing cylindrical items like cuffs, sleeves, and pant hems.
5.6 Kilpų siuvimas
The machine supports easy buttonhole creation.
- Attach the one-step buttonhole foot.
- Insert the button into the back of the buttonhole foot.
- Select the buttonhole stitch on the stitch selector dial.
- Nuleiskite sagos skylutės svirtį.
- Begin sewing; the machine will automatically create the buttonhole to the size of your button.

Figure 3: Buttonhole foot in position. This image shows the buttonhole presser foot attached to the machine, positioned over fabric, ready for automatic buttonhole stitching.
6. Priežiūra
Reguliarus prižiūrėjimas užtikrina jūsų siuvimo mašinos ilgaamžiškumą ir optimalų veikimą.
6.1 Valymas
- Prieš valydami mašiną visada ištraukite iš elektros tinklo.
- Nuimkite adatos plokštelę ir ritės dėklą.
- Use the lint brush (included with accessories) to remove lint and dust from the feed dogs and bobbin area.
- Nuvalykite prietaiso išorę minkštu, sausu skudurėliu. Nenaudokite stiprių cheminių medžiagų ar abrazyvinių valiklių.
6.2 Tepimas
Your SINGER Heavy Duty 6335M is designed to require minimal lubrication. Refer to the full instruction manual for specific oiling points if necessary. Over-oiling can attract lint and cause issues.
6.3 Adatos keitimas
Replace needles frequently (after every 8-10 hours of sewing or when bent/dull) to prevent skipped stitches and fabric damage.
- Išjunkite ir atjunkite mašiną iš maitinimo lizdo.
- Atlaisvinkite adatą clamp prisukti.
- Nuimkite seną adatą.
- Įkiškite naują adatą plokščiąja puse į mašinos galą ir stumkite ją aukštyn kiek įmanoma aukščiau.
- Priveržkite adatą clamp tvirtai prisukite.
7. Problemų sprendimas
Šiame skyriuje aptariamos dažniausiai pasitaikančios problemos, su kuriomis galite susidurti.
| Problema | Galima priežastis | Sprendimas |
|---|---|---|
| Mašina nesiuva | Machine not plugged in; power switch off; bobbin winder engaged. | Check power connection; turn power switch on; disengage bobbin winder. |
| Praleistos siūlės | Incorrect needle size/type; bent or dull needle; improper threading; incorrect tension. | Change needle to correct type/size; replace needle; re-thread machine correctly; adjust tension. |
| Thread breaking (upper) | Improper threading; tension too tight; poor quality thread; burr on needle plate or bobbin case. | Re-thread machine; loosen upper tension; use good quality thread; check for burrs and smooth them. |
| Thread breaking (bobbin) | Improperly wound bobbin; bobbin inserted incorrectly; lint in bobbin case. | Re-wind bobbin evenly; re-insert bobbin correctly; clean bobbin case area. |
| Audinys nepaduodamas | Feed dogs lowered; lint in feed dogs; presser foot pressure too low. | Raise feed dogs; clean feed dogs; increase presser foot pressure. |
For more detailed troubleshooting, please refer to the comprehensive manual available on the SINGER websvetainėje arba susisiekite su klientų aptarnavimo tarnyba.
8. Specifikacijos
| Funkcija | Detalė |
|---|---|
| Modelio numeris | HD6335M |
| Prekės ženklas | Dainininkė |
| Siūlės | 32 įmontuotų siūlių |
| Greitis | High Speed Capability |
| Rankenos tipas | Laisva ranka |
| Gaminio matmenys | 22 cm aukščio x 45 cm pločio x 34 cm aukščio |
| Pakuotės matmenys | 44.8 x 34 x 21.8 cm |
| Pakuotės svoris | 7.9 kilogramo |
| Spalva | Pilka |
9. Garantija ir palaikymas
9.1 Gaminio garantija
The SINGER Heavy Duty 6335M Sewing Machine comes with a 2 metų gamintojo garantijaŠi garantija taikoma medžiagų ir gamybos defektams, atsiradusiems įprasto naudojimo sąlygomis. Išsaugokite pirkimo įrodymą, jei galėtumėte pateikti pretenzijas dėl garantijos.
9.2 Pagalba klientams
For technical assistance, service, or to inquire about replacement parts, please contact SINGER customer support. You can find contact information and additional resources, including a digital version of this manual and FAQs, on the official SINGER websvetainė: www.singer.com.
EU replacement parts availability is guaranteed for 2 years.
Ask a question about this manual
Ask about setup, troubleshooting, compatibility, parts, safety, or missing instructions. Manuals+ will review the question and use this page’s manual context to help answer it.