
1. Įvadas
This manual provides instructions for the operation and maintenance of your Crosley CR612B-AB Corsair Tabletop AM/FM Bluetooth Radio with CD Player and Dual Alarm Clock. Please read this manual thoroughly before using the product to ensure proper function and to prevent damage.

Figure 1: Crosley CR612B-AB Corsair Tabletop AM/FM Bluetooth Radio with CD Player and Dual Alarm Clock.
2. Kas yra dėžutėje
Patikrinkite, ar pakuotėje yra visi toliau išvardyti daiktai:
- Crosley CR612B Corsair Radio Unit
- Kintamos srovės adapteris
- Instrukcijų vadovas
3. Produktas baigtasview
Familiarize yourself with the various components and controls of your Corsair radio.

Figure 2: Front Panel Controls and Features. This image highlights the headphone jack, alarm clock buttons (Alarm 1, Alarm 2), and the analog tuning dial.
- Garsumo rankenėlė: Reguliuoja garso išvesties lygį.
- Derinimo rankenėlė: Pasirenka AM/FM radijo dažnius.
- Režimo mygtukas: Switches between AM/FM radio, CD player, and Bluetooth modes.
- Miego mygtukas: Įjungia miego laikmačio funkciją.
- 1 / 2 žadintuvo mygtukai: Set and activate dual alarms.
- Laiko mygtukas: Used for setting the clock.
- AM/FM mygtukas: Perjungia AM ir FM radijo dažnius.
- CD grotuvo valdikliai: Play/Pause, Stop, Display, CD Mode, Skip/Search (Forward/Backward), Program.
- Ausinių lizdas: Privačiam pasiklausymui.
- Maitinimo mygtukas: Įjungia arba išjungia įrenginį.
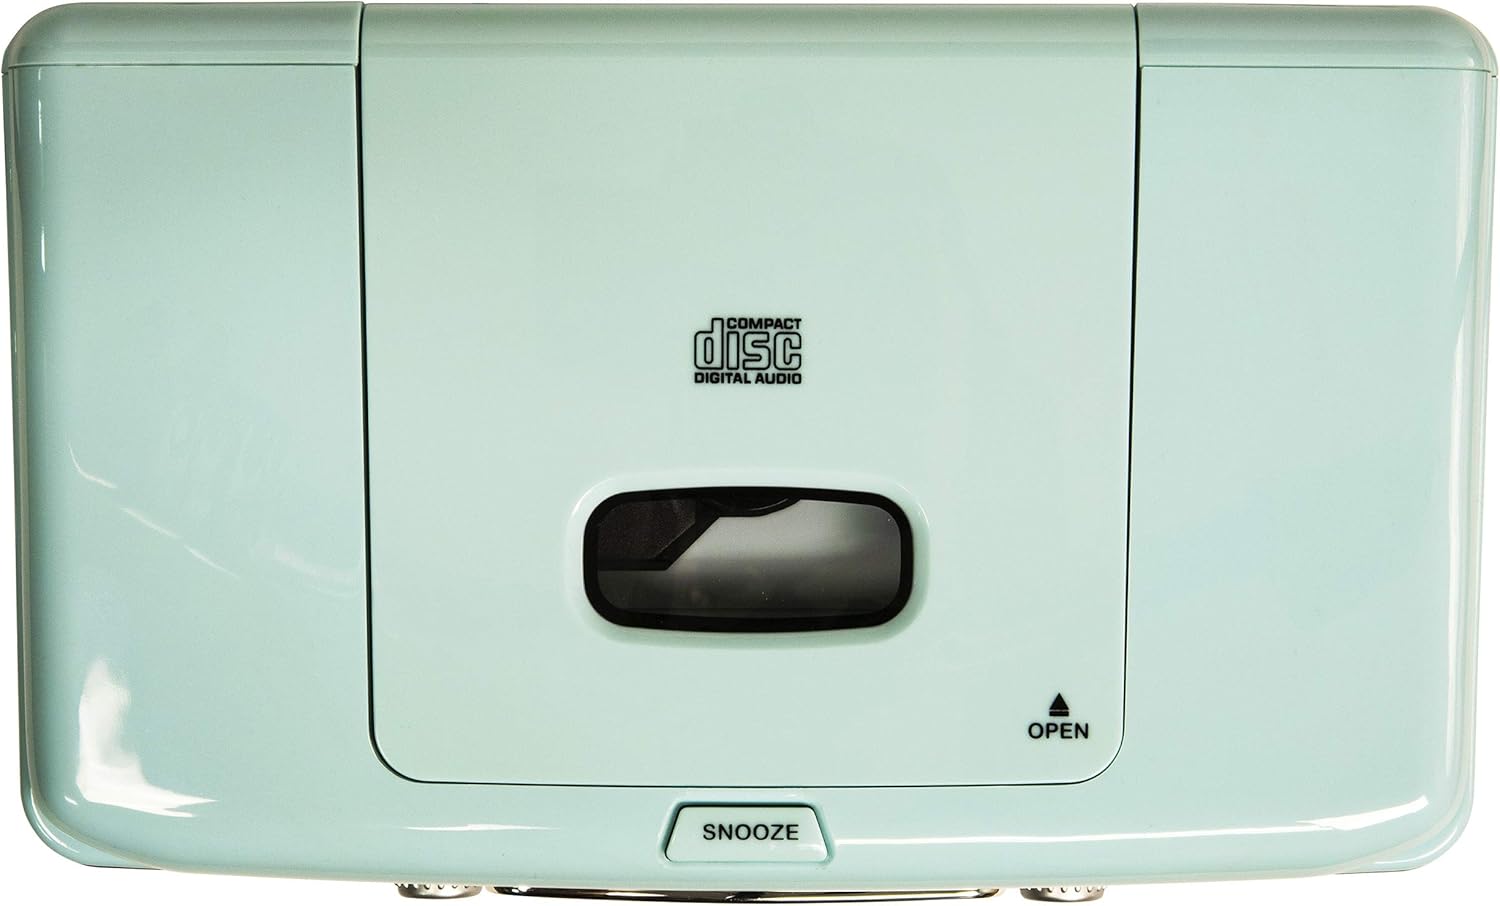
Figure 3: Top Panel. This image shows the top-loading CD player compartment and the Snooze button.

Figure 4: Rear Panel. This image displays the AC power input and the battery compartment for backup power.
4. Sąranka
4.1 Maitinimo jungtis
- Įsitikinkite, kad įrenginys pastatytas ant stabilaus, lygaus paviršiaus.
- Connect the AC power adapter to the DC IN jack on the rear of the unit.
- Įjunkite kintamosios srovės adapterį į standartinį sieninį lizdą.
4.2 Akumuliatoriaus atsarginė kopija (pasirenkama)
For alarm clock backup during power outages, install one 9V battery (not included) into the battery compartment on the rear of the unit. This will maintain time and alarm settings in case of a power interruption.
4.3 Antenos sąranka
The unit has a built-in AM antenna. For FM reception, extend the wire FM antenna located on the rear of the unit for optimal signal reception.
5. Naudojimo instrukcijos
5.1 Maitinimo įjungimas/išjungimas
Paspauskite GALIA mygtuką, esantį priekiniame skydelyje, kad įjungtumėte arba išjungtumėte įrenginį.
5.2 AM/FM radijo veikimas
- Paspauskite REŽIMAS button until 'RADIO' is displayed.
- Paspauskite AM/FM mygtuką, kad pasirinktumėte AM arba FM diapazoną.
- Pasukite TUNINGAS rankenėlę, kad pasirinktumėte norimą radijo stotį.
- Sureguliuokite TOMAS rankenėlę iki pageidaujamo klausymosi lygio.
Video 1: Crosley CR612B-AB Corsair AM/FM Bluetooth Radio. This video demonstrates the radio's AM/FM tuning functionality.
5.3 CD grotuvo valdymas
- Paspauskite REŽIMAS button until 'CD' is displayed.
- Paspauskite ATIDARYTI button on the top of the unit to open the CD compartment.
- Place a CD with the label side facing up into the compartment.
- Uždarykite CD skyriaus dangtį.
- Paspauskite PALEISTI / PAUZĖ mygtuką, norėdami pradėti atkūrimą.
- Naudokite PRALEISTI / PAIEŠKA mygtukai, skirti naršyti tarp takelių.
- Paspauskite STOP mygtuką, kad užbaigtumėte atkūrimą.
- The PROGRAMA button allows you to create a custom playback order for tracks.

Figure 5: CD Player Open. This image shows the top-loading CD player ready for disc insertion.
5.4 Bluetooth veikimas
- Paspauskite REŽIMAS button until 'BT' (Bluetooth) is displayed. The unit will enter pairing mode, indicated by a flashing 'BT'.
- Išoriniame įrenginyje (pvz., išmaniajame telefone, planšetiniame kompiuteryje) įjunkite Bluetooth.
- Ieškokite 'Crosley Corsair' in your device's Bluetooth settings and select it to pair.
- Once paired, the 'BT' indicator will stop flashing, and you can stream audio from your device to the radio.
- Adjust the volume on both your external device and the radio for optimal sound.

Figure 6: Bluetooth Streaming. This image illustrates connecting an external device via Bluetooth to the radio.
Video 2: CR612B Corsair Tabletop AM/FM Bluetooth Radio with CD Player. This video provides an overview of the radio's features, including Bluetooth connectivity.
5.5 Žadintuvo funkcijos
- Nustatymo laikas: Paspauskite ir palaikykite LAIKAS mygtuką. Naudokite PRALEISTI / PAIEŠKA buttons to adjust hours and minutes, then press LAIKAS dar kartą patvirtinti.
- 1/2 žadintuvo nustatymas: Paspauskite ir laikykite bet kurį 1 pavojaus signalas or 2 pavojaus signalas mygtuką. Naudokite PRALEISTI / PAIEŠKA buttons to set the alarm time. Press the respective SIGNALAS button again to select the alarm source (Buzzer, Radio, or CD) and confirm.
- Signalizacijos įjungimas / išjungimas: Trumpai paspauskite 1 pavojaus signalas or 2 pavojaus signalas , kad įjungtumėte arba išjungtumėte žadintuvą. Kai žadintuvas aktyvus, ekrane pasirodys jo piktograma.
- Snausti: Kai suskamba žadintuvas, paspauskite SNAIGĖ button on top of the unit to temporarily silence it. The alarm will sound again after a few minutes.
- Miego laikmatis: Paspauskite MIEGAS Pakartotinai spauskite mygtuką , kad nustatytumėte miego laikmatį (pvz., 15, 30, 60, 90 minučių). Įrenginys automatiškai išsijungs po nustatyto laiko.
5.6 Ausinių naudojimas
Prijunkite 3.5 mm ausines prie Ausinių lizdas on the front panel for private listening. The main speakers will be muted automatically.
6. Priežiūra
6.1 Valymas
- Nuvalykite įrenginio išorę minkštu, sausu skudurėliu.
- Nenaudokite abrazyvinių valiklių, vaško ar tirpiklių, nes jie gali pažeisti apdailą.
- CD skyrių laikykite švarų ir be dulkių.
6.2 Saugykla
When not in use for extended periods, unplug the unit from the power outlet and store it in a cool, dry place.
7. Problemų sprendimas
| Problema | Galima priežastis | Sprendimas |
|---|---|---|
| Nėra galios | Maitinimo laidas netinkamai prijungtas. | Ensure the AC power adapter is firmly plugged into the unit and a working wall outlet. |
| Prastas radijo priėmimas | Silpnas signalas. | Adjust the position of the FM wire antenna. For AM, try repositioning the unit. |
| CD negroja | Kompaktinis diskas įdėtas neteisingai arba nešvarus / subraižytas. | Ensure the CD is inserted label-side up. Clean the CD with a soft cloth. Try a different CD. |
| „Bluetooth“ neprisijungia | Įrenginys nėra susiejimo režime arba yra per toli. | Ensure the radio is in Bluetooth mode and 'BT' is flashing. Move your device closer to the radio. Check your device's Bluetooth settings. |
| Signalizacija neskamba | Signalizacija nenustatyta arba išjungta. | Verify alarm time and source are set correctly and the alarm is activated (icon visible). |
8. Specifikacijos
| Prekės ženklas | Kroslis |
| Modelio numeris | CR612B-AB |
| Spalva | Aqua Blue |
| Gaminio matmenys (I x P x A) | 6.75 colio ilgio x 11.5 colių pločio x 7.25 colio aukščio |
| Ryšio technologija | Bluetooth |
| Palaikomos radijo juostos | AM/FM |
| Garso išvesties režimas | Stereo |
| Maitinimo šaltinis | Kintamosios srovės adapteris |
| Baterijos reikalavimas | 1 x 9V battery (for backup, not included) |
| Ekrano tipas | LED |
| Medžiaga | Chrome (accents) |

Figure 7: Product Dimensions. This diagram provides the overall measurements of the unit.
9. Garantija ir palaikymas
9.1 Informacija apie garantiją
Šiam gaminiui taikomas a One Year Limited Manufacturer's Warranty. Please refer to the warranty card included in your packaging for full details on coverage and terms.
9.2 Pagalba klientams
For technical assistance, troubleshooting, or warranty claims, please contact Crosley customer support. Contact information can typically be found on the manufacturer's official websvetainėje arba ant produkto pakuotės.