1. Įvadas
This manual provides detailed instructions for the setup, operation, and maintenance of your BMW Multi-Function Clock, Alarm, and Weather Station. This device combines a digital clock, an alarm with a snooze function, and a weather station that displays temperature. Please read this manual carefully before use to ensure proper functionality and to maximize your experience with the product.
2. Pakuotės turinys
Išpakuodami patikrinkite pakuotės turinį. Jei trūksta kokių nors daiktų arba jie pažeisti, susisiekite su pardavėju.
- BMW Multi-Function Clock, Alarm, and Weather Station Unit
- Vartotojo vadovas (šis dokumentas)
3. Sąranka
3.1. Akumuliatoriaus įdėjimas
Prietaisas reikalauja 2 AAA baterijos (nepridedama) veikimui. Norėdami įdėti baterijas, atlikite šiuos veiksmus:
- Įrenginio gale suraskite baterijų skyriaus dangtelį.
- Švelniai pastumkite arba pakelkite dangtelį, kad atidarytumėte skyrių.
- Įdėkite dvi AAA tipo baterijas, užtikrindami teisingą poliškumą (+ ir -), kaip nurodyta skyrelio viduje.
- Saugiai uždėkite akumuliatoriaus skyriaus dangtelį.

3.1 paveikslas: Atgal view of the device, illustrating the battery compartment and control buttons for setup.
3.2. Pradinis įjungimas
After battery installation, the device display will illuminate, and it will typically show a default time or begin searching for a signal (if applicable for weather functions). Proceed to the operating instructions to set the time and other functions.
4. Naudojimo instrukcijos
4.1. Laiko ir datos nustatymas
Norėdami nustatyti dabartinį laiką ir datą:
- Paspauskite ir palaikykite REŽIMAS button (usually located on the back or side) for a few seconds until the time display starts flashing.
- Naudokite UP or ŽEMYN buttons (often labeled '+' or '-') to adjust the hour.
- Paspauskite REŽIMAS again to confirm the hour and move to the minutes.
- Nustatykite minutes naudodami UP or ŽEMYN mygtukai.
- Spauskite toliau REŽIMAS and adjusting with AUKŠTYN/ŽEMYN for year, month, and day settings.
- Paspauskite REŽIMAS paskutinį kartą, kad išeitumėte iš nustatymų režimo.
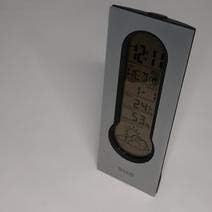
4.1 paveikslas: Front display of the device, showing the digital clock, temperature, and weather forecast icons.
4.2. Žadintuvo nustatymas
Norėdami nustatyti žadintuvo laiką:
- Įprastu laiko rodymo režimu paspauskite SIGNALAS mygtuką (arba REŽIMAS repeatedly until 'AL' or an alarm icon appears).
- Paspauskite ir palaikykite SIGNALAS mygtuką, kol pradės mirksėti žadintuvo laikas.
- Naudokite UP or ŽEMYN mygtukus, kad nustatytumėte norimą žadintuvo valandą.
- Paspauskite SIGNALAS again to confirm the hour and move to the minutes.
- Nustatykite minutes naudodami UP or ŽEMYN mygtukai.
- Paspauskite SIGNALAS one last time to save the alarm setting. An alarm icon will typically appear on the display to indicate the alarm is active.
4.3. Using Snooze Function
Kai skamba žadintuvas, paspauskite SNAIGĖ button (usually a large button on the top of the unit) to temporarily silence the alarm. The alarm will sound again after a few minutes (typically 5-10 minutes, depending on the model). To turn off the alarm completely, press any other button or let it ring until it automatically stops.

4.2 paveikslas: Į viršų view of the device, highlighting the prominent SNOOZE button.
4.4. Temperatūros ekranas
The device continuously displays the ambient temperature. The temperature unit (Celsius or Fahrenheit) can usually be switched by pressing a dedicated button (e.g., 'C/F' or 'TEMP') or by holding down one of the adjustment buttons during time setting.
4.5. Weather Station Function
The integrated weather station provides a basic weather forecast using graphical icons (e.g., sun, clouds, rain). This forecast is based on internal barometric pressure changes and is an estimation for the local area. It is not connected to external weather services.
5. Priežiūra
5.1. Valymas
To clean the device, use a soft, dry cloth. Do not use abrasive cleaners, solvents, or chemical sprays, as these can damage the surface and electronic components. Avoid getting moisture into the device.
5.2. Baterijos keitimas
When the display dims or functions become erratic, it is time to replace the batteries. Follow the battery installation steps in Section 3.1. Always replace both batteries at the same time with new AAA batteries.
6. Problemų sprendimas
Jei kyla problemų dėl įrenginio, žr. toliau pateiktas dažniausiai pasitaikančias problemas ir sprendimus:
- Ekranas tuščias arba blankus:
Check if batteries are installed correctly. Replace with fresh AAA batteries. - Laikas arba data neteisinga:
Refer to Section 4.1 to reset the time and date. Ensure you confirm each setting step. - Signalizacija neskamba:
Verify that the alarm is set and activated (look for an alarm icon on the display). Ensure the volume is not set to zero if adjustable. - Temperatūros rodmenys atrodo netikslūs:
Ensure the device is not placed in direct sunlight, near heat sources, or in drafts, which can affect readings. Allow some time for the sensor to stabilize after placement. - Weather forecast icons are not changing:
The weather forecast is based on local barometric pressure changes and may take time to update. It provides a general trend, not a precise forecast.
7. Specifikacijos
| Funkcija | Detalė |
|---|---|
| Prekės ženklas | BMW |
| Modelio numeris | 06017443015007 |
| Ypatingos savybės | Alarm, Snooze, Temperature Display |
| Maitinimo šaltinis | Baterija |
| Baterijos tipas | 2 x AAA baterijos (į komplektą neįeina) |
| ASIN | B089QGJ9VR |
8. Garantija ir palaikymas
This product is covered by a standard manufacturer's warranty. For specific warranty terms and conditions, please refer to the documentation provided at the time of purchase or contact your retailer. For technical support or service inquiries, please reach out to the point of purchase or the manufacturer's customer service department.