
Įvadas
This manual provides comprehensive instructions for the Vivitar Podcast and Social Media Microphone MIC918. This high-quality condenser microphone is designed for clear audio capture for various applications, including podcasting, live streaming, gaming, voice-overs, and vocal recording. It features a simple plug-and-play USB connection, integrated volume control, and a stable tripod stand for optimal positioning.
Saugos informacija
- Saugokite mikrofoną nuo vandens ar per didelės drėgmės.
- Venkite ekstremalių temperatūrų ar tiesioginių saulės spindulių.
- Nebandykite ardyti ar modifikuoti mikrofono. Tai panaikins garantiją.
- Saugokite mikrofoną nuo stiprių magnetinių laukų.
- Valymui naudokite tik minkštą, sausą šluostę.
Produktas baigtasview
Pakuotės turinys
- Vivitar MIC918 Microphone Unit
- Trikojo stovas
- Integrated USB Connection Cable
Mikrofono komponentai
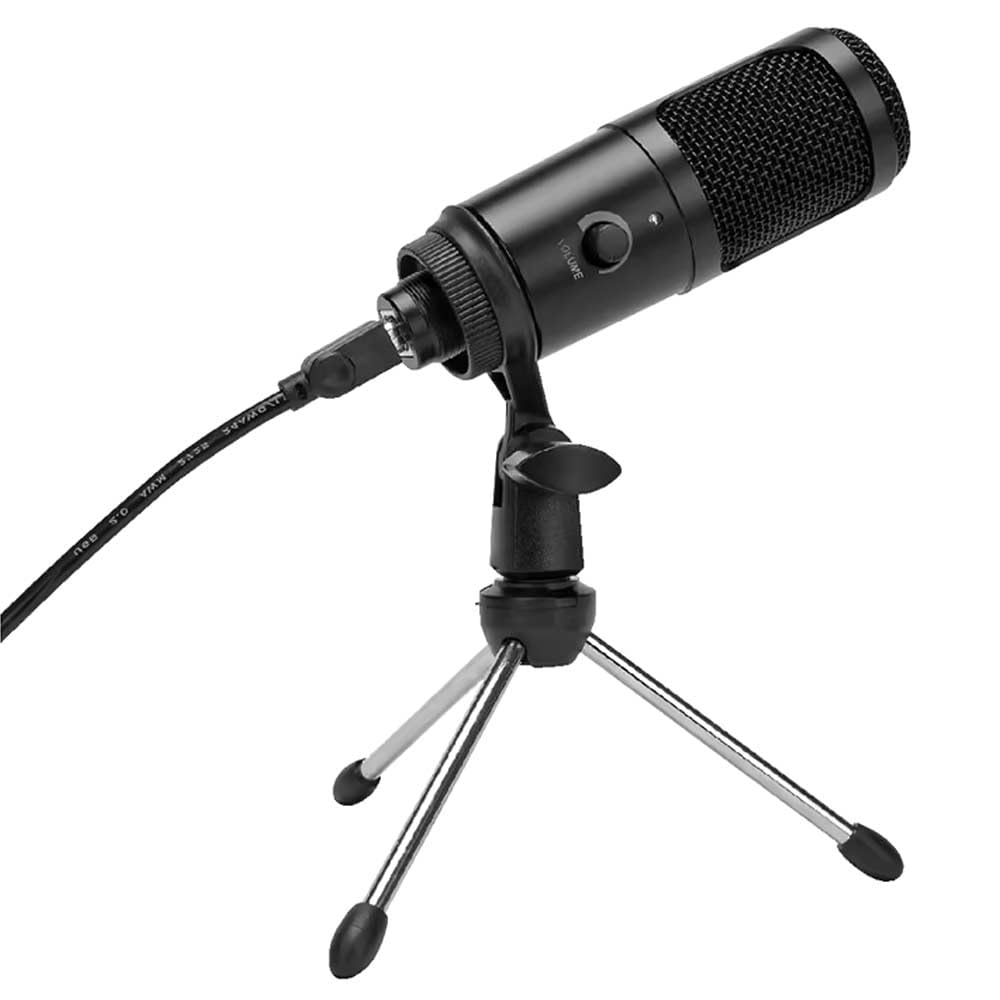
1 paveikslas: Vivitar MIC918 Microphone unit attached to its tripod stand, showing the integrated USB cable.

2 paveikslas: Šoninė view of the Vivitar MIC918 Microphone, highlighting the volume control knob and the Vivitar brand logo.
The microphone unit features a durable metal construction. The front side includes a volume control knob for easy audio level adjustments. The microphone is designed with a unidirectional polar pattern to focus on sound directly in front of it, reducing background noise.
Sąranka
Mikrofono prijungimas
- Surinkite stovą: If not already assembled, unfold the tripod stand and ensure it is stable on a flat surface. Securely attach the microphone unit to the stand's mounting point. The rotating shaft ring allows for angle adjustment.
- Prisijunkite prie įrenginio: Plug the integrated USB cable from the microphone into an available USB port on your computer, laptop, or compatible gaming console.
- Plug and Play: The Vivitar MIC918 is a plug-and-play device. Your operating system (Windows, macOS, etc.) should automatically detect and install the necessary drivers. No additional software installation is typically required.
- Pasirinkite kaip įvesties įrenginį: After connecting, navigate to your device's sound settings or the audio settings within your recording/streaming software. Select the "Vivitar MIC918" or similar USB audio device as your primary input (microphone) device.
Veikiantis
Garso reguliavimas
The microphone features a built-in volume control knob located on its side (refer to Figure 2). Rotate this knob clockwise to increase the microphone's input sensitivity (volume) and counter-clockwise to decrease it. Adjust this to achieve the desired recording level without distortion.
Mikrofono padėties nustatymas
For optimal audio capture, position the microphone directly in front of the sound source (e.g., your mouth for speaking or singing). The tilting tripod stand allows you to adjust the microphone's angle to best suit your needs. Due to its unidirectional polar pattern, the microphone is most sensitive to sounds coming from the front and less sensitive to sounds from the sides or rear, helping to minimize ambient noise.
Priežiūra
- Valymas: Use a soft, dry, lint-free cloth to wipe the microphone's exterior. Do not use liquid cleaners, aerosols, or solvents.
- Saugykla: When not in use, store the microphone in a clean, dry place, away from dust and extreme temperatures.
- Tvarkymas: Elkitės su mikrofonu atsargiai. Venkite jo numesti ir stipriai sutrenkti.
Trikčių šalinimas
| Problema | Galima priežastis | Sprendimas |
|---|---|---|
| Iš mikrofono nėra garso išvesties. | Mikrofonas netinkamai prijungtas. Pasirinktas neteisingas įvesties įrenginys. Mikrofono garsumas per mažas. | Ensure USB cable is securely plugged into both the microphone and the device. Verify that "Vivitar MIC918" is selected as the input device in your system's sound settings or recording software. Increase the volume using the knob on the microphone and check system input levels. |
| Poor sound quality (e.g., muffled, too quiet, background noise). | Neteisingas mikrofono išdėstymas. Didelis aplinkos triukšmas. Input level too high or too low. | Position the microphone closer to the sound source and ensure it's facing directly towards it. Įrašykite tylesnėje aplinkoje. Adjust the microphone's volume knob and system input levels to an optimal range, avoiding clipping or being too faint. |
| Kompiuteris neatpažįsta mikrofono. | Sugedęs USB prievadas arba kabelis. System driver issue. | Pabandykite prijungti mikrofoną prie kito kompiuterio USB prievado. Restart your computer. If the issue persists, check your operating system's device manager for any driver conflicts or updates. |
Specifikacijos
| Funkcija | Specifikacija |
|---|---|
| Prekės ženklas | „Vivitar“ |
| Modelio numeris | MIC918 |
| Ryšys | USB (prijunk ir žaisk) |
| Mikrofono tipas | Kondensatorius |
| Polinis raštas | Vienakryptis |
| Signalo ir triukšmo santykis | 78 dB |
| Korpuso medžiaga | Metalas |
| Prekės svoris | 0.95 svaro (apie 0.43 kg) |
| Prekės matmenys (I x P x A) | 8.86 x 5.36 x 2.49 colio (apytiksliai 22.5 x 13.6 x 6.3 cm) |
| Maitinimo šaltinis | Laidinis elektrinis (per USB) |
| Suderinami įrenginiai | Computers, Laptops, Gaming Consoles |
Informacija apie garantiją
The Vivitar Podcast and Social Media Microphone MIC918 comes with a 3-Year USA Warranty. For specific terms, conditions, and to register your product, please refer to the official Vivitar websvetainėje arba susisiekite tiesiogiai su jų klientų aptarnavimo tarnyba. Išsaugokite pirkimo įrodymą garantiniams reikalavimams.
Pagalba klientams
For further assistance, technical support, or inquiries regarding your Vivitar MIC918 microphone, please visit the official Vivitar website or contact their customer service department. Contact information can typically be found on the Vivitar websvetainės skiltyje „Pagalba“ arba „Susisiekite su mumis“.