
1. Įvadas
Thank you for choosing the ONE Light 10105TR/W Trimless GU10 50W Recessed Spotlight. This manual provides essential information for the safe installation, operation, and maintenance of your new lighting fixture. Please read these instructions carefully before installation and retain them for future reference. This product complies with EN60598-1 and other specific standards.
2. Saugos instrukcijos
- Always disconnect the power supply at the main circuit breaker before installation, maintenance, or bulb replacement.
- Montavimą turi atlikti kvalifikuotas elektrikas, laikydamasis visų vietinių elektros kodeksų ir taisyklių.
- Šis gaminys skirtas naudoti tik patalpose. Do not install in wet or damp vietos.
- Ensure the ceiling material can support the weight of the fixture.
- Neviršykite didžiausios galiostage of 50W for the GU10 bulb.
- Avoid touching the bulb directly with bare hands, as oils can reduce bulb life.
- Laikykite degias medžiagas atokiai nuo šviestuvo.
3. Pakuotės turinys
Prieš pradėdami diegti, patikrinkite, ar yra visi komponentai:
- 1x Recessed Spotlight Housing (White Aluminum)
- Montavimo įranga
- Elektros laidas
- Lipnus padas
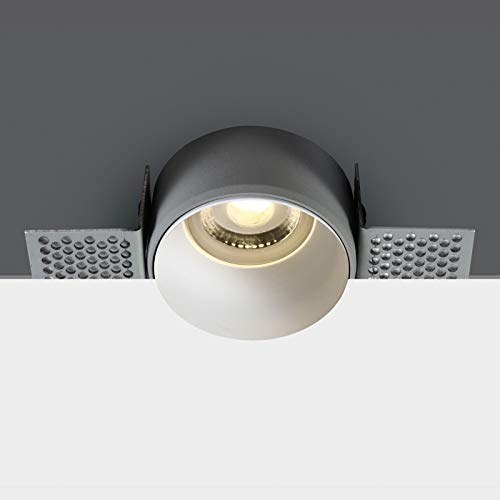
Image 1: Components of the ONE Light Trimless Recessed Spotlight, showing the mounting bracket and the light housing.
4. Sąranka ir diegimas
This trimless recessed spotlight requires careful installation to achieve a seamless finish. Professional installation is recommended.
4.1 Dimensions and Preparation
Before cutting, ensure the chosen location avoids joists, pipes, or electrical wires. Refer to the dimensional diagram for precise cutout requirements.

Image 2: Dimensional diagram of the ONE Light Trimless Recessed Spotlight, indicating a 60mm diameter and 40mm height.
4.2 diegimo žingsniai
- Išjunkite maitinimą: Įsitikinkite, kad pagrindinis maitinimo šaltinis montavimo vietoje yra išjungtas grandinės pertraukikliu.
- Paruoškite lubų angą: Using the provided dimensions (60mm diameter), cut a precise hole in the ceiling. For trimless installation, additional plastering work around the fixture may be required after mounting the housing.
- Laidų jungtys: Connect the electrical cord from the spotlight housing to your main electrical wiring. Ensure all connections are secure and insulated according to local electrical codes.
- Kalno korpusas: Insert the spotlight housing into the ceiling opening. Use the provided mounting hardware to secure the housing firmly in place. For a trimless finish, the housing should be flush with the ceiling surface, ready for plastering.
- Install GU10 Bulb: Once the housing is securely installed and any finishing work is complete, insert a GU10 bulb (max 50W) into the lamp holder. Twist to lock it in place.
- Galutinė asamblėja: Insert the inner light component into the outer housing.
- Atkurti maitinimą: Kai įrengimas baigtas ir visos jungtys pritvirtintos, atkurkite elektros tiekimą automatiniu jungikliu.
5. Naudojimo instrukcijos
The ONE Light 10105TR/W spotlight operates via a standard wall switch connected to its electrical circuit. This fixture is nėra pritemdomas.
5.1 Lemputės keitimas
To replace the GU10 bulb:
- Išjunkite maitinimą: Always disconnect power at the circuit breaker before replacing the bulb.
- Leiskite atvėsti: Let the old bulb cool down completely before touching it.
- Remove Bulb: Gently push the bulb upwards and twist it counter-clockwise to release it from the GU10 base.
- Įdėkite naują lemputę: Align the pins of the new GU10 bulb with the slots in the lamp holder. Push upwards and twist clockwise to secure it. Ensure the new bulb is a GU10 type and does not exceed 50W.
- Atkurti maitinimą: Atkurkite maitinimą prie grandinės pertraukiklio.
6. Priežiūra
The ONE Light 10105TR/W spotlight requires minimal maintenance.
- Valymas: Ensure the power is off and the fixture is cool. Wipe the exterior with a soft, dry cloth. Do not use abrasive cleaners or solvents, as they may damage the finish.
- Nėra vartotojo aptarnaujamų dalių: Other than bulb replacement, there are no user-serviceable parts inside the fixture. Do not attempt to disassemble the unit.
7. Problemų sprendimas
Jei kyla problemų dėl prožektoriaus, žr. šias dažniausiai pasitaikančias problemas ir sprendimus:
- Šviesa neįsijungia:
- Check if the power supply to the fixture is on at the circuit breaker and wall switch.
- Ensure the GU10 bulb is correctly installed and not faulty. Try replacing it with a known working bulb.
- Patikrinkite, ar elektros jungtys yra tvirtos (jei abejojate, kreipkitės į kvalifikuotą elektriką).
- Šviesos mirgėjimas:
- Ensure the GU10 bulb is fully seated and twisted into the base.
- The bulb may be faulty or nearing the end of its life. Replace the bulb.
- Patikrinkite, ar nėra atsilaisvinusių laidų jungčių (pasikonsultuokite su kvalifikuotu elektriku).
8. Specifikacijos
| Funkcija | Specifikacija |
|---|---|
| Prekės ženklas | ONE Light |
| Modelio numeris | 10105TR/W (Internal: 178a2842-1e75-4e3c-87ee-d3a8b094c1aa) |
| Medžiaga | Aliuminis |
| Spalva | Baltas |
| Matmenys (aukštis) | 40 mm |
| Lemputės pagrindas | GU10 |
| Maksas Vatastage | 50 vatų |
| ttage | 120 voltų |
| Šviesos šaltinis | Keičiamas Lamp (Halogen/LED compatible) |
| Pritemdomas | Nr |
| Diegimo tipas | Recessed / Flush Mount |
| Naudojimo aplinka | Tik patalpose |
| Energijos efektyvumas | Compatible with bulbs A++ to E |
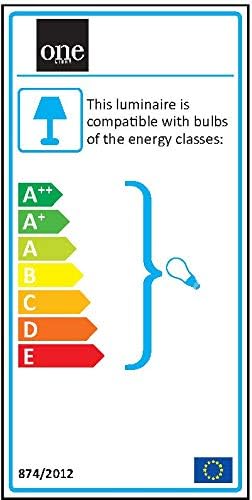
Image 3: EU Energy Label for the luminaire, indicating compatibility with bulbs of various energy classes from A++ to E.
9. Garantija ir palaikymas
This product is covered by a standard manufacturer's warranty. For specific warranty terms and conditions, please refer to the documentation provided at the point of purchase or contact your retailer. For technical support or inquiries, please reach out to your seller or the ONE Light customer service department.