
Garage-Pro JCWKIT-011718-14GP
Garage-Pro Front Bumper Kit Installation and Maintenance Manual
Model: JCWKIT-011718-14GP
Įvadas
This manual provides essential information for the proper installation, care, and maintenance of your Garage-Pro Front Bumper Kit. This kit is designed as a direct replacement for 2011-2014 Chevrolet Silverado 2500 HD and 3500 HD models. Please read all instructions carefully before beginning installation to ensure safety and optimal performance.
The kit includes chrome steel components with provisions for fog lights, offering a durable and aesthetically matching replacement for your vehicle's front bumper assembly.
Gaminio specifikacijos
| Funkcija | Detalė |
|---|---|
| Prekės ženklas | Garage-Pro |
| Modelio numeris | JCWKIT-011718-14GP |
| Suderinamumas | 2011-2014 Chevrolet Silverado 2500 HD, 2011-2014 Chevrolet Silverado 3500 HD |
| Medžiaga | Legiruotasis plienas |
| Baigti | Chrome |
| Savybės | Su rūko žibintų skylėmis |
| Prekės svoris | 37.5 svaro |
| Pakuotės matmenys | 68 x 26.5 x 19 colio |
| Keitimo dalių numeriai | 25883349, GM1002837, 25883355, GM1014106, 20845670, GM1095195, 19370763, GM1092213 |
Sąranka ir diegimas
Professional installation is recommended for this product. If you choose to perform the installation yourself, ensure you have the necessary tools and technical knowledge. Always prioritize safety.
Reikalingi įrankiai
- Galvučių rinkinys (įvairūs dydžiai)
- Wrench or Ratchet
- Atsuktuvų rinkinys (Phillips ir plokščiagalviai)
- Apdailos plokščių nuėmimo įrankiai
- Apsauginiai akiniai
- Pirštinės
- Jack and Jack Stands (if lifting the vehicle)
Saugos priemonės
- Visada dėvėkite tinkamas asmenines apsaugos priemones, įskaitant apsauginius akinius ir pirštines.
- Įsitikinkite, kad transporto priemonė pastatyta ant lygaus paviršiaus ir įjungtas stovėjimo stabdys.
- If lifting the vehicle, use sturdy jack stands to support it securely.
- Disconnect the vehicle's battery before starting work to prevent electrical shorts, especially if working near wiring for fog lights or sensors.
- Refer to your vehicle's service manual for specific instructions on removing the original bumper.
Diegimo veiksmai (bendrasis vadovas)
- Paruoškite transporto priemonę: Park the vehicle on a flat surface, engage the parking brake, and disconnect the negative terminal of the battery.
- Remove Existing Bumper Components:
- Carefully remove any splash shields, fender liners, or trim panels that obstruct access to the bumper mounting hardware.
- Disconnect any electrical connectors for fog lights, parking sensors, or other accessories integrated into the original bumper.
- Unbolt the existing bumper assembly from the vehicle frame. This typically involves bolts located behind the bumper, inside the wheel wells, and sometimes from underneath.
- With assistance, carefully remove the old bumper assembly from the vehicle.
- Assemble New Bumper Kit Components:
The Garage-Pro Front Bumper Kit consists of multiple pieces. Assemble these components before mounting the complete bumper to the vehicle.
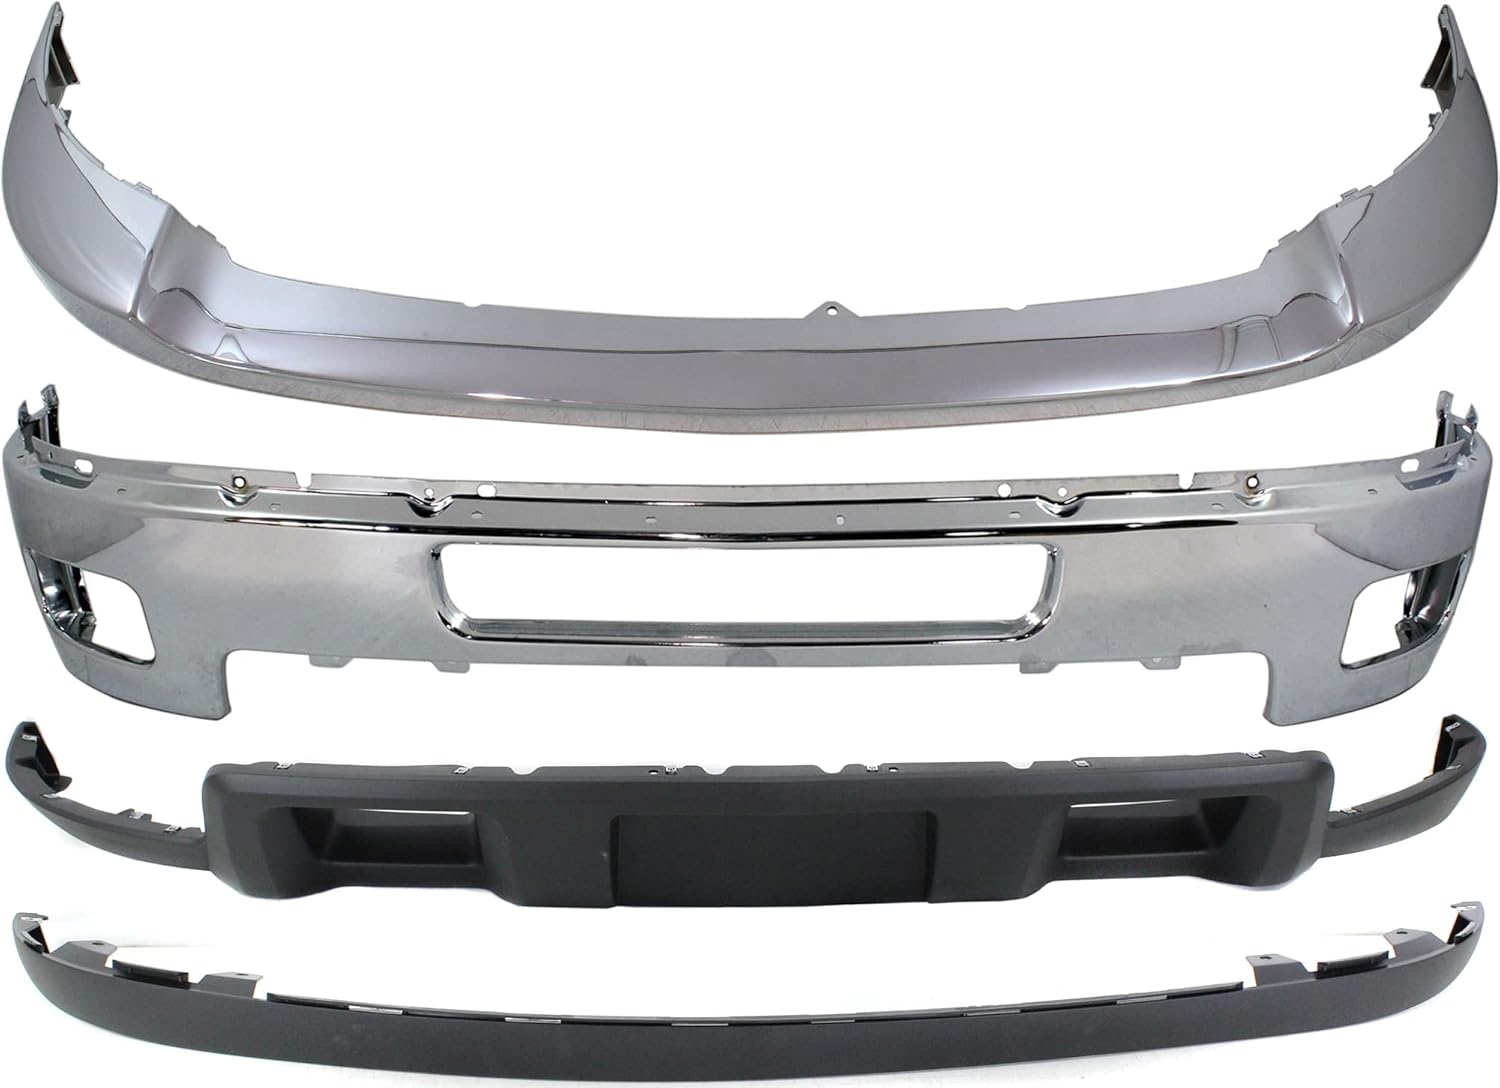
1 vaizdas: Baigtaview of all bumper kit components.
This image displays the complete Garage-Pro Front Bumper Kit, including the upper chrome valance, the main chrome bumper with fog light openings, and the lower black valance and trim pieces.
- Attach the upper chrome valance to the main chrome bumper.
- Install the lower black valance and any associated trim pieces to the main bumper assembly.
- Transfer any necessary components from the old bumper to the new one, such as fog lights, wiring harnesses, or parking sensors.

2 vaizdas: priekis view of the upper chrome valance.
This image shows the front side of the chrome upper valance, a key component of the bumper assembly.

3 vaizdas: priekis view of the main chrome bumper.
This image illustrates the main chrome bumper section, featuring openings for fog lights and mounting points.

4 vaizdas: priekis view of the black lower valance.
This image shows the front side of the black lower valance, which attaches to the main bumper.

5 vaizdas: priekis view of the black bumper trim.
This image displays the front side of the black trim piece, which completes the lower section of the bumper assembly.
- Mount New Bumper Assembly:
- With assistance, carefully lift the new bumper assembly into position on the vehicle.
- Align the mounting holes and loosely attach the bumper to the vehicle frame using the appropriate bolts.
- Reconnect all electrical connectors for fog lights and any other sensors.
- Once aligned, tighten all mounting bolts to the manufacturer's specified torque settings (refer to your vehicle's service manual).
- Reinstall Trim and Test:
- Reinstall any removed splash shields, fender liners, or trim panels.
- Prijunkite transporto priemonės akumuliatorių.
- Test all lights and sensors (e.g., fog lights, parking sensors) to ensure they are functioning correctly.
- Visually inspect the bumper for proper alignment and secure fitment.
Priežiūra
Regular maintenance will help preserve the appearance and integrity of your Garage-Pro Front Bumper Kit.
- Valymas: Wash the chrome surfaces regularly with mild automotive soap and water. Avoid abrasive cleaners or harsh chemicals that can damage the chrome finish. Dry thoroughly with a soft cloth to prevent water spots.
- Patikra: Periodically inspect the bumper for any signs of damage, loose fasteners, or corrosion. Address any issues promptly to prevent further deterioration.
- Apsauga: Consider applying a quality chrome polish or wax to provide an additional layer of protection against environmental elements.
Troubleshooting and Common Issues
This section addresses common concerns that may arise after installation or during the lifespan of your bumper kit.
- Laisvas montavimas: If the bumper feels loose or rattles, re-check all mounting bolts and ensure they are tightened to the correct specifications. Verify that all clips and fasteners are properly engaged.
- Fog Lights Not Working: Check electrical connections to the fog lights. Ensure the bulbs are correctly seated and not burnt out. Verify that the vehicle's fog light circuit is operational.
- Nedideli įbrėžimai ar įlenkimai: For minor surface imperfections on the chrome, specialized chrome repair kits or polishes may be used. For significant damage, professional repair or replacement of the affected component may be necessary.
- Korozija: While chrome steel is designed for durability, prolonged exposure to harsh conditions or lack of maintenance can lead to corrosion. Address small rust spots with appropriate chrome rust removers and ensure regular cleaning and protection.
Garantija ir palaikymas
Garage-Pro products are manufactured to high standards. For specific warranty information regarding your Front Bumper Kit, please refer to the documentation provided with your purchase or contact the seller directly. The manufacturer ensures quality parts and fitment.
For technical assistance or inquiries, please reach out to the retailer or manufacturer's customer support channels.
Ask a question about this manual
Ask about setup, troubleshooting, compatibility, parts, safety, or missing instructions. Manuals+ will review the question and use this page’s manual context to help answer it.