
Įvadas
This user manual provides detailed instructions for the installation, operation, maintenance, and troubleshooting of your Xprinter XP-K200L 80mm Thermal Receipt Printer. Please read this manual thoroughly before using the printer to ensure proper function and to extend the product's lifespan. Keep this manual for future reference.
Saugos informacija
- Visada naudokite prie spausdintuvo pridėtą maitinimo adapterį.
- Saugokite spausdintuvą nuo vandens ar drėgmės.
- Venkite spausdintuvo laikymo tiesioginiuose saulės spinduliuose arba šalia šilumos šaltinių.
- Užtikrinkite tinkamą ventiliaciją aplink spausdintuvą.
- Nebandykite patys ardyti ar taisyti spausdintuvo. Kreipkitės į kvalifikuotus techninės priežiūros darbuotojus.
- Laikyti vaikams nepasiekiamoje vietoje.
Pakuotės turinys
Išpakuodami patikrinkite pakuotės turinį. Jei trūksta kokių nors daiktų arba jie pažeisti, susisiekite su pardavėju.
- Xprinter XP-K200L Thermal Receipt Printer
- Maitinimo adapteris
- Maitinimo laidas
- USB kabelis
- Terminio popieriaus ritinėlis (pradinis ritinėlis)
- Kasos stalčiaus kabelis
- Vartotojo vadovas (šis dokumentas)
Produktas baigtasview
Familiarize yourself with the main components of your Xprinter XP-K200L thermal receipt printer.

1 pav.: šonas view of the Xprinter XP-K200L thermal receipt printer. On the right, the power switch is visible, and on the left, a button to open the paper cover is present.
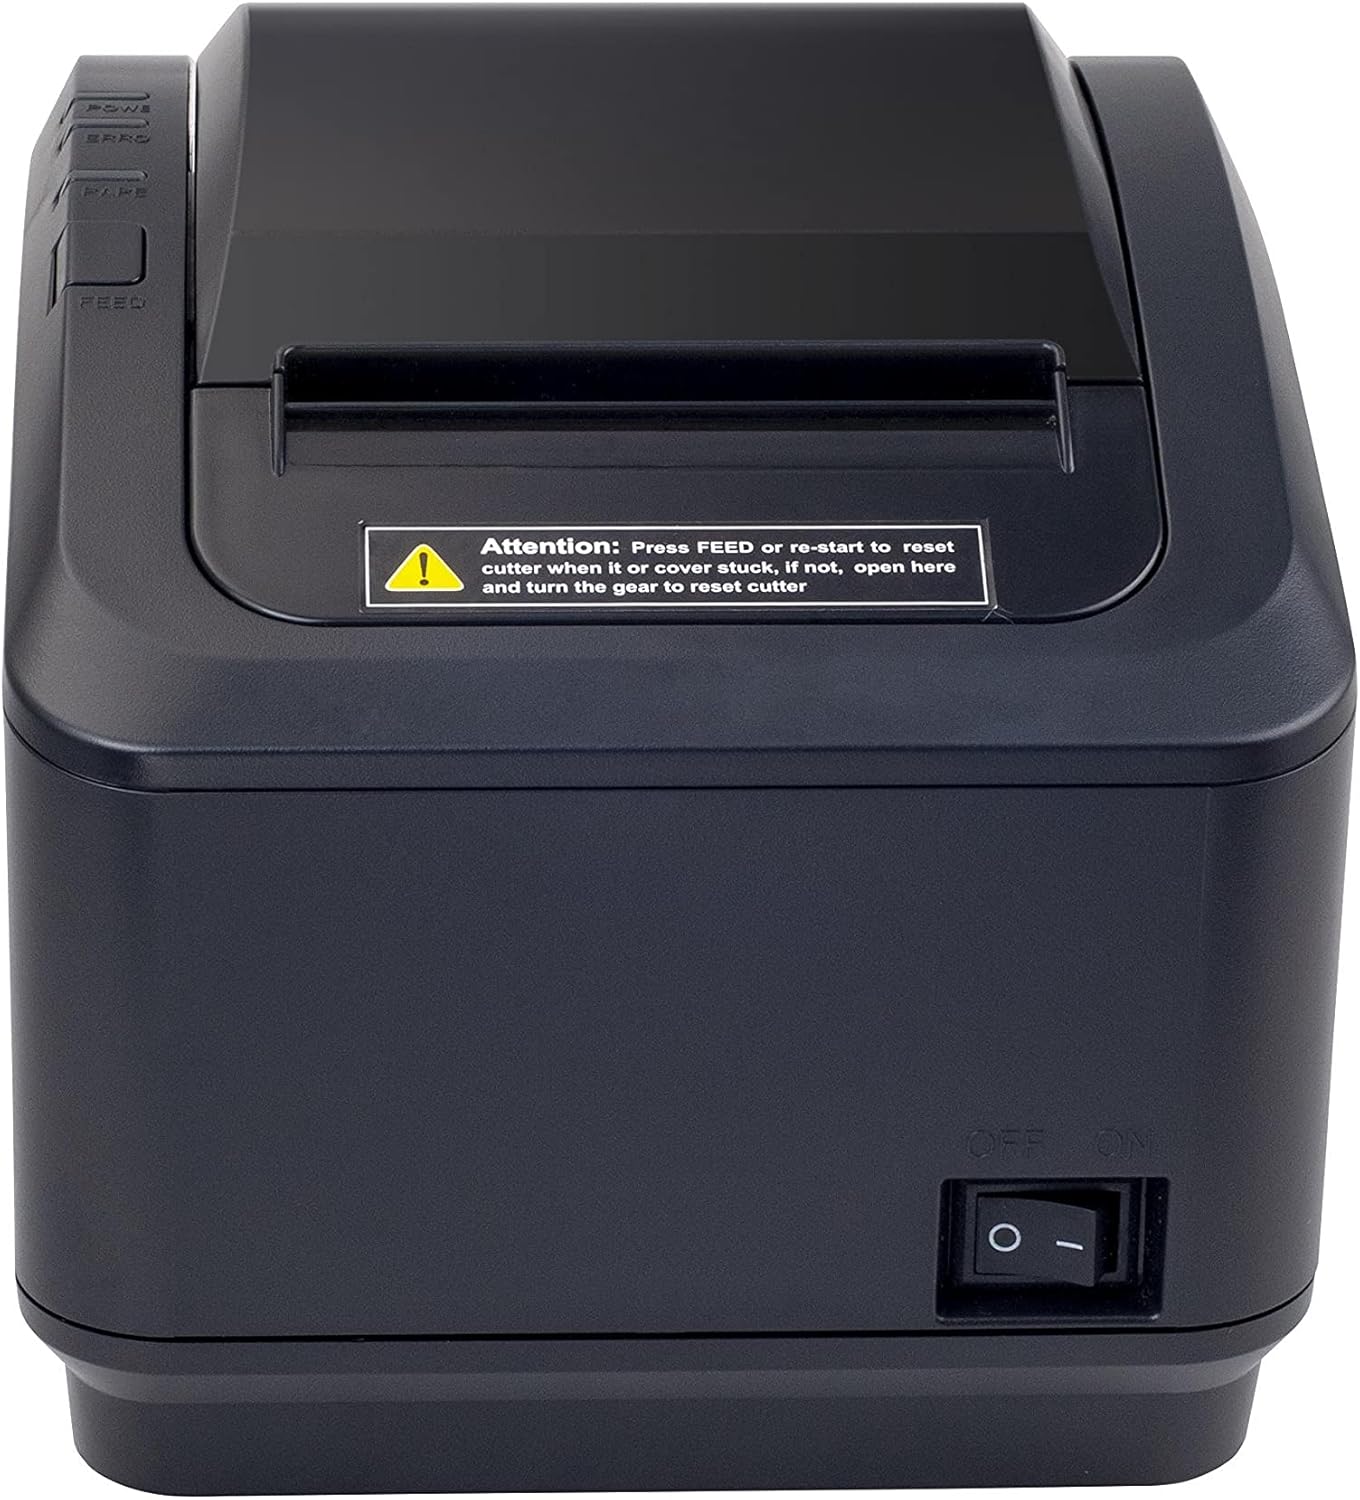
2 pav.: Priekinė dalis view of the Xprinter XP-K200L thermal receipt printer. The paper output slot is at the top, and below it are control buttons for functions like feed and error reset. A warning label is also visible.

Figure 3: This image displays the Xprinter XP-K200L thermal receipt printer with its top cover open, showing the internal compartment where the thermal paper roll is loaded. The print head mechanism is also visible.
Sąranka
1. Maitinimo prijungimas
- Ensure the printer's power switch is in the IŠJUNGTA padėtis.
- Prijunkite maitinimo adapterį prie spausdintuvo maitinimo prievado.
- Įkiškite maitinimo laidą į tinkamą elektros lizdą.
2. Terminio popieriaus įdėjimas
- Press the cover open button (refer to Figure 1) to open the top cover of the printer.
- Insert a new 80mm thermal paper roll into the compartment, ensuring the paper feeds from the bottom and the leading edge extends slightly out of the printer.
- Close the top cover firmly until it clicks into place. Ensure there is no slack in the paper roll.
3. Connecting to a Computer/Network
The XP-K200L printer supports both USB and LAN (Ethernet) connectivity.
USB jungtis:
- Prijunkite vieną USB kabelio galą prie spausdintuvo USB prievado.
- Kitą USB kabelio galą prijunkite prie laisvo kompiuterio USB prievado.
- Install the printer drivers. Drivers are typically provided on a CD or can be downloaded from the manufacturer's websvebsaitą. Vadovaukitės ekrane pateikiamomis diegimo instrukcijomis.
LAN (eterneto) jungtis:
- Connect one end of an Ethernet cable to the printer's LAN port.
- Kitą Ethernet kabelio galą prijunkite prie tinklo maršruto parinktuvo arba jungiklio.
- Configure the printer's network settings (e.g., IP address) if necessary. This usually involves printing a self-test page to get the current IP address and then accessing the printer's web interface or using a utility tool provided by the manufacturer.
- Install the printer drivers on your computer, selecting the network connection option during setup.
4. Connecting a Cash Drawer
- Connect the cash drawer cable to the dedicated cash drawer port on the printer.
- Ensure your POS software is configured to send commands to open the cash drawer via the printer.
Naudojimo instrukcijos
Maitinimo įjungimas/išjungimas
- To power on the printer, flip the power switch (refer to Figure 1) to the ON padėtis.
- To power off the printer, flip the power switch to the IŠJUNGTA padėtis.
Pagrindinis spausdinimas
Once the printer is connected and drivers are installed, you can print receipts from your POS software or any application that supports printing.
- Ensure the printer is powered on and has paper loaded.
- From your application, select the print option.
- Choose the "Xprinter XP-K200L" from the list of available printers.
- Confirm print settings and click "Print".
Self-Test Page
To print a self-test page, which provides information about the printer's settings and status:
- Ensure the printer is powered off and the paper roll is loaded.
- Paspauskite ir palaikykite PAŠARAS mygtuką.
- Laikydami PAŠARAS button, turn the power switch to ON.
- Atleiskite PAŠARAS button after the printer starts printing.
Priežiūra
Spausdintuvo valymas
- Spausdinimo galvutė: Švelniai nuvalykite vatos tamponuampened with isopropyl alcohol to gently wipe the thermal print head. Allow it to dry completely before use. Clean regularly to ensure print quality.
- Pjoviklis: If the cutter becomes jammed or dirty, carefully clean it with a soft brush or cloth.
- Išorė: Spausdintuvo išorę nuvalykite minkštu, sausu skudurėliu. Nenaudokite abrazyvinių valiklių ar tirpiklių.
Terminio popieriaus keitimas
When the paper roll is depleted or near its end, replace it following the steps in the "Loading Thermal Paper" section under Setup.
Trikčių šalinimas
| Problema | Galima priežastis | Sprendimas |
|---|---|---|
| Spausdintuvas neįsijungia. | Power cord or adapter not connected properly; power outlet issue. | Patikrinkite visas maitinimo jungtis. Išbandykite kitą maitinimo lizdą. |
| Nėra spausdinimo. | No paper; paper loaded incorrectly; printer offline; driver issue; incorrect connection. | Load paper correctly. Check printer status. Reinstall drivers. Verify USB/LAN connection. |
| Prasta spausdinimo kokybė. | Dirty print head; low quality thermal paper. | Clean the print head (see Maintenance). Use recommended thermal paper. |
| Paper jam or cutter error. | Paper loaded incorrectly; debris in cutter mechanism. | As per printer label: Paspauskite PAŠARAS or re-start to reset cutter. If the issue persists, open the top cover and carefully turn the gear to reset the cutter mechanism. Ensure paper is loaded correctly and remove any obstructions. |
| Pinigų stalčius neatsidaro. | Cable not connected; POS software not configured. | Check cash drawer cable connection. Verify POS software settings for cash drawer trigger. |
Specifikacijos
| Funkcija | Detalė |
|---|---|
| Prekės ženklas | Xprinteris |
| Modelio pavadinimas | XP-K200L |
| Spausdintuvo technologija | Šiluminis |
| Ryšio technologija | USB, LAN (Ethernet) |
| Ypatingos savybės | Tinklas paruoštas |
| Spalva | Juoda |
| Spausdintuvo išvestis | Vienspalvis |
| Prekės svoris | 1.5 kg |
| Gaminio matmenys (DxPxA) | 19.5 cm x 14 cm x 13.8 cm |
| Compatible OS/Controller Type | Android (and typically Windows/Linux via drivers) |
| Spausdinimo laikmena | Plain Thermal Paper |
| Spausdinimo spalva | Juoda |
| Rezoliucija | 576 x 512 dots per inch (or dots per line) |
| Max Print Resolution B/W | 576 dpi |
| Papildomos spausdintuvo funkcijos | Tik spausdinti |
| Kontrolės metodas | Nuotolinis |
| Maksimalus laikmenos dydis | 80 mm |
| Popieriaus dydis | 79.5 mm |
| Galia | 60 vatų |
| Įtraukti komponentai | Power adapter, Cash drawer cable |
| Serija | XP-K |
| Specifiniai naudojimo būdai | Restaurants, bars, cinemas, garages, transportation, hospitals, clinics |
| Iš viso USB prievadų | 1 |
Garantija ir palaikymas
For warranty information and technical support, please refer to the documentation provided with your purchase or contact your vendor directly. Keep your proof of purchase for warranty claims.
For driver downloads and further support resources, visit the official Xprinter websvetainę.