
1. Įvadas
This manual provides detailed instructions for the installation, operation, and maintenance of the VIVOTEK ND9323P H.265 8-Channel Embedded PoE Network Video Recorder (NVR). Please read this manual thoroughly before using the product to ensure proper and safe operation. Keep this manual for future reference.
2. Saugos informacija
Observe the following safety precautions to prevent damage to the NVR and to ensure user safety:
- Maitinimas: Use only the power adapter supplied with the NVR. Ensure the power source matches the NVR's voltage reikalavimus.
- Vėdinimas: Do not block any ventilation openings. Install the NVR in a well-ventilated area to prevent overheating.
- Aplinka: Avoid exposing the NVR to water, moisture, extreme temperatures, or direct sunlight. Do not place heavy objects on the NVR.
- Aptarnavimas: Nemėginkite patys aptarnauti šio gaminio. Visą techninę priežiūrą patikėkite kvalifikuotam aptarnavimo personalui.
- Tvarkymas: Handle the NVR with care. Avoid dropping or subjecting it to strong impacts.
3. Pakuotės turinys
Carefully unpack the box and ensure all items are present and in good condition. If any items are missing or damaged, contact your vendor immediately.
- VIVOTEK ND9323P NVR įrenginys
- Maitinimo adapteris
- USB pelė
- Greito montavimo vadovas
- Accessory Pack (Screws for HDD installation, Ethernet cable)
- Case (referring to the NVR enclosure itself)
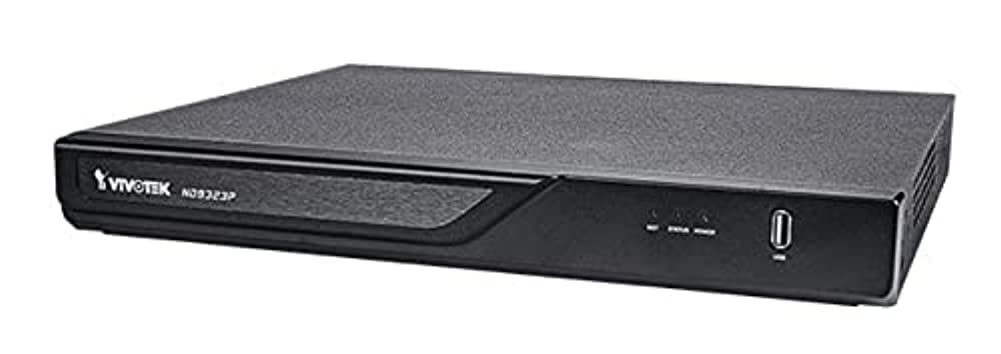
Figure 3.1: VIVOTEK ND9323P NVR unit. This image shows the front panel of the NVR, typically featuring status indicators and USB ports.
4. Produktas baigtasview
The VIVOTEK ND9323P is an 8-channel embedded Network Video Recorder designed for IP surveillance systems. It supports H.265 video compression for efficient storage and bandwidth usage. With its integrated Power over Ethernet (PoE) ports, it simplifies camera installation by providing both power and data connectivity through a single Ethernet cable.
4.1 Pagrindinės savybės
- 8-Channel Video Input
- H.265/H.264 Video Compression
- 8 x 802.3at/af PoE Ports
- Local Display Output (HDMI/VGA)
- Remote Access via VIVOTEK VIVOCloud App or VMS
- Supports up to 16TB HDD storage (HDD not included)
4.2 Priekiniai ir galiniai skydai
Refer to the Quick Installation Guide for detailed diagrams of the front and rear panels, indicating ports and indicators.
- Priekinis skydelis: Power LED, HDD LED, Network LED, USB ports.
- Galinis skydas: Power input, LAN port, PoE ports (1-8), HDMI output, VGA output, Audio I/O, USB ports.
5. Sąranka
5.1 Kietojo disko diegimas (neprivaloma)
The NVR does not typically include a pre-installed hard drive. Follow these steps to install a 3.5-inch SATA hard drive:
- Unscrew and remove the NVR's top cover.
- Prijunkite SATA duomenų ir maitinimo kabelius iš NVR prie kietojo disko.
- Secure the hard drive to the NVR chassis using the provided screws.
- Uždėkite viršutinį dangtelį ir pritvirtinkite jį varžtais.
Pastaba: Ensure the NVR is powered off and unplugged before installing or removing a hard drive.
5.2 Fiziniai ryšiai
- Prijungti kameras: Connect your IP cameras to the NVR's PoE ports (1-8) using Ethernet cables. The NVR will provide power and network connectivity to the cameras.
- Prisijunkite prie tinklo: Connect the NVR's LAN port to your local network router or switch using an Ethernet cable.
- Prijungti ekraną: Prijunkite monitorių prie NVR HDMI arba VGA išvesties prievado.
- Prijungti pelę: Prijunkite USB pelę prie vieno iš NVR USB prievadų.
- Maitinimas: Prijunkite maitinimo adapterį prie vaizdo įrašymo įrenginio maitinimo įvesties, o tada įjunkite jį į maitinimo lizdą. Vaizdo įrašymo įrenginys įsijungs automatiškai.
5.3 Pradinė konfigūracija
Upon first boot, the NVR will guide you through a setup wizard on the connected monitor:
- Kalbos pasirinkimas: Pasirinkite pageidaujamą kalbą.
- Slaptažodžio sąranka: Create a strong password for the administrator account. This is crucial for security.
- Tinklo nustatymai: Configure network settings (DHCP or Static IP). DHCP is recommended for most home users.
- Laikas ir data: Nustatykite teisingą laiko juostą, datą ir laiką.
- Kietojo disko inicijavimas: If you installed a new hard drive, the NVR will prompt you to format it. Confirm to proceed. Įspėjimas: Formatting will erase all data on the drive.
- Camera Search and Add: The NVR will automatically search for connected VIVOTEK cameras. Select and add them to the NVR.
- Baigti: Complete the wizard to access the NVR's live view.
6. NVR valdymas
6.1 Accessing the NVR
You can access and manage the NVR through various methods:
- Vietinis ekranas: Directly via the connected monitor and USB mouse.
- Web Naršyklė: Enter the NVR's IP address into a web naršyklę kompiuteryje, prijungtame prie to paties tinklo.
- VIVOTEK VIVOCloud App: Download the mobile app for remote viewvaldymas.
- VIVOTEK VAST 2 VMS: For advanced management and multi-NVR systems.
6.2 Tiesiogiai View
Gyvi view displays real-time video feeds from all connected cameras. You can switch between single-camera view, kelių kamerų tinklelis view, and customize the display layout.
6.3 Įrašymo nustatymai
Configure recording schedules and modes for each camera:
- Nepertraukiamas įrašymas: Įrašai visą parą.
- Judesio aptikimo įrašymas: Įrašo tik aptikus judesį.
- Suplanuotas įrašymas: Įrašai konkrečiais laikotarpiais.
- Renginio įrašas: Records based on external triggers or alarms.
Access these settings through the NVR's main menu: Configuration > Recording > Schedule.
6.4 Atkūrimas
Norėdami iš naujoview įrašytas footage:
- Pagrindiniame meniu pasirinkite Atkūrimas.
- Choose the camera(s) and the date/time range you wish to review.
- Use the timeline and playback controls (play, pause, fast forward, rewind) to navigate through the footage.
6.5 Event Management and Notifications
Configure the NVR to respond to events such as motion detection, camera tampering, or network disconnection. The NVR can send email notifications, trigger alarms, or start recording.
Access these settings via: Configuration > Event.
7. Priežiūra
7.1 Firmware atnaujinimai
Regularly check for and install firmware updates to ensure optimal performance, security, and access to new features. Firmware can be updated via the NVR's web interface or local display menu: Configuration > System > Firmware Upgrade.
Atsargiai: Do not power off the NVR during a firmware upgrade. This can cause permanent damage.
7.2 Kietojo disko valdymas
Monitor the health of your hard drive(s) and ensure sufficient storage space. The NVR will automatically overwrite the oldest recordings when the disk is full, based on your settings.
Access HDD status and settings via: Configuration > Storage > HDD Management.
7.3 Valymas
Keep the NVR unit clean and free from dust. Use a soft, dry cloth for cleaning. Do not use liquid cleaners or aerosols.
8. Problemų sprendimas
This section addresses common issues you might encounter with your VIVOTEK ND9323P NVR.
8.1 No Video Display on Monitor
- Patikrinkite kabelius: Įsitikinkite, kad HDMI/VGA kabelis yra tvirtai prijungtas prie NVR ir monitoriaus.
- Monitoriaus įvestis: Patikrinkite, ar monitorius nustatytas į teisingą įvesties šaltinį (HDMI/VGA).
- NVR Power: Confirm the NVR is powered on and its power LED is illuminated.
8.2 Cameras Not Showing Up / No Image
- PoE ryšys: Ensure cameras are properly connected to the NVR's PoE ports. Check if the PoE port LEDs on the NVR are active.
- Kameros galia: If not using PoE, ensure cameras are receiving power from their own power adapters.
- Tinklo ryšys: Verify the NVR and cameras are on the same network segment if not directly connected via PoE.
- Kameros būsena: Check the camera's own status indicators.
- NVR Camera Management: Eikite į Configuration > Camera > Camera Management to ensure cameras are added and enabled. Try rescanning for cameras.
8.3 Cannot Access NVR via Web Naršyklė
- IP adresas: Confirm the NVR's IP address is correct and that your computer is on the same network.
- Tinklo kabelis: Ensure the NVR's LAN port is connected to your network.
- Ugniasienė: Temporarily disable your computer's firewall to check if it's blocking access.
- Naršyklės suderinamumas: Use a recommended web naršyklė (pvz., „Chrome“, „Firefox“).
8.4 Pamirštas slaptažodis
If you forget the administrator password, you may need to perform a factory reset. Refer to the VIVOTEK support website or contact technical support for the specific procedure for your model, as this often involves a physical reset button or a specific utility.
9. Specifikacijos
The following table lists the key specifications for the VIVOTEK ND9323P NVR:
| Funkcija | Specifikacija |
|---|---|
| Modelio numeris | ND9323P |
| Prekės ženklas | VIVOTEK |
| Kanalų skaičius | 8 |
| Ryšio technologija | Ethernet |
| Suderinami įrenginiai | Camera, Mobile Device |
| Vaizdo įrašų suspaudimas | H.265, H.264 |
| PoE prievadai | 8 x 802.3at/af |
| Gaminio matmenys | 19.69 x 19.69 x 11.02 colio |
| Prekės svoris | 0.01 uncijos |
| Gamintojas | „Vivotek“ |
10. Garantija ir palaikymas
„VIVOTEK“ gaminiams taikoma ribota garantija. Išsamias garantijos sąlygas rasite prie gaminio pridėtoje garantijos kortelėje arba apsilankykite oficialioje „VIVOTEK“ svetainėje. websvetainę.
For technical support, product registration, or to download the latest firmware and software, please visit the VIVOTEK support portal:
VIVOTEK Official Support Websvetainę
When contacting support, please have your NVR's model number (ND9323P) and serial number ready.