
1. Produktas baigtasview
The NVX QBUS10P is a compact, amplified 10-inch ported subwoofer system designed to deliver powerful bass in spatially challenged vehicles. It features a built-in 500W peak (200W RMS) Class-D amplifier, offering robust audio performance without requiring extensive installation space. This system is engineered for ease of integration with both factory and aftermarket audio systems.
- Erdvės taupymo priemonė: Integrated 10-inch subwoofer and 500W peak amplifier for compact installations.
- Kintamasis žemųjų dažnių filtras: Adjustable from 50-150 Hz to optimize bass output and prevent high-frequency distortion.
- Lankstūs įėjimai: Supports both high-level (speaker wire) and low-level (RCA) inputs for broad compatibility.
- Automatinis įjungimas: Detects audio signal to automatically power on, simplifying installation by eliminating the need for a remote turn-on wire.
- Kintamasis žemųjų dažnių stiprinimas: Allows fine-tuning of low bass levels to personal preference.
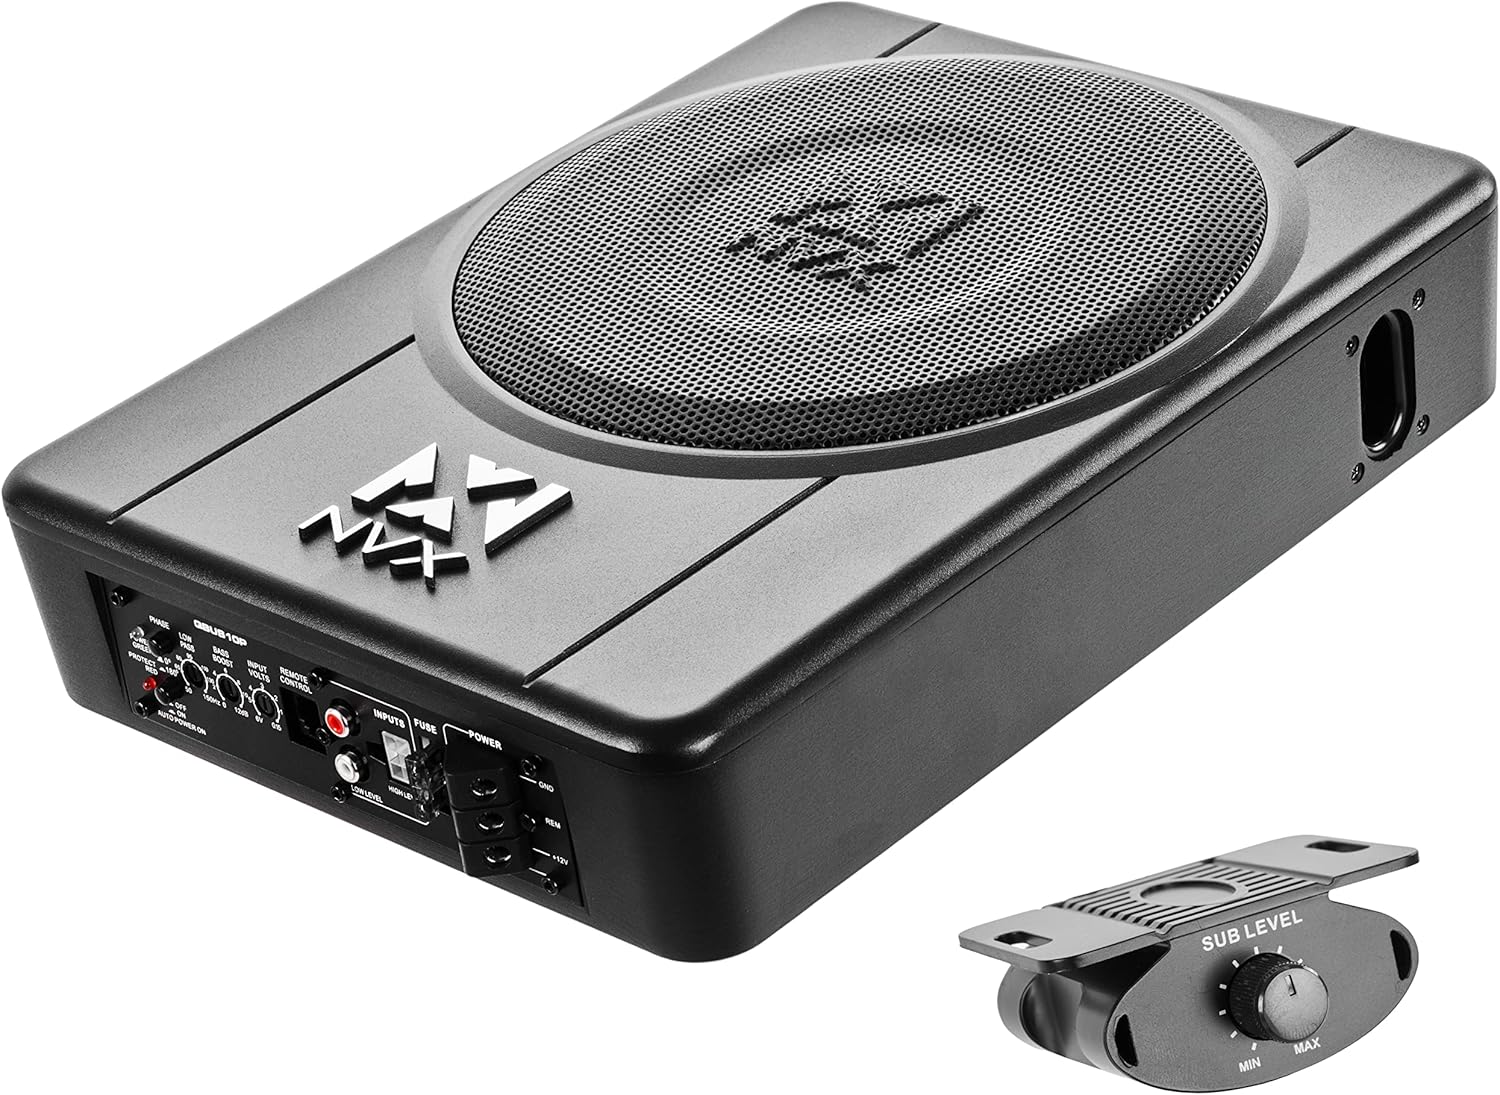
Figure 1.1: NVX QBUS10P Amplified Under Seat Subwoofer System with included remote bass knob.
2. Sąranka ir diegimas
2.1 Pakuotės turinys
Prieš pradėdami montuoti, įsitikinkite, kad yra visi komponentai:
- NVX QBUS10P Amplifikuotas žemųjų dažnių garsiakalbis
- Remote Bass Knob with Cable
- Aukšto lygio įvesties laidai
- Tvirtinimo detalės (laikikliai, varžtai)
- Vartotojo vadovas

Figure 2.1: Included accessories for the NVX QBUS10P, including mounting hardware and high-level input harness.
2.2 Laidų jungtys
Proper wiring is crucial for optimal performance and safety. Refer to the subwoofer's rear panel for connection points.
- Galia (+12V): Connect to the positive terminal of your vehicle's battery. An in-line fuse (not included, but highly recommended within 12 inches of the battery) should be used for protection. The subwoofer has a built-in 15A fuse.
- Įžeminimas (GND): Connect to a clean, unpainted metal surface on the vehicle's chassis. Ensure a solid connection for proper grounding.
- Nuotolinis įjungimas (REM): This terminal is optional. The QBUS10P features an automatic turn-on circuit that senses audio input (either high-level or low-level RCA) and powers on the subwoofer. If using this feature, the REM terminal does not need to be connected. If your head unit provides a dedicated remote turn-on output, you may connect it here and disable the auto-turn-on feature via the switch on the unit.
- Input (Low-Level RCA): For head units with RCA pre-outs, connect RCA cables from the head unit's subwoofer output to the QBUS10P's Low-Level inputs.
- Input (High-Level): For factory or aftermarket head units without RCA pre-outs, use the included high-level input harness. Connect the speaker wires from your head unit's speaker outputs to the corresponding wires on the harness, then plug the harness into the High-Level input port.

Figure 2.2: Rear panel of the NVX QBUS10P, showing power, input, and control connections.
2.3 Montavimo vieta
The compact design of the QBUS10P allows for versatile mounting options, typically under a seat or in other confined spaces.
- Under Seat Mount: This is the primary intended mounting type, utilizing the available space beneath car seats. Ensure adequate clearance for air circulation and cable routing.
- Saugus montavimas: Use the provided mounting brackets and screws to firmly secure the subwoofer to the vehicle's floor or a stable surface. This prevents movement and enhances bass performance.
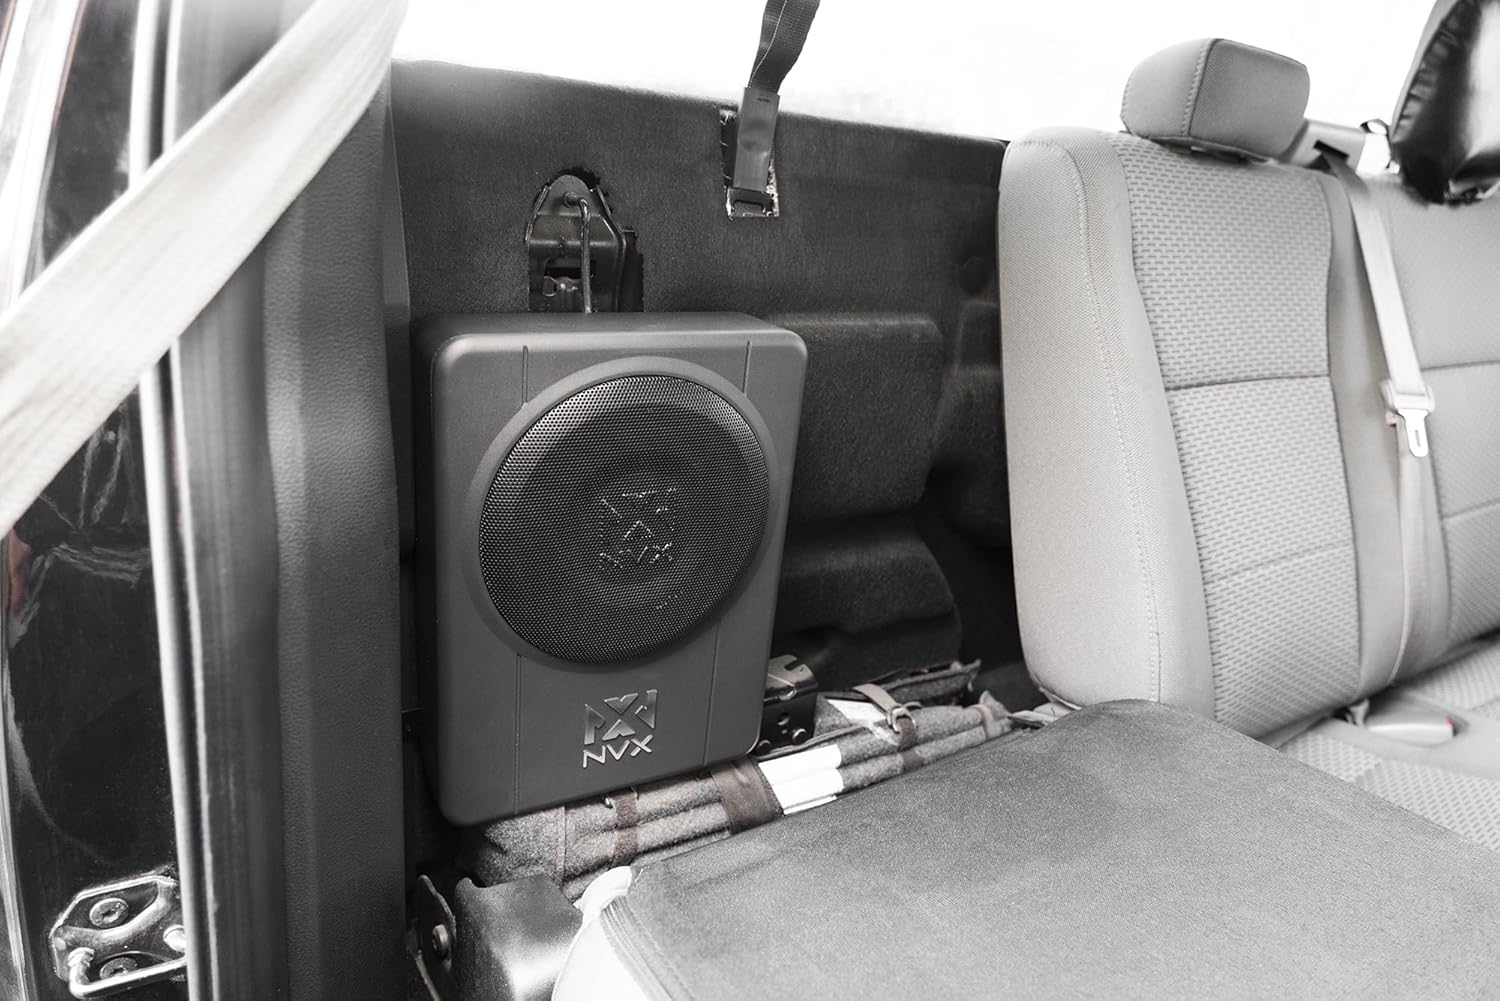
2.3 pav. Pvzample of the NVX QBUS10P subwoofer installed discreetly under a car seat.

Figure 2.4: The NVX QBUS10P features a durable enclosure with the NVX logo.
3. Valdymo įtaisai ir reguliavimas
The QBUS10P offers several controls on its rear panel to fine-tune audio output:
- Fazės perjungiklis (0°/180°): Adjusts the phase of the subwoofer's output relative to the main speakers. Experiment with both settings to find the one that provides the most cohesive and impactful bass.
- Low-Pass Filter (LPF) (50Hz-150Hz): Controls the upper frequency limit of the subwoofer. Set this to blend smoothly with your main speakers, typically between 80Hz and 120Hz.
- Bass Boost (0dB-12dB): Increases the output at a specific low frequency. Use sparingly to avoid distortion.
- Input Volts (0.15V-6V): Atitinka išvesties ttage of your head unit's RCA pre-outs or speaker-level outputs to the subwoofer's input sensitivity. Adjust this for optimal signal level without distortion.
- Auto Power On Switch: Toggles the automatic turn-on feature. Set to 'ON' if using high-level or low-level inputs without a remote turn-on wire. Set to 'OFF' if using a dedicated remote turn-on wire.
3.1 Remote Bass Knob
The included remote bass knob provides convenient control over the subwoofer's output level from the driver's seat. Connect it to the 'REMOTE CONTROL' port on the subwoofer's rear panel.

Figure 3.1: The remote bass knob allows for convenient adjustment of subwoofer output level.
4. Priežiūra
To ensure the longevity and optimal performance of your NVX QBUS10P subwoofer, follow these general maintenance guidelines:
- Valymas: Use a soft, dry cloth to wipe down the exterior of the subwoofer. Avoid using harsh chemicals or abrasive cleaners.
- Vėdinimas: Ensure the subwoofer's vents are not obstructed to allow for proper heat dissipation.
- Ryšio patikrinimai: Periodically inspect all wiring connections (power, ground, inputs) to ensure they are secure and free from corrosion.
5. Problemų sprendimas
If you experience issues with your QBUS10P subwoofer, consult the following table:
| Problema | Galima priežastis | Sprendimas |
|---|---|---|
| Nėra maitinimo (maitinimo šviesos diodas nešviečia) | Blown fuse; Loose power/ground connection; No remote turn-on signal (if auto-on is off) | Check and replace 15A fuse; Verify all power and ground connections; Ensure auto-on is enabled or remote wire is connected and receiving signal. |
| Nėra garso (maitinimo LED šviečia) | Input signal issue; Gain/Input Volts set too low; Low-Pass Filter set too low; Phase incorrect | Check RCA/High-Level input connections; Adjust Gain/Input Volts; Adjust LPF; Experiment with Phase switch. |
| Iškraipytas garsas | Gain/Input Volts set too high; Bass Boost too high; Poor input signal quality | Reduce Gain/Input Volts; Lower Bass Boost; Check head unit settings and input signal quality. |
| Žemųjų dažnių garsiakalbio perkaitimas (apsaugos LED šviečia) | Insufficient ventilation; Impedance mismatch; Prolonged high-volume use | Ensure proper airflow around the unit; Verify speaker impedance (4 Ohm); Reduce volume or allow unit to cool down. |
6. Specifikacijos
Detailed technical specifications for the NVX QBUS10P:
| Funkcija | Specifikacija |
|---|---|
| Modelio pavadinimas | QBUS10P |
| Garsiakalbio tipas | Žemųjų dažnių garsiakalbis |
| Žemųjų dažnių garsiakalbio skersmuo | 10 colių |
| Didžiausia garsiakalbio išėjimo galia | 500 XNUMX vatų (didžiausia) |
| RMS galia | 200 vatų |
| Montavimo tipas | Under Seat Mount |
| Gaminio matmenys (D x P x A) | 13.6 "D x 10.3" P x 3.2" A |
| Prekės svoris | 11.14 svaro |
| Ryšio technologija | RCA, High-level (Speaker-level) |
| Valdiklio tipas | Nuotolinio valdymo pultas |
| Garso išvesties režimas | Stereo |
| Įvesties tomastage | 6 Volts (for RCA input sensitivity) |
| Įtraukti komponentai | 1 x Speaker (Subwoofer Unit) |
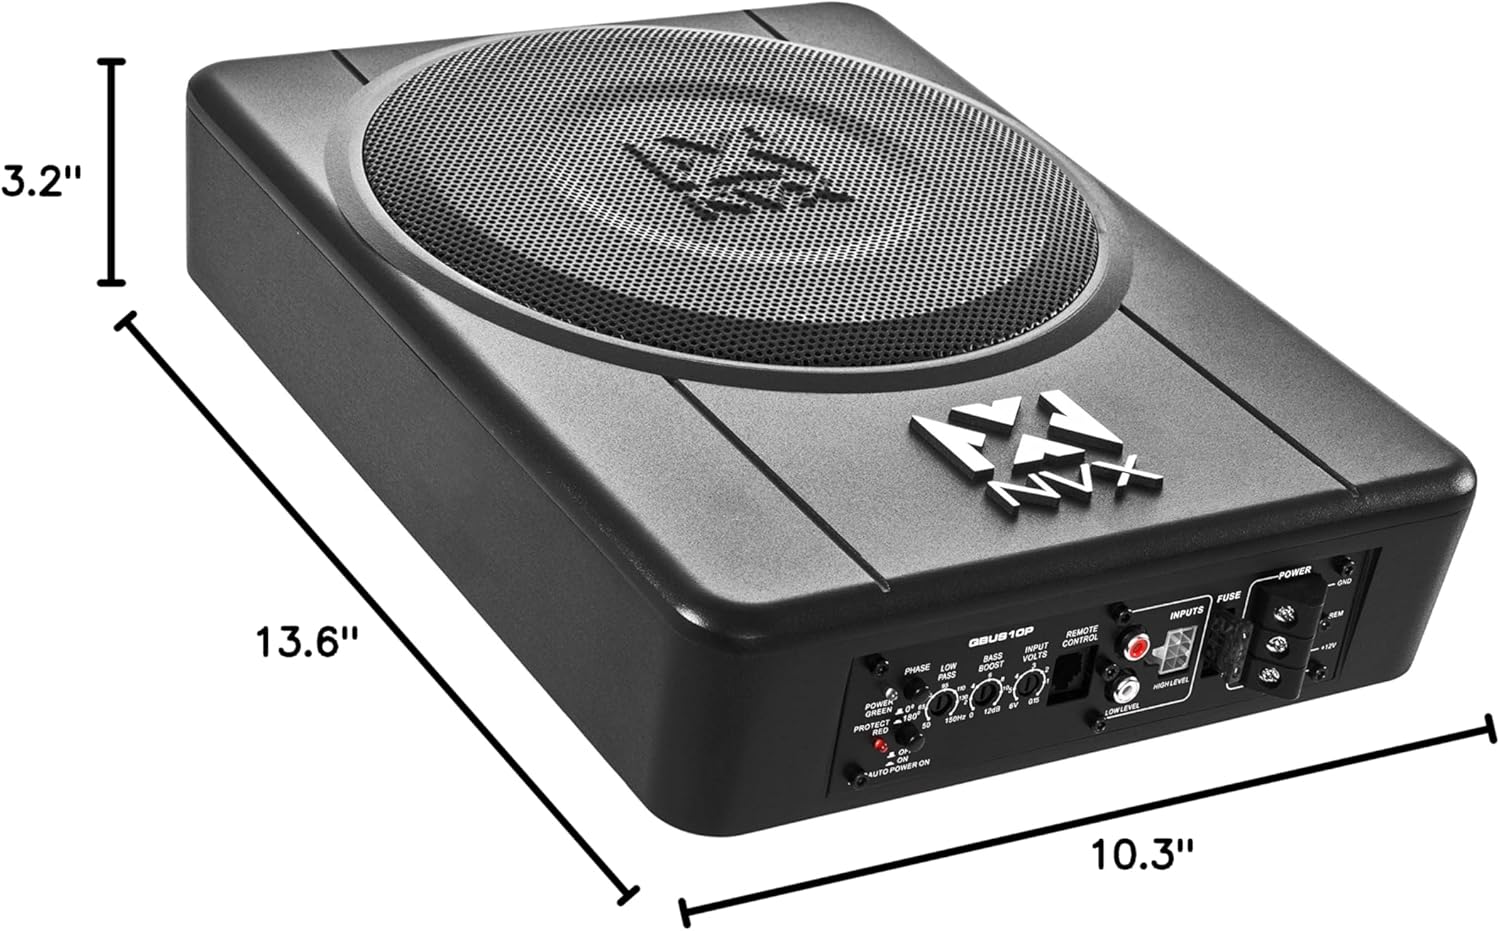
Figure 6.1: Dimensions of the NVX QBUS10P subwoofer for installation planning.
7. Garantija ir palaikymas
The NVX QBUS10P comes with a limited warranty. For detailed warranty information, product support, or to contact customer service, please visit the official NVX store or contact their support channels.
NVX Official Store: https://www.amazon.com/stores/NVX/page/61287025-4741-48F6-876D-1B3C570566E5