
1. Įvadas
Thank you for choosing the Xigmatek Lux M Micro-ATX Mini Tower PC Case. This manual provides detailed instructions for the installation, operation, and maintenance of your new PC chassis. Please read this manual carefully before beginning the assembly process to ensure proper installation and to maximize the performance and longevity of your system.
The Lux M case is designed to offer a robust and aesthetically pleasing housing for your computer components, featuring a tempered glass side panel, a metallic front panel with a unique cut-out pattern, and pre-installed fixed RGB fans for optimal cooling and visual appeal. It supports Micro-ATX and Mini-ITX motherboards and is compatible with various cooling solutions, including water cooling.
2. Saugos informacija
Montavimo ir eksploatavimo metu laikykitės šių saugos priemonių:
- Prieš montuodami arba išimdami bet kokius komponentus, visada atjunkite maitinimo šaltinį nuo sieninio lizdo, kad išvengtumėte elektros smūgio.
- Handle all components with care. Avoid touching circuit boards directly; hold them by their edges.
- Wear an anti-static wrist strap when handling sensitive electronic components to prevent electrostatic discharge (ESD) damage.
- Keep the case and components away from liquids, excessive heat, and direct sunlight.
- Užtikrinkite tinkamą vėdinimą aplink kompiuterio korpusą, kad jis neperkaistų.
- Smulkias dalis ir varžtus laikykite vaikams nepasiekiamoje vietoje.
3. Pakuotės turinys
Patikrinkite, ar pakuotėje yra visi daiktai. Jei trūksta kokių nors daiktų arba jie pažeisti, susisiekite su pardavėju.
- Xigmatek Lux M Micro-ATX Mini Tower PC Case
- Priedų dėžutė (kuriame yra varžtai, tarpikliai, kabelių laikikliai ir kt.)
- Vartotojo vadovas (šis dokumentas)
4. Produktas baigtasview
Familiarize yourself with the various parts of your Xigmatek Lux M PC case.
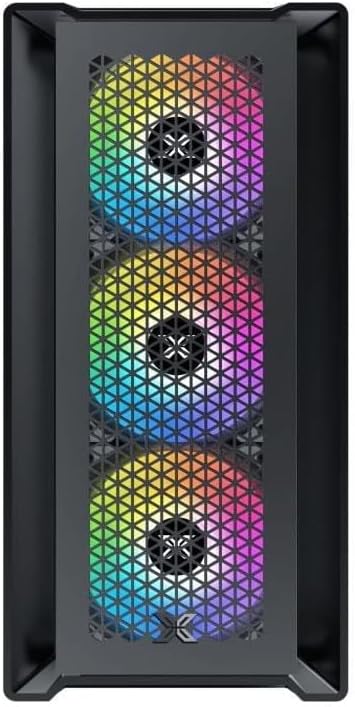
4.1 pav.: priekis View. This image displays the front of the Xigmatek Lux M case, highlighting the metallic mesh panel with a triangular design and the three pre-installed 120mm fixed RGB fans.

Figure 4.2: Angled Top-Front View. This perspective shows the tempered glass side panel, offering a clear view of the interior, and the top panel with its I/O ports (USB, audio) and power button.
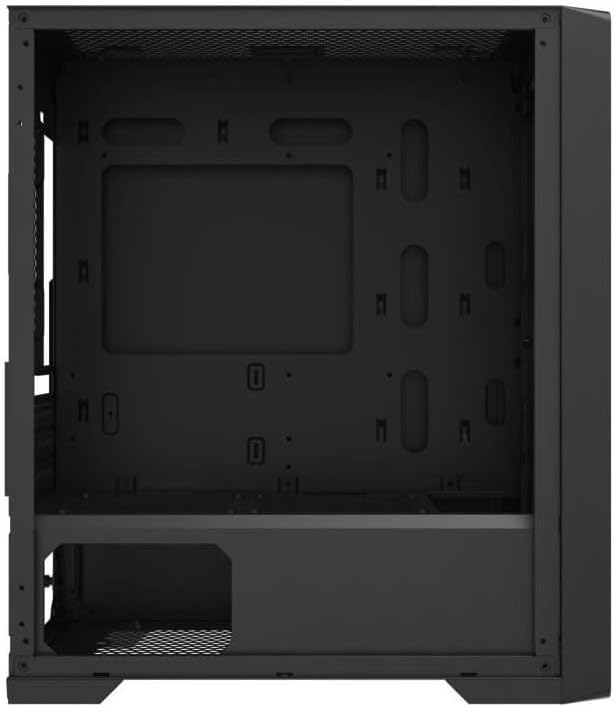
4.3 pav.: Vidaus išdėstymas. The internal structure of the case, featuring the motherboard mounting tray, cutouts for cable management, and the power supply shroud at the bottom.
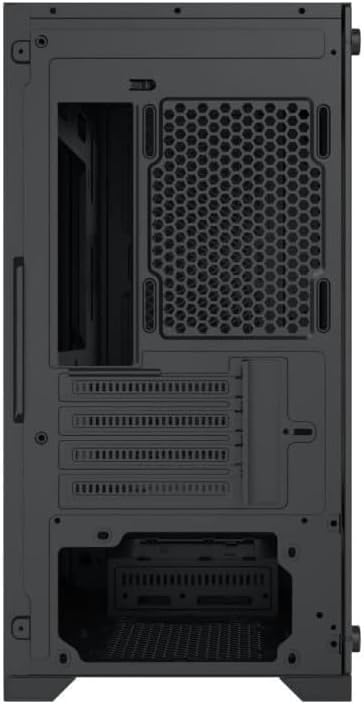
4.4 pav.: galinis View. This image illustrates the rear of the case, including the expansion slots for graphics cards and other add-in cards, the rear fan mounting area, and the power supply mounting bracket.
5. Sąranka ir diegimas
Follow these steps to install your computer components into the Xigmatek Lux M case.
5.1. Bylos rengimas
- Padėkite dėklą ant lygaus, stabilaus paviršiaus.
- Remove the tempered glass side panel by unscrewing the thumb screws and carefully lifting it off. Set it aside on a soft, non-abrasive surface.
- Remove the opposite steel side panel by unscrewing the thumb screws and sliding it backward.
5.2. Pagrindinės plokštės montavimas
The Lux M supports Micro-ATX and Mini-ITX motherboards.
- Install the I/O shield (if not pre-installed on your motherboard) into the rear opening of the case.
- Sulygiuokite pagrindinę plokštę su iš anksto sumontuotais tarpikliais. Įsitikinkite, kad visos pagrindinės plokštės varžtų skylės sutampa su tarpikliais.
- Secure the motherboard using the provided motherboard screws. Do not overtighten.
5.3. Maitinimo šaltinio (PSU) įrengimas
The PSU mounts at the rear bottom of the case.
- Slide the PSU into its designated compartment from the rear of the case.
- Align the PSU's screw holes with the holes on the case's rear panel.
- Secure the PSU with the provided screws.
5.4. Storage Drive Installation (2.5"/3.5" Drives)
The case supports 2x 2.5"/3.5" storage drives.
- Locate the drive cage beneath the PSU shroud or dedicated 2.5" mounting points behind the motherboard tray.
- For 3.5" HDDs, slide the drive into a drive tray (if applicable) and secure it with screws.
- For 2.5" SSDs, secure them directly to the mounting points using the provided screws.
5.5. Vaizdo plokštės (VGA) ir išplėtimo plokštės įdiegimas
Korpusas palaiko iki 320 mm ilgio vaizdo plokštes.
- Nuimkite reikiamus išplėtimo lizdų dangtelius nuo korpuso galo.
- Insert your graphics card or other expansion card into the appropriate PCIe slot on your motherboard.
- Secure the card to the case using the expansion slot screws.
5.6. Cooling System Installation (Optional)
The Lux M comes with 4x 120mm X24F fixed RGB fans. It supports additional cooling options.
- CPU aušintuvas: Max height of 160mm. Install your CPU cooler according to its manufacturer's instructions.
- Radiatoriaus palaikymas: The case supports radiators of 360mm, 240mm, or 120mm. Refer to your radiator's manual for installation. Common mounting locations include the front and top panels.
5.7. Kabelių valdymas
Kabelių išdėstymui naudokite laidų išpjovas ir tvirtinimo taškus už pagrindinės plokštės dėklo. Tai pagerina oro srautą ir vizualiai pagerina vaizdą.
5.8. Galutinis surinkimas
- Once all components are installed and cables are managed, reattach the steel side panel and secure it with thumb screws.
- Carefully reattach the tempered glass side panel and secure it with thumb screws.
6. Naudojimo instrukcijos
After completing the installation, connect your peripherals (monitor, keyboard, mouse) and power cable to the PC. Press the power button located on the top panel of the case to start your system.
The pre-installed X24F RGB fans feature fixed RGB lighting, which will illuminate automatically upon system power-on. No additional software or controller is required for their basic operation.
Ensure that the case's ventilation is not obstructed to maintain optimal airflow and cooling performance.
7. Priežiūra
Reguliarus techninis aptarnavimas padeda užtikrinti kompiuterio komponentų ilgaamžiškumą ir optimalų veikimą.
- Dulkių valymas: Periodically clean dust filters (if present) and the interior of the case using compressed air or a soft brush. Dust accumulation can hinder airflow and lead to overheating.
- Išorinis valymas: Išorinius paviršius nuvalykite minkšta, damp cloth. Avoid harsh chemicals that may damage the finish or tempered glass.
- Grūdintas stiklas: Clean the tempered glass panel with a glass cleaner and a microfiber cloth to avoid scratches and streaks.
8. Problemų sprendimas
Jei diegimo metu arba po jo kyla problemų, atsižvelkite į šiuos įprastus trikčių šalinimo veiksmus:
- Nėra galios:
- Įsitikinkite, kad maitinimo laidas yra tvirtai prijungtas tiek prie maitinimo bloko, tiek prie sieninio lizdo.
- Check that the PSU switch is in the 'ON' position.
- Patikrinkite, ar priekinio skydelio maitinimo jungiklio kabelis tinkamai prijungtas prie pagrindinės plokštės priekinio skydelio jungties.
- Fans Not Spinning / RGB Not Lighting:
- Ensure all fan power cables are securely connected to the motherboard or a fan controller.
- For RGB, confirm that any necessary RGB headers are connected to the motherboard (though the included fans are fixed RGB and should light up with power).
- Nėra ekrano išvesties:
- Verify that your monitor cable is connected to the graphics card (if installed) and not the motherboard's integrated graphics port.
- Įstatykite vaizdo plokštę į PCIe lizdą.
- Perkaitimas:
- Ensure all case fans are spinning and oriented correctly for optimal airflow (intake/exhaust).
- Išvalykite visus dulkių filtrus ir vidinius komponentus.
- Verify that the CPU cooler is properly seated and making good contact with the CPU.
For more complex issues, consult your component manuals or seek assistance from Xigmatek support or a qualified technician.
9. Specifikacijos
| Funkcija | Specifikacija |
|---|---|
| Prekės ženklas | Xigmatek |
| Modelio pavadinimas | Lux M |
| Modelio numeris | EN48540 |
| Atvejo tipas | Mini bokštas |
| Pagrindinės plokštės suderinamumas | „Micro-ATX“, „Mini-ITX“ |
| Medžiaga | Tempered Glass (side panel), Metal (front panel) |
| Spalva | Juoda |
| Iš anksto įdiegti ventiliatoriai | 4 x 120mm X24F Fixed RGB Fans |
| Radiatoriaus palaikymas | 360 mm, 240 mm, 120 mm |
| Maksimalus procesoriaus aušintuvo aukštis | 160 mm |
| Maksimalus VGA ilgis | 320 mm |
| Maksimalus PSU ilgis | 165 mm |
| Sandėliavimo skyriai | 2x 2.5"/3.5" |
| Ypatingos savybės | RGB Lighting, Triangular Mesh Front Design |
10. Garantija ir palaikymas
Xigmatek products are manufactured to the highest quality standards. For warranty information and technical support, please refer to the warranty card included with your product or visit the official Xigmatek websvetainėje. Prašome išsaugoti pirkimo įrodymą garantiniams reikalavimams.
For further assistance, you may contact Xigmatek customer support through their official channels.