1. Įvadas
Thank you for choosing the Qubo B-209 Senior Mobile Phone. This manual provides essential information for setting up, operating, and maintaining your device. Please read it carefully to ensure proper use and to maximize the phone's features.
Pakuotės turinys
- Qubo B-209 Mobile Phone
- Įkraunama ličio jonų baterija
- Įkrovimo dokas
- USB kabelis
- Maitinimo adapteris
- Vartotojo vadovas (šis dokumentas)
2. Produktas baigtasview
The Qubo B-209 is designed for ease of use, featuring large buttons, a clear display, and essential functions for communication. Its key features include a dedicated SOS button for emergencies, a convenient charging dock, and a built-in flashlight.
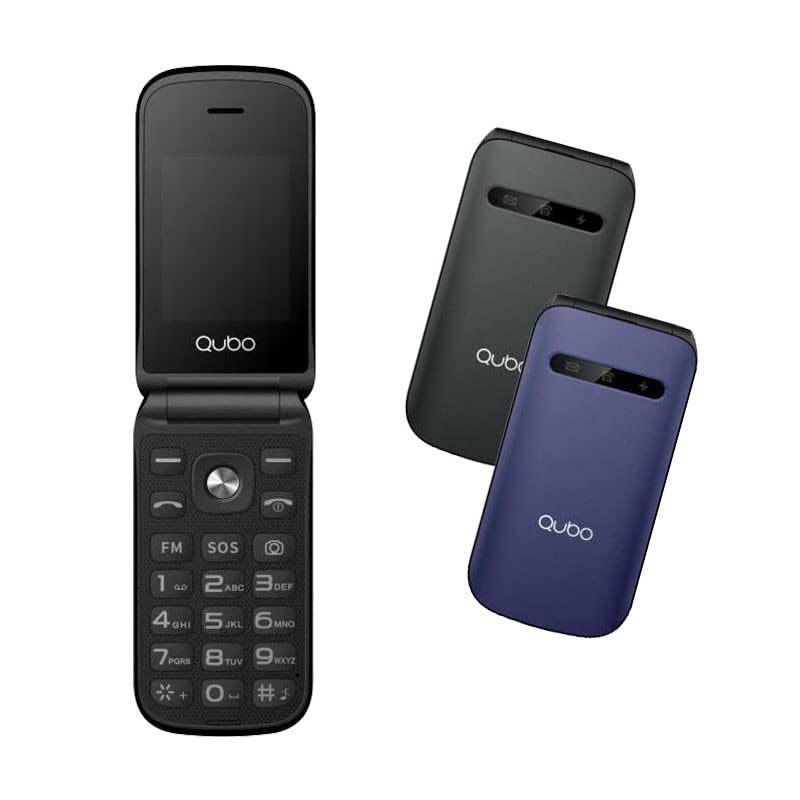
1 vaizdas: Qubo B-209 Senior Mobile Phone with its charging dock. The phone features a blue casing, a large keypad, and a color display.
Pagrindinės savybės
- 2.4-inch QVGA TFT LCD Display: Aiškus ir lengvai skaitomas ekranas.
- Didelė klaviatūra: Ergonomic buttons for comfortable dialing and texting.
- SOS mygtukas: Dedicated emergency button for quick contact with pre-set numbers.
- Įkrovimo dokas: Convenient desktop charger for easy power replenishment.
- Dviejų SIM kortelių palaikymas: Naudokite dvi SIM korteles vienu metu.
- FM radijas: Klausykitės mėgstamų radijo stočių.
- Žibintuvėlis: Built-in LED light for convenience.
- 0.3 MP kamera: Basic camera functionality.
- "Bluetooth 3.0": For wireless connectivity with compatible devices.
3. Sąranka
3.1 Akumuliatoriaus įdėjimas
- Švelniai nuimkite telefono galinį dangtelį.
- Raskite akumuliatoriaus skyrių.
- Insert the provided Li-Ion battery, ensuring the gold contacts align with the phone's terminals.
- Uždėkite galinį dangtelį, kol jis spragtelėdamas tvirtai užsifiksuos.
3.2 SIM Card(s) Installation
- With the back cover and battery removed, locate the SIM card slots. The Qubo B-209 supports Dual SIM.
- Carefully insert your SIM card(s) into the designated slot(s) with the gold contacts facing down and the cut corner aligned as shown in the diagram (refer to phone's internal markings).
- Įsitikinkite, kad SIM kortelė (-ės) yra visiškai įdėta (-os).
- Įdėkite bateriją ir galinį dangtelį.
3.3 Telefono įkrovimas
Prieš pirmą kartą naudodami, visiškai įkraukite telefono bateriją.
- Įkrovimo stotelės naudojimas:
- Connect the USB cable to the power adapter, then plug the adapter into a wall outlet.
- Prijunkite kitą USB laido galą prie įkrovimo stotelės.
- Place the phone into the charging dock, ensuring the charging contacts on the phone align with those on the dock. The phone will indicate charging status on its screen.
- Tiesioginis USB įkrovimas:
- Connect the USB cable to the power adapter, then plug the adapter into a wall outlet.
- Connect the micro USB end of the cable directly to the micro USB port on the side or bottom of the phone.
A full charge typically takes approximately 2-3 hours. The battery indicator on the screen will show the charging progress.
4. Naudojimo instrukcijos
4.1 Maitinimo įjungimas/išjungimas
- Norėdami įjungti: Paspauskite ir palaikykite Maitinimas / skambučio pabaiga mygtuką (dažniausiai raudoną), kol ekranas užsidegs.
- Norėdami išjungti: Paspauskite ir palaikykite Maitinimas / skambučio pabaiga button until the power-off options appear, then select "Power off" or confirm.
4.2 Skambinimas ir skambučių priėmimas
- Norėdami paskambinti:
- Įveskite telefono numerį naudodami klaviatūrą.
- Paspauskite Skambinti mygtukas (dažniausiai žalias), skirtas skambučiui pradėti.
- Norėdami atsiliepti į skambutį: Kai suskamba telefonas, paspauskite Skambinti mygtuką.
- Norėdami baigti skambutį: Paspauskite Maitinimas / skambučio pabaiga mygtuką.
4.3 Sending and Receiving Messages (SMS)
- Pagrindiniame ekrane eikite į meniu „Žinutės“.
- Select "Write message" or "New SMS".
- Įveskite gavėjo telefono numerį arba pasirinkite jį iš kontaktų.
- Įveskite pranešimą naudodami klaviatūrą.
- Norėdami išsiųsti pranešimą, paspauskite „Siųsti“.
4.4 SOS avarinis mygtukas
SOS mygtukas yra telefono gale. Juo galite greitai susisiekti su iš anksto nustatytais pagalbos numeriais.
- SOS numerių nustatymas:
- Go to "Settings" > "SOS Settings" or "Emergency Settings".
- Add up to 5 emergency contact numbers. These numbers will be called in sequence when the SOS button is activated.
- You can also enable an SOS message to be sent to these contacts.
- Naudojant SOS funkciją:
- Avarijos atveju paspauskite ir palaikykite SOS mygtukas kelioms sekundėms.
- The phone will automatically call the pre-set emergency numbers one by one until an answer is received.
- If enabled, an emergency SMS message will also be sent.
Svarbu: Ensure your SOS contacts are aware they are listed as emergency contacts and that their numbers are up-to-date.
4.5 FM radijas
- Pagrindiniame meniu eikite į programą „FM radijas“.
- Norėdami ieškoti stočių arba rankiniu būdu nustatyti dažnį, naudokite naršymo mygtukus.
- Adjust the volume using the side volume buttons (if available) or menu options.
4.6 Žibintuvėlis
The flashlight can be activated quickly.
- Locate the dedicated flashlight button on the side of the phone (if present) or access it via the menu.
- Press the button once to turn the flashlight on, and again to turn it off.
4.7 Kamera
- Pagrindiniame meniu atidarykite programą „Kamera“.
- Kadruokite kadrą naudodami ekraną kaip viewieškiklis.
- Press the designated "Capture" or "OK" button to take a photo.
- Photos are saved to the phone's internal memory or an inserted T-Flash card.
5. Priežiūra
5.1 Valymas
- Use a soft, dry, lint-free cloth to clean the phone's screen and body.
- Avoid using liquid cleaners, aerosols, or harsh chemicals, as these can damage the phone.
- Ensure no moisture enters the charging port or other openings.
5.2 Akumuliatoriaus priežiūra
- Nelaikykite akumuliatoriaus ekstremaliose temperatūrose (karštyje ar šaltyje).
- Venkite dažnai visiškai iškrauti akumuliatorių. Reguliariai jį įkraukite.
- If the phone will not be used for an extended period, charge the battery to about 50% and store it in a cool, dry place.
5.3 Saugykla
- Store the phone in a dry environment, away from direct sunlight and excessive humidity.
- Laikykite telefoną vaikams ir naminiams gyvūnams nepasiekiamoje vietoje.
6. Problemų sprendimas
| Problema | Galima priežastis | Sprendimas |
|---|---|---|
| Telefonas neįsijungia. | Baterija išsikrovusi arba netinkamai įdėta. | Įsitikinkite, kad akumuliatorius yra tinkamai įdėtas ir visiškai įkrautas. |
| Negalima skambinti arba priimti skambučių. | No network signal; SIM card not installed or activated; incorrect network settings. | Check signal strength. Ensure SIM card is properly inserted and activated. Contact your network provider if issues persist. |
| Telefonas neįkraunamas. | Charging cable/adapter faulty; charging port/dock dirty or damaged; battery issue. | Check connections. Try a different outlet or charging method (dock vs. direct USB). Clean charging contacts. |
| SOS mygtukas neveikia. | SOS numbers not set up; no network signal. | Verify SOS numbers are correctly configured in settings. Ensure the phone has network coverage. |
| Ekranas tuščias arba užstrigęs. | Programinės įrangos triktis; išsikrovusi baterija. | Restart the phone by holding the Power/End Call button. Charge the battery. |
7. Specifikacijos
| Funkcija | Detalė |
|---|---|
| Modelio numeris | B-209 |
| Ekranas | 2.4-inch QVGA TFT LCD |
| Lustų rinkinys | M76261DA, ARM7 CPU, 260MHz |
| Atmintis (RAM / ROM) | 32 MB RAM, 32 MB ROM |
| Ryšys | 2G GSM 850/900/1800 (GSM/GPRS), Bluetooth 3.0 |
| Baterija | 800 mAh ličio jonų |
| Fotoaparatas | 0.3 MP (galinė) |
| SIM palaikymas | Dvi SIM kortelės |
| Išorinė saugykla | T-Flash (up to 32MB) |
| Savybės | FM Radio, Flashlight, SOS Button, External Indicator (Messages, Calls, Charge) |
| Jungtys | Mikro USB, 3.5 mm lizdas |
| Matmenys (paketas) | 15.3 x 8.1 x 6.9 cm; 230 g |
| Operacinė sistema | Symbian 9.1 |
8. Garantija ir palaikymas
8.1 Gamintojo garantija
The Qubo B-209 Senior Mobile Phone comes with a trejų metų gamintojo garantija nuo įsigijimo datos. Ši garantija taikoma medžiagų ir gamybos defektams, atsiradusiems įprasto naudojimo sąlygomis. Ji netaikoma žalai, atsiradusiai dėl netinkamo naudojimo, nelaimingų atsitikimų, neleistinų modifikacijų ar įprasto nusidėvėjimo. Prašome išsaugoti pirkimo įrodymą garantiniams reikalavimams.
8.2 Pagalba klientams
For technical assistance, troubleshooting beyond this manual, or warranty inquiries, please contact Qubo customer support. Refer to the packaging or the official Qubo websvetainė, kurioje rasite naujausią kontaktinę informaciją.


