
1. Saugos priemonės
Norėdami užtikrinti saugų darbą ir išvengti žalos, laikykitės šių atsargumo priemonių:
- The M9 charger accepts a DC input voltage range of 7-35V. Verify that your power supply voltage is compatible and correctly observe positive and negative polarity during connection.
- Do not operate this product near heat sources, in humid conditions, or in environments containing flammable or explosive gases.
- Always use this product under supervision to prevent potential accidents.
- When the product is not in use, disconnect the input power promptly.
- When utilizing the charging function, set the current appropriate for the battery type and capacity. Avoid setting excessively high charging currents, as this may damage the battery.
2. Produktas baigtasview
The ToolkitRC M9 is a versatile multifunction smart charger designed for various battery types and applications. It integrates balance charging, discharging, battery display, signal measurement, signal source, and other functionalities into a single compact device.
2.1 Pagrindinės savybės
- Daugiafunkciškumas: Combines balance charge/discharge, electric display, signal measurer, and signal source.
- Platus baterijų suderinamumas: Supports LiPo, LiHV, LiFe, Lion, LTO (1-8S), NiMh (1-20S), and Pb (1-10S) batteries.
- Signal Measurement & Output: Measures and outputs PWM/PPM/SBUS signals with microsecond accuracy.
- Drone Battery Compatibility: Automatically activates and charges mainstream drone batteries.
- Firmware Upgrade & Customization: Allows firmware upgrades and customization of voice and boot screen via USB (simulates a U disk).
- Dvigubas USB greitas įkrovimas: Features USB-A and Type-C ports with up to 65W output for fast charging external devices.
2.2 Pakuotės turinys
- 1x ToolkitRC M9 Charger
- 1x Quick Manual
- 1x USB laidas

Figure 2.1: ToolkitRC M9 Charger, packaging, quick manual, and USB cable.

Figure 2.2: Graphic illustrating the M9's all-in-one functionality, including balance charger, watt meter, battery meter, signal source, DC output, and signal tester.
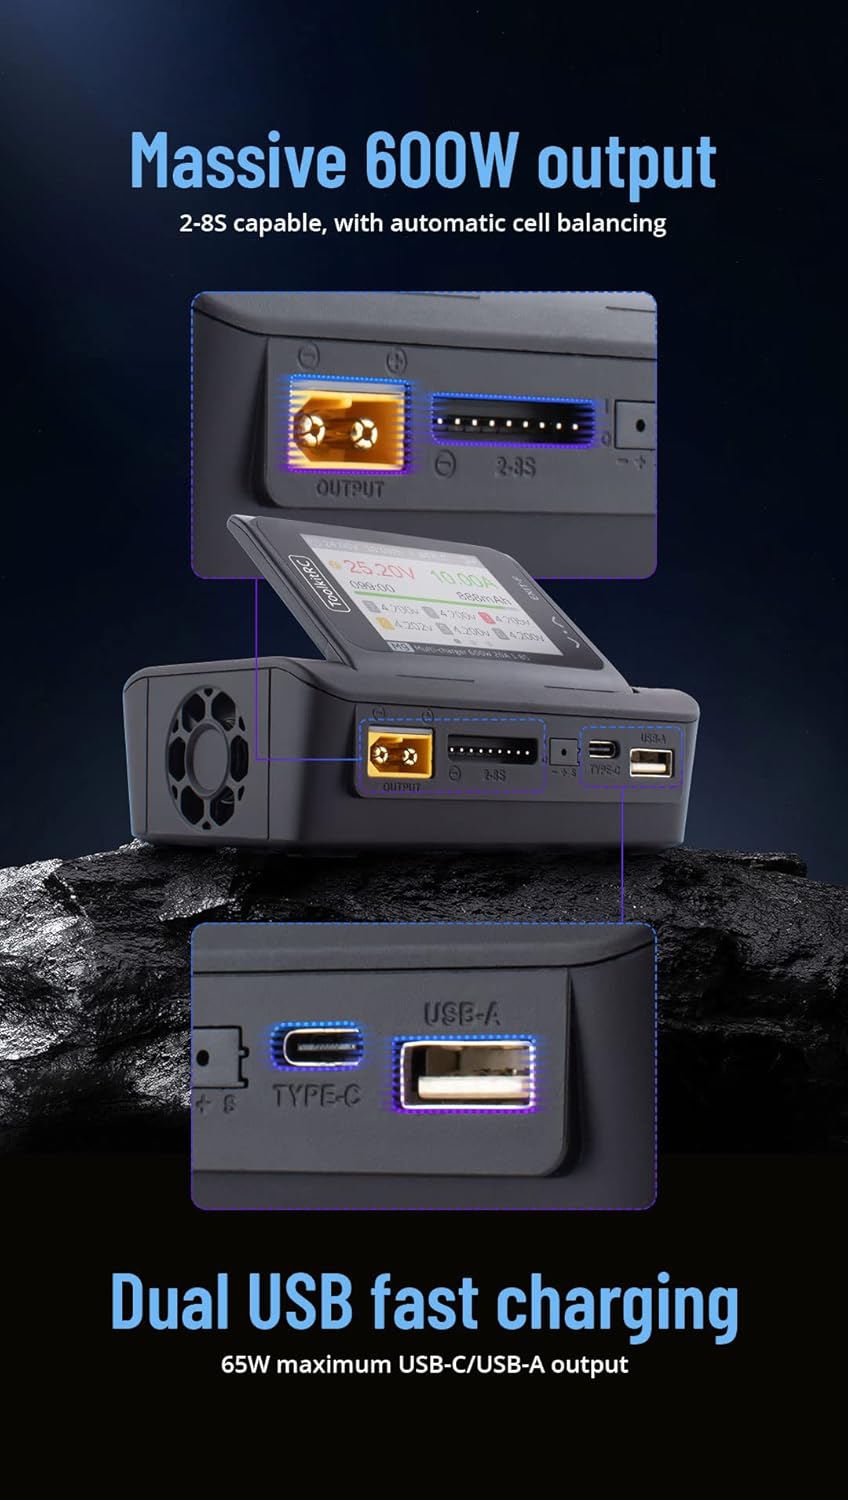
Figure 2.3: Graphic highlighting the M9's massive 600W output (2-8S capable with automatic cell balancing) and dual USB fast charging (65W maximum USB-C/USB-A output).
3. Specifikacijos
| Funkcija | Specifikacija |
|---|---|
| Įvesties tomastage | DC 7-35V @ MAX 25A |
| Palaikomi baterijų tipai | LiPo, LiHV, LiFe, Lion, LTO (1-8S); NiMh (1-20S); Pb (1-10S) |
| Balanso srovė | 1000 mA 4.2 V įtampa |
| Balance Accuracy | <0.005V |
| Įkrovimo galia | 0.1–20 A @ 600 W |
| Discharge Power (Rec/Ext Mode) | 0.1–20 A @ 600 W |
| Discharge Power (Internal Mode) | 0.1–3 A @ 20 W |
| USB Output (A+C) | 5-20V @ 65W (PD, QC, PPS, AFC, SCP) |
| Cell Voltage Matavimas | 1.0V-5.0V @ 1-6S |
| Vidinės varžos matavimas | 0.1mΩ-99Ω @ 1-8S |
| PWM signalas | 880us-2200us @ 20-400Hz (Measure); 500us-2500us @ 20-1000Hz (Output) |
| PPM Signal | 880us-2200us * 8 CH @ 20-50Hz (Measure); 880us-2200us * 8 CH @ 50Hz (Output) |
| SBUS Signal | 880us-2200us * 16 CH @ 20-100Hz (Measure); 880us-2200us * 16 CH @ 74Hz (Output) |
| Maitinimo režimas | 1-20A @ 1-35V (CC+CV) |
| LCD ekranas | IPS 2.4 inch, 320*240 resolution |
| Matmenys | 108 mm x 71 mm x 36 mm |
| Svoris | 235g (Unit); 330g (Packaged) |
4. Sąranka
4.1 Maitinimo prijungimas
- Ensure your DC power supply provides a voltage nuo 7 V iki 35 V.
- Connect the positive (+) terminal of your DC power supply to the positive input terminal of the M9 charger, and the negative (-) terminal to the negative input terminal. Observe polarity carefully.
- Power on the DC supply. The M9 display should illuminate.
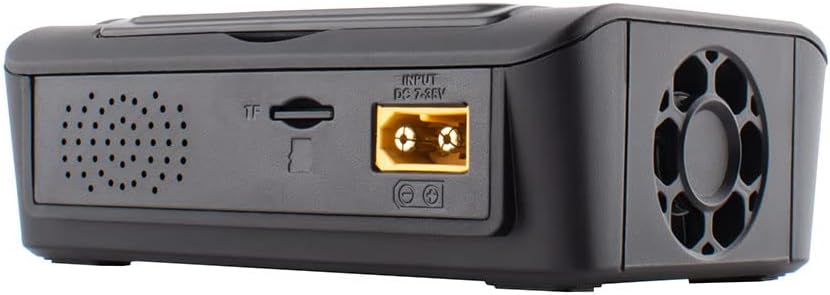
4.1 pav.: galinis view of the M9 charger showing the DC 7-35V input port and TF card slot.

4.2 pav.: priekis view of the M9 charger showing the XT60 output port, balance port, Type-C, and USB-A ports.
4.2 Initial Power On and Navigation
Upon successful power-on, the device will display the main interface. Use the scroll knob and buttons to navigate through menus and select options.

Figure 4.3: Close-up of the M9's IPS display showing real-time charging data, including voltage, current, capacity, and individual cell voltages.

4.4 pav.: šonas view of the M9, illustrating the adjustable display screen and various ports including output, balance, Type-C, and USB-A.
5. Operacija
5.1 Akumuliatoriaus įkrovimas ir iškrovimas
- Connect your battery to the appropriate port (e.g., XT60 for main power, balance port for cell balancing).
- Navigate to the "Charge" or "Discharge" menu on the M9 display.
- Select the battery type (LiPo, LiHV, LiFe, Lion, LTO, NiMh, Pb) and cell count (S).
- Set the desired charging or discharging current. Ensure the current is suitable for your battery's specifications to prevent damage.
- Confirm settings and start the process. Monitor the display for real-time information.
The M9 supports balance charging for multi-cell lithium batteries, ensuring each cell reaches the same voltage optimaliam veikimui ir ilgaamžiškumui.
5.2 USB Fast Charging
The M9 features dual USB ports (USB-A and Type-C) for fast charging external devices. These ports support various fast charging protocols (PD, QC, PPS, AFC, SCP) with a maximum output of 65W.
- Connect your device to either the USB-A or Type-C port using a compatible cable.
- The M9 will automatically detect the device and initiate charging.
5.3 Signal Measurement and Output
The M9 can measure and output PWM, PPM, and SBUS signals, useful for testing RC components like servos and ESCs.
- Navigate to the "Signal Measurer" or "Signal Source" menu.
- Select the desired signal type (PWM, PPM, SBUS).
- Follow the on-screen instructions to connect your component for measurement or to configure the output signal parameters.
5.4 Firmware Updates and Customization
The M9 supports firmware updates and customization of the welcome screen and voice packs.
- Connect the M9 to a computer via the USB port. The device will appear as a U disk.
- Nukopijuokite programinės aparatinės įrangos naujinį file or custom voice/image files to the M9's storage.
- Follow the specific instructions provided with the firmware update for installation.
5.1 vaizdo įrašas: metimas per sekundęview of the ToolkitRC M9 multifunctional charger, demonstrating its ergonomic flip-up display, customizable welcome screen and voice packs, voice-announced menu items, multi-signal output, ESC test functionality, and dual USB fast charging capabilities. This video is provided by Bestpriceic (Seller).
6. Priežiūra
- Įkroviklį laikykite švarų, be dulkių ir šiukšlių. Valymui naudokite minkštą, sausą šluostę.
- Įkroviklį laikykite vėsioje, sausoje vietoje, apsaugotoje nuo tiesioginių saulės spindulių ir ekstremalių temperatūrų.
- Reguliariai tikrinkite laidus ir jungtis, ar nėra susidėvėjimo ar pažeidimų požymių. Nedelsdami pakeiskite pažeistus komponentus.
- Darbo metu užtikrinkite tinkamą vėdinimą, kad išvengtumėte perkaitimo.
7. Problemų sprendimas
7.1 Bendrosios problemos ir sprendimai
- Įkroviklis neįsijungia:
- Verify the DC input voltage yra 7–35 V diapazone.
- Check power supply connections for correct polarity and secure contact.
- Įsitikinkite, kad maitinimo šaltinis veikia tinkamai.
- Charging process not starting or stopping unexpectedly:
- Confirm the battery type and cell count settings match the connected battery.
- Check that the charging current is set appropriately for the battery.
- Inspect battery and charger connections for looseness or damage.
- Ensure the battery is not over-discharged or severely damaged, which might prevent charging.
- Display or navigation issues:
- If the scroll knob is unresponsive or jumps, try pressing it firmly while turning.
- Iš naujo paleiskite įrenginį atjungdami ir vėl prijungdami maitinimą.
- Consider performing a firmware update if available, as this may resolve software-related issues.
Dėl čia neaptartų problemų žr. pagalbos skyrių.
8. Garantija ir palaikymas
Dėl garantijos informacijos, techninės pagalbos ar paslaugų kreipkitės tiesiogiai į pardavėją arba gamintoją. Išsaugokite pirkimo kvitą kaip pirkimo įrodymą.
Manufacturer: Bestpriceic (as per product listing)
For the latest information and firmware updates, please visit the official ToolkitRC websvetainėje arba susisiekite su jų palaikymo kanalais.