1. Įvadas
This manual provides instructions for the assembly, operation, and maintenance of your kleankin Bathroom Under-Sink Cabinet. Please read this manual thoroughly before assembly and use to ensure proper installation and safe operation. Keep this manual for future reference.

Image 1.1: The kleankin Bathroom Under-Sink Cabinet in a typical bathroom setting.
2. Saugos instrukcijos
- Reikalingas surinkimas: This product requires assembly. Please follow all assembly instructions carefully.
- Išvengti traumų: Exercise caution during assembly to avoid personal injury or damage to the product.
- Svorio talpa: Do not exceed the maximum weight capacity of 40 kg for the entire cabinet and 5 kg per shelf.
- Stabili vieta: Įsitikinkite, kad spintelė pastatyta ant lygaus, stabilaus paviršiaus, kad ji neapvirstų.
- Vandens ekspozicija: While the material is resistant, avoid prolonged exposure to excessive water to maintain product integrity. Wipe spills immediately.
- Vaiko sauga: Surinkimo metu laikykite smulkias dalis ir pakavimo medžiagas atokiau nuo vaikų.
3. Pakuotės turinys
Prieš pradėdami surinkimą, patikrinkite, ar yra visi toliau išvardyti komponentai ir ar jie nepažeisti. Jei trūksta kokių nors dalių arba jos pažeistos, susisiekite su klientų aptarnavimo tarnyba.

3.1 pav.: Produktas pristatomas vienoje pakuotėje.
Pakuotėje turi būti:
- 1 x kleankin Bathroom Under-Sink Cabinet (unassembled components)
- 1 x Adjustable Interior Shelf
- Assembly Hardware (screws, dowels, hinges, handles, magnetic catches)
- Surinkimo instrukcijos (šis vadovas)
4. Surinkimo instrukcijos
Follow these steps carefully for proper assembly. A Phillips head screwdriver and possibly a hammer may be required (not included).
4.1. Paruoškite plotą
Clear a spacious, clean, and flat area for assembly. Lay out all components and hardware. Identify each part using the provided diagrams (if any are included separately).
4.2. Surinkite spintelės rėmą
Connect the side panels to the bottom and top panels using the provided hardware. Ensure all connections are secure. The cabinet features elevated feet for stability and moisture protection.
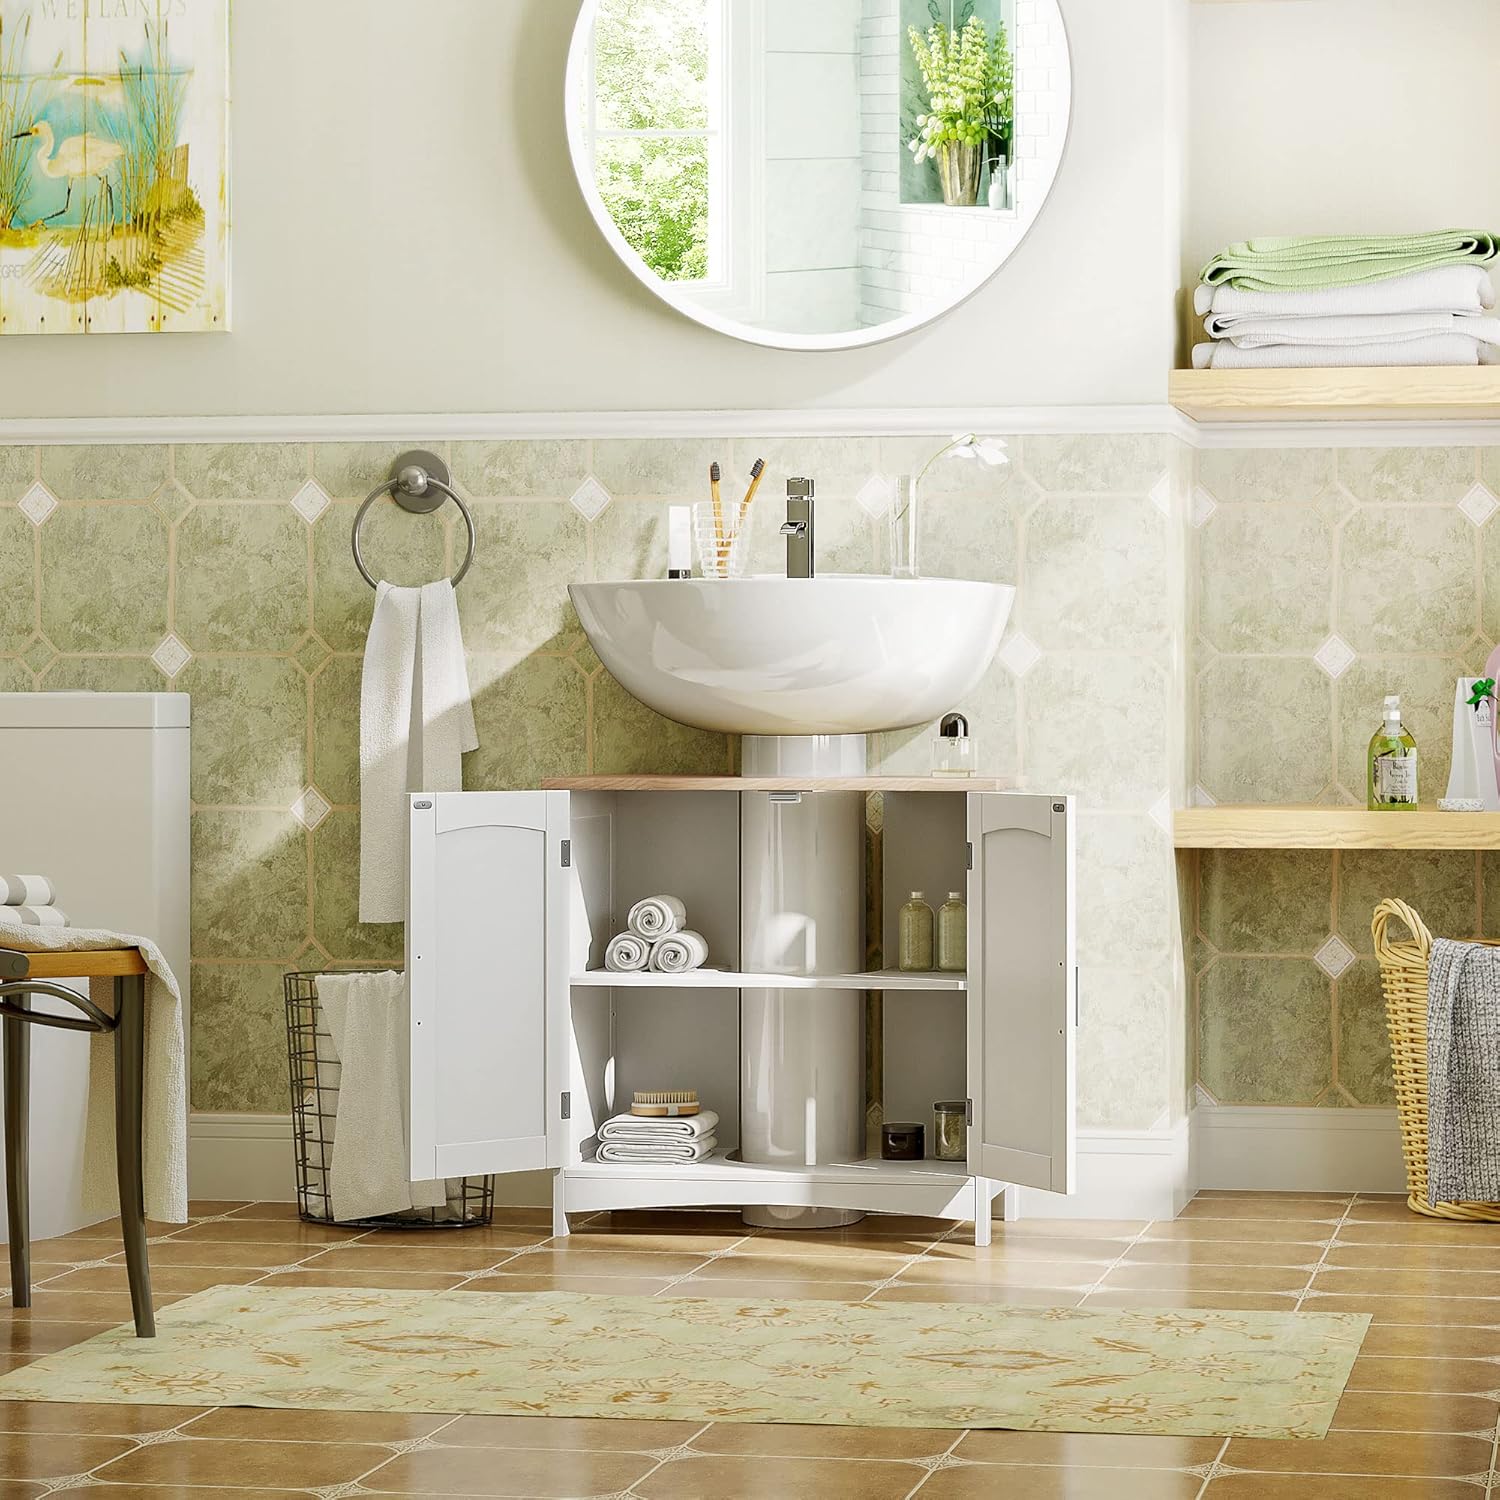
Image 4.1: Detail of aluminum alloy handles and elevated feet.
4.3. Install the Back Panel and U-Shaped Cutout
Attach the back panel. The top panel includes a 20 x 20 cm U-shaped cutout designed to accommodate sink plumbing. Ensure this cutout aligns with your sink's pipes during placement.
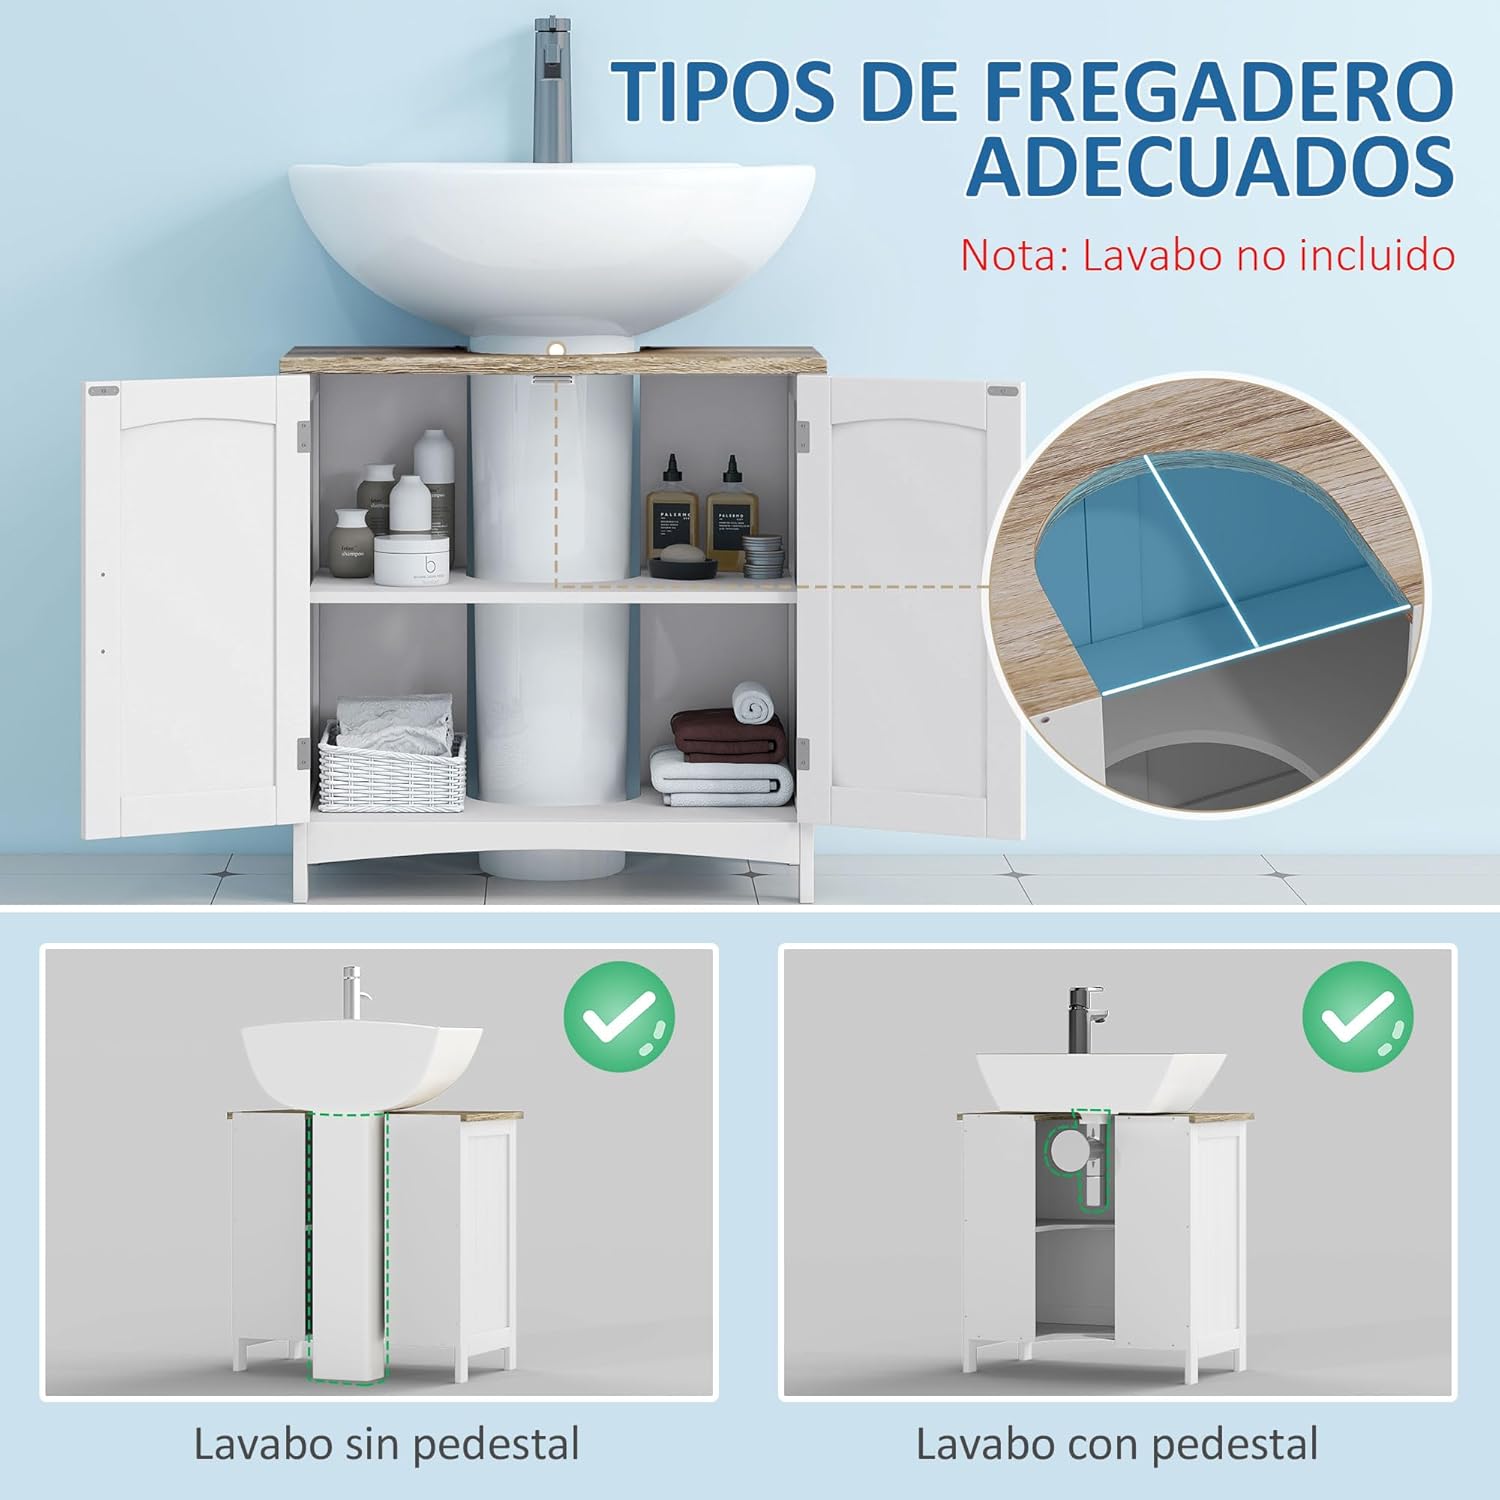
Image 4.2: Sink compatibility diagram, highlighting the U-shaped cutout for plumbing.
4.4. Install the Adjustable Shelf
Insert the shelf support pins into the desired holes on the side panels. Place the adjustable shelf on these pins. The shelf can be positioned at different heights to suit your storage needs.

Image 4.3: Adjustable shelf mechanism with multiple height options.
4.5. Attach the Doors
Mount the hinges to the cabinet doors and then attach the doors to the cabinet frame. Ensure the doors open and close smoothly. Install the aluminum alloy handles and magnetic catches.

Image 4.4: Detail of a door hinge.

Image 4.5: Detail of the magnetic catch.
4.6. Galutinė vieta
Carefully position the assembled cabinet under your sink, ensuring the U-shaped cutout correctly accommodates the plumbing. Verify the cabinet is level and stable.
5. Naudojimo instrukcijos
Your kleankin under-sink cabinet is designed for convenient bathroom storage.
- Saugykla: Use the interior compartments to store towels, toiletries, cleaning supplies, and other bathroom essentials.
- Reguliuojama lentyna: To adjust the shelf height, remove items from the shelf, lift the shelf, reposition the support pins to the desired height, and then place the shelf back on the pins.
- Durų valdymas: The doors are equipped with aluminum alloy handles for easy opening and magnetic catches to keep them securely closed.

Image 5.1: Interior storage capacity with items.
6. Priežiūra
- Valymas: Nuvalykite spintelių paviršius minkšta,amp audinys. Venkite abrazyvinių valiklių ar stiprių cheminių medžiagų, kurios gali pažeisti apdailą.
- Išsiliejimai: Immediately wipe up any water spills or moisture to prevent damage to the engineered wood material.
- Aparatinės įrangos patikrinimas: Periodiškai patikrinkite visus varžtus ir jungtis, kad jie būtų tvirtai priveržti. Jei reikia, priveržkite.
- Vėdinimas: Užtikrinkite tinkamą vonios kambario vėdinimą, kad sumažintumėte drėgmę, kuri laikui bėgant gali paveikti medienos gaminius.
7. Problemų sprendimas
- Svirduliuojanti spintelė: Ensure the cabinet is placed on a level surface. Check all assembly screws and tighten any loose ones.
- Durys netinkamai užsidaro: Check hinge alignment. Adjust hinges if needed. Ensure magnetic catches are properly installed and aligned.
- Shelf Not Stable: Verify that the shelf support pins are fully inserted into the holes and that the shelf is resting evenly on all pins.
8. Specifikacijos

8.1 pav.: Gaminio matmenys viršview.
| Prekės ženklas | kleankin |
| Modelio numeris | 834-356ND |
| Spalva | Baltas |
| Medžiaga | Inžinerinė mediena (MDF) |
| Bendri matmenys (ilgis x aukštis x aukštis) | 60 x 33 x 60 cm |
| U-Shaped Cutout Dimensions | 20 x 20 cm |
| Suitable Sink Dimensions (L x D) | Iki 50 x 20 cm |
| Maksimali svorio talpa (bendra) | 40 kg |
| Max Weight Capacity (Shelf) | 5 kg |
| Durų skaičius | 2 |
| Reguliuojamų lentynų skaičius | 1 (creating 2 compartments) |
| Saugyklos tūris | 79 litrai |
| Clearance from Floor | 1.5 colio (apie 3.8 cm) |
| Reikalingas surinkimas | Taip |
| Ypatingos savybės | Sturdy, Water-resistant, Modern, Adjustable, Stable |
9. Garantija ir palaikymas
For warranty information or customer support, please refer to the retailer's policy or contact the manufacturer directly. Keep your proof of purchase for any warranty claims.