
1. Įvadas
The Saramonic Blink 100 B5 is an ultra-portable and easy-to-use 2.4GHz wireless microphone system designed to deliver broadcast-quality sound. This system is ideal for content creators using iPhone 15, Android smartphones and tablets, newer iPads, computers, and other devices equipped with a USB-C port. Its compact design and advanced features make it suitable for various applications, including video recording, streaming, and audio recording.

2. Kas yra dėžutėje
- 1 x Blink 100 TX Transmitter
- 1 x Blink 100 RXUC USB-C Receiver
- 1 x Furry Windscreen for TX
- 1 x USB-C įkrovimo laidas
- 1 x nešiojamasis krepšys

3. Komponentai baigtiview
3.1. Blink 100 TX Transmitter
- Integruotas daugiakryptis mikrofonas: Captures clear audio.
- Pūkuotas priekinis stiklas: Reduces wind noise for outdoor use.
- Maitinimo mygtukas: Paspauskite ir palaikykite, kad įjungtumėte/išjungtumėte.
- Nutildymo mygtukas: Paspauskite, norėdami nutildyti/įjungti mikrofoną.
- NR (Noise Reduction) Button: Press to activate/deactivate active noise cancellation.
- Gain Control (+/-) Buttons: Adjust microphone input level (12-step control).
- 3.5 mm TRS įvestis: For connecting external lavalier microphones or line-level audio sources.
- USB-C įkrovimo prievadas: For charging the transmitter's internal battery.

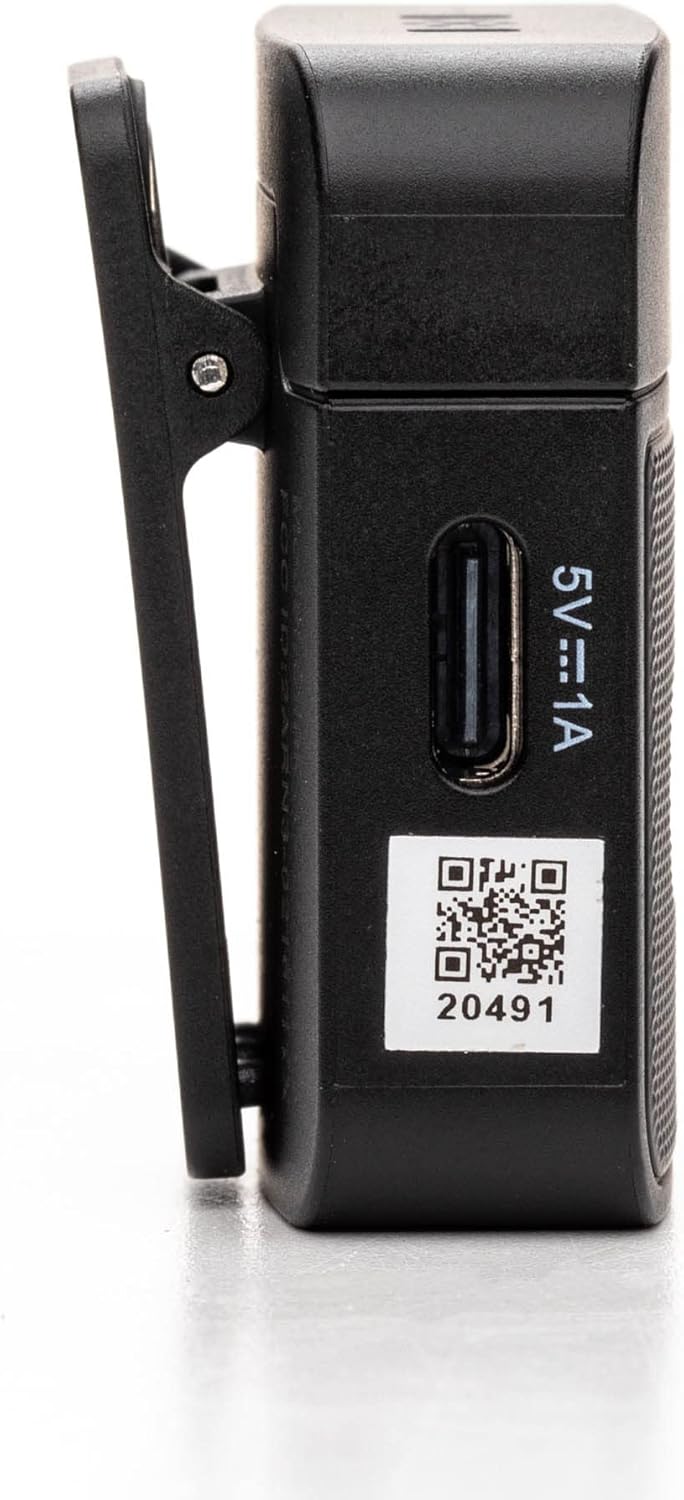
3.2. Blink 100 RXUC USB-C Receiver
- USB-C jungtis: Plugs directly into your mobile device or computer.
- USB-C Pass-Through Charging Port: Allows simultaneous charging of your mobile device while the receiver is connected.
- Susiejimo indikatorius: LED light indicates pairing status.

4. Sąranka
4.1. Siųstuvo įkrovimas
- Connect the supplied USB-C charging cable to the transmitter's USB-C port.
- Kitą laido galą prijunkite prie USB maitinimo šaltinio (pvz., kompiuterio, sieninio adapterio).
- The indicator light will show charging status. A full charge provides up to 10 hours of operation.
4.2. Imtuvo prijungimas
- Plug the Blink 100 RXUC receiver directly into the USB-C port of your smartphone, tablet, or computer.
- The receiver is battery-free and draws power from your device.

4.3. Automatinis susiejimas
The Blink 100 system features automatic pairing. Simply power on the transmitter and plug in the receiver. The units will automatically search for and connect to each other, indicated by a solid blue light on both units. The system also automatically switches channels to avoid static and dropouts.
5. Naudojimo instrukcijos
5.1. Pagrindinė operacija
- Maitinimo įjungimas/išjungimas: Press and hold the power button on the TX transmitter for 2 seconds.
- Wearing the Transmitter: Clip the TX transmitter to your shirt or clothing. For optimal sound, position the microphone approximately 6-8 inches from your mouth.

5.2. Įgykite kontrolę
Naudokite + ir - buttons on the TX transmitter to adjust the microphone's input gain. There are 12 steps of gain control to achieve optimal audio levels for different recording environments and speaker volumes.
5.3. Active Noise Cancellation (NR)
Paspauskite NR button on the TX transmitter to activate or deactivate the active noise cancellation feature. When activated, the system will reduce ambient background noise, providing clearer audio, especially in noisy environments.
5.4. Muting
Paspauskite Nutildyti button on the TX transmitter to temporarily mute the microphone. Press it again to unmute.
5.5. Connecting External Audio Sources
The 3.5mm TRS input on the TX transmitter allows you to connect external lavalier microphones, headset microphones, or even line-level audio devices (e.g., music players, mixers) for wireless transmission. Ensure the input mode is correctly set on the transmitter if using a line-level source (refer to advanced settings if available, though the Blink 100 series typically auto-detects mic input).
5.6. Powering Your Mobile Device
The RXUC receiver features a USB-C pass-through charging port. This allows you to charge your mobile device simultaneously while the receiver is connected and in use, ensuring extended recording sessions without draining your device's battery.
5.7. Oficialus produkto vaizdo įrašas
6. Specifikacijos
| Funkcija | Specifikacija |
|---|---|
| Prekės ženklas | Saramonikas |
| Modelio pavadinimas | Wireless Audio Transmission Kit |
| Prekės modelio numeris | Saramonic BLINK100 |
| Ryšio technologija | 2.4 GHz |
| Jungties tipas | C tipo USB |
| Suderinami įrenginiai | Personal Computer, Smartphones, Tablets |
| Mikrofono formos faktorius | Handheld (Clip-On) |
| Polinis raštas | Visakryptis |
| Garso jautrumas | 39 decibelų |
| Signalo ir triukšmo santykis | 76 dB |
| Dažnio atsakas | 24 GHz |
| Kanalų skaičius | 2 |
| Ypatingos savybės | Battery Indicator Light, Clip, Mute Function, Noise Reduction |
| Maitinimo šaltinis | Laidinis elektrinis (įkrovimui) |
| Baterijos | Reikalinga 1 ličio polimero baterija (pridedama) |
| Prekės svoris | 4.8 uncijos |
| Gaminio matmenys (I x P x A) | 3.74 x 2.32 x 4.69 colio |
| Spalva | Juoda |
| belaidis diapazonas | Up to 164 feet (50m) line-of-sight |
| TX Battery Run Time | Iki 10 valandų |
7. Problemų sprendimas
7.1. No Sound or Low Audio Level
- Ensure both the transmitter (TX) and receiver (RXUC) are powered on and successfully paired (solid blue indicator light).
- Check the microphone gain level on the TX transmitter using the +/- buttons. Increase the gain if the audio is too low.
- Verify that the RXUC is securely plugged into your recording device's USB-C port.
- Confirm that your recording application or device settings are configured to use the external microphone input.
- If using an external lavalier, ensure it is properly connected to the TX's 3.5mm TRS input.
7.2. Poor Sound Quality / Interference
- Activate the Noise Reduction (NR) feature on the TX transmitter if recording in a noisy environment.
- Ensure there are no obstructions between the transmitter and receiver, and try to maintain line-of-sight within the 164-foot (50m) range.
- Avoid operating near other 2.4GHz wireless devices (Wi-Fi routers, other wireless mics) that might cause interference.
- Check the furry windscreen is properly installed on the TX's built-in mic when recording outdoors to minimize wind noise.
7.3. Poravimo problemos
- Power cycle both the TX transmitter and RXUC receiver.
- Ensure both units are within close proximity during initial pairing.
- The system is designed for automatic pairing. If issues persist, refer to the full Saramonic support documentation online.
7.4. Device Not Charging via RXUC Pass-Through
- Ensure the charging cable is securely connected to both the RXUC's pass-through port and a working power source.
- Verify that your mobile device supports charging via its USB-C port while an accessory is connected.
8. Priežiūra
- Keep the devices clean using a soft, dry cloth.
- Venkite prietaisų laikymo ekstremaliose temperatūrose, drėgmėje ar tiesioginiuose saulės spinduliuose.
- Store the system in the provided carrying pouch when not in use to protect it from dust and damage.
- Nebandykite patys ardyti ar taisyti įrenginio, nes tai panaikins garantiją.
9. Garantija ir palaikymas
Saramonic products come with a manufacturer's warranty. For detailed warranty information, product registration, and technical support, please visit the official Saramonic websvetainėje arba susisiekite su jų klientų aptarnavimo tarnyba. Išsaugokite pirkimo kvitą kaip pirkimo įrodymą garantijos pretenzijoms.
Dėl papildomos pagalbos galite apsilankyti Saramonic Store on Amazon.