
1. Įvadas
This manual provides detailed instructions for the setup, operation, maintenance, and troubleshooting of your ELECROW 10.1 Inch Touchscreen Monitor. Please read this manual thoroughly before using the product to ensure proper functionality and to prevent damage.
The ELECROW 10.1 inch portable monitor features a 1280x800 IPS display, offering clear visuals and wide viewing angles. It supports touch input and is compatible with various devices and operating systems, including Raspberry Pi, Jetson Nano, Banana Pi, PC, and Windows.
2. Sąranka
2.1 Pakuotės turinys
Patikrinkite, ar pakuotėje yra visi toliau išvardyti daiktai:
- 1x 10.1 inch Touch Display
- 1x HD to HD Cable
- 2x USB cable (USB A to Micro USB)
- 1x HD to Mini HD Adapter
- 1x Screw Pack (4x Small Copper Pillars, 4x M2.5 Screws)
- 2x Bracket (Pro Stand)
- 1x Atsuktuvas
- 1x vartotojo vadovas

Image: All components included in the ELECROW 10.1 Inch Touchscreen Monitor package.

Vaizdas: Išsamus view of the monitor, cables, stand, and tools.
2.2 Fizinis viršininkasview ir Ryšiai
Familiarize yourself with the monitor's ports and dimensions.

Image: Monitor dimensions and port layout.

Image: Close-up of the monitor's rear panel showing port functions and mounting points.
2.3 Monitoriaus prijungimas
The monitor connects via HDMI for video signal and USB for power and touch functionality. Ensure your device has compatible ports.
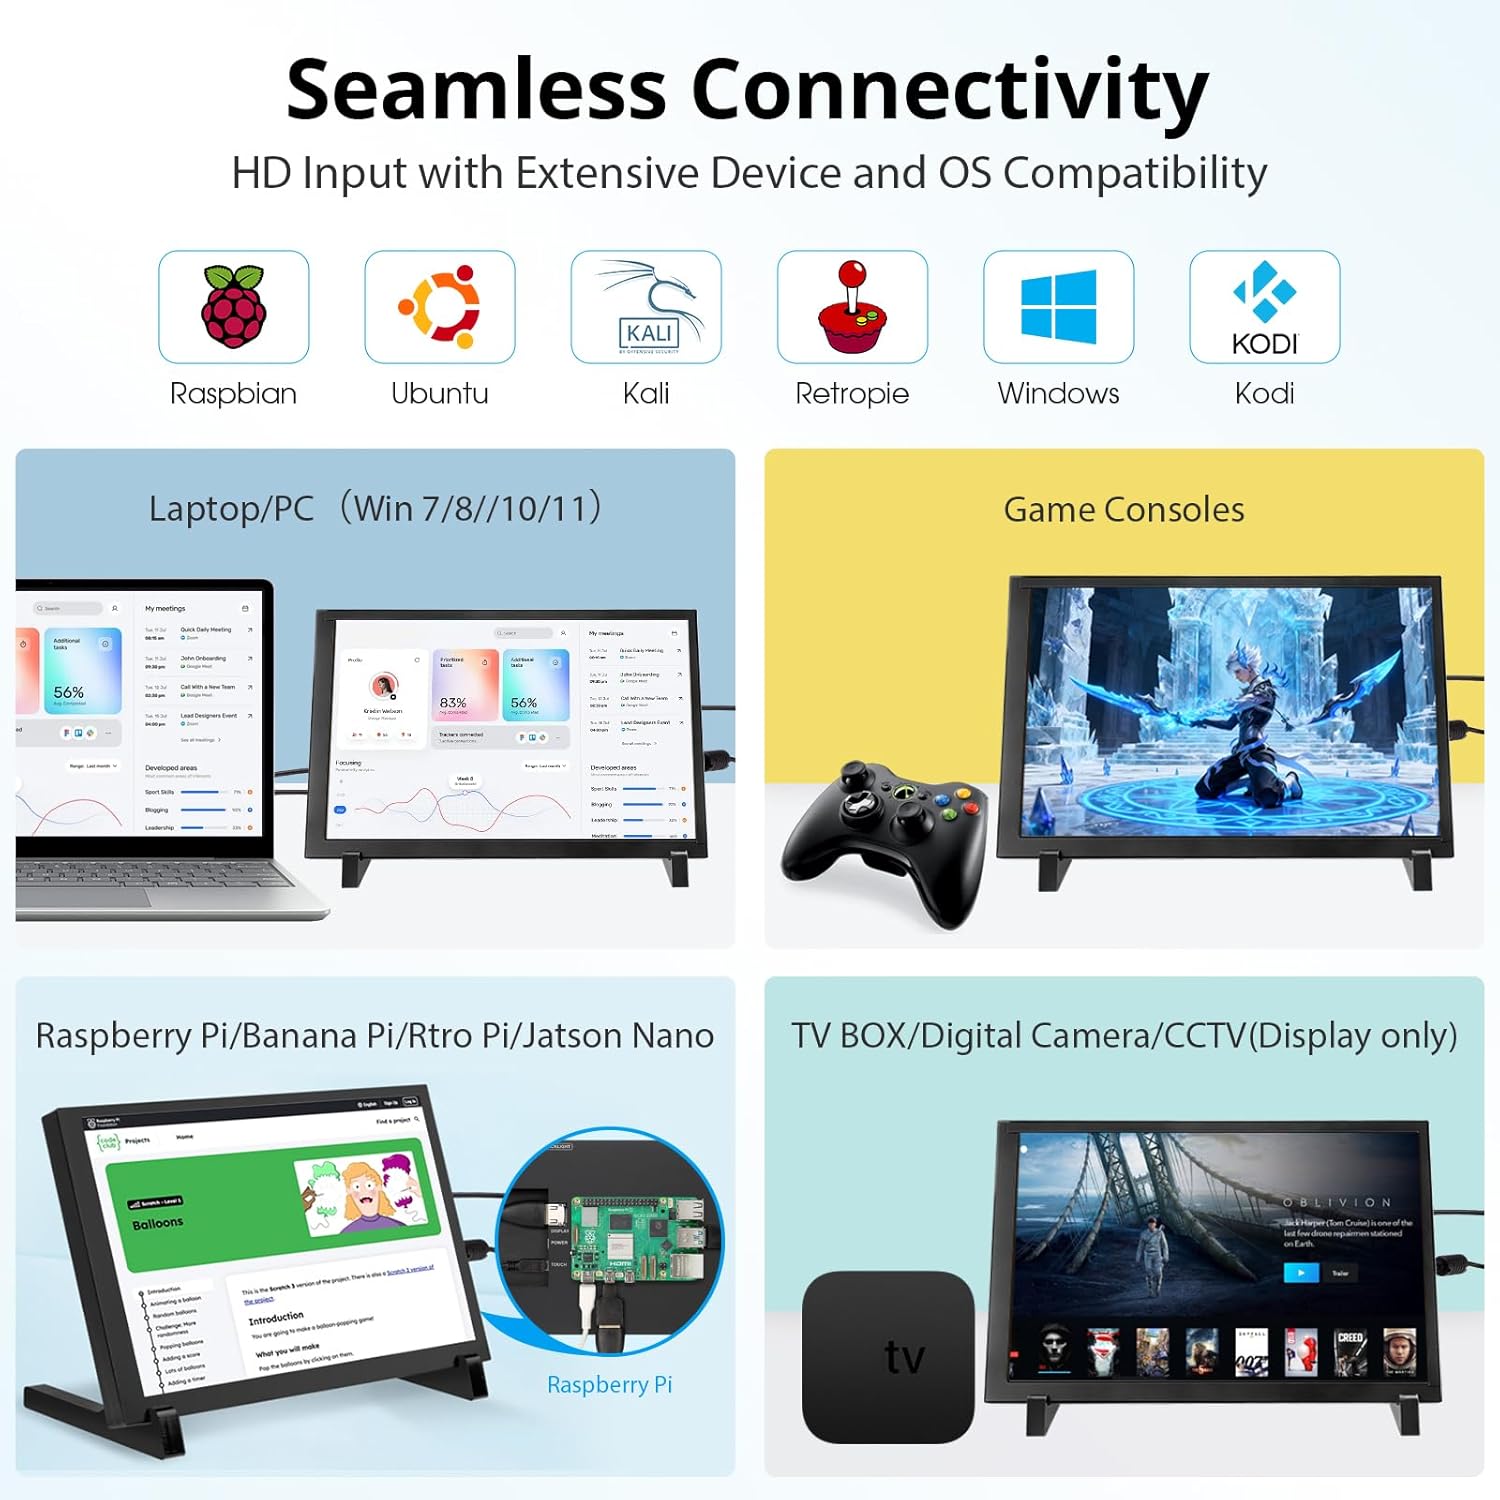
Vaizdas: Viršview of compatible devices and operating systems.
2.3.1 Prisijungimas prie „Raspberry Pi“
Connect the monitor to your Raspberry Pi using the provided HDMI cable for video and a USB cable for power and touch. For Raspberry Pi 4/5, use the included HD to Mini HD adapter if necessary. The monitor supports single-point touch on Raspberry Pi OS (Raspbian), Ubuntu, and Kali Linux.

Image: Raspberry Pi connection setup.
2.3.2 Prijungimas prie kompiuterio / nešiojamojo kompiuterio
Connect the monitor to your PC or laptop using an HDMI cable for video and a USB cable for power and touch. The monitor supports 5-point touch on Windows 11/10/8/7 systems.

Image: PC/Laptop connection setup.
2.3.3 Prijungimas prie kitų įrenginių
The monitor is compatible with Jetson Nano, Banana Pi, Beaglebone, and game consoles. Use appropriate HDMI and USB connections for these devices.

Image: Jetson Nano connection setup.
2.4 Montavimo parinktys
The monitor includes a stand for desktop use and features four mounting holes on the back for integration with Raspberry Pi or wall mounting.
2.4.1 Using the Included Stand
Attach the two bracket pieces to the bottom of the monitor to form a stable stand for desktop placement.
2.4.2 Mounting Raspberry Pi Behind the Display
The monitor is designed to allow a Raspberry Pi to be mounted directly behind it, creating a compact setup. Use the provided screws and copper pillars to secure the Raspberry Pi to the designated mounting holes.

Image: Raspberry Pi mounted discreetly behind the display.

Image: Integrated Raspberry Pi and monitor setup.
2.5 Sąranka baigtaview Vaizdo įrašas
Video: An official ELECROW overview and demonstration of the 10.1 Inch 1280x800 IPS LCD Touchscreen Monitor, showcasing jo funkcijas ir pagrindinę sąranką.
3. Naudojimo instrukcijos
3.1 Maitinimo įjungimas/išjungimas
Once connected to a power source via the USB cable, the monitor will automatically power on. To power off, disconnect the USB power cable. Some operating systems may offer display power management options.
3.2 Jutiklinio ekrano funkcionalumas
The monitor features a capacitive touchscreen. The number of touch points supported depends on the connected operating system:
- Windows (11/10/8/7): Palaiko 5 taškų daugialypį lietimą.
- Raspberry Pi OS (Raspbian), Ubuntu, Kali Linux, Win10 IoT: Supports single-point touch.

Image: 5-point multi-touch in action.

Image: Multi-touch gestures supported.
3.3 Ekrano kokybė
The 1280x800 IPS LCD panel provides a wide 178-degree viewing angle and accurate color reproduction.

Image: Display resolution comparison.

Vaizdas: Platus viewkampinio kampo demonstracija.
3.4 Universalios taikymo sritys
The monitor can be used for various purposes beyond its primary function with development boards, including:
- As a second monitor for PC/Laptops.
- As a digital photo frame.
- For home monitoring displays (CCTV).
- As a display for gaming consoles.

Vaizdas: pvzamples of versatile display applications.

Image: Monitor used for gaming.

Image: Monitor used for home monitoring.
4. Priežiūra
4.1 Ekrano valymas
Norėdami išvalyti ekraną, švelniai nuvalykite jį minkštu, nepūkuotu skudurėliu. Jei dėmės sunkiai įveikiamos, šiek tiek nuvalykiteampen the cloth with water or a screen-safe cleaning solution. Avoid using harsh chemicals, abrasive materials, or excessive moisture, as these can damage the screen surface.
4.2 Bendroji priežiūra
- Laikykite monitorių atokiau nuo tiesioginių saulės spindulių, šilumos šaltinių ir ekstremalių temperatūrų.
- Venkite monitoriaus numetimo ar stiprių smūgių.
- Do not attempt to disassemble the monitor. Unauthorized disassembly will void the warranty.
- Naudojimo metu užtikrinkite tinkamą vėdinimą.
5. Problemų sprendimas
5.1 Nėra vaizdo / Juodas ekranas
- Patikrinkite galią: Ensure the monitor is receiving power via the USB cable and the power source is active.
- Patikrinkite HDMI jungtį: Verify that the HDMI cable is securely connected to both the monitor and the source device. Try a different HDMI cable if available.
- Šaltinio įrenginio išvestis: Confirm that your source device (e.g., Raspberry Pi, PC) is configured to output video to the connected HDMI port.
- Rezoliucijos suderinamumas: Ensure the source device's output resolution is compatible with the monitor (1280x800).
5.2 Touch Functionality Not Working
- Check USB Touch Connection: Ensure the USB cable for touch functionality is securely connected from the monitor's 'TOUCH' port to a USB data port on your source device.
- Tvarkyklės diegimas: For some operating systems (especially Linux distributions), specific drivers or configuration might be required for touch input. Refer to the documentation for your specific OS and device (e.g., Raspberry Pi documentation for touchscreen setup).
- OS suderinamumas: Confirm your operating system supports touch input with this monitor. Windows systems generally offer multi-touch, while Linux-based systems often require specific setup for single-touch.
5.3 Vaizdo kokybės problemos
- Kabelio kokybė: A faulty HDMI cable can cause image distortion or flickering. Try a different cable.
- Source Resolution: Ensure the source device is outputting at the monitor's native resolution (1280x800) for optimal clarity.
6. Specifikacijos
| Funkcija | Specifikacija |
|---|---|
| Prekės ženklas | ELEKTROS |
| Modelio pavadinimas | DIS85101D |
| Ekrano dydis | 10.1 colių |
| Rezoliucija | 1280x800 |
| Gimtoji raiška | 1280 x 800 pikselių |
| Krašto santykis | 16:10 |
| Ekrano tipas | LCD |
| Ekrano technologija | IPS |
| Ekrano paviršiaus aprašymas | Blizgus |
| Kontrasto santykis | 2000:1 |
| Atnaujinimo dažnis | 60 Hz |
| Viewing kampas | 178 laipsnių |
| Ryškumas | 250 cd/m² |
| Reagavimo laikas | 8 milisekundžių |
| Ryšio technologija | HDMI, USB |
| Iš viso HDMI prievadų | 1 |
| Iš viso USB prievadų | 2 (Micro USB for power, Micro USB for touch/power) |
| Energijos suvartojimas | 5.29 vatų |
| ttage | 5 voltų |
| Prekės svoris | 521 g |
| Elemento matmenys (D x P x A) | 1.6 "D x 6.2" P x 9.4" A |
| Montavimo tipas | Desk Mount, Wall Mount (4 mounting holes) |
| Suderinami įrenginiai | Raspberry Pi 3/3B+/4B/5, Jetson Nano, Banana Pi, Beaglebone, PC (Windows, Linux, Ubuntu) |
7. Informacija apie garantiją
This ELECROW 10.1 Inch Touchscreen Monitor comes with a 1 metų gamintojo garantija. Please retain your proof of purchase for warranty claims. The warranty covers defects in materials and workmanship under normal use. It does not cover damage caused by misuse, accidents, unauthorized modifications, or improper installation.
8. Pagalba klientams
For technical assistance, troubleshooting not covered in this manual, or warranty inquiries, please contact ELECROW customer support through the retailer where you purchased the product or visit the official ELECROW websvetainė kontaktinei informacijai.