
1. Įvadas
This manual provides essential information for the safe and effective use of your LUXBIRD 10"x 20.75" Seedling Heat Mat and Digital Thermostat Controller Combo Set. This product is designed to optimize conditions for seedling growth by providing controlled warmth to the rooting area. Please read all instructions carefully before operation.
2. Gaminio komponentai
Your LUXBIRD combo set includes the following items:
- Two (2) 10" x 20.75" Seedling Heating Mats
- One (1) Digital Thermostat Controller (120v US Plug)
- Two (2) Sensor Probes

1 pav. Baigtaview of the LUXBIRD Seedling Heat Mat and Digital Thermostat Controller Combo Set, showing two heat mats, one controller, and two sensor probes.
3. Sąrankos instrukcijos
- Šildymo kilimėlio išdėstymas: Place the heating mat on a well-drained surface, ensuring no standing water. For optimal performance, place the mat on an insulated surface rather than directly on a cold floor.
- Prijunkite valdiklį: Plug the heating mats into the 'WORK1' and 'WORK2' sockets on the digital thermostat controller.
- Insert Sensor Probes: Insert the sensor probes into the rooting area of your plant trays. The probes should be placed directly into the soil or growing medium to accurately monitor temperature.
- Maitinimo jungtis: Plug the digital thermostat controller into a standard 120V US power outlet.
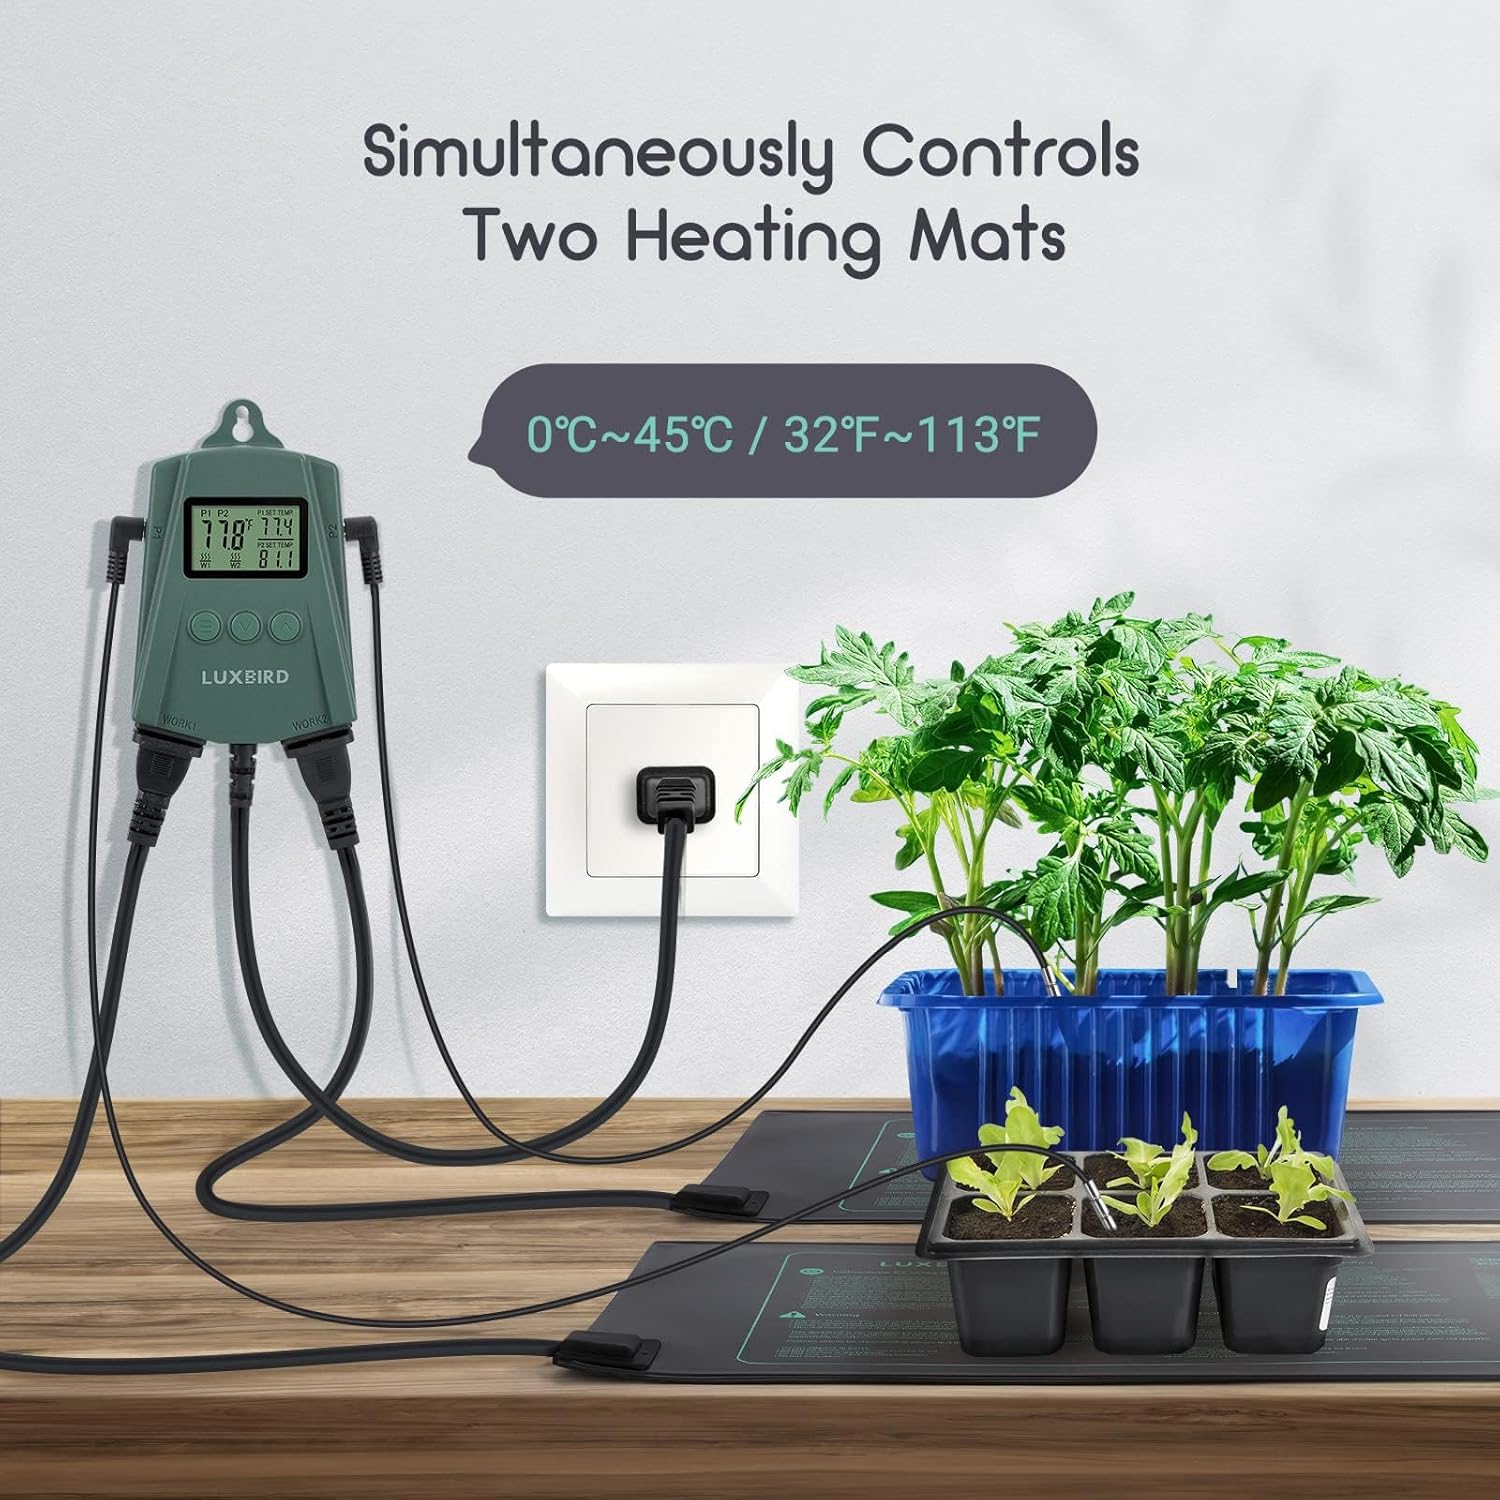
Figure 2: The digital thermostat controller connected to two heat mats, ready for use with plant trays.
4. Naudojimo instrukcijos
4.1. Digital Thermostat Controller
The digital thermostat controller allows precise temperature management for your seedling heat mats. It features a display for current temperature and set temperature, along with buttons for adjustment.
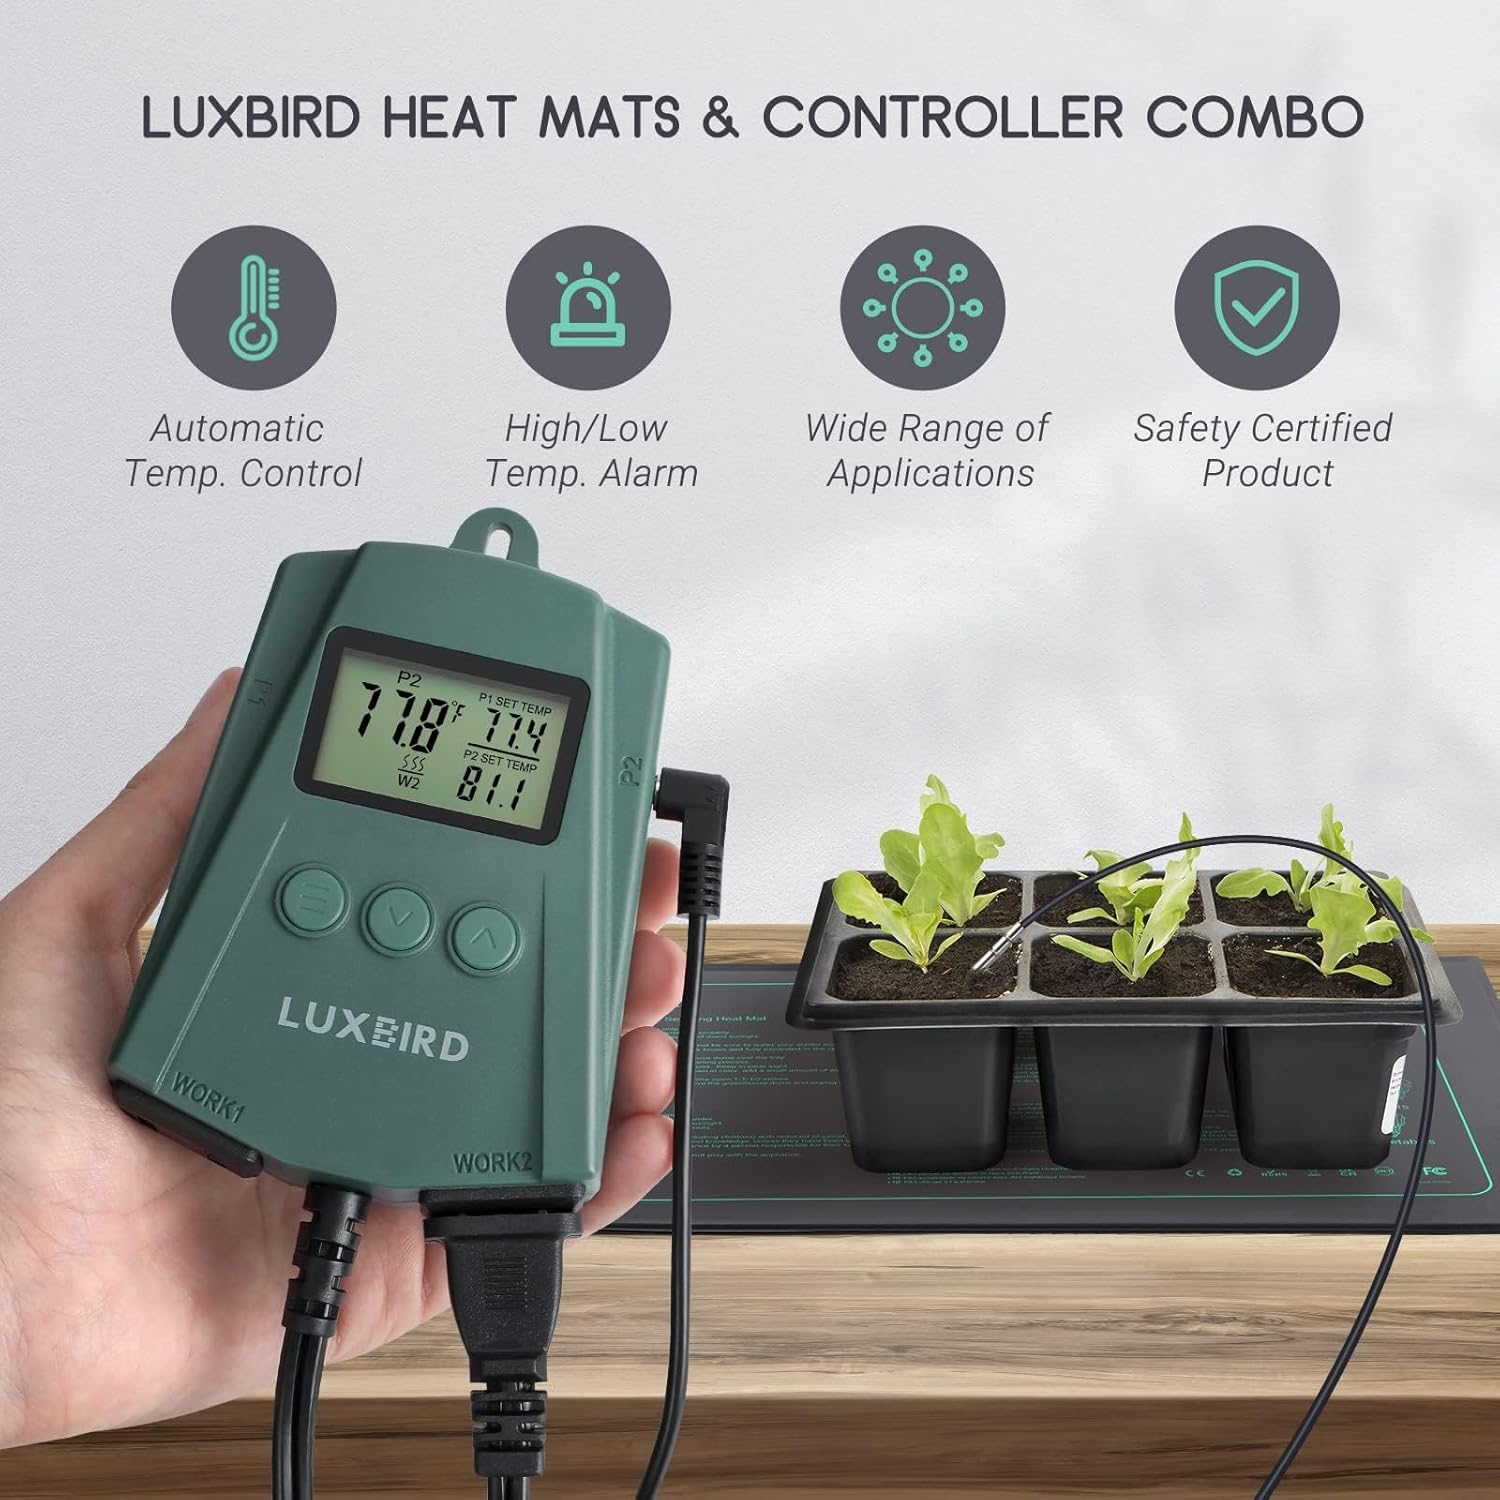
Figure 3: The digital thermostat controller displaying temperature readings.
4.2. Temperatūros nustatymas
The temperature control range is 32.0°F (0°C) to 113°F (45°C). The controller can maintain the root area temperature at 86°F (30°C) to 104°F (40°C) when the ambient temperature is around 68°F (20°C).
- Press the 'SET' button to enter temperature setting mode.
- Use the 'UP' and 'DOWN' arrows to adjust the desired temperature.
- Press 'SET' again to confirm and exit setting mode.
The controller provides real-time monitoring of the detected temperature via the probe and displays the heating status. It will alert you if the detected temperature exceeds safe limits.
4.3. Oficialūs produktų vaizdo įrašai
Video 1: Demonstrates the features and operation of the LB-2SC Digital Thermostat Controller.
Video 2: Provides an overview of the Luxbird LB-HM21W Heat Mat, highlighting its design and functionality.
5. Temperature Settings and Germination Chart
The heat mat is designed to raise rooting area temperatures approximately 10-20°F (5-11°C) above ambient air temperature. Covering your plant tray with a humidity cover or dome will also help maintain root area warmth and humidity for better rooting.
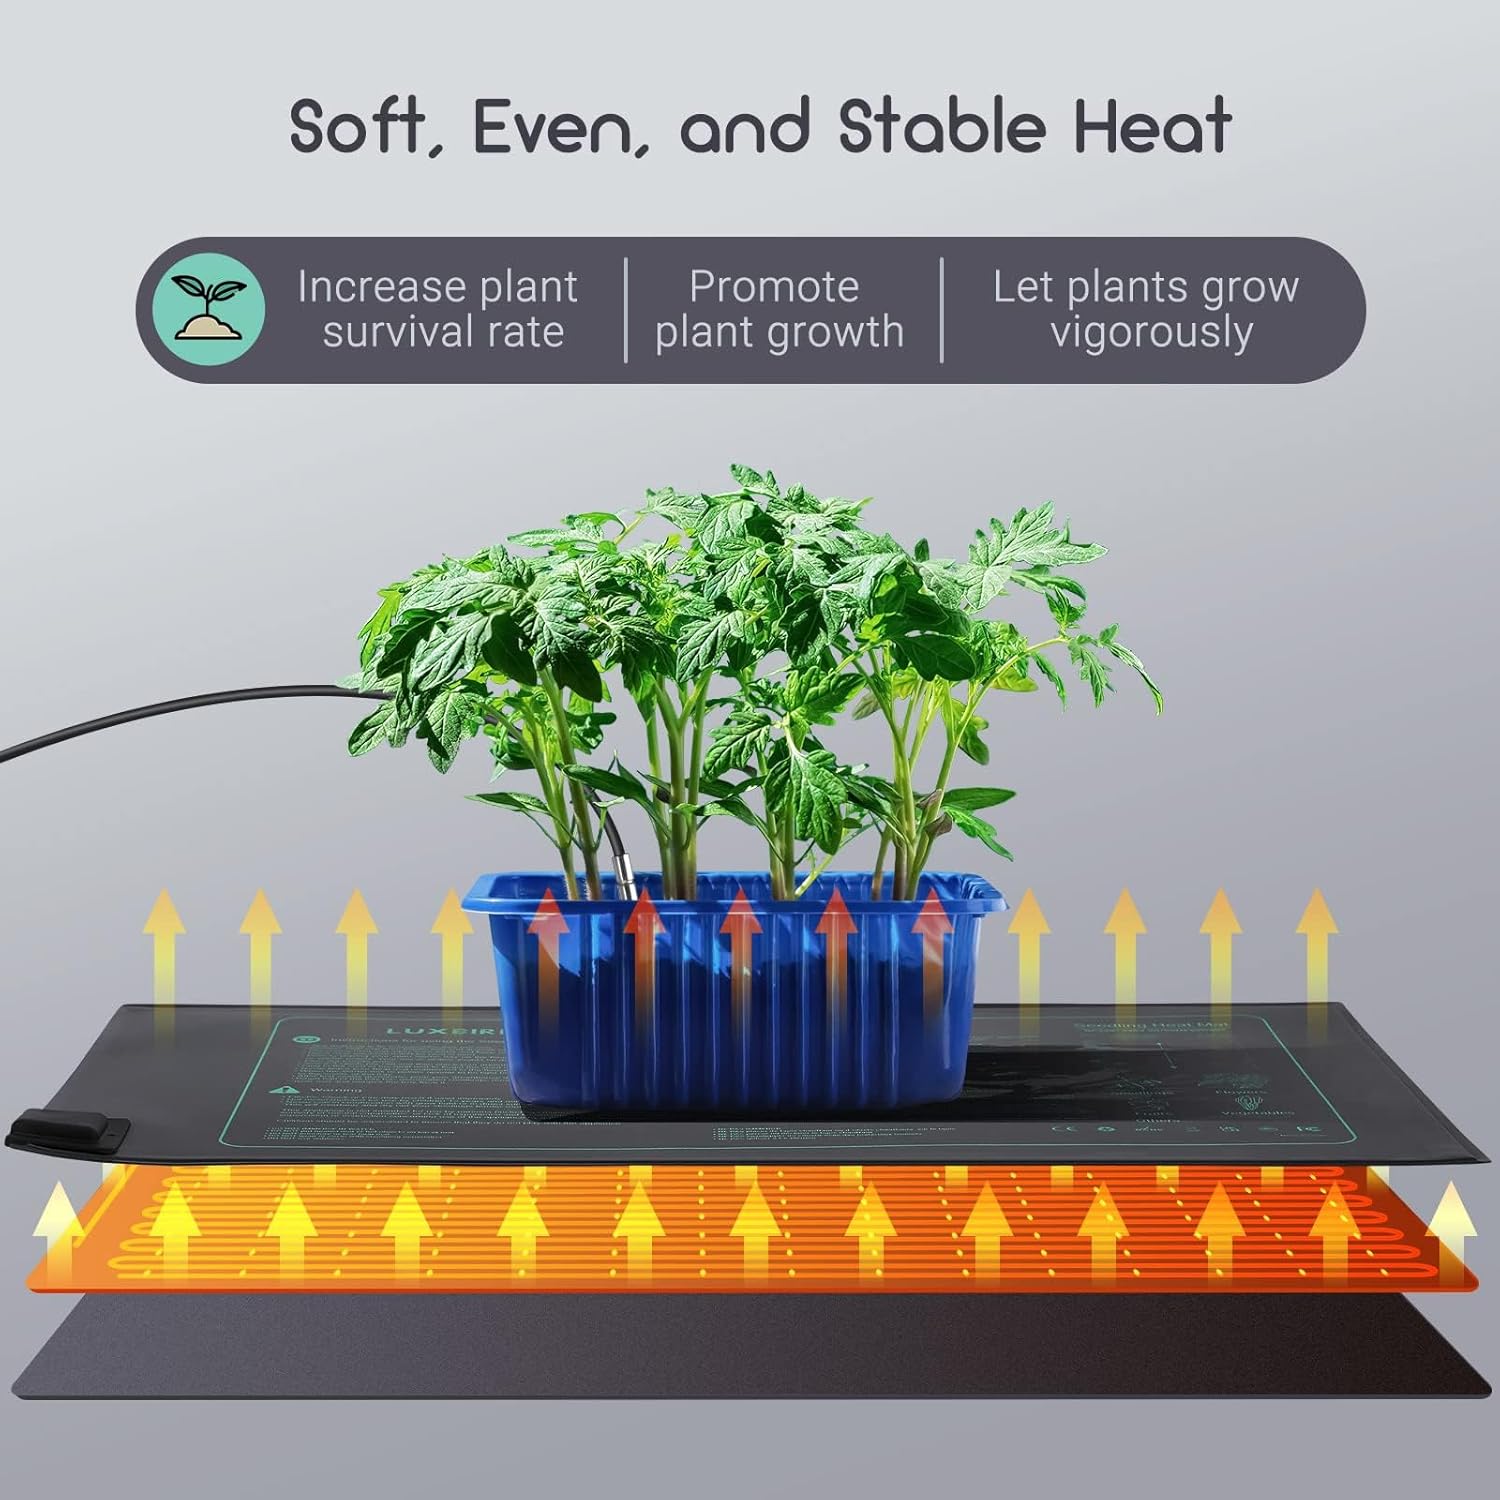
Figure 4: Illustration showing soft, even, and stable heat distribution from the heat mat, promoting plant growth.
The product includes a germination chart printed on the mat itself, providing approximate days to germination for various plants at optimal temperatures (70-85°F / 24-30°C).
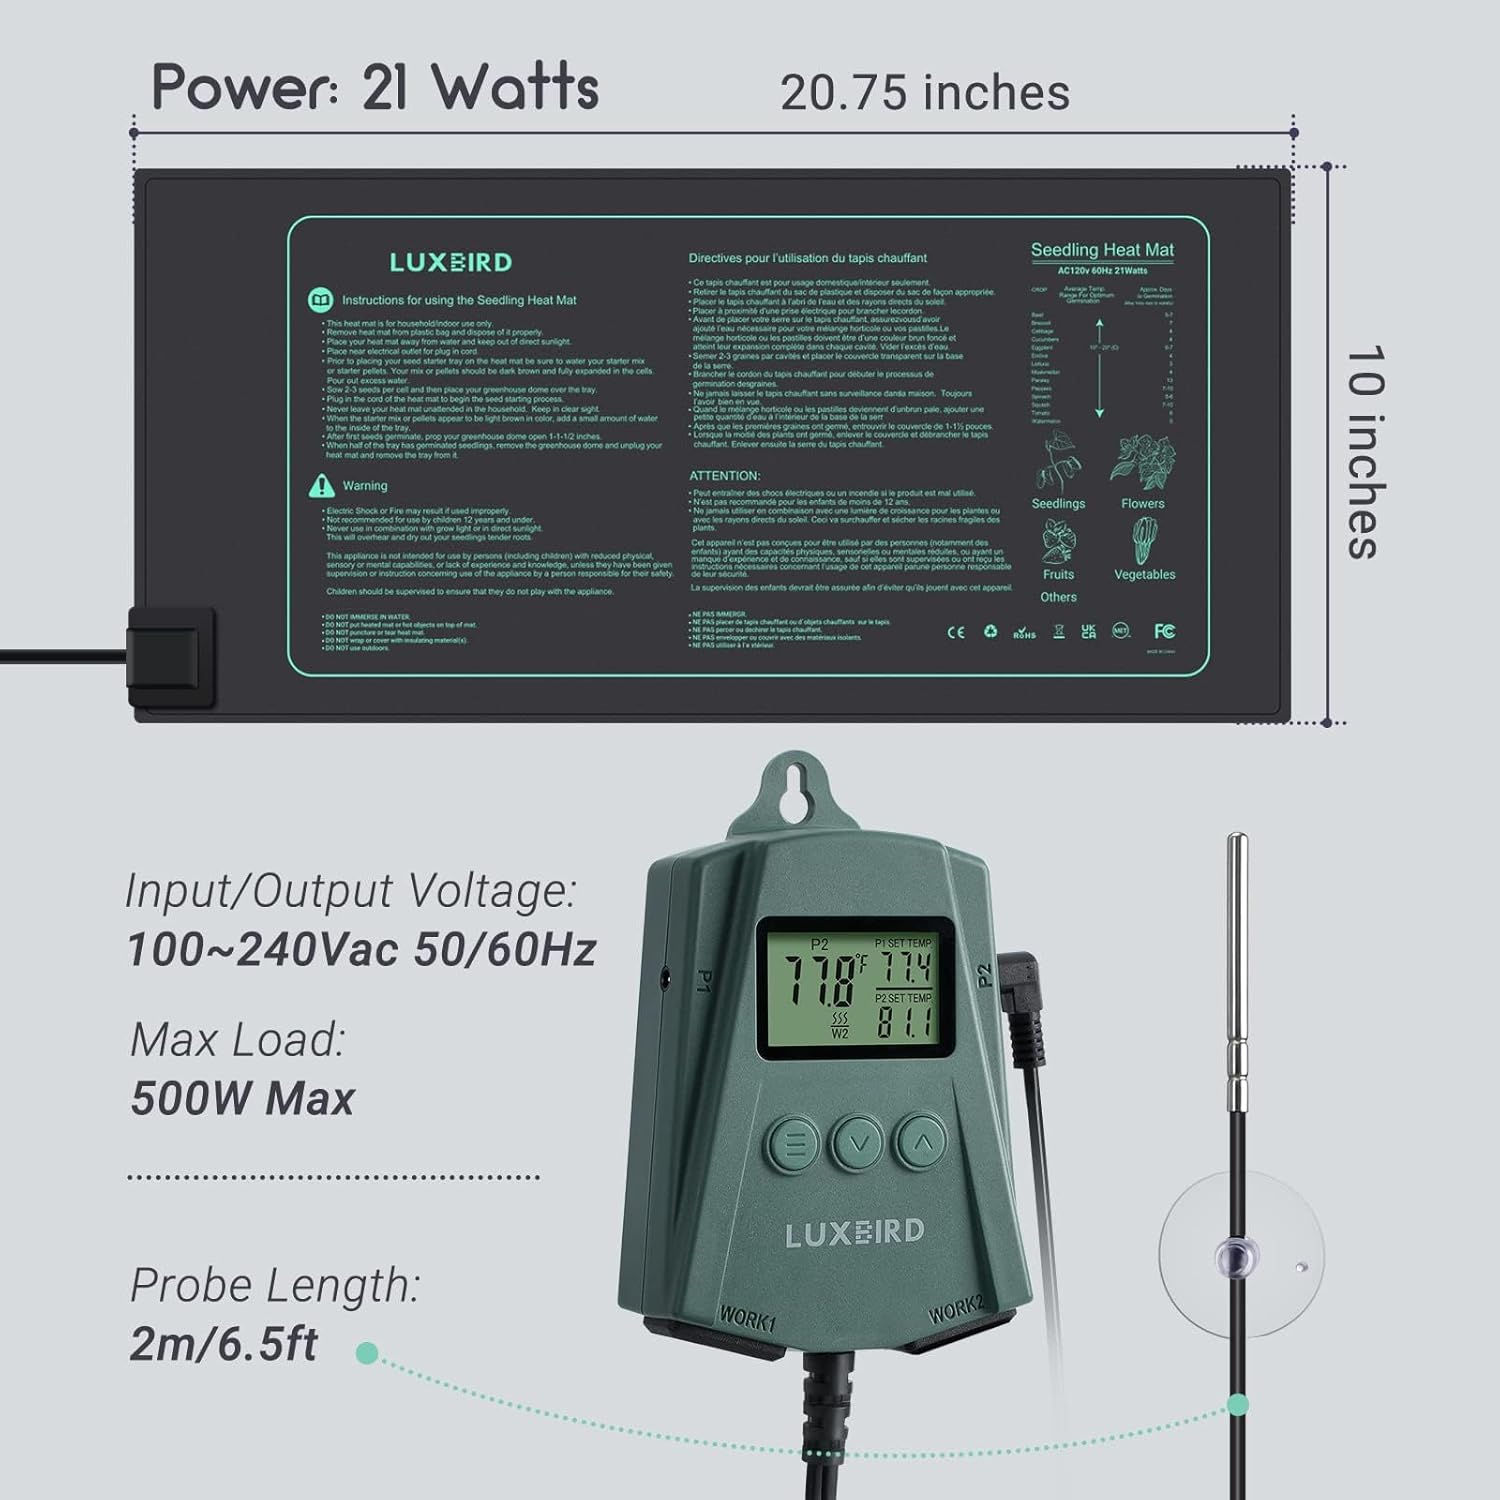
Figure 5: The heat mat displaying its dimensions (10" x 20.75") and an example germination chart for various crops.
6. Saugos įspėjimai
- Elektros sauga: Fire or electric shock may result from improper use. Ensure the surface under the mat is free of sharp points or objects that might puncture the mat.
- Vieta: Do not place the mat inside a tray or cover directly with soil or growing medium. Do not place any heat insulating materials over the heat mat, as it may cause it to overheat.
- Panardinimas į vandenį: NENARDINKITE Į VANDENĮ.
- Naudoti tik patalpose: Naudoti tik patalpose.
- Kištuko tipas: Šis prietaisas turi poliarizuotą kištuką (viena mentė platesnė už kitą). Siekiant sumažinti elektros smūgio pavojų, šis kištukas skirtas tik vienu būdu tilpti į poliarizuotą lizdą. Jei kištukas iki galo netelpa į lizdą, apverskite kištuką. Jei jis vis tiek netelpa, kreipkitės į kvalifikuotą elektriką. Jokiu būdu nemodifikuokite kištuko.
- Vaikai: Šis prietaisas nėra skirtas naudoti asmenims (įskaitant vaikus), kurių fizinės, jutimo ar psichikos negalios arba neturintys patirties ir žinių, nebent už jų saugumą atsakingas asmuo juos prižiūrėtų arba instruktuotų, kaip naudoti prietaisą. Vaikus reikia prižiūrėti, kad jie nežaistų su prietaisu.
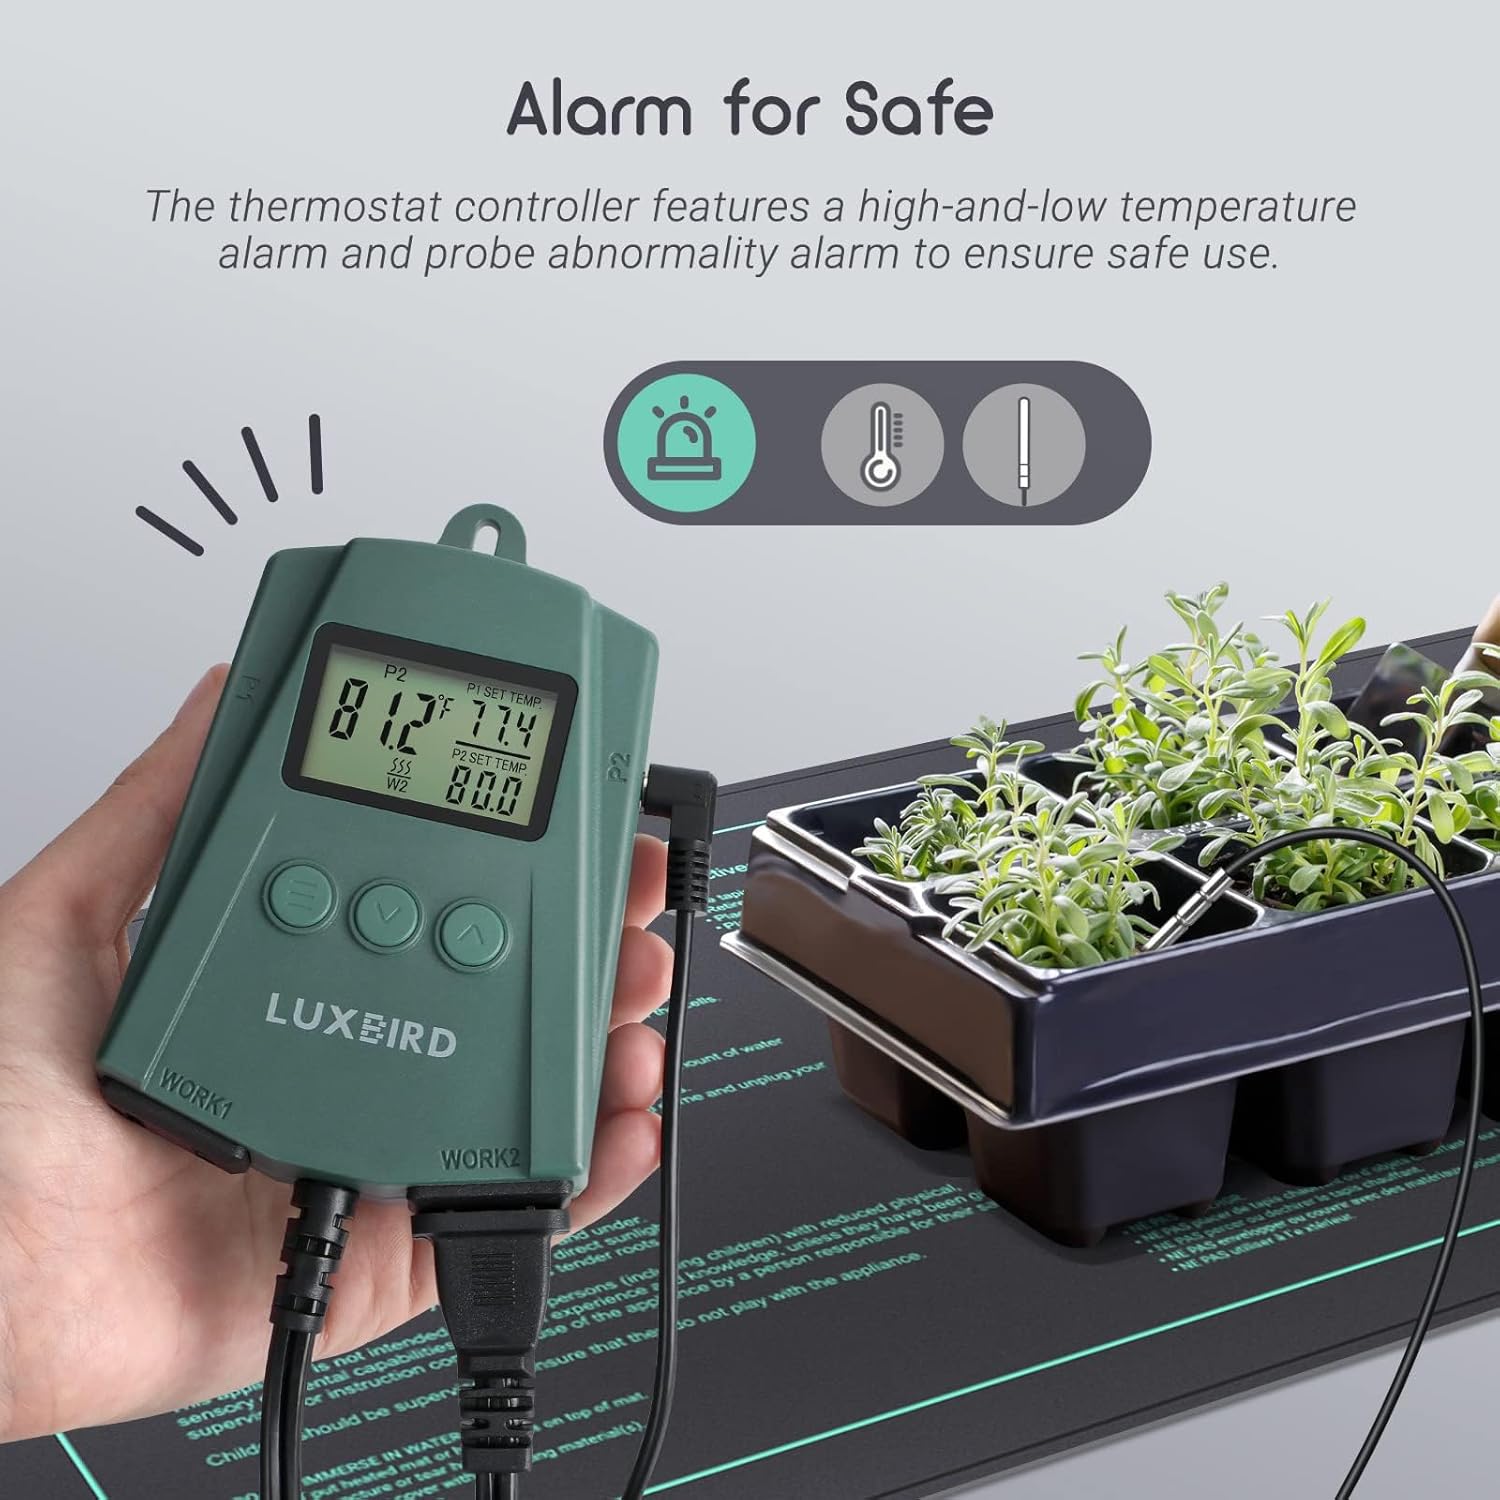
Figure 6: The thermostat controller features a high- and low-temperature alarm and probe abnormality alarm to ensure safe use.
7. Priežiūra
The heat mat adopts heavy-duty PVC material for its outer layer and IP67-grade waterproof material, making it resistant to splashing and spraying. This design facilitates easy washing and wiping for cleaning.
- Valymas: After each use, wipe down the heat mat with a damp cloth. Ensure the mat is completely dry before storing.
- Saugykla: The mat is foldable for easy storage. Keep the heating pad away from sharp objects when using or storing.

Figure 7: The IP67 waterproof rating ensures the heat mat is splash-proof, dust-proof, and easy to clean.
8. Problemų sprendimas
If you experience issues with your heat mat or thermostat controller, consider the following general troubleshooting steps:
- No Heat/Uneven Heating: Ensure the mat is placed on an insulated surface. Check all power connections. Verify the sensor probe is correctly inserted into the soil.
- Temperatūros netikslumas: Ensure the sensor probe is fully inserted into the medium you wish to measure. Calibrate the probe if necessary (refer to the thermostat's specific instructions for calibration range, typically -4.9°C to 4.9°C or -9.9°F to 9.9°F).
- Valdiklio gedimas: If the controller displays error codes or behaves unexpectedly, unplug it from the power source, wait a few minutes, and plug it back in. If the issue persists, contact customer support.

Figure 8: Precision probes offer accurate temperature measurement and calibration capabilities.
9. Specifikacijos
| Funkcija | Detalė |
|---|---|
| Modelio numeris | B0BMLSHRPS |
| Šilumos kilimėlio matmenys | 10" x 20.75" |
| Įvesties / išvesties tomastage | 120V US Plug |
| Power (Heat Mat) | 21 Watts (per mat) |
| Max Load (Controller) | 500W maks |
| Temperatūros valdymo diapazonas | 32.0 ° F ~ 113 ° F (0 ° C ~ 45 ° C) |
| Zondo ilgis | 2 m / 6.5 pėdų |
| Atsparumo vandeniui įvertinimas | IP67 |
| Pakuotės matmenys | 10.91 x 5.71 x 4.21 colio |
| Prekės svoris | 2.4 svaro |
10. Garantija ir palaikymas
For warranty information, technical support, or any product-related inquiries, please refer to the documentation included with your product or contact Luxbird customer service directly. Keep your purchase receipt for warranty claims.