
1. Įvadas
Thank you for choosing the Cecotec Ready Warm 2000 Now Mica Heater. This manual provides essential information for the safe and efficient use of your new heater. Please read it thoroughly before operation and retain it for future reference.
The Cecotec Ready Warm 2000 Now is a 2000W mica heater designed to provide rapid and efficient heating for areas up to 25 m². It features an adjustable thermostat and two power levels (1000W and 2000W) for customized comfort. Its lightweight design and integrated wheels ensure easy portability between rooms.
2. Saugos instrukcijos
To prevent personal injury or property damage, always observe basic safety precautions when using electrical appliances. This heater is equipped with a triple safety system, including automatic shutdown in case of tipping or overheating, and a protective grille.
- Prieš naudodami šildytuvą, perskaitykite visas instrukcijas.
- Nenaudokite šildytuvo šalia vandens arba damp aplinkos.
- Įsitikinkite, kad ttagAnt etiketės nurodyta įtampa atitinka jūsų elektros tinklo įtampątage.
- Neuždenkite šildytuvo ir neužblokuokite jo oro įleidimo / išleidimo angų.
- Laikykite degias medžiagas bent 1 metro atstumu nuo šildytuvo.
- Visada atjunkite šildytuvą nuo elektros tinklo, kai jo nenaudojate arba prieš valydami.
- Do not insert objects into the grilles.
- Supervise children and individuals with reduced physical, sensory, or mental capabilities when the heater is in use.
- Do not use the heater if the cord or plug is damaged. Contact authorized service personnel for repairs.
3. Gaminio komponentai
Familiarize yourself with the main parts of your Cecotec Ready Warm 2000 Now Mica Heater.

1 paveikslas: Kampuotas view of the Cecotec Ready Warm 2000 Now Mica Heater, showing the mica heating elements behind the protective grille, control knobs on the side, and wheels for portability.
- Mica Heating Elements
- Apsauginės grotelės
- Control Panel (Thermostat and Power Selector)
- Maitinimo indikatoriaus lemputė
- Pagrindas su ratukais
- Maitinimo laidas ir kištukas

2 paveikslas: Priekyje view of the heater, highlighting the mica heating elements glowing red when active, visible through the mesh grille.

3 paveikslas: Šoninė view of the heater, showing the compact profile and the control panel on the right side.
4. Sąranka
4.1 Išpakavimas
Carefully remove the heater from its packaging. Retain the packaging for storage or future transport. Check for any signs of damage. If the product is damaged, do not use it and contact customer support.
4.2 Surinkimas (jei reikia)
The Cecotec Ready Warm 2000 Now Mica Heater typically comes pre-assembled with its base and wheels. If the wheels or base require attachment, follow these steps:
- Padėkite šildytuvą aukštyn kojomis ant minkšto, lygaus paviršiaus, kad nesubraižytumėte.
- Align the wheel assemblies with the designated slots on the heater's base.
- Secure the wheel assemblies using the provided screws. Ensure they are firmly attached.
- Grąžinkite šildytuvą į vertikalią padėtį.
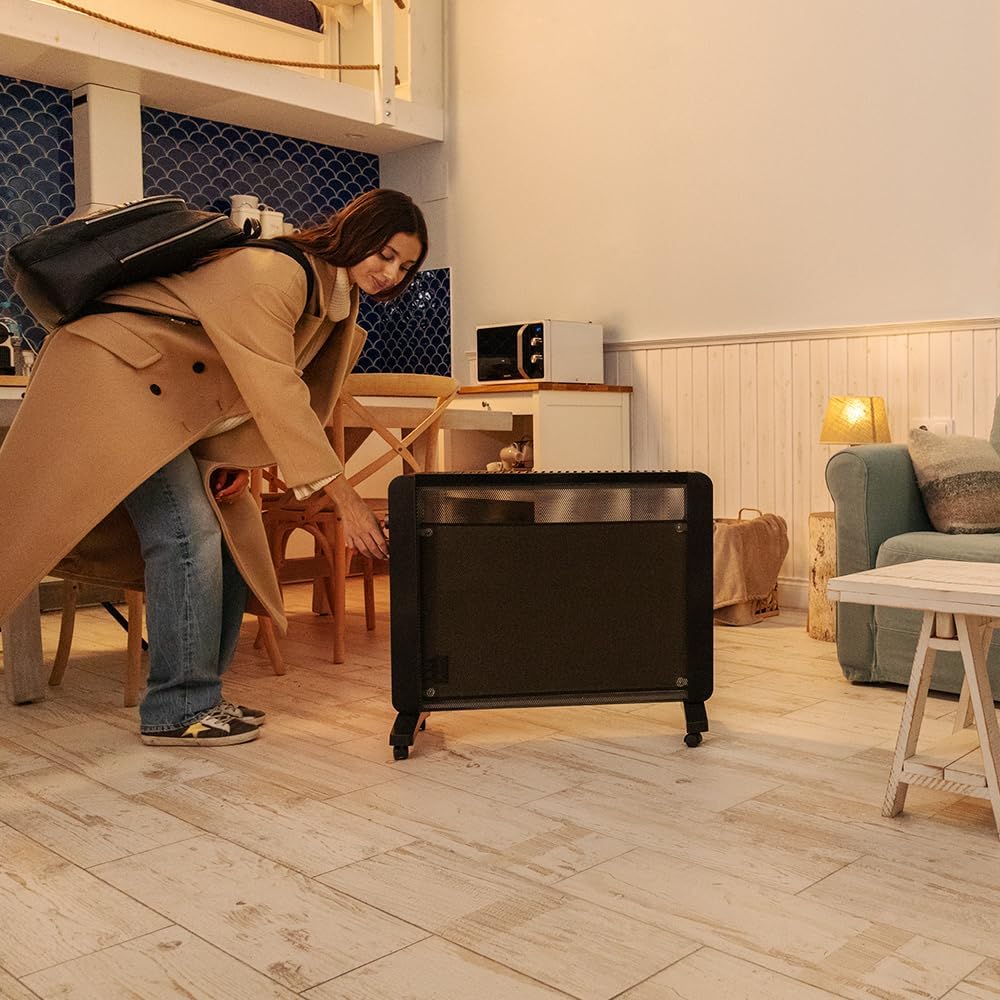
4 paveikslas: The heater's lightweight design and integrated wheels allow for easy movement between rooms.
4.3 Įdėjimas
Place the heater on a firm, level surface. Ensure there is adequate clearance around the heater (at least 1 meter from walls, furniture, curtains, and other flammable materials) to allow for proper air circulation and prevent fire hazards. Do not place the heater directly below a power outlet.
5. Naudojimo instrukcijos
The Cecotec Ready Warm 2000 Now Mica Heater offers simple and intuitive controls for optimal heating.

5 paveikslas: Close-up of a hand adjusting one of the two control knobs on the side panel of the heater.
5.1 Įjungimas ir išjungimas
- Plug the power cord into a suitable electrical outlet. The power indicator light may illuminate.
- To turn on the heater, rotate the lower control knob (Power Selector) to your desired power level:
- I: 1000W (Low Power)
- II: 2000W (High Power)
- To turn off the heater, rotate the Power Selector knob to the "0" (Off) position and unplug the unit from the wall outlet.
5.2 Termostato reguliavimas
The upper control knob functions as the adjustable thermostat. This allows you to set your desired room temperature.
- Once the heater is powered on (Power Selector set to I or II), rotate the upper control knob (Thermostat) clockwise to increase the desired temperature setting, or counter-clockwise to decrease it.
- The heater will cycle on and off to maintain the set temperature. When the room temperature reaches the set level, the heater will temporarily stop heating. It will resume heating when the temperature drops below the set point.
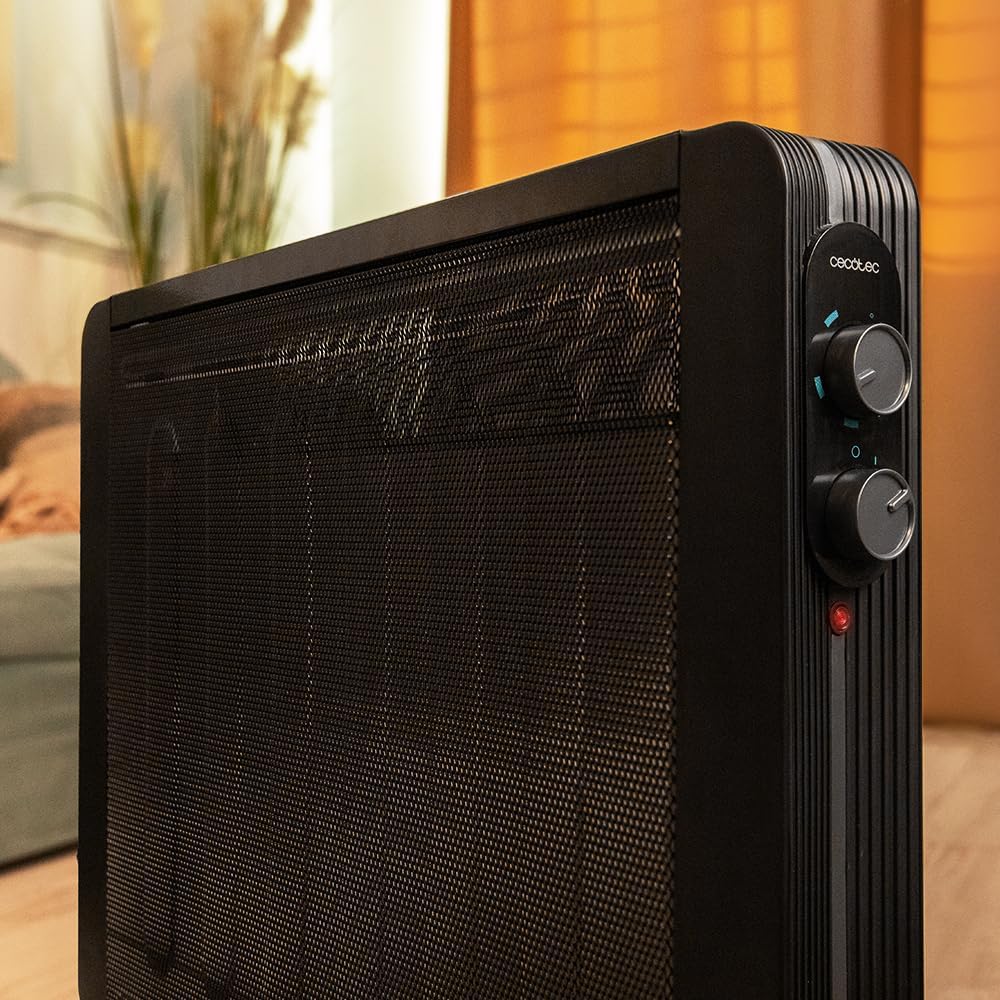
6 paveikslas: Išsamus view of the control panel, showing the upper thermostat knob and the lower power selector knob.
6. Priežiūra
Reguliarus šildytuvo aptarnavimas užtikrina jo ilgaamžiškumą ir efektyvų veikimą.
6.1 Valymas
- Prieš valydami visada atjunkite šildytuvą nuo elektros tinklo ir leiskite jam visiškai atvėsti.
- Išorinius paviršius nuvalykite minkšta, damp audinys. Nenaudokite abrazyvinių valiklių ar tirpiklių.
- Nemerkite šildytuvo į vandenį ar kitą skystį.
- Dulkėms nuo grotelių pašalinti naudokite dulkių siurblį su šepetėliu.
- Prieš vėl įjungdami šildytuvą, įsitikinkite, kad jis yra visiškai sausas.
6.2 Saugykla
When not in use, store the heater in a cool, dry place, preferably in its original packaging, to protect it from dust and damage. The heater features a foldable system for minimal space storage.
7. Problemų sprendimas
If you encounter issues with your heater, refer to the following troubleshooting guide. If the problem persists, contact customer support.
| Problema | Galima priežastis | Sprendimas |
|---|---|---|
| Šildytuvas neįsijungia. |
|
|
| Šildytuvas gamina nepakankamai šilumos. |
|
|
| Neįprastas kvapas pirmojo naudojimo metu. | New appliance burning off manufacturing residues. | This is normal for the first few uses. Ensure good ventilation. The odor should dissipate quickly. |
8. Specifikacijos
Technical details for the Cecotec Ready Warm 2000 Now Mica Heater.
| Funkcija | Detalė |
|---|---|
| Prekės ženklas | Cecotec |
| Modelio numeris | 08266 |
| Galia | 2000 W (2 levels: 1000W / 2000W) |
| Šildymo būdas | Radiant and Convection |
| Aprėpties sritis | Iki 25 m² |
| Termostatas | Reguliuojamas |
| Saugos sistema | Triple (Auto-off for tip-over/overheat, protective grille) |
| Matmenys (I x P x A) | 78 x 13.5 x 62.5 cm |
| Svoris | 4.3 kg |
| Spalva | Juoda |
| Maitinimo šaltinis | Su laidu elektra |

7 paveikslas: Galinis view of the heater, showing the power cord exit point and the overall construction.

8 paveikslas: The heater positioned in a living room, demonstrating its compact size and suitability for various indoor spaces.
9. Garantija ir palaikymas
Cecotec products are manufactured to high-quality standards. This product comes with a manufacturer's warranty. Please refer to the warranty card included in the packaging for specific terms and conditions.
Spare parts availability for this model is indicated as 10 years from the date of purchase. For technical assistance, repairs, or questions regarding your product, please contact Cecotec customer support through their official websvetainėje arba kontaktinę informaciją, pateiktą jūsų produkto dokumentuose.
Daugiau informacijos rasite oficialioje „Cecotec“ svetainėje websvetainė: www.cecotec.com