
Singer C7225
Singer C7225 kompiuterizuotos siuvimo mašinos naudotojo vadovas
Modelis: C7225
Įvadas
Thank you for choosing the Singer C7225 Computerized Sewing Machine. This manual provides comprehensive instructions for the safe operation, setup, maintenance, and troubleshooting of your new sewing machine. Please read this manual thoroughly before using the machine to ensure proper function and to maximize your sewing experience.
The Singer C7225 is designed for a wide range of sewing projects, offering advanced features and ease of use for both beginners and experienced sewers.
Svarbios saugos instrukcijos
Naudojant elektrinį prietaisą, visada reikia laikytis pagrindinių saugos priemonių, įskaitant:
- Visada atjunkite siuvimo mašiną nuo elektros lizdo iškart po naudojimo ir prieš valydami, nuimdami dangčius ar atlikdami bet kokius naudotojo aptarnavimo pakeitimus.
- Neleisti naudoti kaip žaislo. Būtinas ypatingas dėmesys, kai šiuo prietaisu naudojasi vaikai arba jį naudoja šalia vaikų.
- Šį prietaisą naudokite tik pagal paskirtį, kaip aprašyta šiame vadove. Naudokite tik gamintojo rekomenduojamus priedus, nurodytus šiame vadove.
- Niekada nenaudokite šio prietaiso, jei jo laidas ar kištukas pažeistas, jei jis tinkamai neveikia, buvo numestas, pažeistas arba įkritęs į vandenį.
- Never operate the appliance with any air openings blocked. Keep ventilation openings of the sewing machine and foot controller free from the accumulation of lint, dust, and loose cloth.
- Pirštus laikykite toliau nuo visų judančių dalių. Siuvimo mašinos adata turi būti ypač atsargi.
- Visada naudokite tinkamą adatos plokštelę. Dėl netinkamos plokštelės adata gali nulūžti.
- Siuvimo metu netraukite ir nestumkite audinio. Tai gali iškreipti adatą ir ji gali nulūžti.
- Išjunkite siuvimo mašiną, kai atliekate bet kokius pakeitimus adatos srityje, pavyzdžiui, įveriate siūlo siūlą, keičiate adatą, įveriate ritinėlį arba keičiate prispaudimo pėdelę.
- Always unplug the sewing machine from the electrical outlet when removing the covers, lubricating, or when making any other user servicing adjustments mentioned in the instruction manual.
Produktas baigtasview
Familiarize yourself with the main components of your Singer C7225 sewing machine.

1 paveikslas: Priekyje view of the Singer C7225 sewing machine, showcasing the main body, needle area, and control panel with various stitch patterns.

2 paveikslas: Šoninė view of the Singer C7225, highlighting the handwheel and the power input port at the rear.
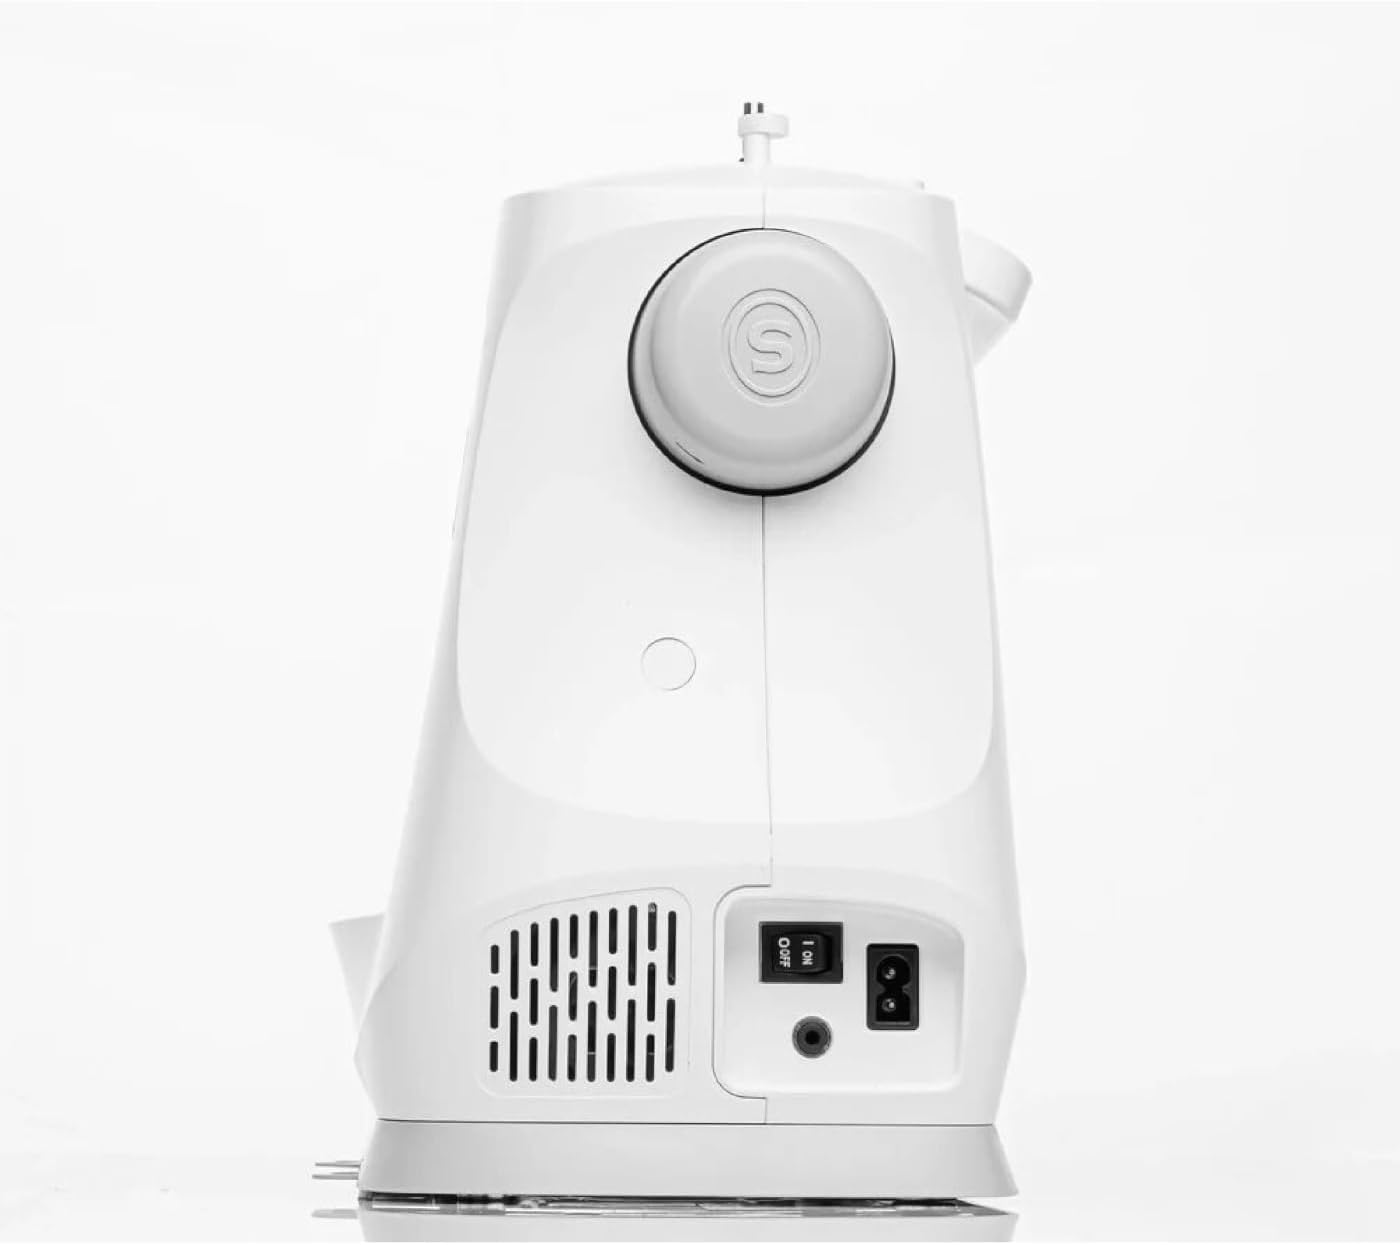
3 paveikslas: Galinis view of the Singer C7225, showing the power switch and power cord connection point.

4 paveikslas: Priekinis stambus planas view of the Singer C7225, focusing on the needle, presser foot, and bobbin area.
Pagrindiniai komponentai:
- Adatos plokštelė: The metal plate under the needle, often with seam allowance guides.
- Spaudimo pėdelė: Holds the fabric firmly against the feed dogs while sewing.
- Pašariniai šunys: Teeth-like mechanisms that move the fabric under the presser foot.
- Bobbin Case: Holds the bobbin, which supplies the lower thread.
- Temos vadovai: Paths for the upper thread to follow from the spool to the needle.
- Įtempimo ratukas: Reguliuoja viršutinio siūlo įtempimą.
- Rankinis ratas: Rankiniu būdu pakelia ir nuleidžia adatą.
- Control Panel/LCD Screen: For selecting stitches, adjusting settings, and viewinformaciją.
- Kojinio valdiklio prievadas: Where the foot pedal is connected.
- Maitinimo jungiklis: Įjungia ir išjungia mašiną.
Sąranka
1. Išpakavimas ir įdėjimas:
- Carefully remove the machine from its packaging. Retain all packaging materials for future storage or transport.
- Pastatykite mašiną ant stabilaus, lygaus paviršiaus su tinkamu apšvietimu. Įsitikinkite, kad aplink mašiną yra pakankamai vietos audiniams pakelti.
2. Maitinimo prijungimas:
- Locate the power cord and foot controller.
- Insert the foot controller plug into the foot controller port on the machine.
- Insert the power cord plug into the power input port on the machine.
- Kitą maitinimo laido galą prijunkite prie tinkamo elektros lizdo.
- Turn on the power switch, usually located on the side or rear of the machine. The LCD screen should illuminate.
3. Winding the Bobbin:
- Uždėkite siūlų ritę ant ritės kaiščio.
- Follow the bobbin winding path indicated by the arrows on the machine.
- Uždėkite tuščią ritę ant ritės vyniojimo veleno.
- Pasukite ritės vyniojimo veleną į dešinę.
- Norėdami pradėti vynioti, paspauskite kojinį pedalą arba paleidimo/stabdymo mygtuką. Sustabdykite, kai ritė bus pilna.
- Nupjaukite siūlą ir nuimkite ritę.
4. Inserting the Bobbin:
- Atidarykite ritės dangtelio plokštelę.
- Įkiškite suvyniotą ritę į ritės dėklą, užtikrindami, kad siūlas išsivyniotų teisinga kryptimi (paprastai prieš laikrodžio rodyklę).
- Prakiškite siūlą per įtempimo spyruoklę į siūlo kreiptuvo angą.
- Pakeiskite ritės dangtelį.
5. Threading the Upper Thread:
- Pakelkite pėdutės keltuvą.
- Uždėkite siūlų ritę ant ritės kaiščio.
- Sekite ant mašinos nurodytą sunumeruotą siūlo įvėrimo kelią, užtikrindami, kad siūlas praeitų per visus kreipiklius ir įtraukimo svirtį.
- Thread the needle from front to back using the automatic needle threader if available, or manually.
- Per adatos akutę ištraukite apie 6 colių siūlo.
6. Bringing Up the Bobbin Thread:
- Hold the upper thread lightly.
- Pasukite smagratį į save, kad nuleistumėte adatą į adatos plokštelę, o tada vėl ją pakeltumėte.
- The upper thread will catch the bobbin thread, forming a loop. Pull the loop up through the needle plate opening.
- Patraukite abu viršutinius ir apatinius siūlus po prispaudimo pėdele link mašinos galo.
Naudojimo instrukcijos
1. Selecting a Stitch:
- Įjunkite mašiną.
- Use the stitch selection buttons or dial on the control panel to choose your desired stitch. The selected stitch will be displayed on the LCD screen.
- The C7225 offers a wide variety of utility, decorative, and alphanumeric stitches.
2. Adjusting Stitch Settings:
- Dygsnio ilgis: Adjust the length of each stitch using the dedicated buttons. Longer stitches are for basting or thicker fabrics, shorter for fine details.
- Dygsnio plotis: Adjust the width for zigzag or decorative stitches.
- Siūlo įtempimas: The machine typically sets tension automatically, but manual adjustment may be needed for specific fabrics or threads. Refer to the tension dial.
- Adatos padėtis: Adjust the needle position (left, center, right) for certain techniques like topstitching or zipper insertion.
3. Starting to Sew:
- Padėkite audinį po prispaudimo pėdele, sulygiuodami kraštą su siūlės kreiptuvu ant adatos plokštelės.
- Nuleiskite prispaudimo pėdelę.
- Press the foot controller gently or press the Start/Stop button to begin sewing.
- Guide the fabric gently with both hands, but do not push or pull it. Allow the feed dogs to move the fabric.
- To reverse stitch (for securing seams), press and hold the reverse button.
- When finished, press the Start/Stop button or release the foot controller.
- Pakelkite adatą į aukščiausią padėtį naudodami rankinį ratą.
- Pakelkite pėdelę.
- Pull the fabric towards the back and cut the threads using the thread cutter on the machine.
4. Changing Needles and Presser Feet:
- Changing Needles: Always turn off the machine before changing the needle. Loosen the needle clamp screw, remove the old needle, insert the new needle with the flat side facing the back, and tighten the screw. Use the correct needle type and size for your fabric.
- Prispaudimo pėdelės keitimas: Raise the presser foot lifter. Press the release button on the back of the presser foot holder to detach the current foot. Position the new presser foot under the holder and lower the presser foot lifter until it snaps into place.
Priežiūra
Reguliarus prižiūrėjimas užtikrina jūsų siuvimo mašinos ilgaamžiškumą ir optimalų veikimą.
1. Valymas:
- Po kiekvieno naudojimo: Use a small brush to remove lint and dust from the bobbin area and under the needle plate.
- Reguliariai: Remove the needle plate and clean the feed dogs and bobbin case area thoroughly. A small vacuum attachment can be helpful.
- Išorė: Nuvalykite mašinos išorę minkšta, damp audinys. Nenaudokite stiprių cheminių medžiagų.
2. Oiling:
The Singer C7225 is largely self-lubricating. Refer to the full instruction manual for specific oiling points if necessary. Over-oiling can cause issues.
3. Sandėliavimas:
When not in use, cover the machine with a dust cover to protect it from dust and debris. Store in a dry, cool place.
Trikčių šalinimas
Šiame skyriuje aptariamos dažniausiai pasitaikančios problemos. Dėl sudėtingesnių problemų kreipkitės į klientų aptarnavimo tarnybą.
| Problema | Galima priežastis | Sprendimas |
|---|---|---|
| Machine not sewing / No power | Power cord not plugged in; Power switch off; Foot controller not connected. | Check all power connections; Turn on power switch; Ensure foot controller is securely plugged in. |
| Praleistos siūlės | Incorrect needle; Needle bent or dull; Machine not threaded correctly; Incorrect tension. | Change needle to correct type/size; Replace bent/dull needle; Re-thread machine completely; Adjust tension. |
| Siūlų laužymas | Improper threading; Thread tension too tight; Needle bent or wrong size; Poor quality thread. | Re-thread machine; Loosen upper tension; Replace needle; Use good quality thread. |
| Audinys nepaduodamas | Presser foot not lowered; Feed dogs lowered; Lint under needle plate. | Lower presser foot; Raise feed dogs; Clean under needle plate. |
| Spyruoklinio siūlo susivėlėjimas | Bobbin incorrectly inserted; Bobbin case dirty; Upper tension too loose. | Re-insert bobbin correctly; Clean bobbin case; Tighten upper tension. |
Specifikacijos
| Funkcija | Detalė |
|---|---|
| Prekės ženklas | Dainininkė |
| Modelis | C7225 |
| Spalva | Baltas |
| Medžiaga | Geležis |
| Svoris | 8 kilogramo |
| Matmenys (I x P x A) | 20P x 28l x 22H centimeters (Approximate) |
| Maitinimo šaltinis | Elektros kabelis |
| Tipas | Kompiuterizuota siuvimo mašina |
| Atsarginių dalių prieinamumas (ES) | 2 metai |
Garantija ir palaikymas
Informacija apie garantiją: The Singer C7225 sewing machine comes with a manufacturer's warranty. Please refer to the warranty card included with your purchase for specific terms, conditions, and duration. Keep your proof of purchase for warranty claims.
Klientų aptarnavimas: For technical assistance, spare parts, or service, please contact Singer customer support. Contact details can typically be found on the Singer official websvetainėje arba garantijos kortelėje.
Internetiniai ištekliai: Visit the official Singer website for additional resources, including FAQs, video tutorials, and updated information about your C7225 model.
Ask a question about this manual
Ask about setup, troubleshooting, compatibility, parts, safety, or missing instructions. Manuals+ will review the question and use this page’s manual context to help answer it.