1. Įvadas
This manual provides detailed instructions for the installation, operation, and maintenance of the Generic ThinkCentre E73 IH81M H81 Desktop Motherboard. Please read this manual thoroughly before proceeding with installation to ensure proper setup and to prevent damage to the components.
2. Saugos informacija
- Prieš įdiegdami arba išimdami bet kokius komponentus, visada atjunkite kompiuterio maitinimo šaltinį.
- Prieš liesdami pagrindinę plokštę ar kitus komponentus, dėvėkite antistatinį riešo dirželį arba dažnai lieskite įžemintą metalinį objektą, kad iškrautumėte statinę elektrą.
- Pagrindinę plokštę imkite už kraštų, kad neliestumėte jautrių komponentų.
- Užtikrinkite tinkamą vėdinimą kompiuterio korpuse, kad išvengtumėte perkaitimo.
- Saugokite pagrindinę plokštę nuo drėgmės ir ekstremalių temperatūrų.
3. Pakuotės turinys
Patikrinkite, ar pakuotėje yra visi daiktai. Jei trūksta kokių nors daiktų arba jie pažeisti, nedelsdami susisiekite su pardavėju.
- Generic ThinkCentre E73 IH81M H81 Desktop Motherboard
- I/O Shield (may be included)
- SATA Data Cables (may be included)
- Driver CD/DVD or USB drive (may be included)
- User Manual (this document, or a quick start guide)
4. Produktas baigtasview
Familiarize yourself with the layout and key components of your motherboard.
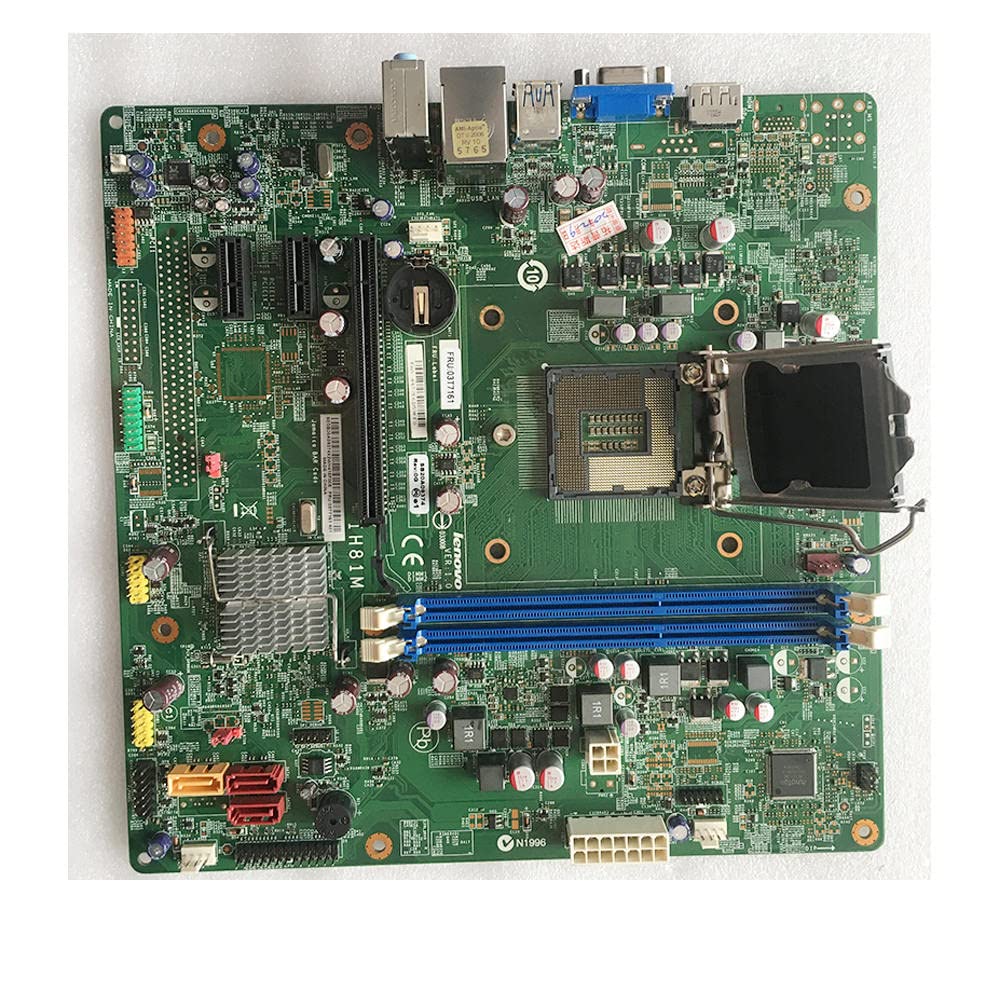
4.1 pav.: priekis view of the motherboard, displaying the overall component layout.
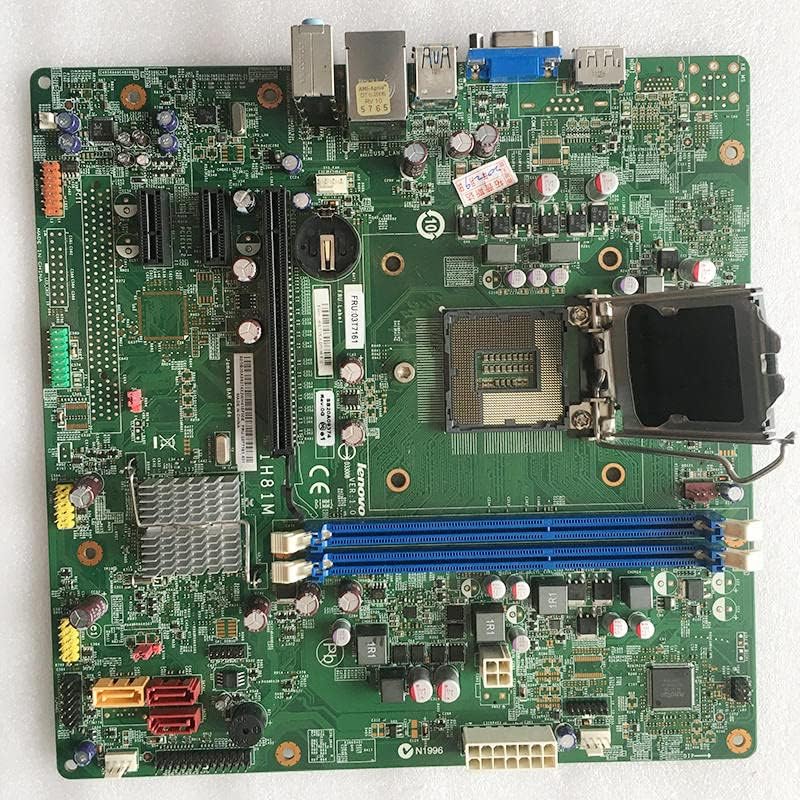
4.2 pav.: Detalus priekis view of the motherboard, showing various ports and headers.
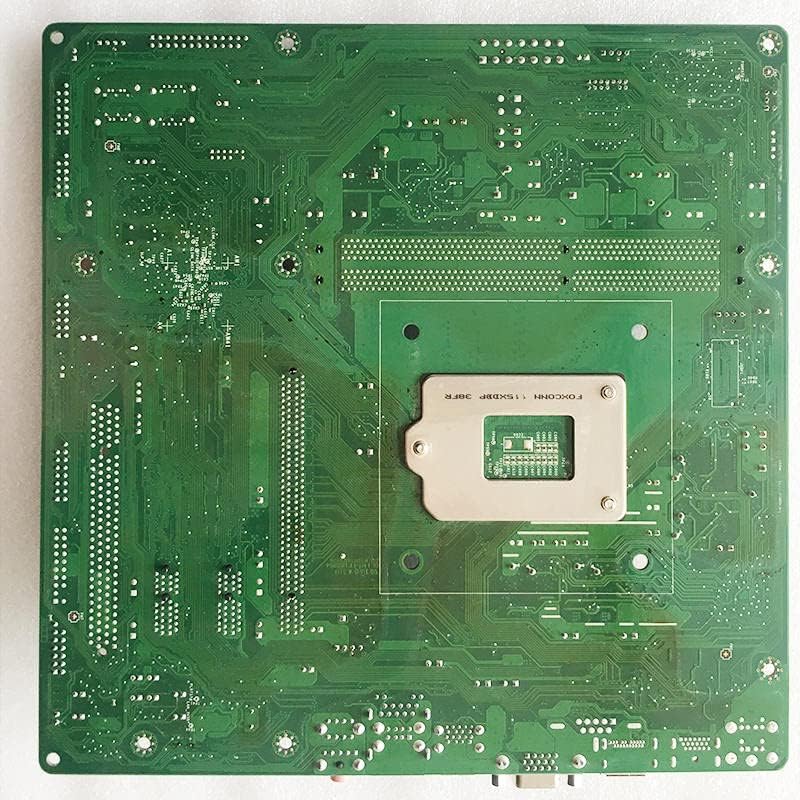
4.3 pav.: Nugara view of the motherboard, illustrating the PCB traces and mounting points.

4.4 pav.: Kampinis view of the motherboard, providing a perspective of the I/O ports and expansion slots.

Figure 4.5: Close-up of the CPU socket and adjacent components.
5. Sąranka ir diegimas
5.1 Kontrolinis sąrašas prieš diegimą
- Ensure your computer case is compatible with the motherboard form factor.
- Gather all necessary components: CPU, CPU cooler, RAM, power supply, storage devices, and graphics card (if applicable).
- Paruoškite švarią, nuo statinės elektros apsaugotą darbo vietą.
5.2 CPU diegimas
- Pagrindinėje plokštėje suraskite procesoriaus lizdą.
- Gently push down the load lever and pull it away from the socket to open the CPU socket cover.
- Align the CPU with the socket, matching the golden triangle or notch on the CPU with the corresponding mark on the socket.
- Atsargiai įdėkite procesorių į lizdą, jo nespausdami jėgos.
- Uždarykite lizdo dangtelį ir stumkite apkrovos svirtį atgal į vietą, kol ji spragtelės.
5.3 CPU aušintuvo montavimas
- Apply a thin, even layer of thermal paste to the top of the CPU (if not pre-applied to the cooler).
- Align the CPU cooler with the mounting holes around the CPU socket.
- Secure the cooler according to its specific instructions (e.g., push pins, screws, backplate).
- Connect the CPU cooler fan cable to the CPU_FAN header on the motherboard.
5.4 Installing RAM (Memory Modules)
- Atidarykite spaustukus abiejuose DIMM lizdų galuose.
- Suderinkite RAM modulio įpjovą su DIMM lizdo rakteliu.
- Tvirtai spauskite abu RAM modulio galus, kol spaustukai užsifiksuos savo vietoje.
5.5 Pagrindinės plokštės montavimas
- Įstatykite įvesties/išvesties skydą į kompiuterio korpuso galinę angą.
- Sulygiuokite pagrindinę plokštę su korpuso atramomis.
- Secure the motherboard with screws, ensuring it is firmly seated.
5.6 Maitinimo šaltinio prijungimas
- Connect the 24-pin ATX main power connector to the corresponding slot on the motherboard.
- Connect the 4-pin or 8-pin ATX 12V power connector to the appropriate slot near the CPU.
5.7 Saugojimo įrenginių prijungimas
- Connect SATA data cables from your storage devices (HDD/SSD) to the SATA ports on the motherboard.
- Connect power cables from the power supply to your storage devices.
5.8 Connecting Front Panel Connectors
- Refer to your case manual and the motherboard's silkscreen labels to connect the power button, reset button, HDD LED, power LED, and front panel USB/audio connectors.
5.9 Išplėtimo plokščių diegimas
- Insert your graphics card or other PCIe expansion cards into the appropriate PCIe slots.
- Secure the cards with screws to the case.
6. Naudojimo instrukcijos
6.1 Pirmasis paleidimas ir BIOS / UEFI sąranka
- Prijungę visus komponentus ir periferinius įrenginius, įjunkite sistemą.
- Press the designated key (usually DEL, F2, arba F10) during startup to enter the BIOS/UEFI setup utility.
- Configure boot order, system time, and other necessary settings. Save changes and exit.
6.2 Tvarkyklės diegimas
- After installing your operating system, install the necessary drivers for the motherboard chipset, audio, network, and any other integrated components.
- Drivers can typically be found on the manufacturer's website or an included driver CD/DVD.
7. Priežiūra
7.1 Valymas
- Suslėgtu oru reguliariai valykite dulkes nuo pagrindinės plokštės ir komponentų.
- Prieš valydami, įsitikinkite, kad sistema išjungta ir atjungta nuo elektros tinklo.
- Venkite naudoti skystus valiklius tiesiai ant komponentų.
7.2 BIOS / UEFI atnaujinimai
- Only update the BIOS/UEFI if necessary (e.g., for new CPU support, bug fixes).
- Follow the specific instructions provided by the motherboard manufacturer for BIOS/UEFI updates. Incorrect procedures can damage the motherboard.
8. Problemų sprendimas
8.1 Nėra maitinimo / Neįkraunama
- Patikrinkite visas maitinimo jungtis (24 kontaktų ATX, 4/8 kontaktų procesoriaus maitinimo).
- Įsitikinkite, kad maitinimo šaltinis yra įjungtas.
- Patikrinkite priekinio skydelio maitinimo mygtuko prijungimą.
- Jei įmanoma, išbandykite su kitu maitinimo šaltiniu.
8.2 Nėra ekrano
- Ensure the monitor is connected to the correct graphics output (integrated or discrete GPU).
- Iš naujo įstatykite grafikos plokštę ir RAM modulius.
- Pabandykite paleisti sistemą tik su viena RAM atmintimi.
- Clear CMOS (refer to motherboard manual for jumper location).
8.3 Sistemos nestabilumas / gedimai
- Patikrinkite procesoriaus ir grafikos plokštės temperatūrą.
- Įsitikinkite, kad visos tvarkyklės yra atnaujintos.
- Paleiskite atminties diagnostikos įrankius, kad patikrintumėte RAM vientisumą.
- Patikrinkite maitinimo šaltinio stabilumą.
9. Specifikacijos
| Funkcija | Specifikacija |
|---|---|
| Gamintojas | Bendras |
| Modelio numeris | IH81M H81 03T7161 00KT254 00KT255 |
| Suderinami įrenginiai | Asmeninis kompiuteris |
| Suderinami procesoriai | Intel Core 2 DUO |
| Atminties laikrodžio greitis | 2133 MHz |
| Modelio pavadinimas | IH81M |
| Atminties talpa | 8 GB |
| Pagrindinės maitinimo jungties tipas | 24-Pin |
| Grafikos plokštės sąsaja | PCI Express |
| Galimi atminties lizdai | 2 |
| Palaikomas sistemos magistralės standartas | SATA 1 |
10. Garantija ir palaikymas
For warranty information, please refer to the documentation provided with your purchase or contact your vendor directly. Technical support may be available through the seller or manufacturer's official channels.
Visada išsaugokite pirkimo įrodymą garantiniams reikalavimams.


