1. Įvadas
Thank you for choosing the SILENTWARE Air 1000 Black ATX Midi Tower PC Case. This manual provides essential information for the proper installation, operation, and maintenance of your new PC case. Please read this manual thoroughly before beginning the assembly process to ensure a smooth and successful build.
2. Saugos informacija
- Always disconnect the power supply from the wall outlet before installing or removing any components inside the PC case.
- Atsargiai elkitės su komponentais, kad išvengtumėte elektrostatinės iškrovos (ESD) sukeltos žalos. Apsvarstykite galimybę naudoti antistatinį riešo dirželį.
- Būkite atsargūs dėl aštrių kraštų korpuso viduje.
- Nebandykite modifikuoti korpuso ar jo komponentų, nes tai gali panaikinti garantiją ir sukelti pavojų saugumui.
- Laikykite dėklą atokiau nuo vandens, drėgmės ir ekstremalių temperatūrų.
3. Pakuotės turinys
Prašome patikrinti, ar pakuotėje yra visi reikalingi daiktai:
- SILENTWARE Air 1000 Black ATX Midi Tower PC Case
- Pre-installed 4x 120mm ARGB Fans
- Accessory box (screws, cable ties, standoffs, etc.)
- Vartotojo vadovas (šis dokumentas)
4. Produktas baigtasview
The SILENTWARE Air 1000 is an ATX Midi Tower PC case designed for optimal airflow and component compatibility. It features a mesh front panel for maximum ventilation and a tempered glass side panel to showcase your build.


Pagrindinės funkcijos:
- Maksimalus oro srautas: Large mesh front panel and four pre-installed 140mm A-RGB fans with hydraulic bearings ensure excellent ventilation.
- Easy PC Building: Thoughtful design with daisy-chain connections simplifies installation, eliminating the need for additional adapters or controllers.
- Aukštos kokybės dizainas: Genuine tempered glass side panel showcases installed components and provides a minimalist, premium aesthetic.
- Flexible Lighting and Control: 3-pin A-RGB fans and 4-pin fan control allow for impressive lighting effects and easy adjustment of fan speed and curves directly from the motherboard.
- Powerful Component Compatibility: Supports GPUs up to 400mm long, radiators up to 360mm (front and top) and 140mm (rear), and space for up to 4 fans.
- Compact Case with Amperdvė: Midi tower format accommodates E-ATX, ATX, mATX, and ITX motherboards, up to two 2.5" SSDs, two 3.5" HDDs, and ATX power supplies.
5. Diegimo vadovas
Follow these steps for component installation. Refer to your individual component manuals for specific instructions.
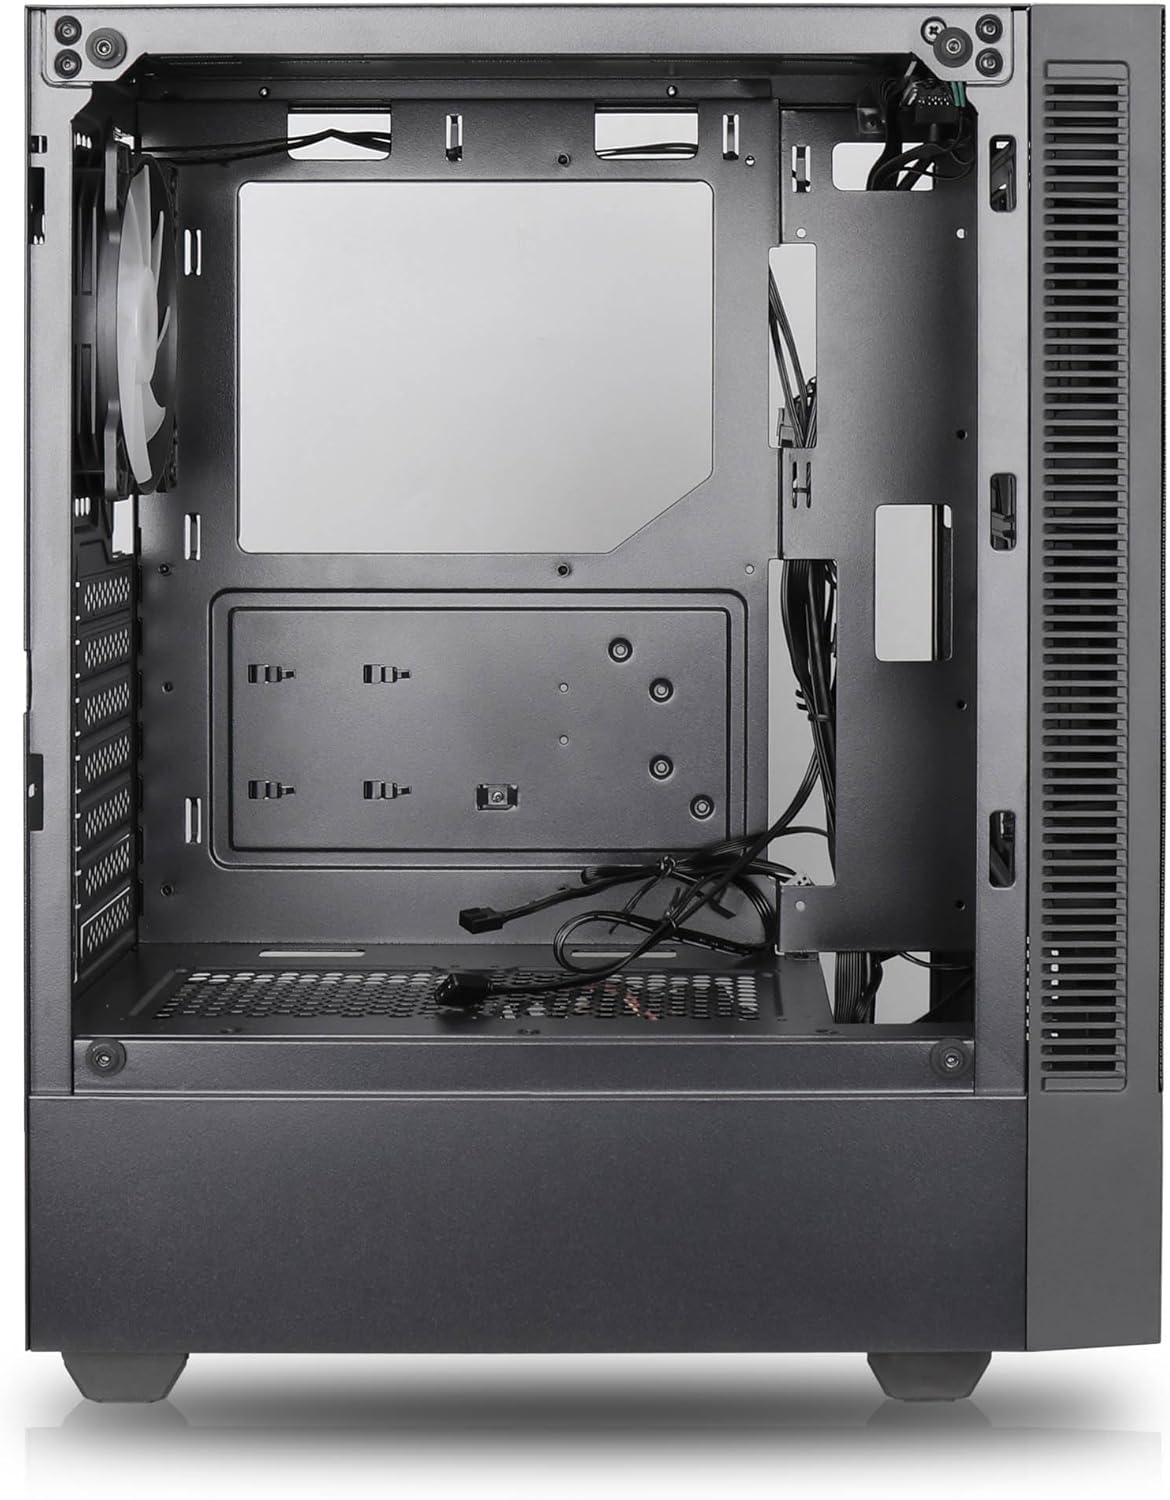
5.1. Bylos rengimas
- Padėkite dėklą ant lygaus, stabilaus paviršiaus.
- Carefully remove the tempered glass side panel by unscrewing the thumb screws and gently pulling it away. Set it aside on a soft, non-abrasive surface.
- Remove the solid right side panel by unscrewing the thumb screws and sliding it backward.
5.2. Pagrindinės plokštės montavimas
- Įstatykite įvesties/išvesties skydą į galinę korpuso angą.
- Ensure the correct standoffs are installed for your motherboard form factor (E-ATX, ATX, mATX, ITX). Adjust or add standoffs as needed.
- Atsargiai uždėkite pagrindinę plokštę ant atramų, sulygiuodami varžtų skyles.
- Pritvirtinkite pagrindinę plokštę pridėtais varžtais. Neperveržkite.
5.3. Maitinimo šaltinio (PSU) įrengimas
- Įdėkite maitinimo bloką į specialų skyrių korpuso apačioje, gale.
- Ensure the PSU fan faces downwards (if the case has a bottom vent) or upwards, depending on your cooling preference.
- Pritvirtinkite maitinimo bloką prie korpuso iš galo pridėtais varžtais.
5.4. Atminties disko diegimas
2.5 colio SSD diskai:
- Locate the 2.5" drive mounts (typically behind the motherboard tray).
- Secure the SSDs using the provided screws.
3.5 colio kietieji diskai:
- Locate the 3.5" drive cages (usually near the PSU shroud).
- Slide the HDDs into the drive trays and secure them with screws or tool-less mechanisms if available.
5.5. Vaizdo plokštės (GPU) diegimas
- Nuimkite reikiamus PCIe lizdų dangtelius nuo korpuso galo.
- Align your GPU with the PCIe slot on the motherboard and press firmly until it clicks into place.
- Secure the GPU to the case with screws.
5.6. Kabelių valdymas
Kabelių tvarkymui naudokite kabelių išvedimo angas ir tvirtinimo taškus už pagrindinės plokštės dėklo. Tai pagerina oro srautą ir vizualiai pagerina vaizdą.
6. Operacija
6.1. Įjungimas
After all components are installed and cables are connected, reattach the side panels. Connect the power cable to the PSU and a wall outlet, then press the power button on the top I/O panel of the case.
6.2. ARGB ventiliatoriaus valdymas
The pre-installed ARGB fans feature 3-pin ARGB connectors for lighting control and 4-pin connectors for fan speed control. These can be connected directly to compatible headers on your motherboard. Use your motherboard's software or BIOS settings to customize lighting effects and fan curves.
7. Priežiūra
7.1. Valymas
- Reguliariai valykite dulkių filtrus (jei yra), kad būtų palaikomas optimalus oro srautas.
- Use a can of compressed air to remove dust from inside the case and components.
- Išorinius paviršius nuvalykite minkšta, damp audinys. Venkite stiprių cheminių medžiagų.
- For the tempered glass panel, use a glass cleaner and a microfiber cloth.
8. Problemų sprendimas
- PC not powering on: Check all power connections, including the 24-pin motherboard power, 8-pin CPU power, and GPU power cables. Ensure the PSU switch is in the 'ON' position.
- Fans not spinning/RGB not working: Verify that fan and ARGB headers are correctly connected to the motherboard. Check motherboard software for fan speed and lighting control settings.
- Perkaitimas: Ensure proper airflow by checking fan orientation and cleaning dust filters. Verify CPU cooler and GPU cooler are properly seated.
- Nėra ekrano: Confirm the monitor cable is connected to the graphics card (not the motherboard integrated graphics, unless you are using integrated graphics). Reseat the graphics card and RAM modules.
9. Specifikacijos
| Funkcija | Specifikacija |
|---|---|
| Prekės ženklas | SILENTWARE |
| Modelio pavadinimas | Silentware Flow 100 ARGB |
| Prekės modelio numeris | FLOW100 |
| ASIN | B0CB8CZ5GF |
| Spalva | Juoda |
| Atvejo tipas | Mid Tower |
| Medžiaga | Grūdintas stiklas |
| Pagrindinės plokštės suderinamumas | ATX, mikro ATX, mini ITX |
| Suderinami įrenginiai | ATX, mATX, ITX motherboards, GPUs up to 325mm, radiators up to 360mm, 2.5" and 3.5" storage drives |
| Rekomenduojami naudojimo būdai | Žaidimas |
| Aušinimo būdas | Oras |
| Iš anksto įdiegti ventiliatoriai | 4x 120mm ARGB Fans |
| Ventiliatoriaus dydis | 140 Millimeters (Note: Product description mentions 140mm fans, while pre-installed are 120mm. Please verify with product packaging.) |
| Maitinimo šaltinio tvirtinimo tipas | Apatinis kalnas |
| Maksimalus GPU ilgis | 400 mm |
| Radiator Support (Front/Top) | Iki 360 mm |
| Radiatoriaus atrama (galinė) | Iki 140 mm |
| 2.5 colių diskų lizdai | Iki 2 |
| 3.5 colių diskų lizdai | Iki 2 |
10. Garantija ir palaikymas
For warranty information and technical support, please refer to the official SILENTWARE website or contact your retailer. Specific details regarding spare parts availability and software updates are not available in the provided product information.