
Beetronics 19VG7M
Beetronics 19VG7M 19-Inch Full HD IPS Monitor User Manual
Professional Industrial-Grade Display
Įvadas
This manual provides comprehensive instructions for the installation, operation, and maintenance of your Beetronics 19VG7M 19-Inch Full HD IPS Monitor. Designed for professional and continuous use, this industrial-grade display offers exceptional visual clarity, versatile connectivity, and robust construction. Please read this manual thoroughly before using the monitor to ensure proper setup and optimal performance.

1 pav.: priekis view of the Beetronics 19VG7M Monitor.
Pakuotės turinys
Prieš tęsdami sąranką, patikrinkite, ar pakuotėje yra visi komponentai:
- Beetronics 19VG7M Monitor
- Maitinimo šaltinis ir laidas
- Nuotolinio valdymo pultas
- Flush Mounting Brackets (if applicable)
- Desktop & Surface Mounting Stand
- Vartotojo vadovas (šis dokumentas)
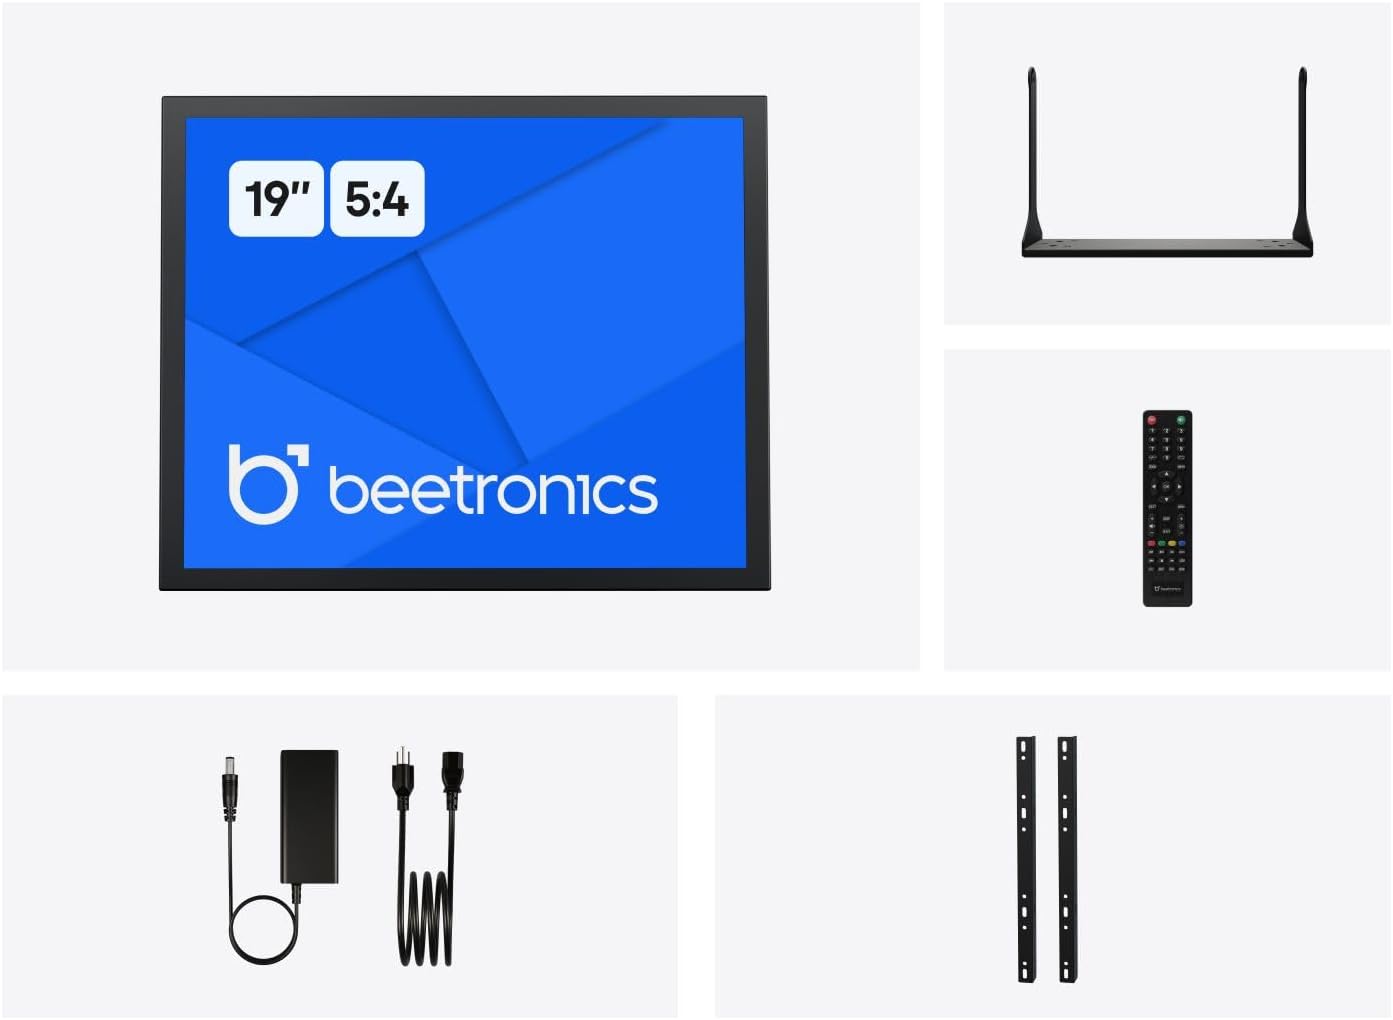
Figure 2: Included accessories with the Beetronics 19VG7M Monitor.
Sąranka
1. Montavimo parinktys
The 19VG7M monitor offers flexible mounting solutions, including a collapsible desktop stand and VESA 100mm compatibility for wall or arm mounting.
Desktop Stand Installation:
- Atsargiai padėkite monitorių ekranu žemyn ant minkšto, švaraus paviršiaus, kad nesubraižytumėte.
- Attach the desktop stand to the designated mounting points on the rear of the monitor using the provided screws. Ensure it is securely fastened.
- Padėkite monitorių ant stabilaus, lygaus paviršiaus.
VESA Wall/Arm Mounting:
- If the desktop stand is attached, remove it.
- Align the VESA 100mm mounting holes on the back of the monitor with your VESA-compatible wall mount or arm.
- Secure the monitor to the mount using appropriate VESA screws (M4 x 10mm recommended, not always included with monitor).

Figure 3: Monitor dimensions with desktop stand.
2. Jungiamieji kabeliai
The 19VG7M monitor features a variety of input ports located on the rear, facing downwards for neat cable management. Ensure the monitor and all connected devices are powered off before making connections.

Figure 4: Downward-facing input ports.
- HDMI: Connect an HDMI cable from your source device (e.g., computer, media player) to the HDMI port on the monitor.
- VGA: Connect a VGA cable from your source device to the VGA port on the monitor.
- BNC: For professional video applications, connect a BNC cable to the BNC input.
- RCA (AV): Use RCA cables for composite video and stereo audio input. Connect the yellow plug for video, and red/white for audio.
- USB: (If applicable for touch functionality or specific peripherals, consult product specifications for exact USB function).
- Galia: Connect the provided power supply to the DC input port on the monitor, then plug the power cord into a wall outlet. The monitor supports a wide input voltage range of 9-36 Volts.

5 paveikslas: uždengtas galinis skydelisview with control buttons and ports.
Naudojimo instrukcijos
1. Įjungimas/išjungimas
Paspauskite ĮJUNGTA/IŠJUNGTA button located on the rear panel or on the remote control to power the monitor on or off. The power indicator light will illuminate when the monitor is on.
2. Įvesties pasirinkimas
To switch between different video inputs (HDMI, VGA, BNC, RCA):
- Paspauskite AUTO button on the rear panel or the ĮVESTIS nuotolinio valdymo pulto mygtuką.
- Naudokite + or - buttons to navigate through the available inputs.
- Paspauskite MENIU button or wait a few seconds to confirm your selection.
3. Ekrano ekrano (OSD) meniu
The OSD menu allows you to adjust various display settings. To access and navigate the OSD menu:
- Paspauskite MENIU button on the rear panel or remote control to open the OSD menu.
- Naudokite + or - mygtukai, skirti naršyti meniu parinktis.
- Paspauskite MENIU button again to enter a sub-menu or confirm a setting.
- To exit the OSD menu, navigate to the "Exit" option or press the MENIU button repeatedly until the menu disappears.
Įprasti OSD nustatymai:
- Paveikslėlis: Adjust brightness, contrast, color temperature, and aspect ratio (e.g., 5:4).
- Garsas: Control volume and mute settings.
- OSD nustatymai: Koreguokite OSD kalbą, skaidrumą ir skirtąjį laiką.
- Atstatyti: Atkurkite gamyklinius numatytuosius nustatymus.
The monitor also supports a fully dimmable backlight, which can be adjusted via the OSD menu or dedicated dimmer controls if available.
Priežiūra
Proper maintenance ensures the longevity and optimal performance of your Beetronics monitor.
Monitoriaus valymas:
- Prieš valydami visada išjunkite monitorių ir atjunkite jį nuo elektros lizdo.
- Ekranas: Šiek tiek naudokite minkštą, be pūkelių šluostę dampened with water or a non-abrasive, monitor-specific cleaning solution. Do not spray liquid directly onto the screen.
- Casing: Wipe the metal housing with a soft, dry cloth. Avoid using harsh chemicals, abrasives, or solvents, as they may damage the finish.
Bendra priežiūra:
- Venkite dėti sunkių daiktų ant monitoriaus ar jo laidų.
- Neužblokuokite monitoriaus ventiliacijos angų.
- Laikykite monitorių atokiau nuo tiesioginių saulės spindulių, per didelio karščio ir didelės drėgmės.
- If the monitor will not be used for an extended period, it is recommended to unplug it from the power source.
Trikčių šalinimas
Jei kyla problemų dėl monitoriaus, žr. šias dažniausiai pasitaikančias problemas ir sprendimus:
| Problema | Galima priežastis | Sprendimas |
|---|---|---|
| Ekrane nėra vaizdo |
|
|
| Vaizdas per tamsus / per ryškus arba spalvos neteisingos |
|
|
| Nėra garso |
|
|
| Monitor flickering or unstable image |
|
|
If the problem persists after trying these solutions, please contact Beetronics customer support.
Specifikacijos
Key technical specifications for the Beetronics 19VG7M 19-Inch Full HD IPS Monitor:
| Modelio numeris | 19VG7M |
| Ekrano dydis | 19 colių |
| Krašto santykis | 5:4 |
| Rezoliucija | 1280 x 1024 (Full HD) |
| Skydelio tipas | IPS |
| Viewing kampas | 178° (horizontalus / vertikalus) |
| Ryškumas | 470 kandelų |
| Įvesties tomastage | 9–36 voltai (nuolatinė srovė) |
| Įvesties prievadai | HDMI, VGA, BNC, RCA (AV), USB |
| Gaminio matmenys (I x P x A) | 1.6 x 16.1 x 15.2 colio (be stovo) |
| Prekės svoris | 3.3 svaro |
| Gamintojas | Beetronics |
| Ekrano paviršius | Matinis |

Figure 6: Internal components and key features.
Garantija ir palaikymas
Informacija apie garantiją
The Beetronics 19VG7M monitor comes with a solid 2 metų garantija, ensuring reliability and peace of mind. This warranty covers defects in materials and workmanship under normal use. Please retain your proof of purchase for warranty claims.
For detailed warranty terms and conditions, please refer to the official Beetronics websvetainėje arba susisiekite su klientų aptarnavimo tarnyba.
Pagalba klientams
If you require technical assistance, have questions about your product, or need to initiate a warranty claim, please contact Beetronics customer support:
- Websvetainė: Visit the official Beetronics webDUK, pagalbos išteklių ir kontaktinių formų svetainė. www.beetronics.com
- El. paštas: Refer to the Beetronics websvetainėje, kurioje pateikiamas naujausias palaikymo el. pašto adresas.
- Telefonas: Refer to the Beetronics webregioninės pagalbos telefono numerių svetainė.
When contacting support, please have your monitor's model number (19VG7M) and purchase information readily available.
Ask a question about this manual
Ask about setup, troubleshooting, compatibility, parts, safety, or missing instructions. Manuals+ will review the question and use this page’s manual context to help answer it.