1. Įvadas
The Walfront MPPT Solar Charge Controller is designed to efficiently manage power flow from your solar panels to your battery bank, optimizing charging performance for off-grid solar systems. This manual provides essential information for the safe and effective installation, operation, and maintenance of your 50A MPPT solar charge controller.

Image 1.1: Walfront MPPT Solar Charge Controller 50A. This image shows the front view of the orange and black controller, featuring an LCD screen displaying PV, Battery, and Load information, along with 'ESC' and 'SET' buttons.
2. Pagrindinės savybės
- High Efficiency MPPT Tracking: Features MPPT tracking efficiency greater than 99% and a maximum conversion efficiency of up to 98%, maximizing energy harvest from solar panels.
- Wide 180V PV Input and Auto Voltage. Pripažinimas: Supports a maximum solar input voltage of 180V (at 25℃) and automatically recognizes 12V, 24V, 36V, and 48V battery systems. Compatible with battery voltagnuo 9V iki 64V.
- Clear LCD Display and Smart Protection: Built-in LCD provides real-time system data (voltage, current, operating status). Includes temperature compensation and multiple protection features for safe operation.
- Low No-Load Loss and Reliable Performance: No-load loss of ≤0.4W conserves energy. Designed for reliable operation in temperatures from -10℃ to 65℃ and altitudes up to 3000 meters.
- Lengva įdiegti ir naudoti: Auto-recognition feature simplifies setup. Compact design allows for straightforward mounting.

Image 2.1: Automatic Voltage Identification. This image highlights the controller's ability to automatically identify 12V, 24V, 36V, and 48V systems, shown with various solar panel application examples.
3. Saugos informacija
Please read all instructions carefully before installation and operation. Failure to follow these safety guidelines may result in personal injury, damage to the controller, or other equipment.
- Ensure all wiring is correctly polarized and securely connected. Loose connections can cause overheating and damage.
- Visada pirmiausia prijunkite akumuliatorių, tada saulės bateriją ir galiausiai apkrovą. Atjunkite atvirkštine tvarka.
- Do not connect the solar panel array to the controller without a battery connected.
- Įsitikinkite, kad sistemos ttage of the solar panel and battery are compatible with the controller's specifications.
- Valdiklį montuokite gerai vėdinamoje vietoje, atokiau nuo degių medžiagų ir tiesioginių saulės spindulių.
- Avoid touching live terminals. Use insulated tools during installation.
- This device is not waterproof. Protect it from moisture and water exposure.
4. Pakuotės turinys
Patikrinkite, ar pakuotėje yra visi toliau išvardyti daiktai:
- 1 x Walfront MPPT Solar Charge Controller (50A)
- 4 x Varžtai
- 4 x išsiplėtimo varžtai
- 1 x Naudotojo vadovas (šis dokumentas)
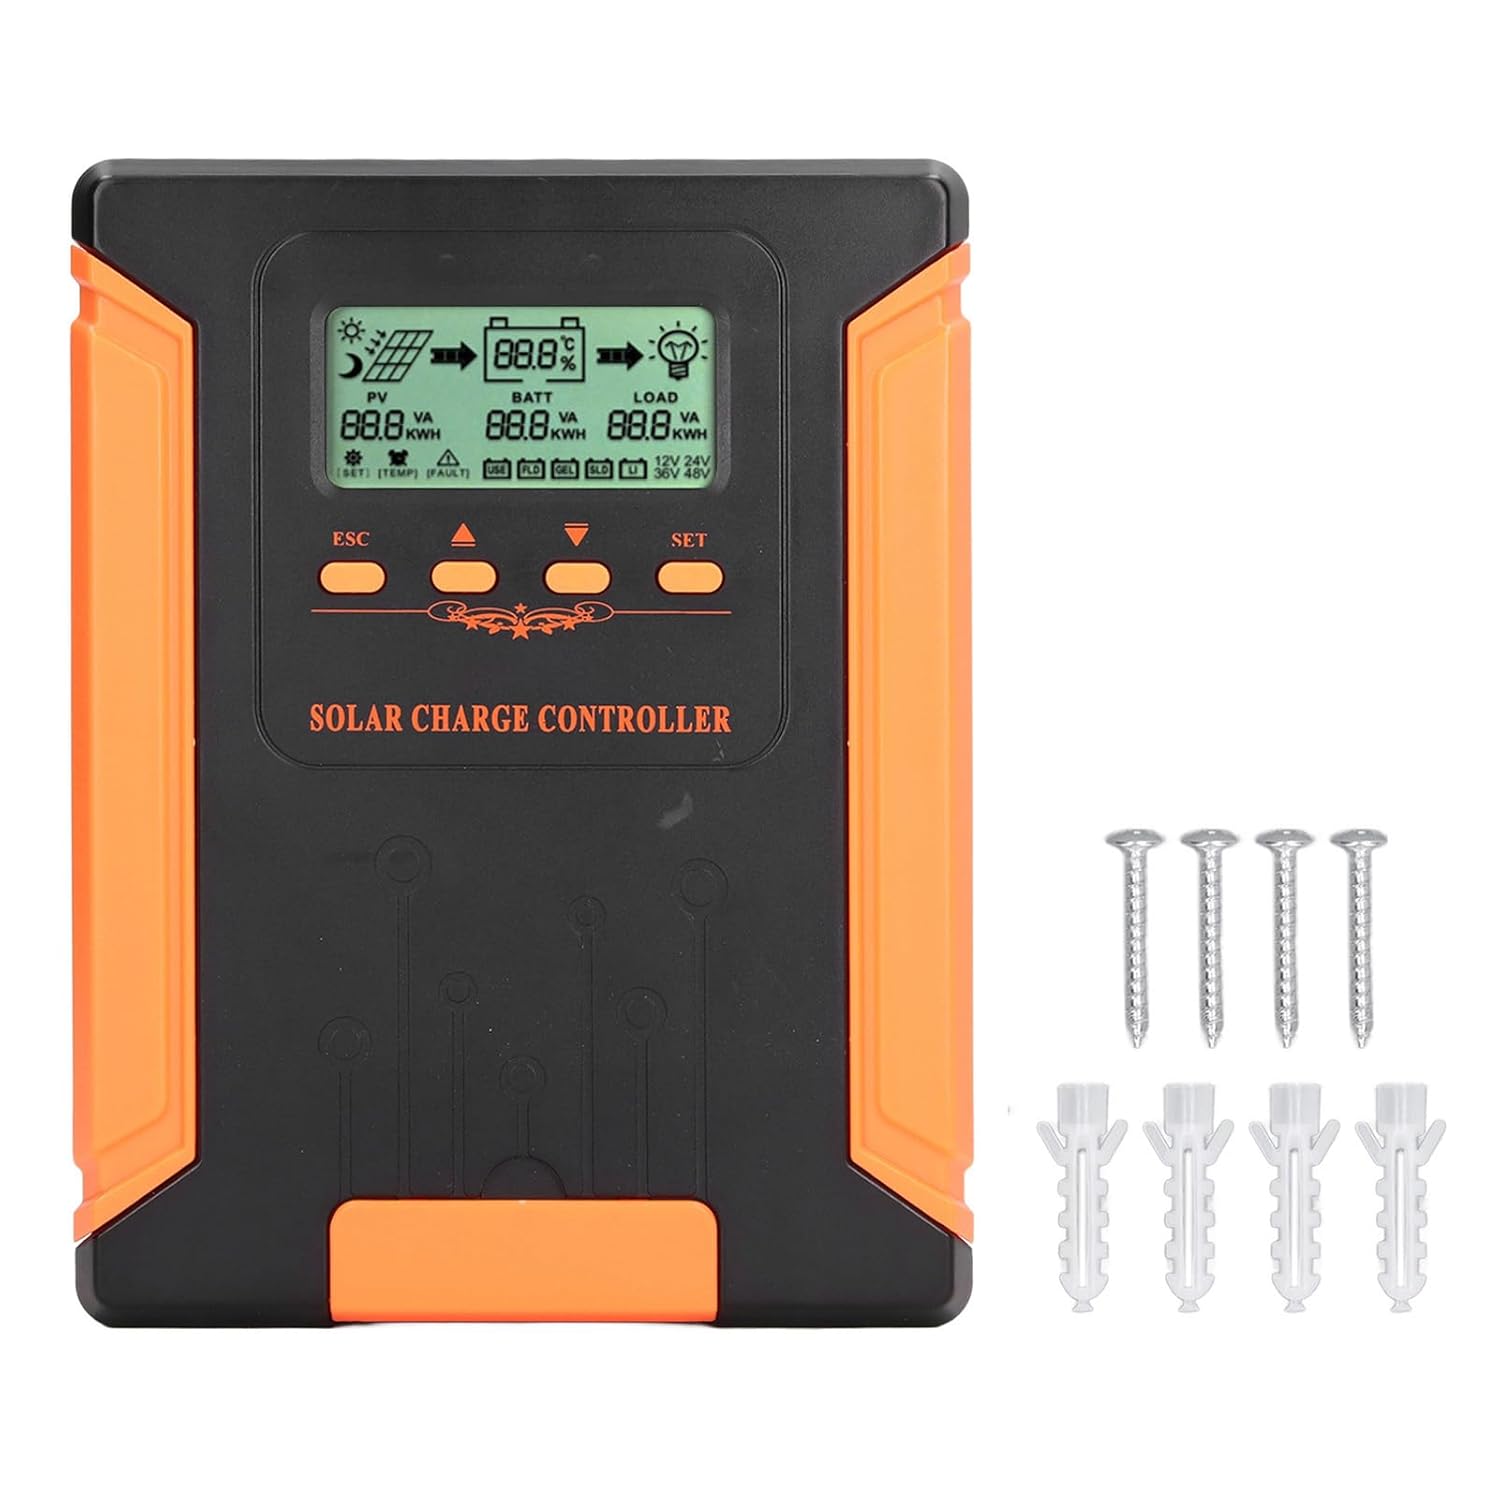
Image 4.1: Package Contents. This image displays the solar charge controller alongside the mounting screws and expansion screws provided in the package.
5. Sąranka ir diegimas
Norėdami tinkamai įdiegti saulės baterijų įkrovimo valdiklį, atlikite šiuos veiksmus.
5.1 Valdiklio montavimas
- Pasirinkite sausą, gerai vėdinamą vietą, apsaugotą nuo tiesioginių saulės spindulių, aukštos temperatūros ir drėgmės.
- Ensure there is sufficient space around the controller for heat dissipation, especially around the cooling fins.
- Mount the controller vertically on a solid surface using the provided screws.
5.2 Laidų jungtys
Refer to the wiring diagrams below for correct connection sequence. Always connect in the following order:
- Prijunkite akumuliatorių: Prijunkite bateriją prie valdiklio baterijos gnybtų. Įsitikinkite, kad poliškumas yra teisingas (+ prie + ir - prie -). Valdiklis automatiškai aptiks baterijos įtampą.tage.
- Prijunkite saulės kolektorių: Connect the solar panel array to the controller's PV terminals. Ensure correct polarity.
- Prijunkite nuolatinės srovės apkrovą (neprivaloma): Connect the DC load to the controller's load terminals. Ensure correct polarity.
To disconnect the system, follow the reverse order: disconnect load, then solar panel, then battery.

Image 5.1: Basic System Connection Diagram. This diagram illustrates the connection order: 1. Battery Assembly, 2. Solar Panel Assembly, 3. DC Load. It also shows an AC Load and Inverter connected to the Battery Assembly.

Image 5.2: Detailed System Wiring Diagram. This diagram provides a more comprehensive view of a solar power system, including solar panels, battery, inverter (AC Output/Input), and various AC loads like laptops, lights, air conditioners, televisions, and fans.
6. Naudojimo instrukcijos
The controller features an LCD display and control buttons for monitoring and configuration.
6.1 LCD ekranas
The LCD screen provides real-time information about your solar system, including:
- PV (Photovoltaic) Status: Įvesties tūristage, current, and power from solar panels.
- BATT (Battery) Status: Baterijos tūristage, charging current, and state of charge.
- LOAD Status: Output current and power to the DC load.
- Sistemos ttage: Automatically detected battery system voltage (12 V / 24 V / 36 V / 48 V).
- Klaidų indikatoriai: Displays fault codes or warnings if issues occur.
6.2 Valdymo mygtukai
The controller has three buttons: ESC, Up/Down arrows, and SET.
- ESC mygtukas: Used to exit current menu or cancel an operation.
- Aukštyn/žemyn mygtukai: Naudojamas naršyti meniu parinktis arba koreguoti parametrų vertes.
- SET mygtukas: Used to enter a menu, confirm a selection, or save changes to parameters.

Image 6.1: Control Buttons. This close-up image shows the 'ESC', 'Up arrow', 'Down arrow', and 'SET' buttons on the controller's front panel.
7. Priežiūra
Reguliarus saulės įkrovimo valdiklio veikimas ir ilgaamžiškumas užtikrinamas reguliariu jo aptarnavimu.
- Valymas: Periodically clean the controller's exterior with a dry cloth. Ensure the cooling fins are free from dust and debris to maintain proper heat dissipation.
- Jungtys: Check all wiring connections regularly to ensure they are tight and free from corrosion.
- Patikra: Inspect the controller for any signs of physical damage, overheating, or unusual odors.
- Aplinka: Užtikrinkite, kad įrengimo aplinka būtų sausa ir gerai vėdinama.

Image 7.1: Cooling Fins. This close-up shows the cooling fins on the top of the controller, which are crucial for heat dissipation and require regular cleaning.
8. Problemų sprendimas
Jei kyla problemų dėl valdiklio, žr. šias dažniausiai pasitaikančias problemas ir sprendimus:
| Problema | Galima priežastis | Sprendimas |
|---|---|---|
| Valdiklio ekranas išjungtas | Akumuliatorius neprijungtas arba akumuliatoriaus įtampatage per žema. | Ensure battery is connected correctly and has sufficient charge (above 9V). |
| Nėra įkrovimo srovės iš PV | Solar panels not connected, insufficient sunlight, or PV polarity reversed. | Patikrinkite PV jungtis ir poliškumą. Užtikrinkite pakankamą saulės šviesos kiekį. Patikrinkite PV tūrį.tage yra diapazone. |
| Įkrova neveikia | Load disconnected, load current too high, or load polarity reversed. | Check load connections and polarity. Ensure load current does not exceed controller's rating. |
| Akumuliatorius nėra visiškai įkrautas | Insufficient solar input, undersized solar array, or battery issues. | Increase solar panel capacity or check for shading. Inspect battery health. |
9. Techninės specifikacijos
Below are the technical specifications for the Walfront MPPT Solar Charge Controller 50A.
| Parametras | Specifikacija |
|---|---|
| Sistemos ttage | 12 V / 24 V / 36 V / 48 V automatinis |
| Nominali įkrovimo srovė | 50A |
| No Load Loss | ≤0.4W |
| Solar Maximum Input Voltage | 180V (at 25℃), 150V (at -25℃) |
| Baterijos tūristage Diapazonas | 9-64V |
| Maksimali galios taško apimtistage Diapazonas | Baterijos tūristage +2V iki 150V |
| Konversijos efektyvumas | ≤98 % |
| MPPT sekimo efektyvumas | >99 % |
| Temperatūros kompensavimo koeficientas | -2mv/℃/2V (default value) |
| Darbinė temperatūra | -10 ℃ iki 65 ℃ |
| Apsaugos laipsnis | IP21 |
| Aukštis virš jūros lygio | ≤3000 Meter / 9842.5ft |

Image 9.1: Model Comparison Table. This table provides a comparison of rated charging current and solar panel maximum input power for CM-50 (50A) and CM-60 (60A) models across different system voltages.
10. Garantija ir palaikymas
Dėl garantijos informacijos ir techninės pagalbos žr. pirkimo metu pateiktus dokumentus arba susisiekite su pardavėju. Išsaugokite pirkimo kvitą kaip pirkimo įrodymą.