
Įvadas
Welcome to the CHEFMAN InstaCoffee Max Lift+ Single Serve Coffee Maker. This manual provides essential information for the safe and efficient operation of your new coffee machine. This versatile appliance is designed to brew 6 to 14 ounces of coffee using either K-Cup® pods or ground coffee, featuring an adjustable cup lift to accommodate various mug sizes.

Image: The CHEFMAN InstaCoffee Max Lift+ Single Serve Coffee Maker in operation, dispensing coffee into a yellow mug. K-Cup pods and the reusable filter are visible nearby.
Svarbios apsaugos priemonės
Naudojant elektros prietaisus, visada reikia laikytis pagrindinių saugos priemonių, kad sumažėtų gaisro, elektros smūgio ir asmenų sužalojimo rizika. Prieš naudodami atidžiai perskaitykite visas instrukcijas.
- Nelieskite karštų paviršių. Naudokite rankenas arba rankenėles.
- Kad apsisaugotumėte nuo elektros smūgio, nemerkite laido, kištukų ar prietaiso į vandenį ar kitą skystį.
- Atidžiai prižiūrėti būtina, kai bet kurį prietaisą naudoja vaikai arba jį naudoja šalia vaikų.
- Ištraukite kištuką iš elektros lizdo, kai nenaudojate ir prieš valydami. Prieš uždėdami ar nuimdami dalis ir prieš valydami prietaisą, leiskite atvėsti.
- Nenaudokite prietaiso, kurio laidas ar kištukas pažeistas, arba po to, kai prietaisas neveikia arba buvo kaip nors sugadintas.
- Prietaiso gamintojo nerekomenduojamų priedų naudojimas gali sukelti gaisrą, elektros smūgį arba susižaloti žmones.
- Nenaudoti lauke.
- Neleiskite laidui kaboti virš stalo ar prekystalio krašto ir neliesti karštų paviršių.
- Nedėkite ant įkaitusios dujinės ar elektrinės viryklės ar šalia jos, taip pat į įkaitintą orkaitę.
- Visada pirmiausia prijunkite kištuką prie prietaiso, o tada įjunkite laidą į elektros lizdą. Norėdami atjungti, išjunkite bet kurį valdiklį ir ištraukite kištuką iš elektros lizdo.
- Nenaudokite prietaiso ne pagal paskirtį.
- Jei virimo ciklo metu nuimsite dangtį, galite nusiplikyti.
Dalys ir savybės
Familiarize yourself with the components of your CHEFMAN InstaCoffee Max Lift+.
- Vandens rezervuaro dangtis
- K-Cup Pod Holder / Ground Coffee Filter Basket
- Virimo galvutė
- Adjustable Cup Lift Platform
- Nuimamas lašų padėklas
- Power Button / Brew Button
- Maitinimo laidas

Image: An annotated diagram of the coffee maker, pointing out key features such as the reusable coffee filter, self-cleaning function, overheat protection, adjustable cup lift, and removable drip tray.
Prieš pirmąjį naudojimą
Before using your coffee maker for the first time, it is recommended to clean all removable parts and run a few cycles with water only.
- Išpakuokite kavos aparatą ir nuimkite visas pakavimo medžiagas.
- Wash the reusable coffee filter, K-Cup pod holder, and drip tray in warm, soapy water. Rinse thoroughly and dry.
- Nuvalykite kavos virimo aparato išorę skelbimuamp audinys.
- Pripildykite vandens rezervuarą švariu vandeniu iki MAX užpildymo linijos.
- Place a large mug or container on the drip tray.
- Close the brew head lid.
- Press the Power/Brew button to run a water-only cycle. Discard the hot water.
- Repeat steps 4-7 two more times to ensure the system is clean.
Naudojimo instrukcijos
Alaus darymas su K-Cup kapsulėmis
- Įsitikinkite, kad kavos aparatas įjungtas į standartinį elektros lizdą.
- Lift the water reservoir lid and fill the reservoir with the desired amount of fresh water (6 to 14 oz). Do not exceed the MAX fill line.
- Lift the brew head handle to open the K-Cup pod holder.
- Insert a K-Cup pod into the holder, ensuring it is seated correctly.
- Close the brew head handle firmly until it clicks into place.
- Place your mug on the adjustable cup lift platform. Adjust the platform height as needed to minimize splashing.
- Press the Power/Brew button. The light will illuminate, indicating brewing has started.
- Brewing will stop automatically once the cycle is complete. The light will turn off.
- Carefully remove your mug and enjoy your coffee.
- After brewing, lift the brew head handle to remove and discard the used K-Cup pod.
Virimas su malta kava
- Follow steps 1 and 2 from 'Brewing with K-Cup Pods'.
- Pakelkite kavos virimo galvutės rankeną.
- Place the reusable coffee filter into the K-Cup pod holder.
- Add your desired amount of ground coffee into the reusable filter. Do not overfill.
- Close the brew head handle firmly until it clicks into place.
- Place your mug on the adjustable cup lift platform.
- Press the Power/Brew button. The light will illuminate, indicating brewing has started.
- Brewing will stop automatically once the cycle is complete. The light will turn off.
- Carefully remove your mug and enjoy your coffee.
- After brewing, lift the brew head handle to remove the reusable filter and discard the used coffee grounds.
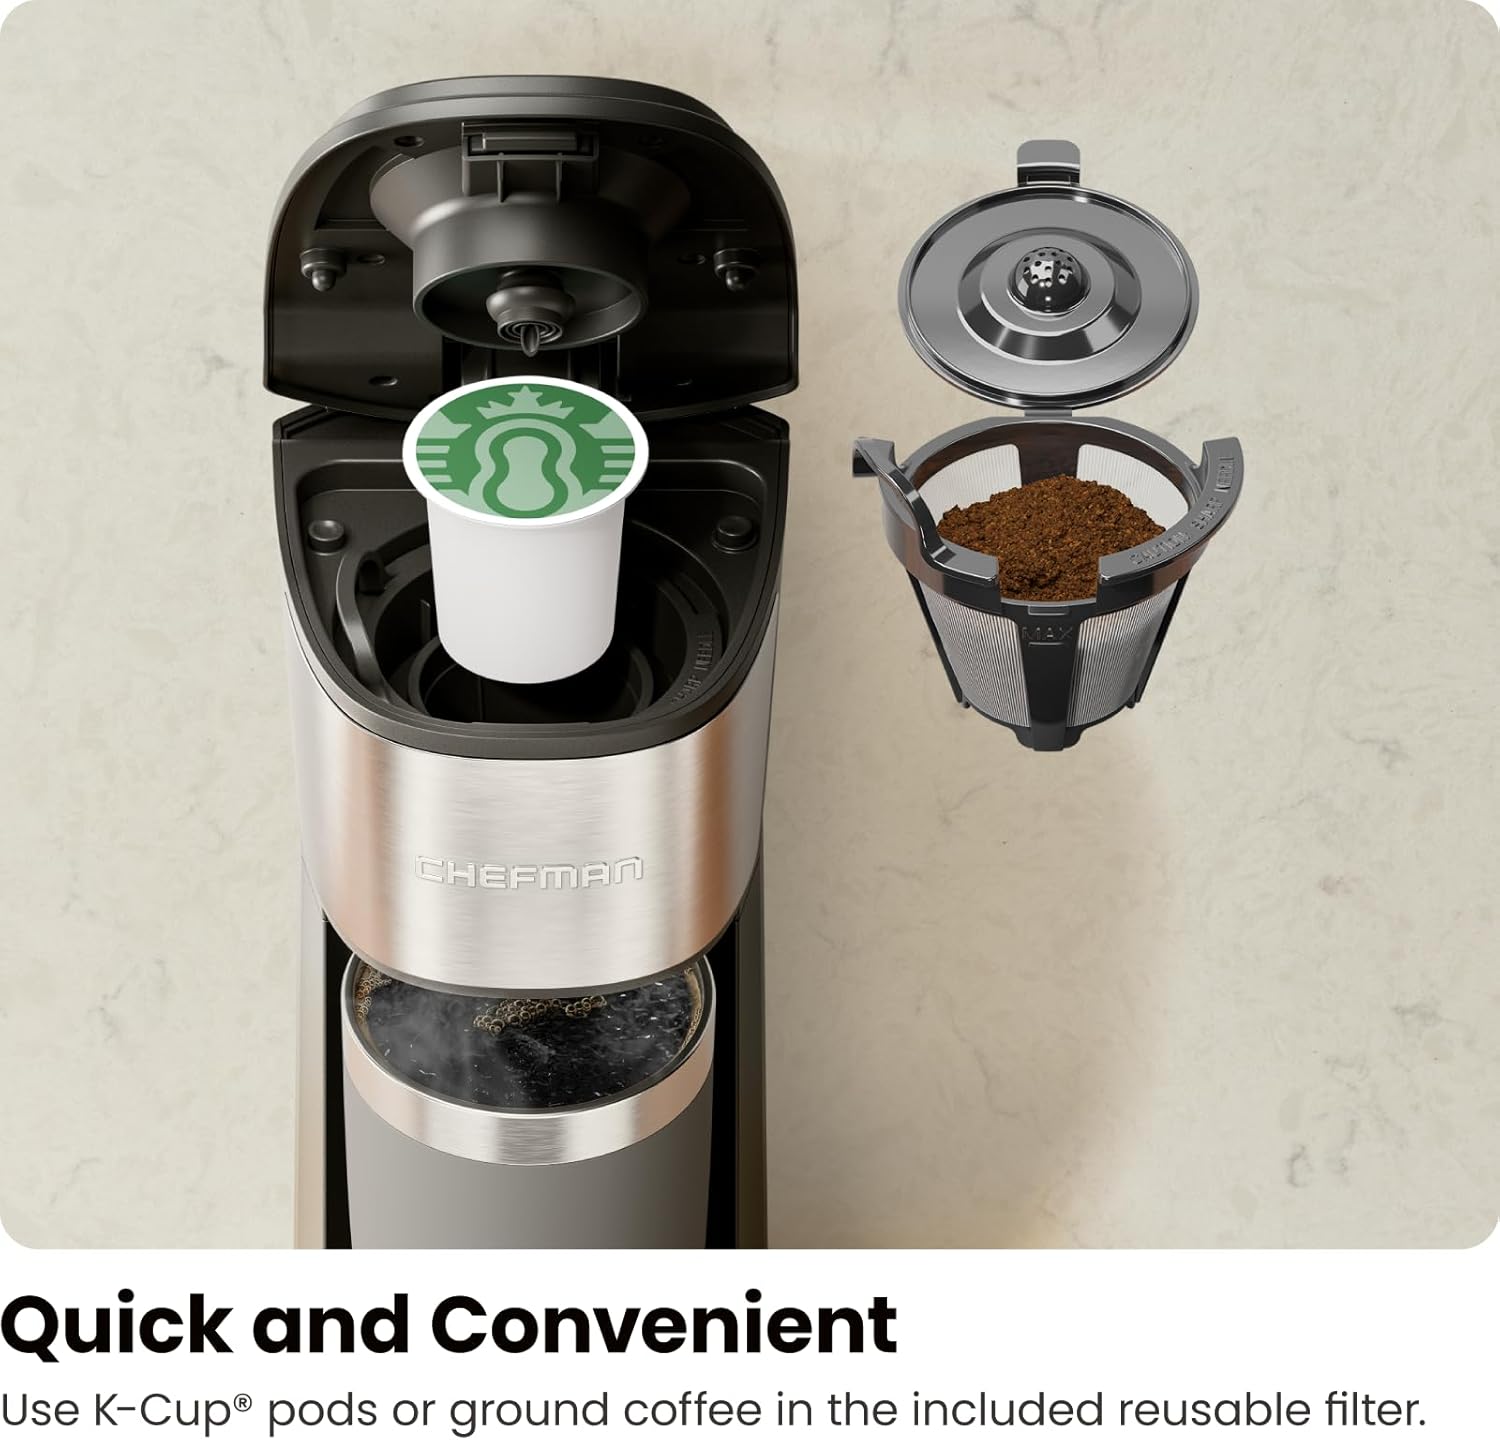
Image: The open brew head of the coffee maker, illustrating the placement of a K-Cup pod and the reusable filter for ground coffee.
Adjustable Cup Lift
The coffee maker features an adjustable cup lift platform to accommodate various mug sizes, from standard coffee cups to travel mugs up to 16 oz. Simply slide the platform up or down to the desired height before brewing to prevent splashing.

Image: A visual comparison of the coffee maker with its adjustable cup lift set for a standard mug and a taller travel mug, demonstrating its versatility.
Valymas ir priežiūra
Reguliarus valymas užtikrina optimalų kavos aparato veikimą ir pailgina jo tarnavimo laiką.
Kasdienis valymas
- Prieš valydami kavos virimo aparatą, visada išjunkite jį iš elektros tinklo.
- Remove and wash the K-Cup pod holder/reusable filter and drip tray in warm, soapy water. Rinse and dry thoroughly.
- Nuvalykite kavos virimo aparato išorę skelbimuamp audinys. Nenaudokite abrazyvinių valiklių ar šveitimo pagalvėlių.
- Nemerkite kavos virimo aparato į vandenį ar kitą skystį.
Nušalinimas
Mineral deposits (calcium and lime) can build up in your coffee maker over time, affecting performance. Descale your machine every 3-6 months, or more frequently if you have hard water.
- Užpildykite vandens rezervuarą vienos dalies baltojo acto ir dviejų dalių vandens mišiniu.
- Padėkite didelį puodelį ant lašų padėklo.
- Run a brew cycle without a K-Cup pod or ground coffee.
- After the cycle, let the coffee maker sit for 30 minutes with the vinegar solution inside.
- Run another brew cycle.
- Repeat the process with fresh water only at least three times to rinse out any vinegar residue.
Trikčių šalinimas
Jei kyla problemų dėl kavos aparato, žr. šias dažniausiai pasitaikančias problemas ir sprendimus:
| Problema | Galima priežastis | Sprendimas |
|---|---|---|
| Kava neužverda. | No water in reservoir; brew head not fully closed; power issue. | Fill water reservoir; ensure brew head is clicked shut; check power connection. |
| Kavos skonis silpnas arba vandeningas. | Too much water for coffee amount; K-Cup pod punctured incorrectly; grounds too coarse. | Use less water; ensure K-Cup is properly seated; use finer grounds for ground coffee. |
| Coffee overflows or splashes. | Mug too small; cup lift not adjusted. | Use a larger mug; adjust the cup lift platform to the appropriate height. |
| Slow brewing or clogged. | Mineralų sankaupos (apnašos). | Perform a descaling cycle as described in the 'Cleaning and Maintenance' section. |
| Grounds in coffee. | Reusable filter not seated correctly; overfilled filter. | Ensure reusable filter is properly inserted; do not overfill with grounds. |
Specifikacijos
- Prekinis ženklas: Virėjas
- Modelio pavadinimas: InstaCoffee Max Lift+
- Prekės modelio numeris: RJ14-IC-L-V3
- Spalva: Juoda
- Gaminio matmenys: 6.23 "D x 4.57" P x 13.24" A
- Prekės svoris: 2.5 svaro
- ttage: 120 voltų
- Vattage: 1100 vatų
- Kavos įvedimo tipas: K-Cup Pods and Ground Coffee
- Alaus darymo talpa: 6-14 uncijos
- Ypatingos savybės: Large Reusable Coffee Filter, Adjustable Cup Lift, Overheat Protection
- UPC: 810087846923
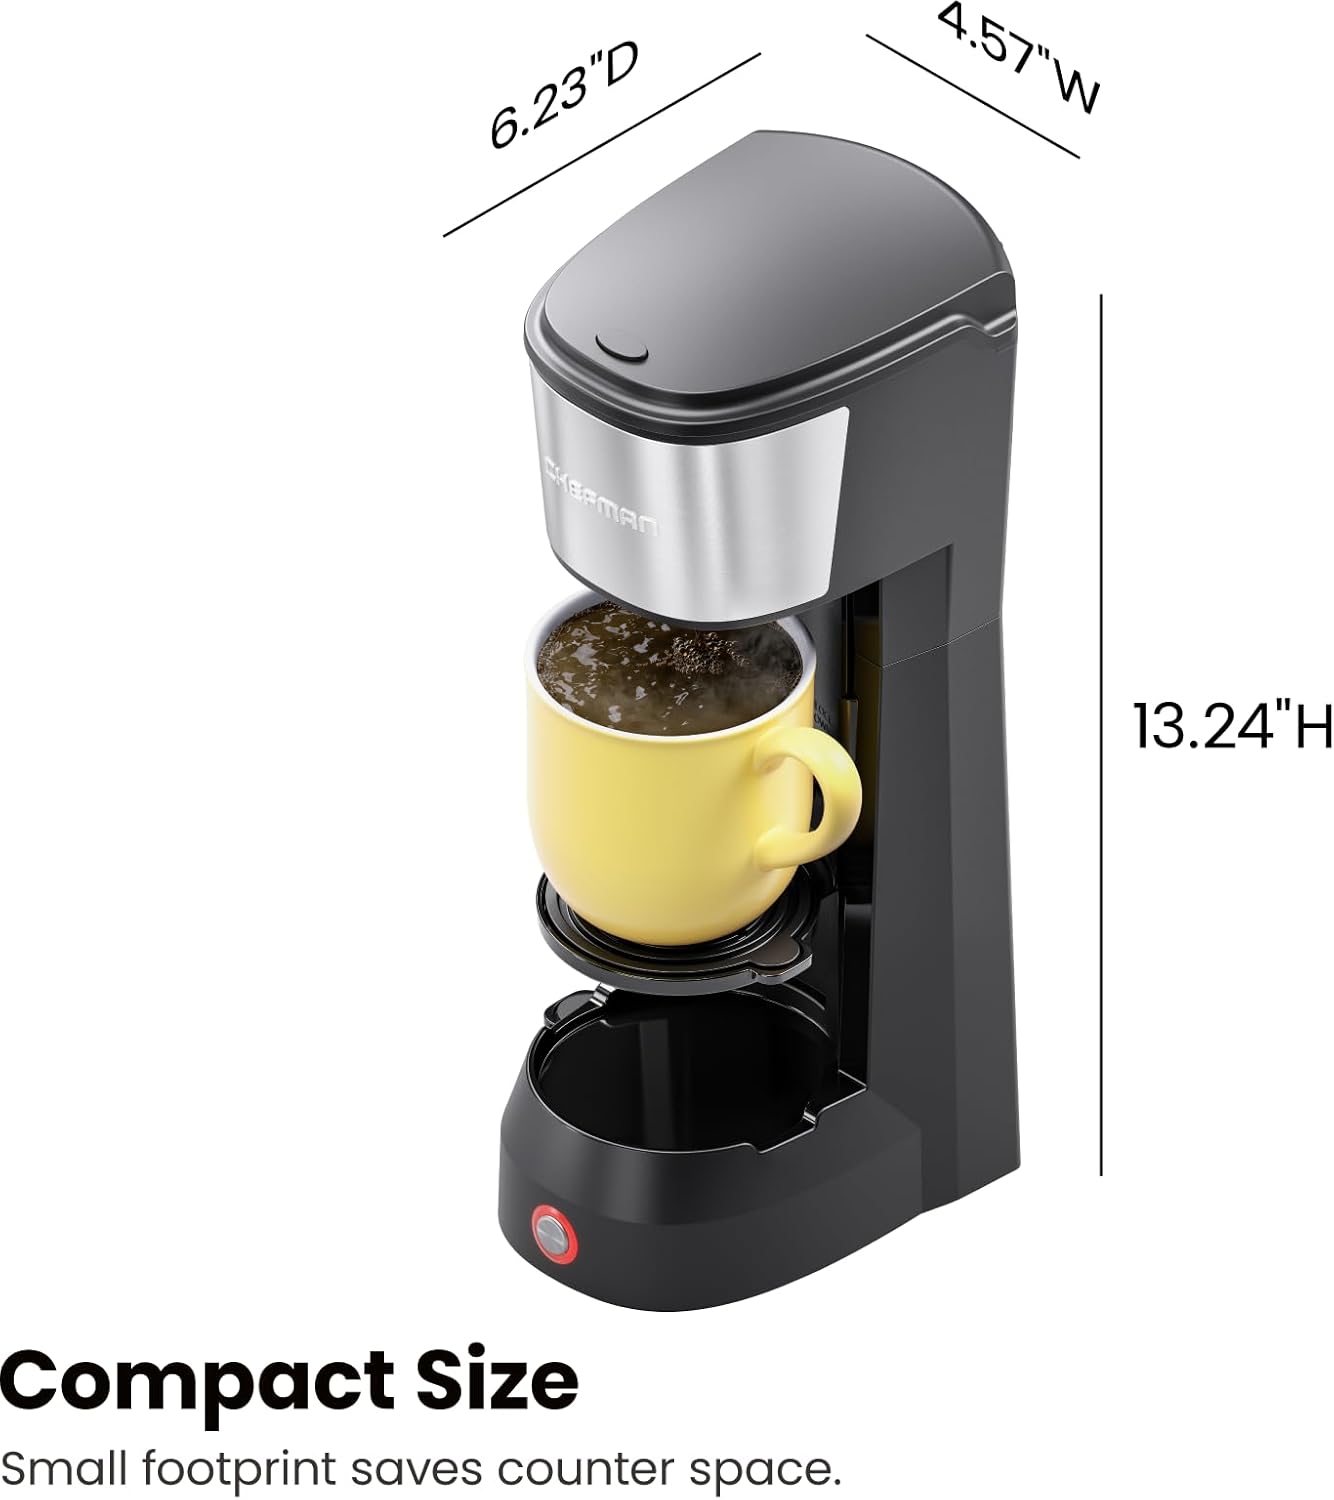
Image: A visual representation of the coffee maker with its key dimensions labeled for reference.
Garantija ir klientų aptarnavimas
This CHEFMAN InstaCoffee Max Lift+ Single Serve Coffee Maker is backed by a vienerių metų garantija provided by Chefman. For detailed warranty information, product registration, or customer support, please refer to the official Chefman websvetainėje arba susisiekite tiesiogiai su jų klientų aptarnavimo tarnyba.
For additional information and a downloadable PDF user guide, please visit the official product page or download the PDF User Guide here.