
1. Įvadas
This manual provides detailed instructions for the installation, operation, maintenance, and troubleshooting of the Fydun ZL-7901A Incubator Controller. This device is designed for precise and automatic control of temperature and humidity in various incubation environments, ensuring optimal conditions for successful hatching.
2. Produktas baigtasview
The Fydun ZL-7901A is a high-precision digital incubator controller capable of managing both temperature and humidity. It features a clear display and intuitive controls for easy programming and monitoring.
Pagrindinės funkcijos:
- Tikslus valdymas: High-accuracy temperature and humidity regulation for stable incubator environments.
- Stiprus anti-interferencinis poveikis: Designed for reliable operation in various conditions.
- High Stability and Accuracy: Ensures consistent performance for critical incubation processes.
- Platus pritaikymas: Suitable for a variety of eggs including chicken, duck, goose, pigeon, quail, parrot, and peacock.
- Automatinis veikimas: Fully automatic control reduces manual intervention.
Komponentai:

2.1 paveikslas: Priekyje view of the Fydun ZL-7901A Incubator Controller, showing the display and control buttons.

2.2 paveikslas: The ZL-7901A controller packaged with its temperature and humidity sensors and connecting cables.

2.3 paveikslas: The ZL-7901A controller shown in an incubator environment, demonstrating its application for egg incubation.
3. Saugos informacija
- Prieš montuodami ir naudodami atidžiai perskaitykite visas instrukcijas.
- Užtikrinkite maitinimo šaltinio ttage matches the controller's requirements (100V-240V).
- All wiring should be performed by a qualified professional to prevent electrical hazards.
- Saugokite valdiklį nuo vandens ar per didelės drėgmės.
- Prietaisą laikykite toliau nuo degių medžiagų.
- Prieš atlikdami bet kokius techninės priežiūros darbus ar keisdami laidus, atjunkite maitinimą.
- Šis prietaisas nėra žaislas. Saugoti nuo vaikų.
4. Sąranka ir diegimas
4.1 Valdiklio montavimas
The ZL-7901A controller is designed for panel mounting. Ensure a secure and stable location within your incubator setup.

4.1 paveikslas: Šoninė view illustrating the mounting bracket for panel installation.
4.2 Laidų jungtys
Carefully connect the power supply, sensors, and output devices (heater, humidifier, fan, egg turner) to the appropriate terminals on the back of the controller. Refer to the wiring diagram provided with your product for specific connections. Ensure all connections are tight and secure.

4.2 paveikslas: Galinis view of the controller, showing the terminal blocks for electrical connections.
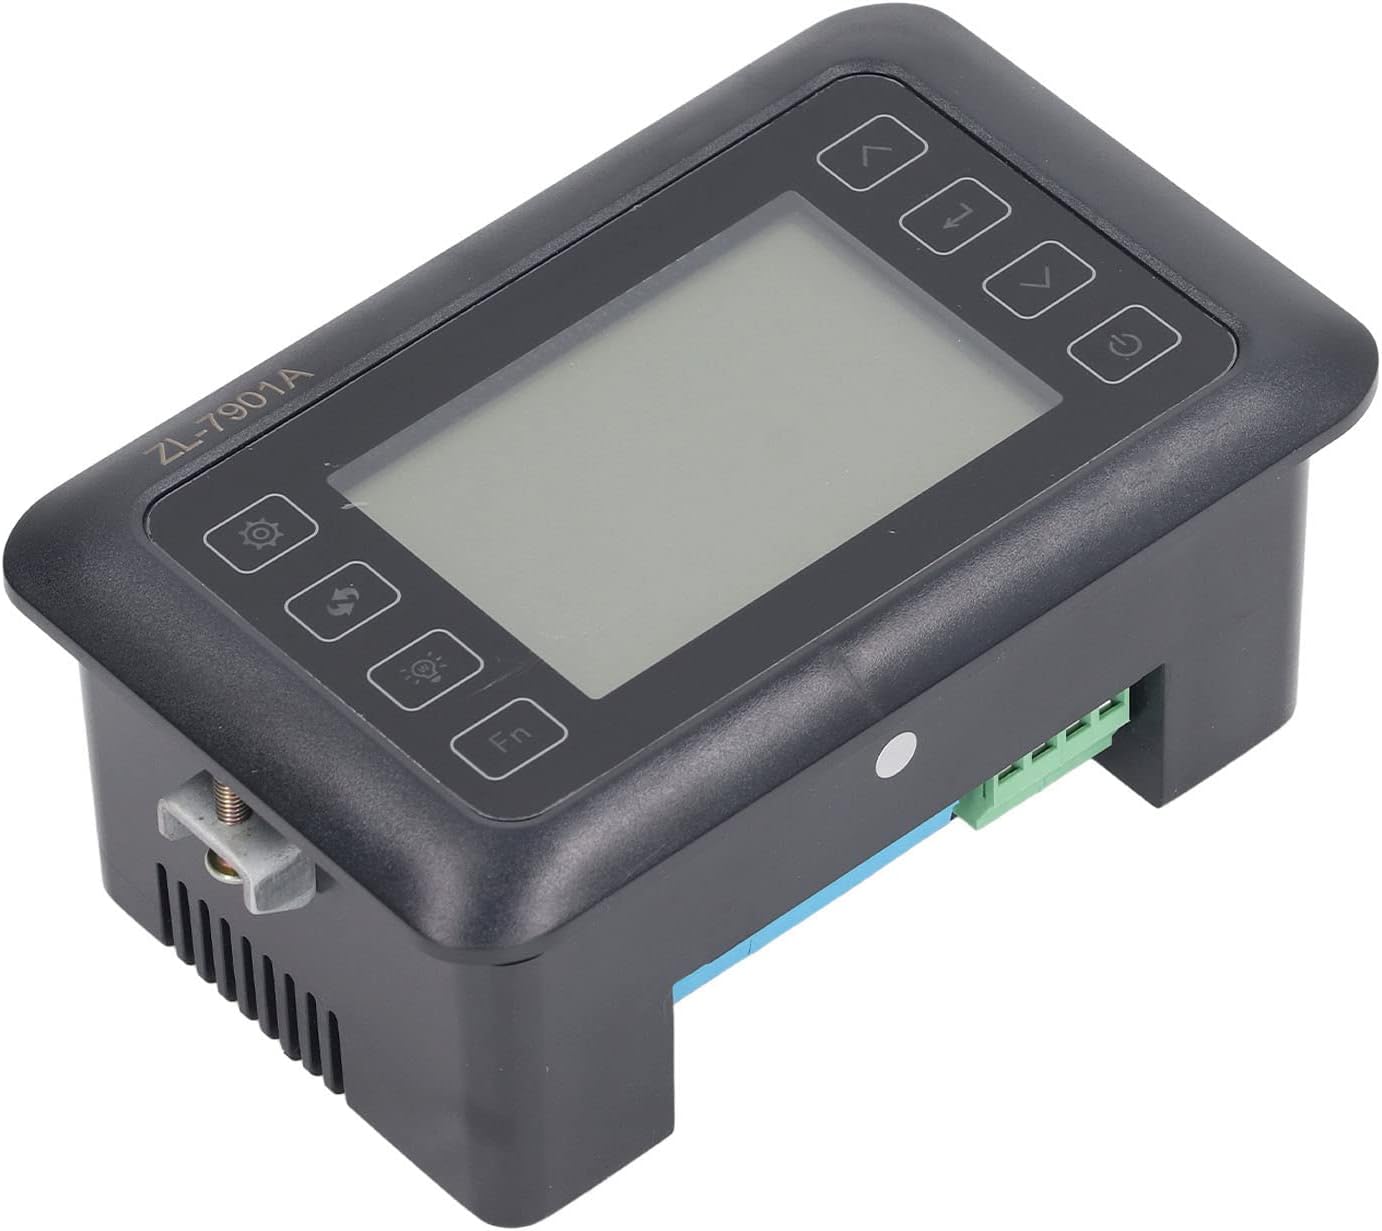
4.3 paveikslas: Kampuotas view highlighting the various connection points on the controller's side.
After all connections are made, double-check them for correctness before applying power.
5. Naudojimo instrukcijos
5.1 Maitinimo įjungimas/išjungimas
Paspauskite Maitinimo mygtukas to turn the controller on or off. The display will illuminate upon power-on. The power button is located on the right side of the controller's front panel.
5.2 Ekranas baigtasview
The main display shows the current temperature and humidity readings. Additional indicators may show the status of heating, humidifying, and turning functions.
5.3 Parametrų nustatymas
- Paspauskite Nustatymų mygtukas (gear icon) to enter the parameter setting mode. This button is on the left side of the controller's front panel.
- Naudokite Up (rodyklė aukštyn) ir Žemyn (down arrow) buttons to navigate through different parameters (e.g., target temperature, target humidity, egg turning interval). These buttons are on the right side of the controller's front panel.
- Paspauskite Įvesti mygtuką (return arrow icon) to select a parameter for editing. This button is on the right side of the controller's front panel.
- Naudokite Up ir Žemyn mygtukai vertei reguliuoti.
- Paspauskite Įvesti mygtuką dar kartą, kad patvirtintumėte naują vertę.
- Repeat for all desired parameters.
- Išeikite iš nustatymo režimo paspausdami Nustatymų mygtukas again or waiting for a timeout.
Pastaba: Consult the full product manual (if provided separately) for a complete list of parameters and their functions.
5.4 Funkcijos mygtukai
- Šviesos mygtukas (light bulb icon): Controls the internal light of the incubator (if connected). This button is on the left side of the controller's front panel.
- Fn mygtukas: Activates special functions or enters advanced settings. Refer to the detailed manual for specific Fn button operations. This button is on the left side of the controller's front panel.
6. Priežiūra
6.1 Valymas
- Ensure the controller is powered off and disconnected from the power source before cleaning.
- Wipe the exterior of the controller with a soft, dry cloth.
- Nenaudokite abrazyvinių valiklių, tirpiklių ir nemerkite įrenginio į vandenį.
- Keep the sensor probes clean and free from debris to ensure accurate readings.
6.2 Jutiklių priežiūra
Handle the temperature and humidity sensors with care. Avoid bending or damaging the cables. If readings appear inaccurate, gently clean the sensor tips. Do not attempt to disassemble the sensors.
7. Problemų sprendimas
| Problema | Galima priežastis | Sprendimas |
|---|---|---|
| Valdiklis neįsijungia. | Nėra maitinimo; atsilaisvinęs prijungimas; sugedęs maitinimo laidas. | Check power outlet; ensure all connections are secure; test power cable. |
| Netikslūs temperatūros / drėgmės rodmenys. | Sensor dirty or damaged; sensor not properly placed; calibration needed. | Clean sensor; reposition sensor away from direct airflow/heat; refer to advanced settings for calibration (if available). |
| Heater/Humidifier not activating. | Output device not connected; setpoint not reached; faulty output device. | Verify wiring connections; check setpoint values; test heater/humidifier independently. |
| Ekrane rodomas klaidos kodas. | Sensor fault; internal error. | Note the error code and consult the full product manual or contact support. |
8. Specifikacijos
| Funkcija | Detalė |
|---|---|
| Modelis | ZL-7901A |
| Prekės ženklas | Fydun |
| Įvesties tomastage | 100V-240V kintamoji srovė |
| Valdymo tipas | Fully Automatic Digital Temperature and Humidity Control |
| Tikslumas | High precision for both temperature and humidity |
| Taikymas | Incubators for various poultry and bird eggs |
| Montavimas | Skydo tvirtinimas |
9. Garantija ir palaikymas
Fydun is committed to providing quality products and excellent customer service. If you encounter any issues or have questions regarding your ZL-7901A Incubator Controller, please contact our customer service team.
For support, please refer to the contact information provided with your purchase or visit the official Fydun store on Amazon: Fydun Amazon Store.
Our professional customer service team is ready to assist you promptly.