
1. Įvadas
This manual provides comprehensive instructions for the safe and effective operation of your CREWORKS 60000 mg/h Ozone Negative Ion Generator, Model IOG-P030-00. This device is designed to eliminate tough odors and purify air in various environments by generating ozone and negative ions. Please read this manual thoroughly before use and retain it for future reference.
2. Svarbios saugos instrukcijos
ĮSPĖJIMAS: Ozone can be harmful in high concentrations. Use this device only in unoccupied spaces. Ensure no humans, pets, or plants are present during operation.
- Always unplug the generator when not in use or before cleaning.
- Nenaudokite įrenginio šlapioje ar sausoje vietojeamp aplinkos.
- Laikyti vaikams nepasiekiamoje vietoje.
- Ensure adequate ventilation after each use. Wait at least 30-60 minutes after the cycle ends and ventilate the area thoroughly before re-entry.
- Neužblokuokite oro įleidimo ar išleidimo angų veikimo metu.
- Avoid direct inhalation of ozone.
- If you experience any discomfort, immediately turn off the unit, leave the area, and ventilate.
3. Produktas baigtasview
The CREWORKS Ozone Negative Ion Generator is designed for powerful odor elimination and air purification. Key features include a durable aluminum alloy shell, precise timer controls, and a portable design.
Vaizdas: priekis view of the CREWORKS Ozone Negative Ion Generator, highlighting the timer knob and control panel.
Product Components (Refer to Product Diagram)

Image: Detailed product diagram illustrating the comfy handle, timer knob, ozone/anion outlet, mode switch button, indicator light, fan, air inlet, power switch, and power cord port.
- Comfy Handle: Kad būtų lengviau pernešti.
- Laikmačio rankenėlė: Sets operation duration (0-180 minutes or HOLD).
- Ozone/Anion Outlet: Where purified air is dispersed.
- Režimo perjungimo mygtukas: To select between Ozone and Negative Ion modes.
- Indikatoriaus lemputė: Rodo veikimo būseną.
- Ventiliatorius: Circulates air for effective treatment.
- Oro įleidimo anga: Vieta, kur oras patenka į įrenginį.
- Maitinimo jungiklis: Įjungia/išjungia įrenginį.
- Maitinimo laido prievadas: Maitinimo kabelio prijungimui.
- Nuimamas filtras: Lengvam valymui ir priežiūrai.
- Neslystančios kojelės: Užtikrina stabilų veikimą.
4. Sąranka
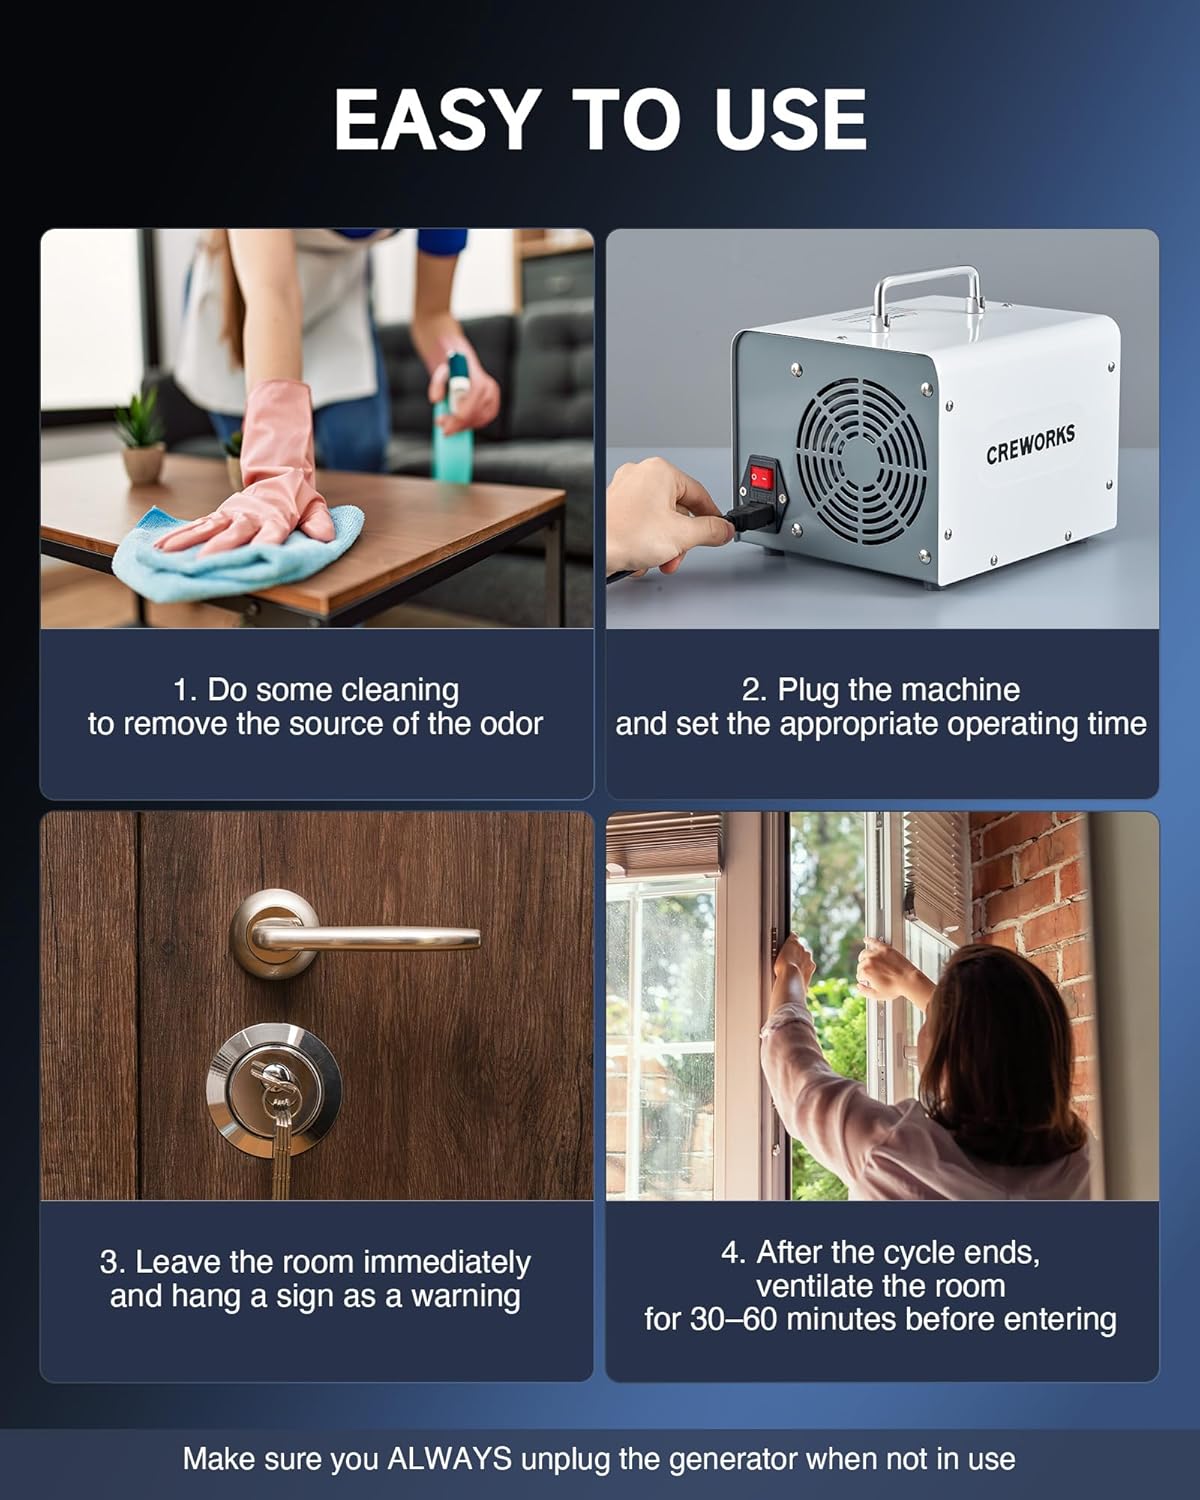
- Paruoškite plotą: Ensure the space to be treated is unoccupied by humans, pets, and plants. Remove any valuable artwork or delicate items that might be sensitive to ozone.
- Clean the Source of Odor: For best results, clean or remove the primary source of the odor before operating the ozone generator.
- Vieta: Place the ozone generator in a central location within the treatment area, preferably elevated, to allow for optimal air circulation.
- Maitinimo jungtis: Prijunkite maitinimo laidą į standartinį elektros lizdą.

Image: Visual guide for easy use, showing steps: 1. Clean the source of odor, 2. Plug in and set timer, 3. Leave the room, 4. Ventilate after use.
5. Naudojimo instrukcijos
5.1 Ozone Generation Mode
- Nustatykite laikmatį: Turn the timer knob clockwise to set the desired operating time (0-180 minutes). For continuous operation, turn the knob counter-clockwise to the "HOLD" position.
- Suaktyvinti: Flip the power switch to the "ON" position. The indicator light will illuminate.
- Evakuojuosi: Immediately leave the treatment area. Ensure all doors and windows are closed to contain the ozone.
- Vėdinimas: After the set time, the unit will automatically shut off (or manually turn off if on "HOLD"). Wait at least 30-60 minutes for the ozone to dissipate. Open windows and doors to thoroughly ventilate the area before re-entry.
5.2 Negative Ion Mode
To activate the negative ion mode, ensure the unit is plugged in and the power switch is on. Press the "NEGATIVE ION" button. This mode can be used in occupied spaces for general air purification.
5.3 Recommended Treatment Durations
The optimal treatment duration depends on the room size and the severity of the odor. Refer to the table below for general guidelines. Always start with shorter durations and increase if necessary.

Image: Guide for ozone treatment durations based on room size. For example, 161.5 sq ft (15 m²) for 10 min, up to 3200 sq ft (297 m²) for 80 min.
| Room Size (sq ft) | Kambario dydis (m²) | Trukmė (min.) |
|---|---|---|
| 161.5 | 15 | 10 |
| 323 | 30 | 20 |
| 538.2 | 50 | 30 |
| 753.5 | 70 | 40 |
| 1076.4 | 100 | 50 |
| 1614.5 | 150 | 60 |
| 3200 | 297 | 80 |
6. Paraiškos
The CREWORKS Ozone Negative Ion Generator is effective in eliminating a wide range of odors in various enclosed spaces, including:

Image: Visual representation of odors effectively removed, such as pet odor, chemical odor, food smells, smoke, musty smells, and car smells.
- Homes and Apartments (e.g., kitchens, basements, attics)
- Vehicles (cars, RVs, boats)
- Offices and Commercial Spaces
- Naminių gyvūnėlių zonos
- Areas affected by smoke, mold, mildew, or chemical odors.

Image: The ozone generator depicted in different application settings, including a pet room, basement, car, attic, kitchen, and bathroom.
7. Priežiūra
Reguliarus ozono generatoriaus techninis aptarnavimas užtikrina optimalų veikimą ir ilgaamžiškumą.
- Filtro valymas: The unit features a removable filter. Regularly clean the filter to prevent dust buildup and maintain efficient airflow. To clean, slide out the filter, gently brush off any debris, and rinse with water if necessary. Ensure it is completely dry before reinserting.
- Cleaning Ozone Plates: Over time, the ozone plates may accumulate residue, reducing efficiency. Refer to the manufacturer's guidelines for cleaning or replacing ozone plates. Always unplug the unit before attempting to clean internal components.
- Išorinis valymas: Prietaiso išorę nuvalykite minkštu, sausu skudurėliu. Nenaudokite abrazyvinių valiklių ar tirpiklių.
8. Problemų sprendimas
If you encounter issues with your CREWORKS Ozone Negative Ion Generator, please refer to the following common troubleshooting steps:
- Įrenginys neįsijungia:
- Įsitikinkite, kad maitinimo laidas yra tvirtai prijungtas tiek prie įrenginio, tiek prie veikiančio elektros lizdo.
- Patikrinkite, ar maitinimo jungiklis yra „ĮJUNGTA“ padėtyje.
- Verify that the timer knob is not set to "OFF".
- Reduced Odor Elimination:
- Clean the removable filter and ozone plates as described in the Maintenance section.
- Ensure the treatment area is properly sealed during operation.
- Increase the treatment duration or consider treating smaller sections of the area.
- Neįprastas triukšmas:
- Check for any obstructions near the fan or air inlets.
- Įsitikinkite, kad įrenginys pastatytas ant stabilaus, lygaus paviršiaus.
If problems persist, please contact CREWORKS customer support for assistance.
9. Specifikacijos
| Funkcija | Detalė |
|---|---|
| Prekės ženklas | ĮRENGINIAI |
| Modelio numeris | IOG-P030-00 |
| Ozono išvestis | 60,000 mg/val |
| Aprėpties sritis | Iki 3200 kv |
| Gaminio matmenys | 9.84 "D x 8.15" P x 7.67" A |
| Prekės svoris | 6.4 svaro |
| Maitinimo šaltinis | AC |
| Spalva | Baltas |
10. Garantija ir palaikymas
For warranty information, technical support, or any questions regarding your CREWORKS Ozone Negative Ion Generator, please contact CREWORKS customer service. Refer to the product packaging or the official CREWORKS websvetainę, kurioje rasite naujausią kontaktinę informaciją.
Palaikymas internetu: Visit the CREWORKS Store on Amazon