
1. Įvadas
This manual provides detailed instructions for the setup, operation, and maintenance of your TELLUR Shade Wireless Mouse (Model 491261). This mouse features multi-device connectivity, silent click buttons, RGB lighting, and adjustable DPI settings for enhanced productivity and comfort across various operating systems.
2. Pakuotės turinys
Patikrinkite, ar pakuotėje yra visi reikalingi daiktai:
- 1 x TELLUR Shade Wireless Mouse
- 1 x Nano receiver (USB-A)
- 1 x C tipo įkrovimo laidas
- 1 x Naudotojo vadovas (šis dokumentas)

Image: The TELLUR Shade Wireless Mouse, accompanied by its USB Nano receiver and Type-C charging cable, illustrating the complete package contents.
3. Produktas baigtasview
Familiarize yourself with the components of your TELLUR Shade Wireless Mouse:

Vaizdas: Iš viršaus į apačią view of the TELLUR Shade Wireless Mouse, highlighting the left and right silent click buttons, the main scroll wheel, DPI adjustment button, and the multi-device switch button.
- Kairysis paspaudimo mygtukas: Tylus veikimas.
- Dešinysis pelės mygtuko paspaudimas: Tylus veikimas.
- Slinkties ratukas (pagrindinis): Vertikaliam slinkimui.
- DPI reguliavimo mygtukas: Cycles through DPI settings (800/1200/1600/2400/3200).
- Multi-Device Switch Button: Toggles between connected devices (1, 2, 3, 4).
- Pirmyn mygtukas: Naviguoja pirmyn web naršyklės arba file tyrinėtojai.
- Mygtukas atgal: Naviguoja atgal web naršyklės arba file tyrinėtojai.
- Horizontal Scroll Wheel: For horizontal scrolling.
- „Windows“ pagrindinis mygtukas: Minimizes all windows to show the desktop; pressing again restores them.
- USB-C įkrovimo prievadas: Located on the front for recharging the internal battery.
- Maitinimo jungiklis: On/Off switch on the bottom of the mouse.
- Nano Receiver Storage: Compartment on the bottom for storing the USB receiver.
4. Sąranka
4.1. Pelės įkrovimas
Before initial use, ensure the mouse is fully charged. Connect the provided Type-C charging cable to the USB-C port on the front of the mouse and the other end to a USB power source (e.g., computer USB port, USB wall adapter).

Vaizdas: Šoninė view of the TELLUR Shade Wireless Mouse, clearly showing the USB-C charging port located at the front for convenient recharging.
The RGB lighting may indicate charging status. A full charge typically provides approximately 20 days of average use.
4.2. Prisijungimas prie įrenginio
The TELLUR Shade Wireless Mouse supports up to 4 devices simultaneously via Bluetooth and a 2.4GHz USB Nano receiver. Turn on the mouse using the power switch on the bottom.
4.2.1. 2.4GHz Wireless Connection (USB Nano Receiver)
- Locate the USB Nano receiver stored in the compartment on the bottom of the mouse.
- Plug the Nano receiver into an available USB-A port on your computer.
- Press the Multi-Device Switch Button on the mouse to select one of the 2.4GHz channels (usually indicated by a specific LED color or number).
- The mouse should automatically connect. If not, ensure the mouse is powered on and try replugging the receiver.
4.2.2. „Bluetooth“ ryšys (BT1, BT2, BT3)
- Press the Multi-Device Switch Button to select one of the Bluetooth channels (BT1, BT2, or BT3). The corresponding indicator light will flash.
- Press and hold the Multi-Device Switch Button for 3-5 seconds until the indicator light flashes rapidly. This puts the mouse into pairing mode.
- Savo įrenginyje (kompiuteryje, planšetiniame kompiuteryje, išmaniajame telefone) eikite į „Bluetooth“ nustatymus ir ieškokite naujų įrenginių.
- Select "TELLUR Shade Mouse" or a similar name from the list of available devices.
- Once paired, the indicator light on the mouse will stop flashing and remain solid for a few seconds before turning off.
Repeat these steps for additional Bluetooth devices on BT2 and BT3 channels.
5. Naudojimo instrukcijos
5.1. Įrenginių perjungimas
To switch between connected devices, simply press the Multi-Device Switch Button. The mouse will cycle through the 2.4GHz channel and the three Bluetooth channels (BT1, BT2, BT3).
5.2. DPI jautrumo reguliavimas
Press the DPI Adjustment Button to cycle through the available DPI settings: 800, 1200, 1600, 2400, and 3200 DPI. Each press will change the cursor speed, allowing you to find your preferred sensitivity.
5.3. RGB apšvietimo valdymas
The mouse features customizable RGB lighting. To change the RGB lighting mode or turn it off, simultaneously press the Forward and Backward buttons located on the side of the mouse. Continue pressing to cycle through different lighting effects or to disable the lighting.

Vaizdas: Stambus planas view of the TELLUR Shade Wireless Mouse, highlighting the side buttons (Forward and Backward) and the integrated RGB lighting strip.
5.4. Using the Windows Home Button
The dedicated Windows Home Button (often located near the thumb rest) allows for quick desktop access. Pressing this button will minimize all open windows, revealing your desktop. Pressing it again will restore the previously open windows.
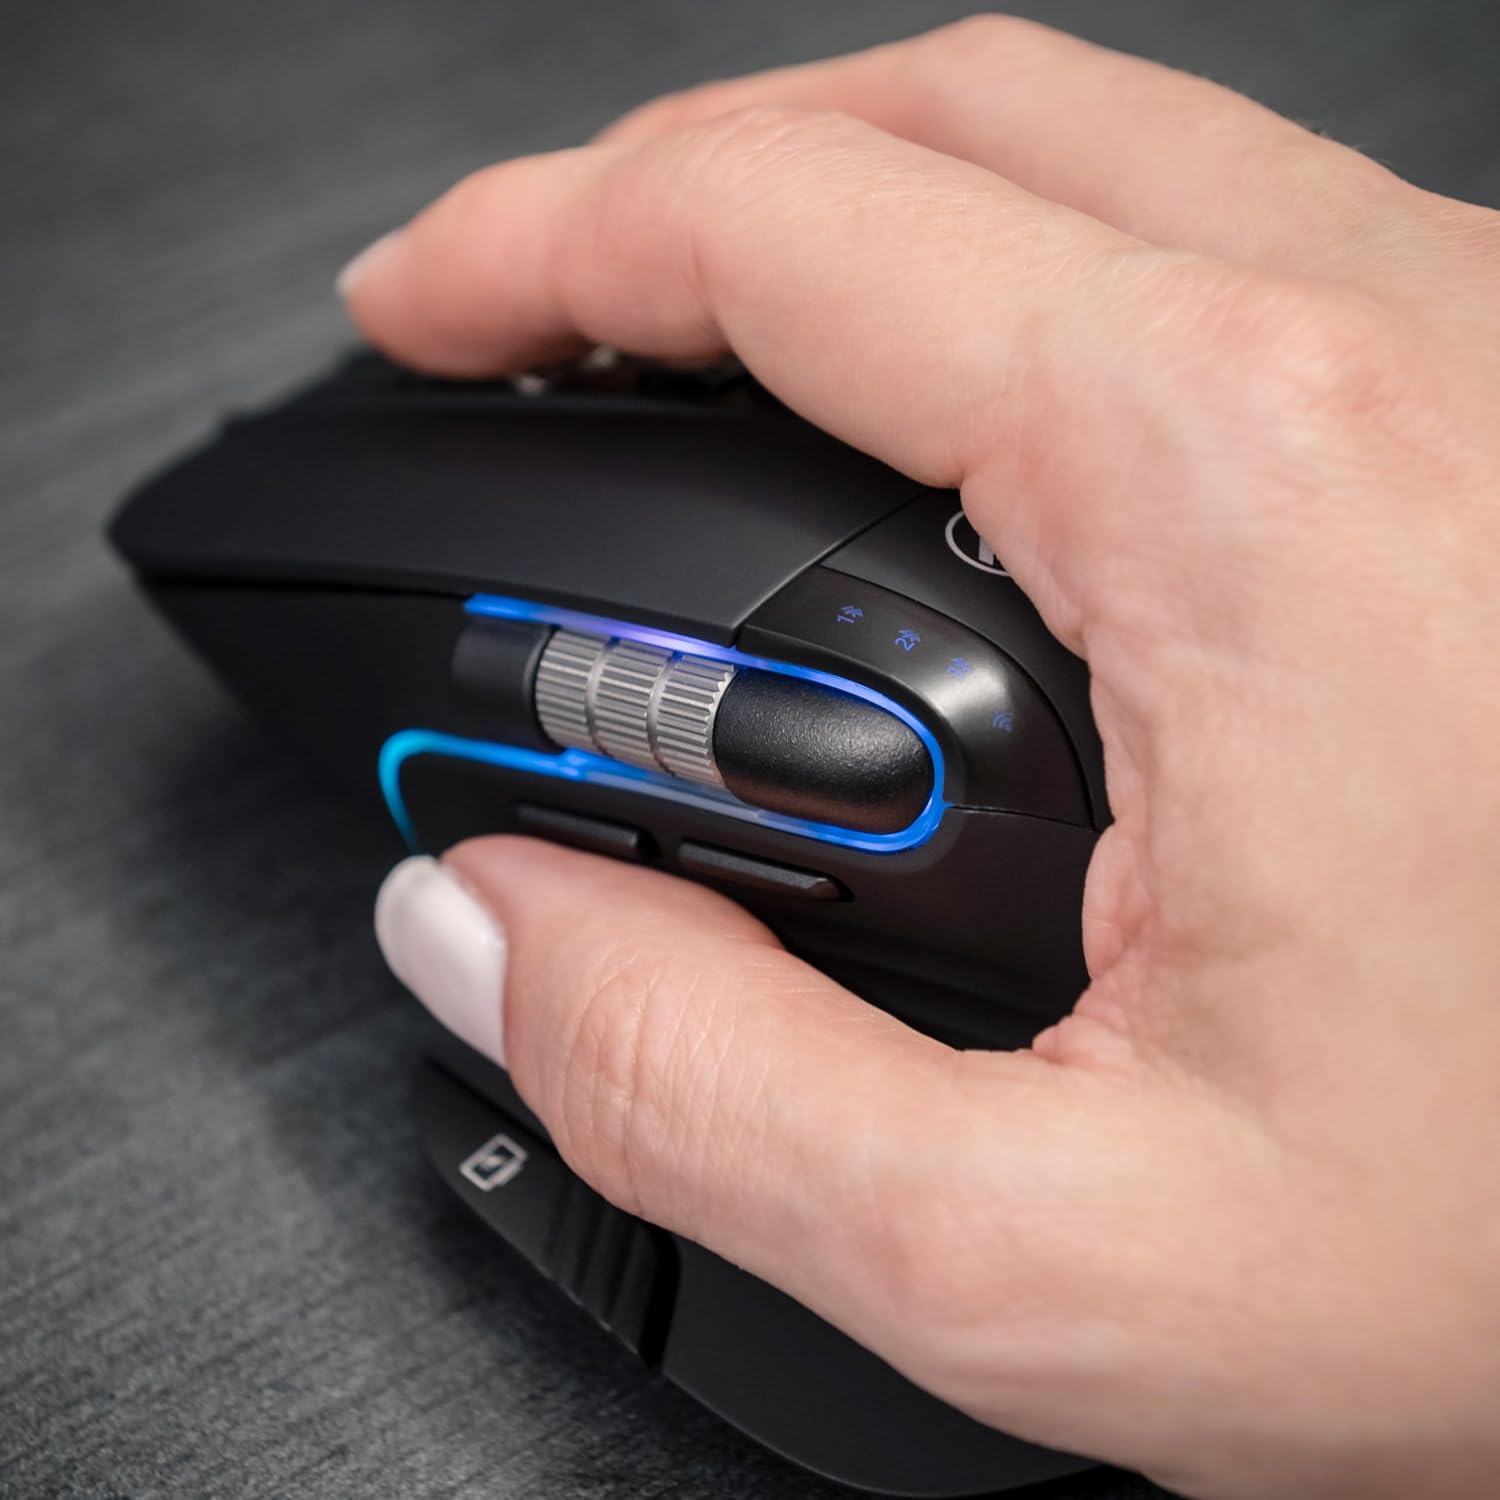
Image: A hand operating the TELLUR Shade Wireless Mouse, demonstrating the ergonomic grip and the placement of the Windows Home button accessible by the thumb.
6. Priežiūra
- Valymas: Pelę valykite minkšta, sausa šluoste. Įsisenėjusius nešvarumus lengvai nuvalykite.amp Galima naudoti šluostę, tačiau įsitikinkite, kad į įrenginį nepatenka drėgmės.
- Saugykla: Jei ilgesnį laiką nenaudojate pelės, išjunkite ją, kad taupytumėte baterijų veikimo laiką. Laikykite ją vėsioje, sausoje vietoje.
- Akumuliatoriaus priežiūra: Avoid fully discharging the battery frequently. Recharge when the battery indicator is low.
- Venkite ekstremalių sąlygų: Nelaikykite pelės itin aukštos temperatūros, tiesioginių saulės spindulių ar didelės drėgmės aplinkoje.
7. Problemų sprendimas
7.1. Pelė nereaguoja
- Įsitikinkite, kad pelė įjungta.
- Patikrinkite akumuliatoriaus lygį ir, jei reikia, įkraukite pelę.
- Verify that the correct connection channel (2.4GHz, BT1, BT2, or BT3) is selected using the Multi-Device Switch Button.
- For 2.4GHz connection, ensure the Nano receiver is securely plugged into a working USB port. Try a different USB port.
- For Bluetooth connection, ensure Bluetooth is enabled on your device and try re-pairing the mouse.
- Paleiskite kompiuterį arba įrenginį iš naujo.
7.2. Pertraukiamas ryšys
- Ensure the mouse is within the effective range (up to 10 meters).
- Minimize interference from other wireless devices (e.g., Wi-Fi routers, other Bluetooth devices).
- Venkite naudoti pelę ant metalinių paviršių, nes tai gali trukdyti belaidžio ryšio signalams.
7.3. Žymeklio judėjimo problemos
- Nuvalykite optinį jutiklį pelės apačioje.
- Pelę naudokite ant švaraus, neatspindinčio paviršiaus arba pelės kilimėlio.
- Adjust the DPI setting using the DPI Adjustment Button.
7.4. Neveikia RGB apšvietimas
- Įsitikinkite, kad pelė įjungta.
- Press the Forward and Backward buttons simultaneously to cycle through lighting modes or to turn it on if it was previously off.
- Check battery level; low battery might disable RGB lighting to conserve power.
8. Specifikacijos
| Prekės ženklas | TELLUR |
| Modelio pavadinimas | TLL 491261 |
| Modelio numeris | 491261 |
| Ryšio technologija | Bluetooth, 2.4GHz Wireless (via Nano receiver) |
| Judesio aptikimas | Optinis |
| DPI jautrumas | 800/1200/1600/2400/3200 DPI |
| Mygtukų skaičius | 8 (including silent click, DPI, multi-device switch, forward/backward, horizontal scroll, Windows Home) |
| Rankų orientacija | Abipusis |
| Ypatingos savybės | Silent Click, RGB Light, Multi-device (4 devices), Lightweight, Portable |
| Suderinami įrenginiai | Personal Computer, Laptop, Smartphones, Tablets |
| Operacinės sistemos palaikymas | Windows, Mac, iOS, Android, Linux |
| belaidis diapazonas | Iki 10 metrų |
| Maitinimo šaltinis | Maitinamas baterijomis (įkraunamas per USB-C) |
| Vidutinis akumuliatoriaus veikimo laikas | Maždaug 20 dienų |
| Medžiaga | Plastikiniai |
| Prekės svoris | 0.29 kilogramo |
9. Garantija ir palaikymas
Dėl garantijos informacijos ir techninės pagalbos žr. prie gaminio pridėtą garantinę kortelę arba apsilankykite oficialioje TELLUR svetainėje. websvetainėje. Išsaugokite pirkimo kvitą kaip pirkimo įrodymą bet kokiems garantiniams prašymams.
Kontaktinę informaciją apie pagalbą paprastai galima rasti gamintojo svetainėje. websvetainėje arba ant produkto pakuotės.