
Yaheetech YTxwxe0001001
„Yaheetech 10x10“ išskleidžiama palapinė su 17 saulės energija varomų LED lempučių ir viršutine ventiliacijos anga, naudojimo instrukcija
Model: YTxwxe0001001
Įvadas
This manual provides detailed instructions for the setup, operation, and maintenance of your Yaheetech 10x10 Pop-Up Canopy Tent. Designed for ease of use and durability, this canopy offers ample shade and features integrated solar LED lighting for evening use. Please read this manual thoroughly before assembly and use to ensure safe and optimal performance.
Svarbi saugos informacija
ĮSPĖJIMAS:
- For optimal performance and safety, do not use this canopy in conditions of strong breeze, continuous light rain, heavy rain, or any other extreme weather scenarios.
- Always anchor the canopy to the ground when in use using the provided stakes, sandbags, and ropes.
- Ensure all locking mechanisms are fully engaged during setup to prevent collapse.
- Surinkimo ir išmontavimo metu laikykite vaikus ir naminius gyvūnus atokiau nuo stogelio.
- Do not hang heavy objects from the canopy frame.
- Avoid using open flames or heating devices inside or near the canopy.
Komponentų ir dalių sąrašas
Before beginning assembly, ensure all parts are present and accounted for. Refer to the image below for a visual guide.

Figure 1: All included components for the Yaheetech 10x10 Pop-Up Canopy Tent.
- Pop-Up Canopy Frame (1)
- Canopy Fabric with 17 Solar LED Lights (1)
- Wheeled Carry Bag (1)
- Sandbags (4)
- Anchor Ropes (4)
- Į žemę įstatomi kuoliukai (12)
- Solar Panel (integrated into canopy)
- Nuotolinis valdymas (1)
Sąrankos instrukcijos
Follow these steps for quick and easy assembly of your canopy tent. It is recommended that two people perform the setup for optimal ease and safety.
1 veiksmas: išpakuokite ir padėkite rėmą
- Remove the canopy frame and fabric from the wheeled carry bag.
- Padėkite sulankstytą rėmą norimoje montavimo vietoje.
- With a partner, gently pull the frame outwards from opposite corners to partially expand it.

Figure 2: Quick and easy installation steps.
Step 2: Attach the Canopy Fabric and Solar Panel
- Drape the canopy fabric over the partially expanded frame. Ensure the solar panel is positioned at the top center.
- Locate the electrical connector from the solar panel and connect it to the corresponding port on the canopy fabric.
- Secure the canopy fabric to the frame using the hook and loop fasteners located at each corner and along the frame.

Figure 3: Key features and attachment points of the canopy.
Step 3: Fully Extend the Frame and Adjust Height
- From underneath the canopy, push up the horizontal bars at each corner until they "click" into place, fully extending the frame.
- Adjust the canopy height by pushing the spring buttons on each leg and sliding the telescopic outer tubes along the legs. There are 3 adjustable height settings from 8.8' to 9.4'.
- Svarbu: Do not overextend the frame legs beyond the designated height settings, as this may damage the canopy fabric or frame.
4 žingsnis: pritvirtinkite stogelį
- Fill the four sandbags with sand or other heavy material and attach them to the canopy legs using the hook and loop fasteners.
- Attach the anchor ropes to the corner rings of the canopy.
- Drive the ground stakes into the ground at an angle, securing the anchor ropes to them. Ensure the ropes are taut to provide stability.
Naudojimo instrukcijos
Solar LED Lights Operation
Your canopy tent is equipped with 17 built-in solar LED lights for illumination during the evening. The lights are powered by the integrated solar panel or can be charged via a power bank (not included).
- Pradinis mokestis: For first-time use, allow the solar panel to charge in direct sunlight for at least 6-8 hours to ensure sufficient power for the LED lights.
- Nuotolinio valdymo pultas: The LED lights are controlled by the included remote. The remote allows you to turn the lights ON/OFF and adjust brightness levels.
- Nuotolinio valdymo baterija: The remote control requires a CR2025 button cell battery (included, usually with a pull tab to activate). Remove the plastic tab before first use.
- Power Bank įkrovimas: If solar charging is insufficient, you can connect a power bank (not included) to the USB port on the solar panel unit for alternative charging.

Figure 4: Day and Night view of the canopy with remote control for LED lights.
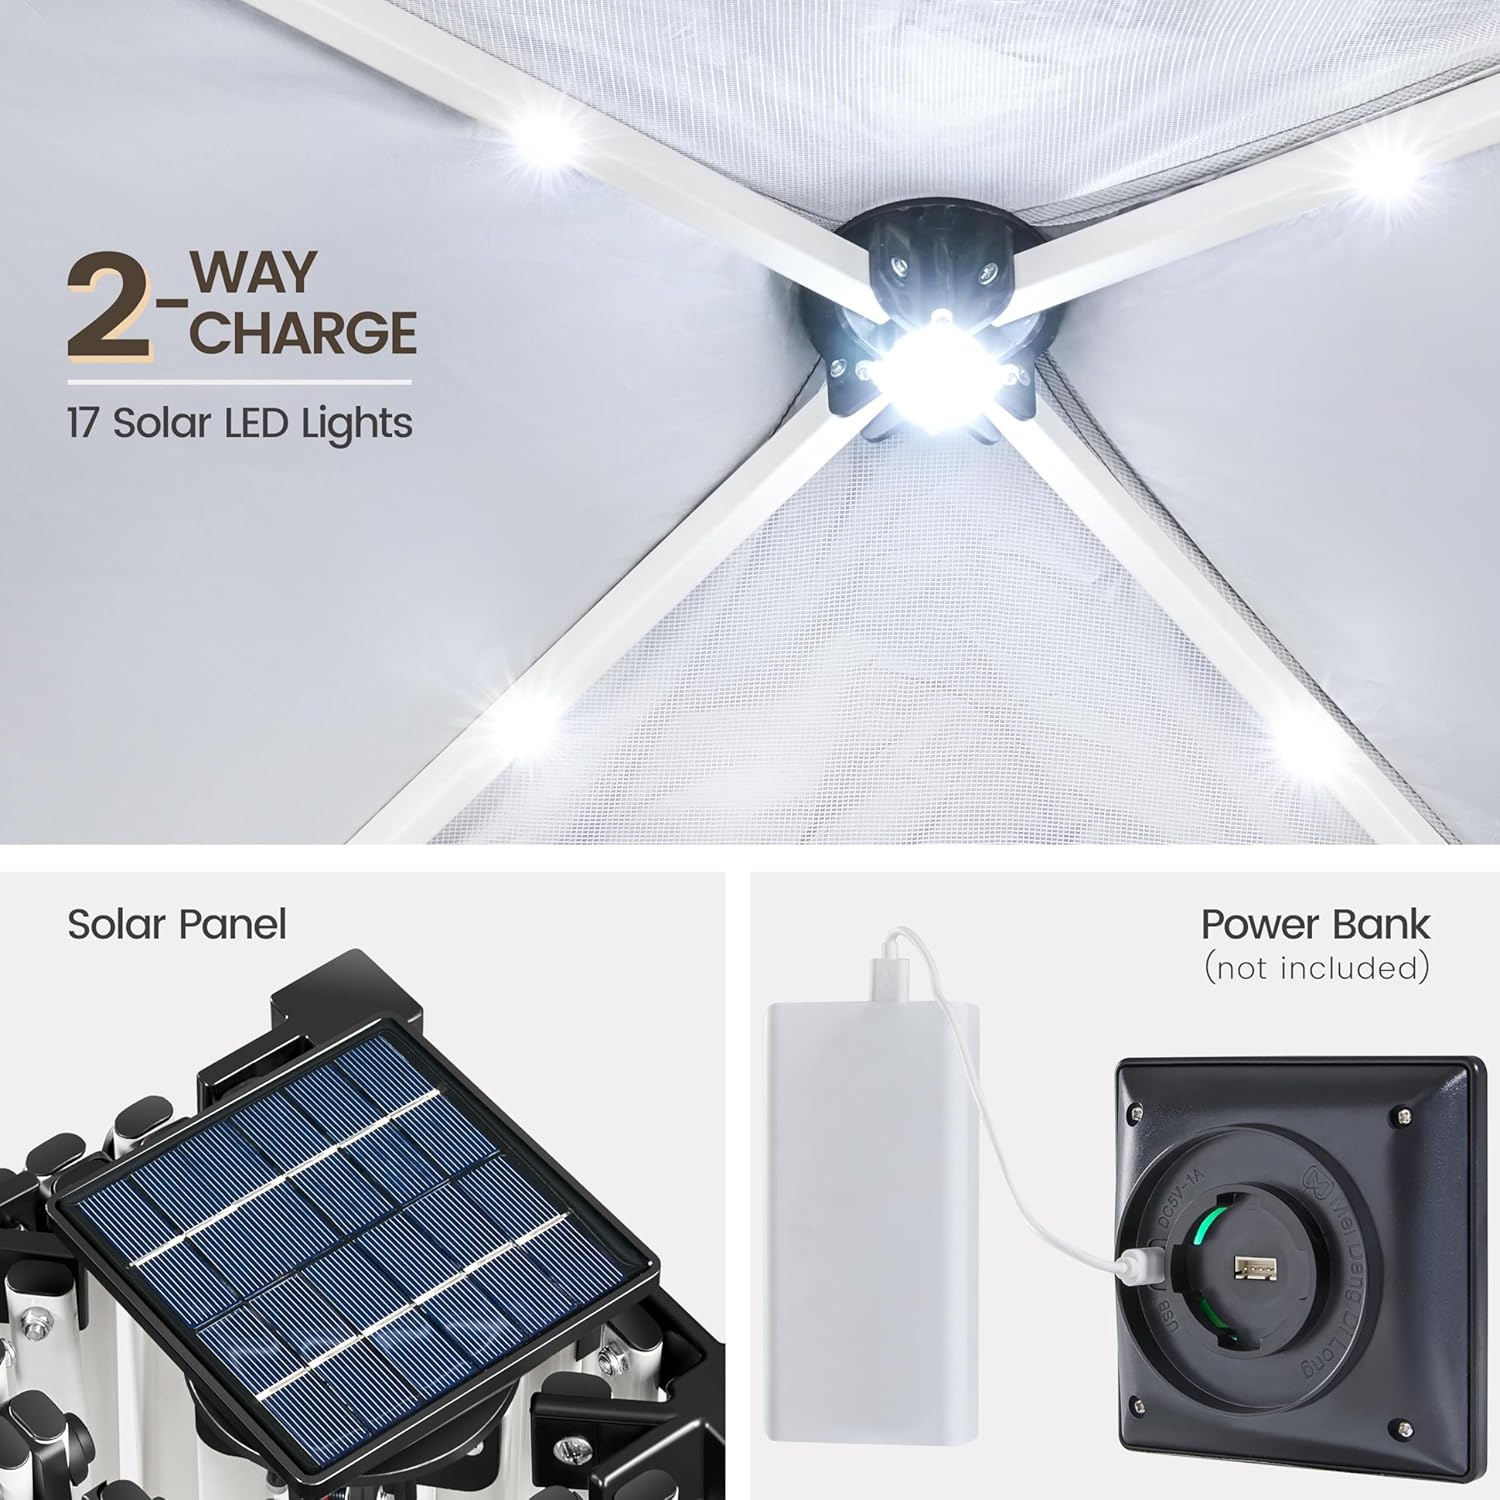
Figure 5: Two-way charging options for the solar LED lights.
Priežiūra
- Valymas: Stogelio audinį valykite švelniu muilu ir vandeniu. Nenaudokite stiprių cheminių medžiagų ar abrazyvinių valiklių. Prieš padėdami į sandėlį, leiskite jam visiškai išdžiūti.
- Rėmo priežiūra: Inspect the steel frame regularly for any signs of rust or damage. Clean and dry any wet spots promptly.
- Saugykla: When not in use, disassemble the canopy and store it in its wheeled carry bag in a cool, dry place, away from direct sunlight and extreme temperatures.
- LED lemputės: Ensure the solar panel is clean and free of debris for efficient charging.
Trikčių šalinimas
| Problema | Galima priežastis | Sprendimas |
|---|---|---|
| Canopy difficult to set up/take down. | Frame not fully expanded/collapsed; fabric snagging. | Ensure two people are assisting. Check for fabric snags. Apply light lubricant to frame joints if necessary. |
| LED lights not working or dim. | Insufficient solar charge; remote battery low/inactive; loose connection. | Allow solar panel to charge in direct sunlight. Check remote battery (CR2025) and remove pull tab. Verify solar panel connection to canopy. |
| Canopy unstable in light wind. | Improper anchoring; insufficient weight in sandbags. | Ensure all sandbags are filled and attached. Ropes are taut and stakes are firmly in the ground. Do not use in strong winds. |
Specifikacijos
| Prekės ženklas | Yaheetech |
| Modelio numeris | YTxwxe0001001 |
| Matmenys (I x P x A) | 116.93"L x 116.93"W x 113.39"H (10ft x 10ft x adjustable height) |
| Reguliuojamas aukštis | 8.8' to 9.4' (in 4" increments) |
| Medžiaga | Powder-Coated Steel Frame, UPF 50+ Polyester Oxford Fabric with Silver Lining |
| Svoris | 33.5 svaro |
| Aprėpties sritis | 100 kvadratinių pėdų |
| Šviesos | 17 Solar LED Lights |
| Pridedami priedai | Wheeled Bag, 4 Sandbags, 4 Anchor Ropes, 12 Stakes, Remote Control |
Garantija ir palaikymas
For warranty information, product support, or to purchase replacement parts, please visit the official Yaheetech websvetainėje arba susisiekite tiesiogiai su jų klientų aptarnavimo tarnyba. Dėl konkrečių garantijos sąlygų žr. pirkimo dokumentaciją.
„Yaheetech“ parduotuvė: Apsilankykite „Yaheetech“ parduotuvėje „Amazon“ svetainėje
Ask a question about this manual
Ask about setup, troubleshooting, compatibility, parts, safety, or missing instructions. Manuals+ will review the question and use this page’s manual context to help answer it.