
1. Įvadas
This manual provides essential information for the proper installation, operation, and maintenance of your CHENGHEM Model KH888 2-in-1 Combustible Gas and Carbon Monoxide Detector. This device is designed to detect both combustible gases (such as natural gas, propane, and methane) and carbon monoxide (CO) to enhance safety in your home or RV. Please read this manual thoroughly before use and retain it for future reference.
2. Svarbi saugos informacija
ĮSPĖJIMAS: This device is a safety alarm and should not be used as a substitute for proper installation, use, and maintenance of fuel-burning appliances, including appropriate ventilation and exhaust systems. This detector is designed to alert you to the presence of combustible gas and carbon monoxide. It is not designed to detect smoke or fire.
- Do not paint the detector. Paint can clog the sensor openings and prevent the unit from functioning properly.
- Do not block the air intake vents on the device.
- Do not install in areas with high humidity, excessive dust, or extreme temperatures.
- Reguliariai tikrinkite detektorių, kaip nurodyta šiame vadove.
- In case of an alarm, follow the emergency procedures outlined in this manual immediately.
3. Produkto ypatybės
- Dviejų jutiklių technologija: Equipped with a catalytic combustion sensor for combustible gas and an electrochemical sensor for carbon monoxide.
- LED skaitmeninis ekranas: Shows real-time gas concentration levels (PPM for CO, LEL for combustible gas).
- Voice and Light Warning: Provides clear audible (85dB) and visual alerts during an alarm.
- Įskiepio dizainas: Easy installation directly into a standard electrical outlet.
- Testavimo / atstatymo mygtukas: Allows for manual testing of the alarm and silencing during an event.

3.1 vaizdas: priekis view of the CHENGHEM 2-in-1 Gas and Carbon Monoxide Detector.
4. Pakuotės turinys
Patikrinkite, ar pakuotėje yra visi reikalingi daiktai:
- 1 × CHENGHEM 2-in-1 Gas and Carbon Monoxide Detector (Model KH888)
- 1 × Vartotojo vadovas
- 1 × Protection Cotton (for sensor protection during shipping)
5. Montavimas
5.1 Vietos pasirinkimas
Proper placement is crucial for effective detection. Consider the following guidelines:
- Carbon Monoxide (CO) Detection: CO is slightly lighter than air and mixes readily with air. Install CO detectors at least 5 feet (1.5 meters) from the floor. For optimal detection, place detectors in or near sleeping areas and living areas.
- Degiųjų dujų aptikimas: Natural gas (methane) is lighter than air and rises. Propane (LPG) is heavier than air and sinks. For natural gas, install the detector within 12 inches (30 cm) of the ceiling. For propane, install the detector within 12 inches (30 cm) of the floor. If both types of gas are a concern, consider placing detectors at both high and low levels, or choose a central height.
- General Placement: Avoid placing the detector directly above sinks, near windows or doors, in direct sunlight, or in areas with strong air currents (e.g., near fans, vents). Keep it away from areas where it might be exposed to steam, grease, or chemical fumes.
5.2 Plugging in the Detector
The CHENGHEM KH888 is a plug-in unit. Simply insert the detector into a standard 120V AC electrical outlet. Ensure the outlet is not controlled by a switch that could accidentally turn off power to the detector.
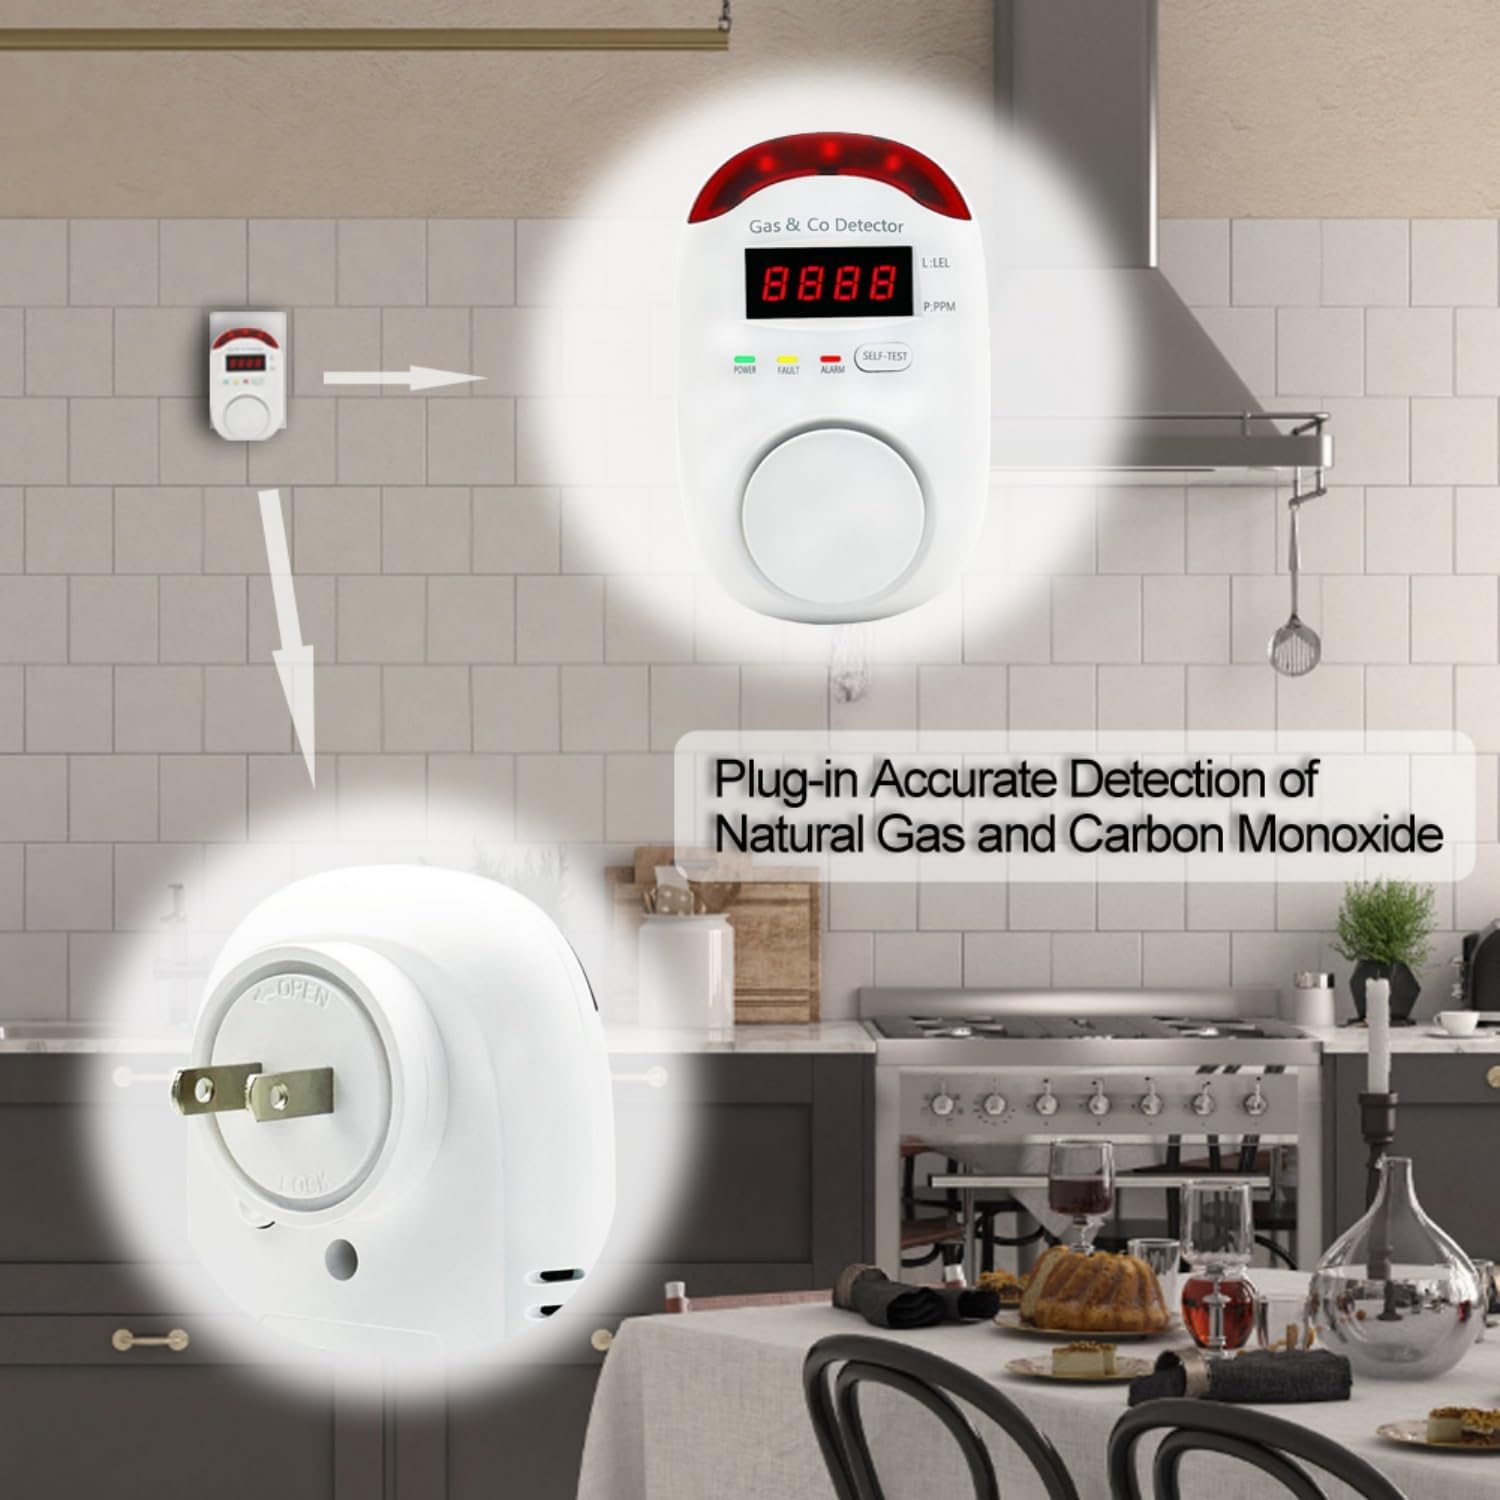
Image 5.1: The detector is designed for direct plug-in installation into a wall outlet.
6. Operacija
6.1 Power-Up and Self-Test
Upon plugging in the detector, it will initiate a self-test sequence. The LED display will show a countdown or a series of numbers, and the alarm may sound briefly. This indicates the unit is powering on and checking its internal components. Once the self-test is complete, the detector will enter normal monitoring mode.
6.2 Normal Monitoring Mode
In normal operation, the green 'POWER' indicator light will be on. The LED display will typically show '0' or '---' indicating no detectable gas or CO levels. If low levels of gas or CO are detected, the display may show the concentration in PPM (parts per million) for CO or LEL (lower explosive limit) for combustible gas.

Image 6.1: Front panel showing LED display, power, fault, and alarm indicators, and the self-test button. The back shows the plug and air intake.
7. Alarm Indications
The detector provides distinct alarms for different conditions:
- Combustible Gas Alarm: When combustible gas reaches a dangerous level (e.g., 6% LEL), the red 'ALARM' light will flash, the LED display will show the LEL concentration, and a loud audible alarm will sound. The voice prompt may announce "Gas Leak!"
- Anglies monoksido (CO) detektorius: When CO reaches a dangerous level (e.g., 50 PPM for a sustained period), the red 'ALARM' light will flash, the LED display will show the CO concentration in PPM, and a loud audible alarm will sound. The voice prompt may announce "Carbon Monoxide Alarm!"
- Gedimo signalas: If the detector experiences a malfunction, the yellow 'FAULT' light will illuminate, and the unit may emit a specific fault tone. The LED display might show an error code. Refer to the Troubleshooting section for common fault codes.
7.1 Emergency Procedures (In Case of Alarm)
Jei skamba žadintuvas:
- Nepanikuoju. Išlik ramus.
- Nedelsiant evakuoti. Move everyone, including pets, to fresh air outdoors.
- Do not re-enter the premises until emergency services (fire department or gas company) have confirmed it is safe.
- Skambinkite greitosios pagalbos tarnyboms from a safe location.
- Do not use phones or electrical appliances inside the building if a gas leak is suspected, as this could create a spark.
8. Priežiūra
8.1 Reguliarus testavimas
Test the detector weekly by pressing and holding the 'SELF-TEST' button until the alarm sounds. This confirms the alarm circuit and horn are functioning. If the alarm does not sound, refer to the Troubleshooting section.
8.2 Valymas
Reguliariai valykite detektoriaus išorę minkšta,amp cloth. Do not use cleaning agents, waxes, or polishes as they can damage the sensor or casing. Do not spray cleaning products directly onto the detector.
8.3 Jutiklio tarnavimo laikas
Gas and CO sensors have a limited lifespan. The detector is designed for a typical operational life of several years. Refer to the product label for specific replacement recommendations. Replace the unit after its recommended lifespan or if a permanent fault is indicated.
9. Problemų sprendimas
| Problema | Galima priežastis | Sprendimas |
|---|---|---|
| Detektorius neįsijungia. | No power to the outlet; faulty outlet. | Check the power outlet with another appliance. Try a different outlet. |
| Alarm sounds without apparent gas/CO. | False alarm; residual fumes; sensor contamination. | Ventilate the area. Press the 'SELF-TEST' button to reset. If alarms persist, treat as a real alarm. |
| Yellow 'FAULT' light is on. | Internal sensor fault or malfunction. | Unplug the detector for 30 seconds and plug it back in. If the fault persists, the unit may need replacement. |
| Test button does not trigger alarm. | Faulty alarm circuit or horn. | Ensure the unit is powered. If the test still fails, the unit is defective and must be replaced. |
10. Specifikacijos
- Modelis: KH888
- Maitinimo šaltinis: Plug-in (120V AC)
- Jutiklio tipas: Catalytic (Combustible Gas), Electrochemical (Carbon Monoxide)
- Signalizacijos garsumas: >85dB prie 1 metrų
- Darbinė drėgmė: ≤95% RH (nekondensuojantis)
- Gaminio matmenys: Maždaug 2.5" gylio x 3" pločio x 4.5" aukščio
- Medžiaga: ABS
- Aptikimo dujos: Natural Gas (Methane), Propane, Carbon Monoxide
11. Garantija ir klientų aptarnavimas
For warranty information or technical support, please refer to the contact details provided with your purchase or visit the official CHENGHEM websvetainėje. Išsaugokite pirkimo kvitą kaip pirkimo įrodymą.