RHM RM-L268
RHM L268 Karaoke Machine User Manual
Model: RM-L268 | Brand: RHM
Įvadas
Thank you for choosing the RHM L268 Karaoke Machine. This powerful and versatile system is designed to deliver clear, dynamic sound and vibrant lighting effects for an immersive karaoke experience. This manual provides detailed instructions for setting up, operating, and maintaining your device to ensure optimal performance and enjoyment.
Saugos informacija
- Prieš naudodami gaminį perskaitykite visas instrukcijas.
- Saugokite įrenginį nuo vandens ar per didelės drėgmės.
- Užtikrinkite tinkamą vėdinimą, kad išvengtumėte perkaitimo.
- Use only the provided power adapter. This machine is designed for indoor use and does not contain a battery for the main unit.
- Keep the microphone and the machine within 10 feet for the best voice effect.
- Nebandykite patys ardyti ar remontuoti įrenginio. Visus techninės priežiūros darbus patikėkite kvalifikuotiems specialistams.
Pakavimo sąrašas
Patikrinkite siuntos turinį, kad įsitikintumėte, jog yra visi reikalingi daiktai:
- RHM L268 Karaoke Machine x 1
- Belaidžiai mikrofonai x 2
- Maitinimo adapteris x 1
- AUX kabelis x 1
- Charging Cable for Wireless Microphones x 1
- Bag for Wireless Mics x 1
- Vartotojo vadovas x 1

Image: The RHM L268 Karaoke Machine with its two wireless microphones, showcasindėl savo kompaktiško dizaino.
Produkto savybės
- Support for Up to 4 Microphones: Comes with two rechargeable wireless microphones that automatically sync. Two additional 6.5mm jacks allow for connecting two wired microphones (not included) for group performances.
- Powerful & Clear Sound: Equipped with 2x15W tweeters and a 30W subwoofer, delivering 60W of clear, powerful audio with balanced bass and treble. Ideal for home parties.
- Spalvą keičiančios LED lemputės: Features two lighting modes with 7 color changes that sync with the music, enhancing the party atmosphere. Lights can be turned off.
- Kelios ryšio parinktys: Supports Bluetooth, Line IN (AUX), and USB connections for versatile compatibility with TVs, phones, iPads, tablets, and other devices.
- Adjustable Bass & Treble: Dedicated controls on the speaker allow for tailoring audio output to your preference, ensuring a rich and immersive sound experience.
- Belaidžiai mikrofonai: Rechargeable 500mAh battery provides approximately 4 hours of play time after a 2-hour charge. Features LED light effects and a control panel for volume and echo.

Image: A group of friends enjoying karaoke, demonstrating the machine's ability to support multiple microphones simultaneously.
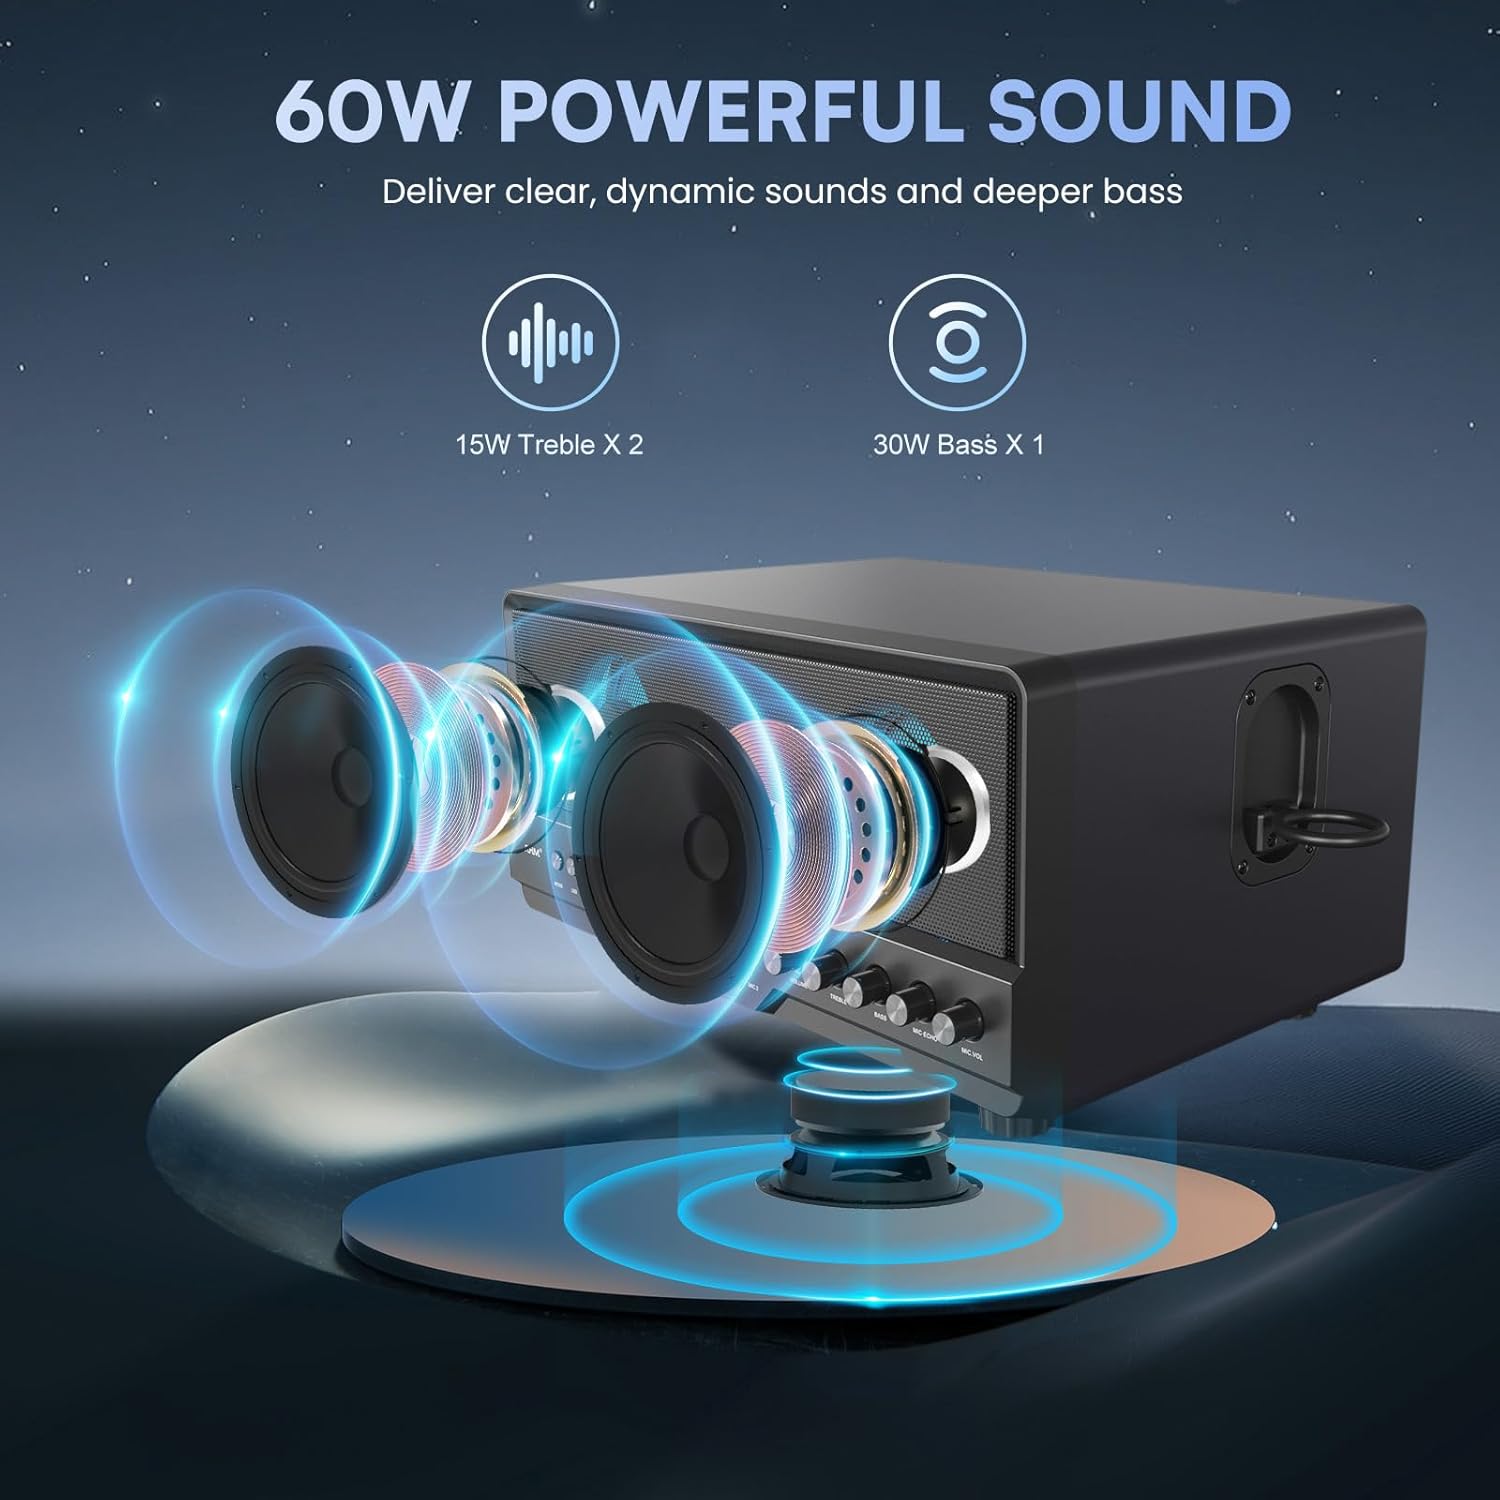
Image: An illustrative diagram highlighting the 15W tweeters and 30W subwoofer for powerful sound delivery.

Vaizdas: Keli views of the karaoke machine demonstrating its various colorful LED lighting effects.

Image: The karaoke machine connected to a laptop, highlighting its Bluetooth, AUX, and USB connectivity options.

Image: A visual representation of the wireless microphones' battery life and charging duration.
Sąrankos vadovas
1. Maitinimo prijungimas
- Connect the provided power adapter to the DC IN port on the back of the karaoke machine.
- Plug the power adapter into a standard wall outlet. The main unit requires continuous power and does not have an internal battery.
2. Mikrofono sąranka
- Įkrovimas: Use the provided charging cable to charge the wireless microphones. A full charge takes approximately 2 hours.
- Poravimas: Turn on the wireless microphones. They will automatically sync with the karaoke machine.
- Wired Microphones (Optional): If using wired microphones, plug them into the MIC 1 or MIC 2 6.5mm jacks on the front panel.
3. Prijungimas prie garso šaltinių
- Bluetooth:
- Press the "MODE" button on the karaoke machine until "BT" appears on the display.
- Enable Bluetooth on your device (phone, tablet, TV).
- Select "RHM L268" from the list of available devices to pair.
- AUX (Line IN):
- Connect one end of the AUX cable to the "LINE IN" port on the karaoke machine.
- Kitą galą prijunkite prie savo įrenginio garso išvesties lizdo.
- Press the "MODE" button until "LINE" appears on the display.
- USB:
- Įdėkite USB atmintinę su garso įrašais files į USB prievadą.
- Press the "MODE" button until "USB" appears on the display. The machine will automatically play compatible audio files.
Naudojimo instrukcijos
Priekinio skydelio valdikliai:
- MODE: Press to switch between Bluetooth, AUX, and USB input modes.
- LED: Press to cycle through different LED lighting modes or turn them off.
- Garsumo rankenėlė: Reguliuoja bendrą muzikos garsumą.
- TREBLE rankenėlė: Adjusts the high-frequency sound (treble).
- BASS rankenėlė: Adjusts the low-frequency sound (bass).
- Mikrofono aidėjimo rankenėlė: Reguliuoja mikrofonų aidėjimo efektą.
- MIC VOL rankenėlė: Reguliuoja mikrofonų garsumą.
- Play/Pause, Next/Previous Track Buttons: Control media playback in USB or Bluetooth mode.
Wireless Microphone Controls:
- Maitinimo mygtukas: Paspauskite ir palaikykite, kad įjungtumėte / išjungtumėte mikrofoną.
- LED mygtukas: Press to change the LED light color on the microphone.
Priežiūra
- Valymas: Use a soft, dry cloth to clean the exterior of the machine and microphones. Do not use liquid cleaners or abrasive materials.
- Saugykla: When not in use, store the karaoke machine and accessories in a cool, dry place away from direct sunlight and extreme temperatures.
- Mikrofono priežiūra: Keep microphones dry and avoid dropping them. Store them in the provided bag when not in use.
Trikčių šalinimas
| Problema | Galima priežastis | Sprendimas |
|---|---|---|
| Iš garsiakalbio nėra garso. | Volume too low; incorrect input mode; loose connection. | Increase volume; ensure correct mode (BT/AUX/USB); check all cable connections. |
| Microphones not connecting/no sound. | Microphones off; low battery; out of range; interference. | Turn on microphones; charge microphones; keep mics within 10ft of machine; check for interference. |
| Loud voice prompts when changing modes. | Default system setting. | This is a known characteristic. Ensure overall volume is adjusted before changing modes. Contact customer support for potential software updates if available. |
| Sound distortion or feedback. | Microphone too close to speaker; MIC VOL too high; BASS/TREBLE settings too high. | Increase distance between mic and speaker; lower MIC VOL; adjust BASS/TREBLE knobs. |
| Neveikia LED lemputės. | LED function turned off. | Press the "LED" button to activate or change light modes. |
Specifikacijos
| Funkcija | Detalė |
|---|---|
| Modelio numeris | RM-L268 |
| Matmenys (I x P x A) | 14.96 x 9.84 x 8.07 colio |
| Prekės svoris | 14.17 svaro |
| Garsiakalbio išvestis | 2x15W Tweeters, 1x30W Subwoofer (Total 60W) |
| Mikrofono palaikymas | 2 Wireless Mics included, 2 Wired Mic inputs (6.5mm Jack) |
| Wireless Mic Battery | 500mAh Lithium Ion (4 hours play, 2 hours charge) |
| Ryšys | Bluetooth 5.2, 3.5mm AUX (Line IN), USB |
| Maitinimo šaltinis | Plug In Electric (AC 1.1E+2 Volts) |
| LED lemputės | 2 modes, 7 color changing effects |
| Reguliuojami valdikliai | Volume, Treble, Bass, Mic Echo, Mic Volume |
Garantija ir palaikymas
For warranty information or technical support, please refer to the contact details provided in your product packaging or visit the official RHM websvetainėje. Išsaugokite pirkimo kvitą kaip pirkimo įrodymą.
Ask a question about this manual
Ask about setup, troubleshooting, compatibility, parts, safety, or missing instructions. Manuals+ will review the question and use this page’s manual context to help answer it.