
1. Įvadas
The ZGCINE VM-HS2 is a versatile hot-swap V-mount battery plate designed to provide continuous power to your camera, camcorder, and various rig accessories. Featuring a unique shark fin design and dual micro V-mounts, it ensures stable power delivery and extended runtime without interruption. This manual provides essential information for the safe and efficient use of your VM-HS2 battery plate.

Figure 1: ZGCINE VM-HS2 Hot Swap V-Mount Battery Plate Overview
2. Produkto ypatybės
- 100W USB-C PD Power Delivery: Rapidly charge high-demand devices like laptops and cameras with 5V/20V output, compatible with PD 3.0 standards for fast, stable energy transfer.
- 10-Port Multi-Interface Flexibility: Power up to 10 devices simultaneously via 2x Lemo 2Pin (14.8V/10A), 4x D-Tap (14.8V/10A), 1x BP (14.8V/10A), and USB-C PD ports, ideal for cameras, monitors, and film rigs.
- Hot-Swap & Dual V-Mount Design: Seamlessly switch between batteries without power interruption; dual micro V-mounts enhance stability for handheld/steadicam setups and extend runtime.
- Professional-Grade Build & Control: Features one-touch power management, LED power status indicators, and a 15mm rod clamp for secure mounting on cinema rigs or tripods.
- Kompaktiškas ir paruoštas kelionėms: Lightweight (1.15LB) with a 4.8x4.8x3.2IN footprint, includes mounting base and USB-C E-mark cable for on-location efficiency.

Figure 2: Multi-Interface Flexibility of the VM-HS2
3. Pakuotės turinys
Patikrinkite, ar pakuotėje yra visi reikalingi daiktai:
- 1x ZGCINE VM-HS2 Hot Swap V-Mount Plate
- 1x M4 Spanner
- 1x USB-C įkrovimo laidas
- 1x vamzdžių klojiniaiamp (15mm rod clamp)

Figure 3: VM-HS2 Package Contents
Video 1: ZGCINE VM-HS2 Introduction Video. This video provides an overview gaminio ir jo komponentų.
4. Sąranka
4.1 Mounting the Battery Plate
- Attach the provided 15mm rod clamp to your camera rig's 15mm rods.
- Secure the VM-HS2 battery plate to the rod clamp using the integrated mounting mechanism. Ensure it is firmly tightened to prevent movement.

Figure 4: VM-HS2 mounted on a camera rig
4.2 Attaching V-Mount Batteries
- Align your micro V-mount battery with one of the dual V-mount slots on the plate.
- Stumkite bateriją žemyn, kol ji spragtelėjimu tvirtai užsifiksuos vietoje.
- For hot-swap functionality, attach a second micro V-mount battery to the other slot. The plate will automatically switch power sources when one battery is depleted.
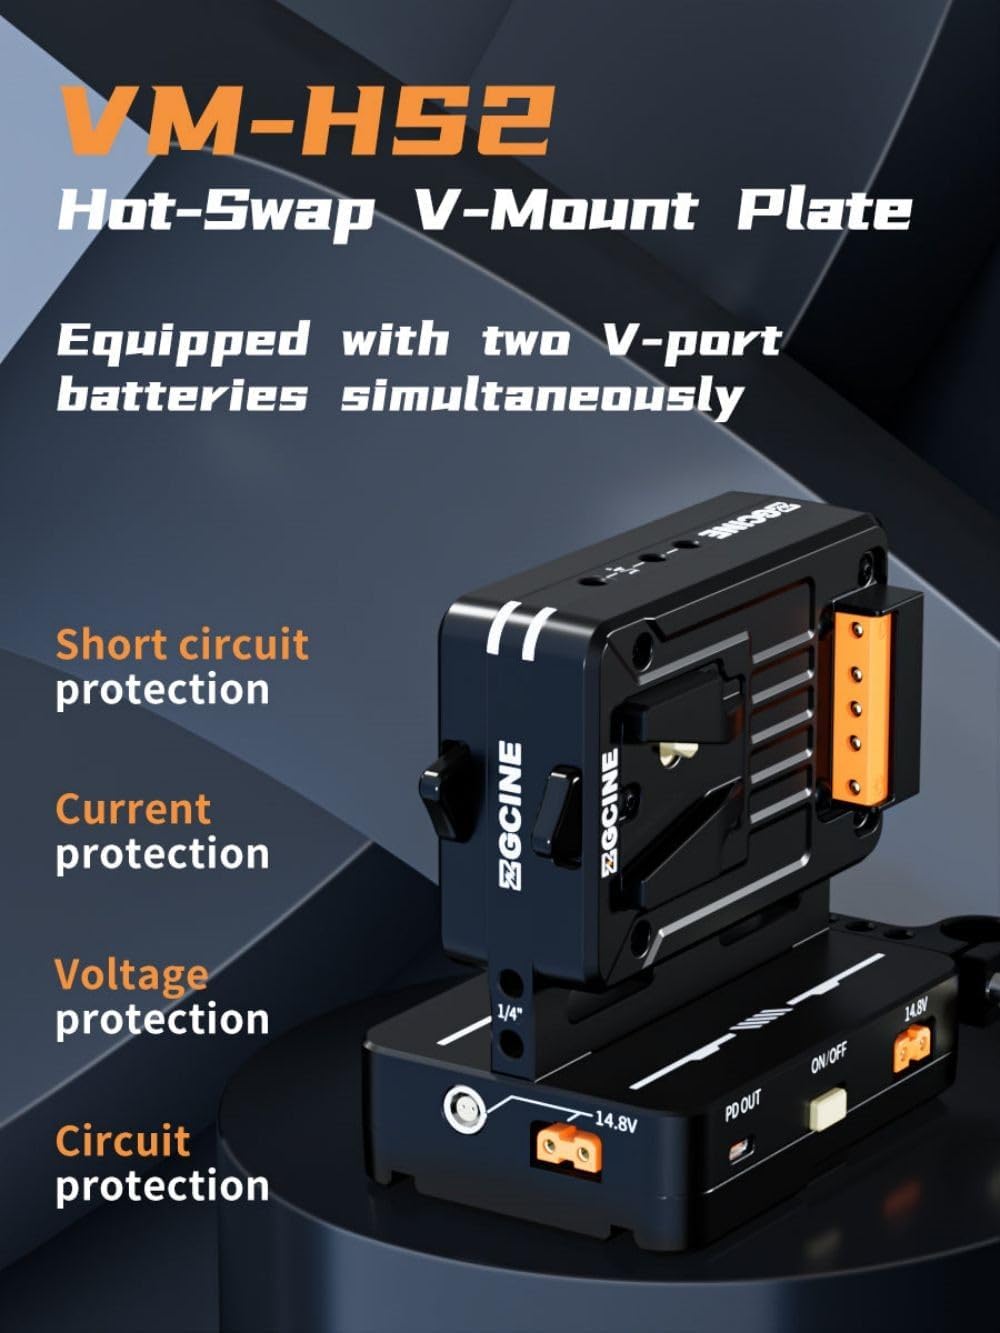
Figure 5: Dual Micro V-Mount batteries attached
4.3 Įrenginių prijungimas
Utilize the various output ports to power your equipment:
- USB-C PD išvestis: Connect laptops, cameras, or other USB-C powered devices for fast charging.
- D-Tap Ports: Use D-Tap cables to power monitors, lights, and other accessories.
- LEMO Ports: Connect devices requiring Lemo 2-pin power.
- BP Port: For specific BP-compatible devices.
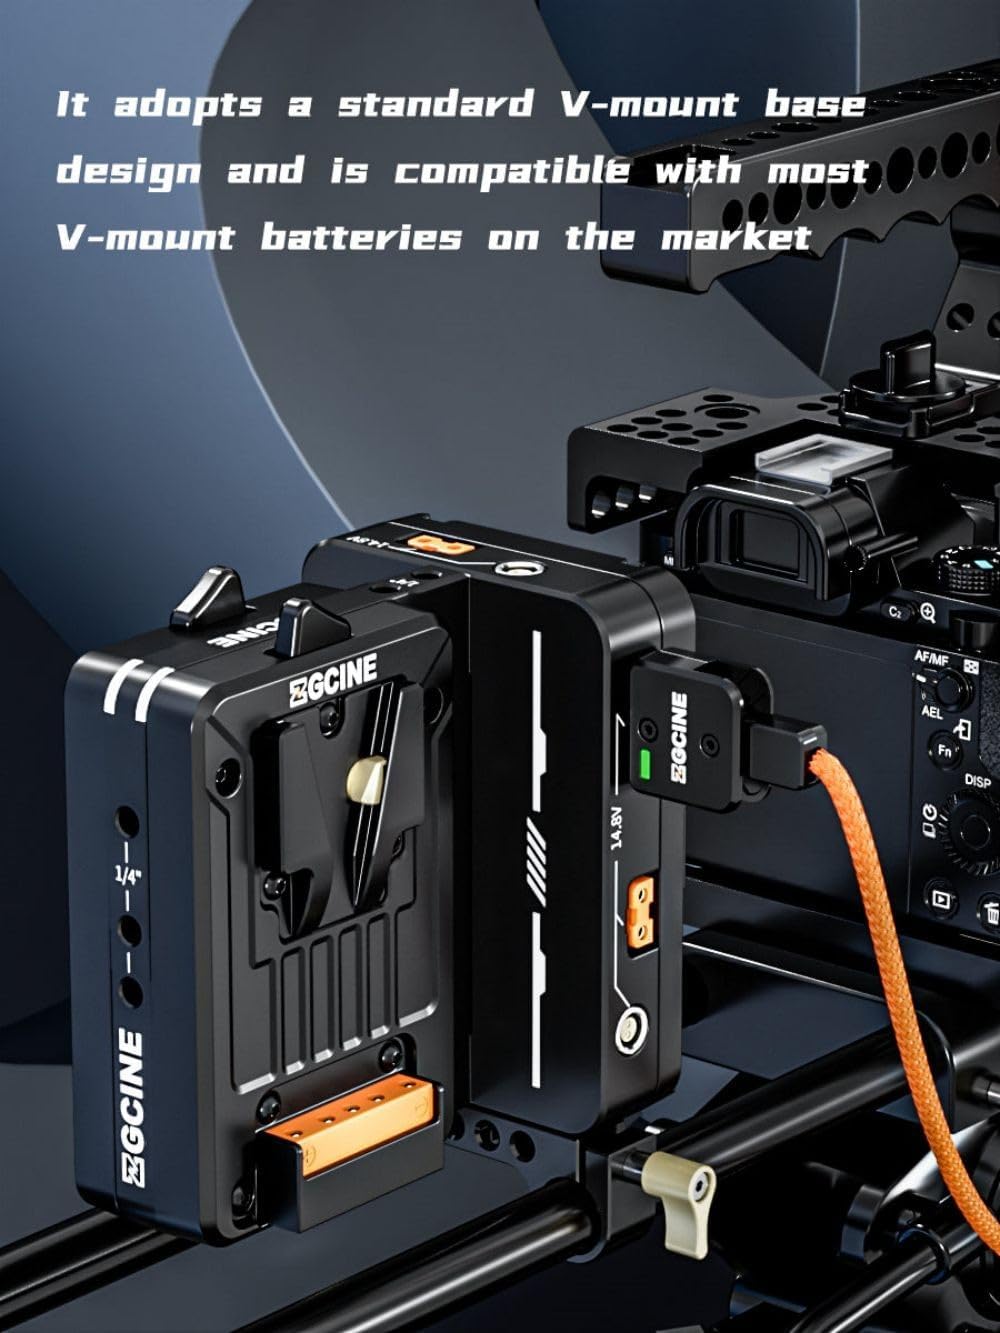
Figure 6: Multiple output ports on the VM-HS2
Video 2: ZGCINE VM-HS2 Dual Micro V Mount Battery Plate. This video demonstrates the various ports and their functions.
5. Naudojimo instrukcijos
5.1 Maitinimo įjungimas/išjungimas
- To power on the unit, press the power button located on the side of the plate.
- Norėdami išjungti, paspauskite maitinimo mygtuką 3 sekundes.
5.2 Power Status Indicators
The LED indicators on the unit display the current power status of the connected batteries. Refer to the product's display for detailed voltage ir vattage informacija.
5.3 Karštojo keitimo funkcionalumas
The VM-HS2 supports hot-swap functionality with two micro V-mount batteries. When one battery is depleted, the unit automatically switches to the second battery without interrupting power to your connected devices. This allows for seamless battery changes during operation.
5.4 Įrenginio įkrovimas
The VM-HS2 can be charged via its USB-C PD 100W input/output port. Connect a compatible USB-C PD charger to this port to recharge the connected V-mount batteries.
6. Priežiūra
- Laikykite įrenginį švarų, be dulkių ir šiukšlių. Valymui naudokite minkštą, sausą šluostę.
- Avoid exposing the unit to extreme temperatures, moisture, or direct sunlight.
- Nenaudojamą įrenginį laikykite vėsioje, sausoje vietoje.
- Reguliariai tikrinkite visas kabelių jungtis, ar nėra susidėvėjimo.
7. Problemų sprendimas
- Nėra maitinimo išvesties: Ensure batteries are properly seated and charged. Check all cable connections. Verify the unit is powered on.
- Pertraukiama galia: Check for loose connections or damaged cables. Ensure batteries are fully charged and functioning correctly.
- Perkaitimas: Disconnect all devices and allow the unit to cool down. Ensure adequate ventilation around the unit during operation.
Jei problemos išlieka, susisiekite su klientų aptarnavimo tarnyba.
8. Specifikacijos
| Funkcija | Specifikacija |
|---|---|
| Modelis | VM-HS2 |
| USB-C išvestis | 5V/3A, 9V/3A, 12V/3A, 15V/3A, 20V/5A (100W PD) |
| BP Output | 14.8V/10A |
| D-TAP išvestis | 14.8V/10A |
| Lemo Output | 14.8V/6A |
| Darbinė temperatūra | -20°C iki +55°C |
| Matmenys | 120 mm x 119 mm x 80 mm (4.8 x 4.8 x 3.2 colio) |
| Svoris | 520 g (1.15 svaro) |

Figure 7: VM-HS2 Parameter Diagram
9. Garantija ir palaikymas
For any questions or support regarding your ZGCINE VM-HS2, please refer to the following:
- Before Purchase: Click on the seller profile (HolaFoto) and find "Have a question for HolaFoto?" to inquire.
- After Purchase: Check your Amazon Order Page and click "problem with this order." The seller aims to reply within 24 hours during working days.
ZGCINE is committed to providing reliable power solutions for content creators, ensuring efficiency and safety in various environments.