
SunTouch 500950-SB
SunStat CommandPlus Touchscreen Programmable Smart Wi-Fi Thermostat User Manual
Prekinis ženklas: SunTouch | Modelis: 500950-SB
1. Produktas baigtasview
The SunTouch CommandPlus is an advanced thermostat designed for electric floor heating systems. It offers remote access via Wi-Fi, enabling features such as automatic clock setting, outdoor temperature readings, weather compensation, and energy monitoring. Users can program the thermostat through the Watts Home app, providing flexible scheduling and control. Its modern design integrates seamlessly into various home decors.

1.1 pav.: priekis view of the SunTouch CommandPlus Thermostat, displaying a temperature of 74 degrees Fahrenheit.
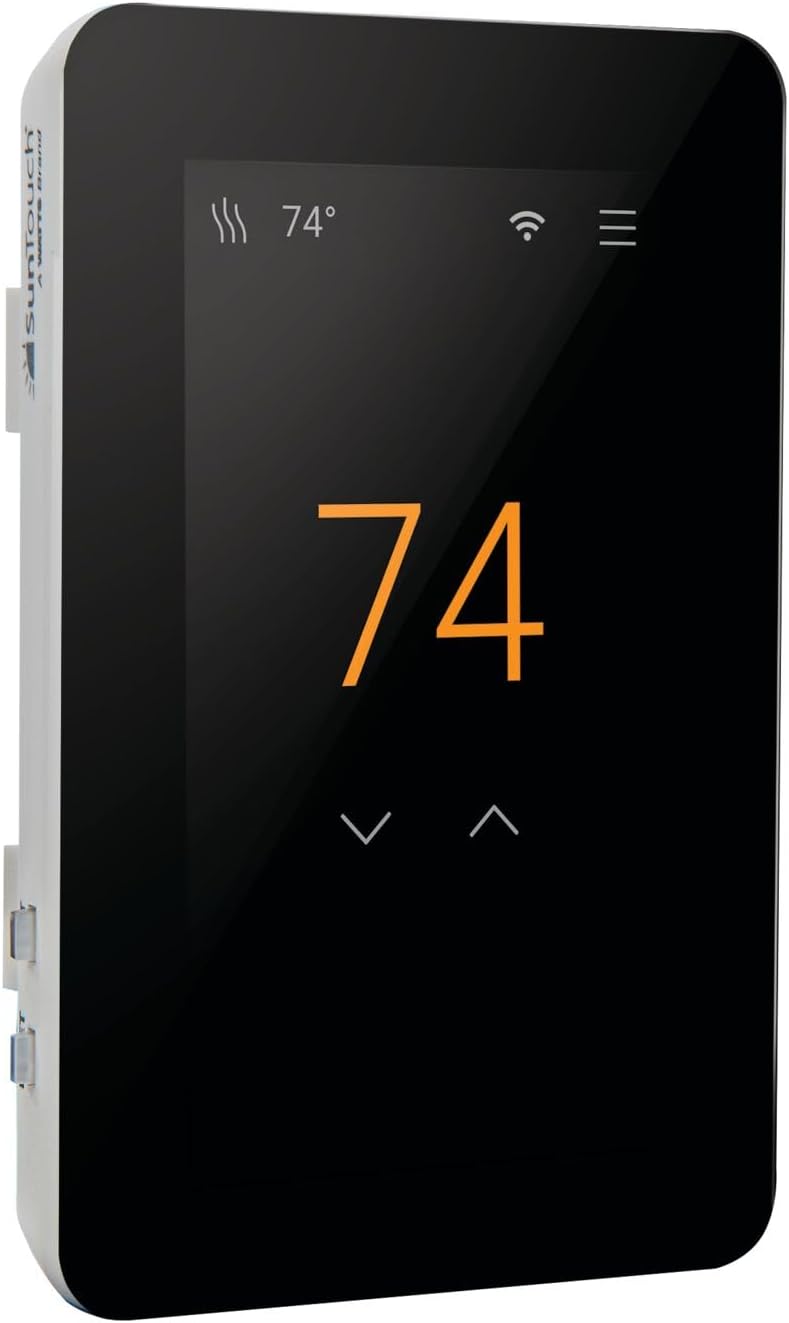
1.2 pav.: Kampinis view of the SunTouch CommandPlus Thermostat, showing the side profile and the SunTouch branding.
2. Pagrindinės savybės
- „Wi-Fi“ ryšys: Enables remote control and programming via the Watts Home mobile app (iOS and Android).
- Išmaniųjų namų integracija: Compatible with Amazon Alexa and Hey Google voice commands.
- Energijos stebėjimas: Track energy usage to optimize heating efficiency and savings.
- Automatic Clock Setting: Ensures accurate timekeeping without manual adjustments.
- Oro kompensacija: Adjusts heating based on outdoor temperature readings.
- Grindų apsauga: Features a maximum floor temperature setting to protect various flooring types.
- Pranešimai: Receive email/text notifications for system alerts.
- Universalus Voltage: Works with 120V and 240V electric floor heating systems.
- „Bluetooth“ valdymas: Allows for direct Bluetooth connectivity for setup and control.
- Intuitive Installation Wizard: Simplifies setup and customization of temperature settings.
3. Specifikacijos
| Atributas | Vertė |
|---|---|
| Prekės ženklas | „SunTouch“ |
| Modelio pavadinimas | 500950-SB |
| Valdiklio tipas | Amazon Alexa, Android, iOS |
| Ypatinga funkcija | Programuojamas |
| Spalva | Juoda |
| Specifinis produkto naudojimas | Elektrinis grindų šildytuvas |
| Temperatūros valdymo tipas | Programmable, Smart/Remote |
| Ryšio technologija | „Bluetooth“, „Wi-Fi“ |
| Maitinimo šaltinis | Su laidu elektra |
| ttage | 240 voltų |
| Ekrano tipas | Jutiklinis ekranas |
| Ekrano dydis | 4.3 colių |
| Gaminio matmenys | 4 x 3 x 2 colio |
| Prekės svoris | 1 svaro |
4. Montavimas
PASTABA: Įsitikinkite, kad skiedinys turėjo laiko visiškai sukietėti, prieš pradėdami naudoti sistemą daugiau nei trumpam bandymui.
ĮSPĖJIMAS: To prevent the risk of personal injury and/or death, electric shock, or property damage, disconnect power to the circuit at the main distribution panel before installation or servicing. This product must be installed by a qualified electrician.

Figure 4.1: Detailed installation instructions and wiring diagrams for the SunTouch CommandPlus Thermostat.
4.1 Svarbi saugos informacija
- This is a safety-alert symbol. It alerts you to potential personal injury hazards.
- Šis simbolis žymi pavojus, kurių neišvengus, gali baigtis mirtimi arba sunkiai susižeisti.
- This symbol identifies practices which, if not avoided, could result in property damage or damage to the equipment.
- Always install in a UL Listed electrical box.
- Always install in a circuit protected by a Class A GFCI or AFCI.
- Always install in a circuit protected by a circuit breaker at the main distribution panel.
- Always install in a circuit that is rated for 90°C (194°F) and 600 V minimum. Do not use Aluminum.
- All wiring must be in accordance with local and national electrical codes.
4.2 Dėžutės turinys
The SunStat CommandPlus box typically includes:
- SunStat CommandPlus Wi-Fi termostatas
- Grindų jutiklis
- Atsuktuvas
- Montavimo vadovas
- Machine screws (6-32, 2)
4.3 Items Needed (Not Supplied)
- Elektros dėžutė (turi būti UL sąraše ir tinkamo dydžio)
- Pliers, electrical wiring stripper
- Small flat-blade screwdriver, 1-gang plastic mud ring
- Conduit or rigid pipe (if required, must be UL Listed and proper size)
- Electrical wiring (UL Listed): Minimum 14 AWG to 12 A, Minimum 12 AWG to 15 A.
- Nail glue or hot glue gun
4.4 Vieta
Indoor location only. Do not install where there is a draft, direct sun, hot-water pipes, chimneys, or other causes for inaccurate temperature readings.
Install away from all electrical interferences from appliances, motors, and other sources of electrical noise.
Install away from all water sources such as sinks and at least 4 ft (1.2 m) away from showers, tubs, and toilets.
Do not install the thermostat in a bathroom. If installing in a bathroom, it must be at least 4 ft (1.2 m) from showers, tubs, and toilets.
Install at a suitable height, normally about 4 to 5 ft (1.2 to 1.5 m) from the floor.
4.5 Įjungimas
Ensure power is supplied to the thermostat from the circuit breaker at the main distribution panel. The thermostat will power up and display the default settings.
4.6 GFCI Testing and GFCI Light Operation
Press the GFCI Test button monthly to verify it is working correctly. If the GFCI trips, the thermostat will shut down. Reset by pressing the RESET button. If the GFCI fails to trip, contact a qualified electrician. If the GFCI trips frequently, it may indicate a fault in the heating system.
4.7 Laidai
Maitinimo laidai: Connect the power supply wires to the LOAD 1 and LOAD 2 terminals. Ensure proper wire gauge for the current draw.
Žemas tomastage laidai: Prijunkite žemą tūrįtage wires from the automation system to the terminal block by inserting the wires into the openings and tightening the screws. These wires provide the interface for the thermostat to communicate with the home automation system. Ensure the terminal block and the display board do not touch any metal surfaces.
Floor Heating Mat or Cable Power Lead Installation: Connect the heating mat or cable power leads to the LOAD 1 and LOAD 2 terminals. Ensure the leads are properly secured and insulated.
SunStat Relay Rough-in Wiring: If using a SunStat Relay, refer to the Relay Manual for detailed wiring instructions. The Relay allows for control of multiple heating zones.
Home Automation System Rough-in Wiring: If integrating with a home automation system, refer to the system's manual for specific wiring requirements. Connect the automation wires to the appropriate terminals on the thermostat.
Finish CommandPlus Installation: Secure all connections and ensure the thermostat is properly mounted in the electrical box. Re-attach the display front and secure it to the base.
5. Operacija
The SunTouch CommandPlus features a touchscreen interface for easy navigation and control. The main screen displays the current temperature and status icons.

Figure 5.1: Detailed operation instructions and menu navigation for the SunTouch CommandPlus Thermostat.
5.1 Jutiklinio ekrano valdymas
- Pagrindinis ekranas: Displays current temperature, Wi-Fi status, and menu icon.
- Temperatūros reguliavimas: Tap the up/down arrows to change the desired temperature.
- Prieiga prie meniu: Tap the menu icon (three horizontal lines) to access settings.
- Pastabos: If the floor or room has reached its maximum allowed temperature, the display will indicate this.
5.2 Home/Away Operation
- Namų režimas: Normal operation, maintaining the set temperature.
- Išvykos režimas: Set a lower temperature to save energy when the space is unoccupied.
- Set Floor or Room Away: Configurable to the Away terminal features.
- Away Terminal: Connects to the home automation system for remote control.
5.3 Meniu nustatymai
Access the menu to configure various settings:
- Temperatūra: Set temperature limits and display units (°F/°C).
- Maks.: Defines the maximum floor temperature to protect flooring.
- Oro kompensacija: Adjusts heating based on outdoor temperature.
- Warm Weather Shut-down: Automatically turns off heating when outdoor temperatures are above a set threshold.
- Away Terminal: Configure away terminal features.
- Paslaugos: Manage Wi-Fi settings and connections.
- Duomenys: View energy usage and other statistics.
- Pagalba: Access built-in help features.
5.4 Tvarkaraštis
The thermostat supports a 7-day programmable schedule. You can set different temperatures for various times of the day and days of the week.
- Default Schedule: Pre-programmed schedule for convenience.
- Create/Edit Schedule: Customize schedules for each day or group days.
- Copy Schedule: Copy a schedule from one day to another.
- Šventės tvarkaraštis: Temporarily override the regular schedule for holidays.
5.5 Ekrano nustatymai
- Kalba: Select display language (English, Español, Français).
- Orientacija: Portretas arba peizažas.
- Ryškumas: Sureguliuokite ekrano ryškumą.
- Naktinė šviesa: Enable/disable night light feature.
- Screen Clean: Temporarily disables the touchscreen for cleaning.
6. Priežiūra
The SunTouch CommandPlus thermostat requires minimal maintenance. Keep the screen clean using a soft, dry cloth. Avoid using abrasive cleaners or solvents. Regularly check the GFCI for proper operation as described in the installation section.
Ensure the thermostat is free from dust and debris to maintain optimal performance. No user-serviceable parts are inside the unit.
7. Trikčių šalinimo vadovas
If you encounter issues with your SunTouch CommandPlus thermostat, refer to the table below for common problems and their solutions. If the problem persists, contact customer support.
| Problema | Galima priežastis | Sprendimas |
|---|---|---|
| Wi-Fi connected but no internet access | Vieta nežinoma | Enter ZIP/Postal Code in Menu > Settings > Services > Wi-Fi > Weather. |
| Heating orange light is on but floor doesn't feel warm | Setpoint too low to feel warmth to the touch | Increase the setpoint. |
| Sugedęs laidas | Have the sensor resistance and wiring checked by a certified electrician. | |
| Ekranas išjungtas | Thermostat is in off mode, Power off at the breaker | To resume operation, touch the display. If power is off, check the breaker or fuse in the electrical panel supplying power to the thermostat. |
| Sugedęs laidas | Have the power supply wiring checked by a certified electrician. | |
| Heat is on before the schedule starts | SmartStart feature enabled | Heating will begin early to meet the scheduled temperature on time. |
| Atminties klaida | Thermostat cannot read the floor sensor | Verify all settings or reboot. Factory Reset in Menu > Settings > Reset > Factory Reset. |
| Grindų jutiklio klaida | Faulty or no wiring | Have the sensor resistance and wiring checked by a certified electrician. Replace wired sensor. |
| Pair CommandPlus Smart Sensor and accept to use as floor temperature. |
8. Ribota 3 metų garantija
SunTouch warrants this control to be free from defects in material and workmanship for a period of three (3) years from the original date of purchase from authorized dealers. During this period, SunTouch will, at its option, repair or replace the product without charge. This warranty does not cover defects caused by improper installation, abuse, misuse, or normal wear and tear. This warranty is non-transferable.
This limited warranty does not cover shipping costs, nor does it cover product damage attributed to misuse or accidental damage. SunTouch is not responsible for consequential damages, removal or reinstallation costs, or any material costs or loss of use.
The implied warranties of merchantability and fitness for a particular purpose are limited to the duration of this warranty. Some states do not allow limitations on how long an implied warranty lasts, or the exclusion or limitation of incidental or consequential damages, so the above limitations or exclusions may not apply to you. This warranty gives you specific legal rights, and you may also have other rights which vary from state to state.
9. Pagalba klientams
For technical assistance or warranty claims, please contact SunTouch Customer Support:
- JAV nemokami: 1-888-432-8932
- Kanados nemokami: 1-888-208-8927
- Websvetainė: www.suntouch.com
Please have your model number (500950-SB) and purchase date ready when contacting support.
Susiję dokumentai500950-SB


Ask a question about this manual
Ask about setup, troubleshooting, compatibility, parts, safety, or missing instructions. Manuals+ will review the question and use this page’s manual context to help answer it.